
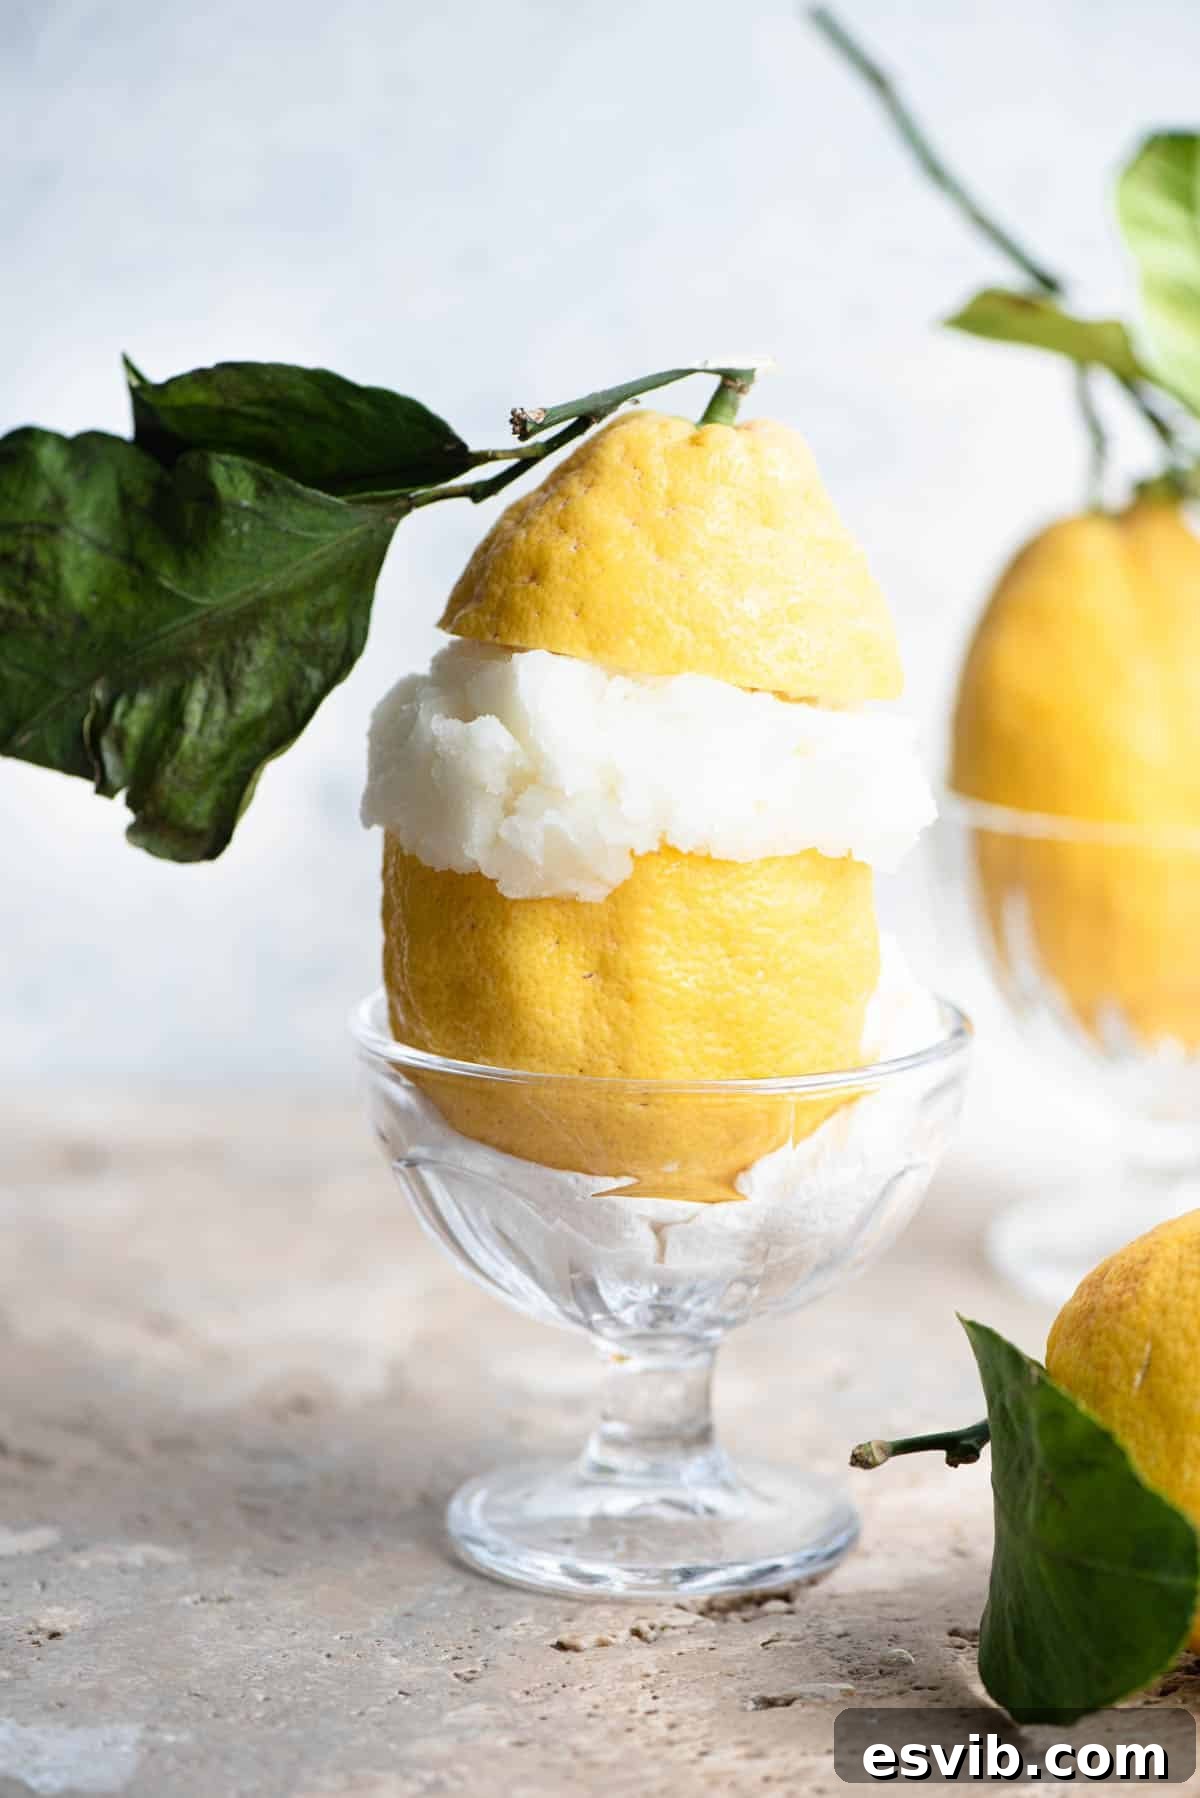
Transport yourself to the vibrant shores of Italy with this incredible recipe for the most delicious and refreshing Italian Lemon Sorbet. Inspired by the iconic Amalfi Coast, this delightful dessert is surprisingly easy to whip up at home using just three simple ingredients. It’s the ultimate cool-down on a hot summer’s day, offering a burst of zingy, sweet, and tart perfection in every spoonful.
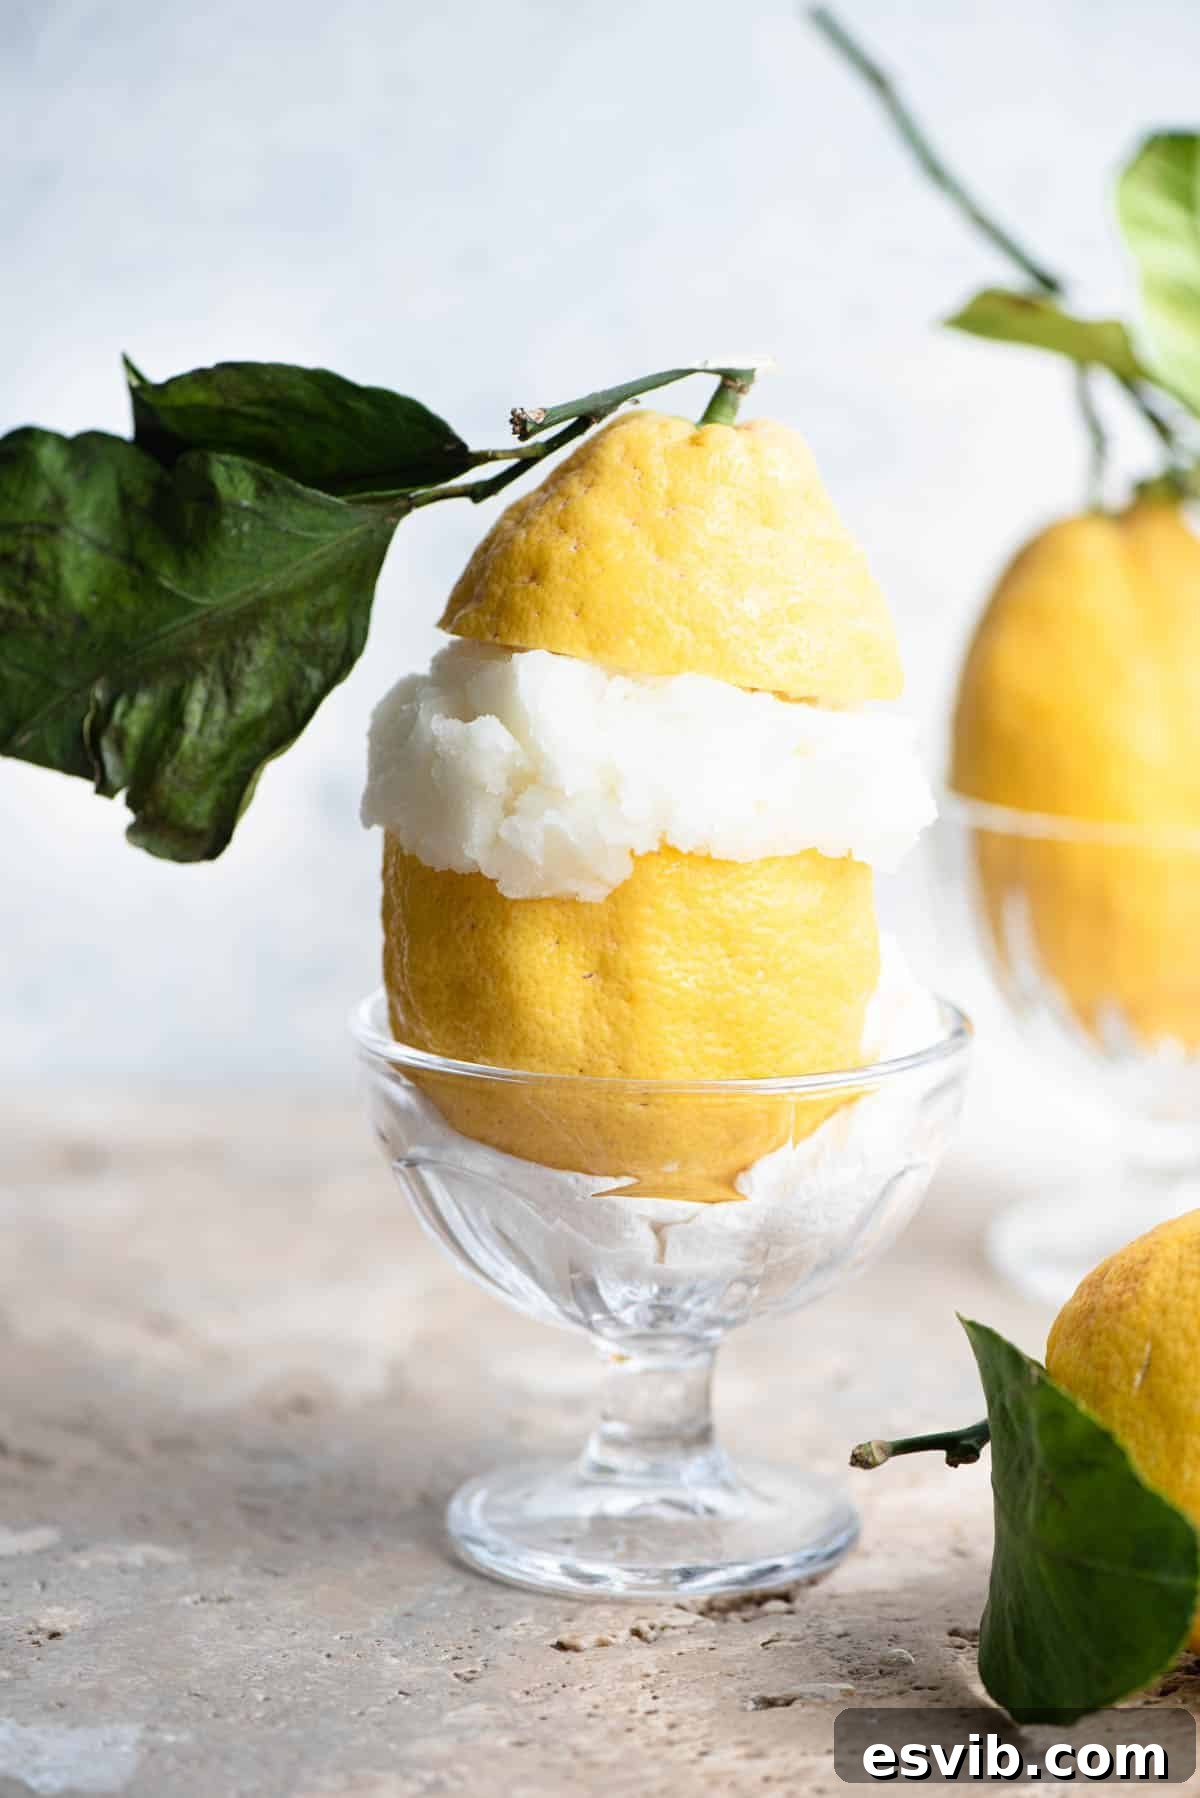
If you’ve ever had the pleasure of visiting the breathtaking Amalfi Coast, you’ll know that lemons aren’t just a fruit there – they’re a way of life. From quaint roadside stalls overflowing with plump, fragrant lemons to charming shops solely dedicated to serving the most exquisite Sorbetto al Limone, these bright yellow citrus fruits are omnipresent. The air itself seems to carry the sweet, tangy aroma of fresh lemons, promising a taste experience unlike any other.
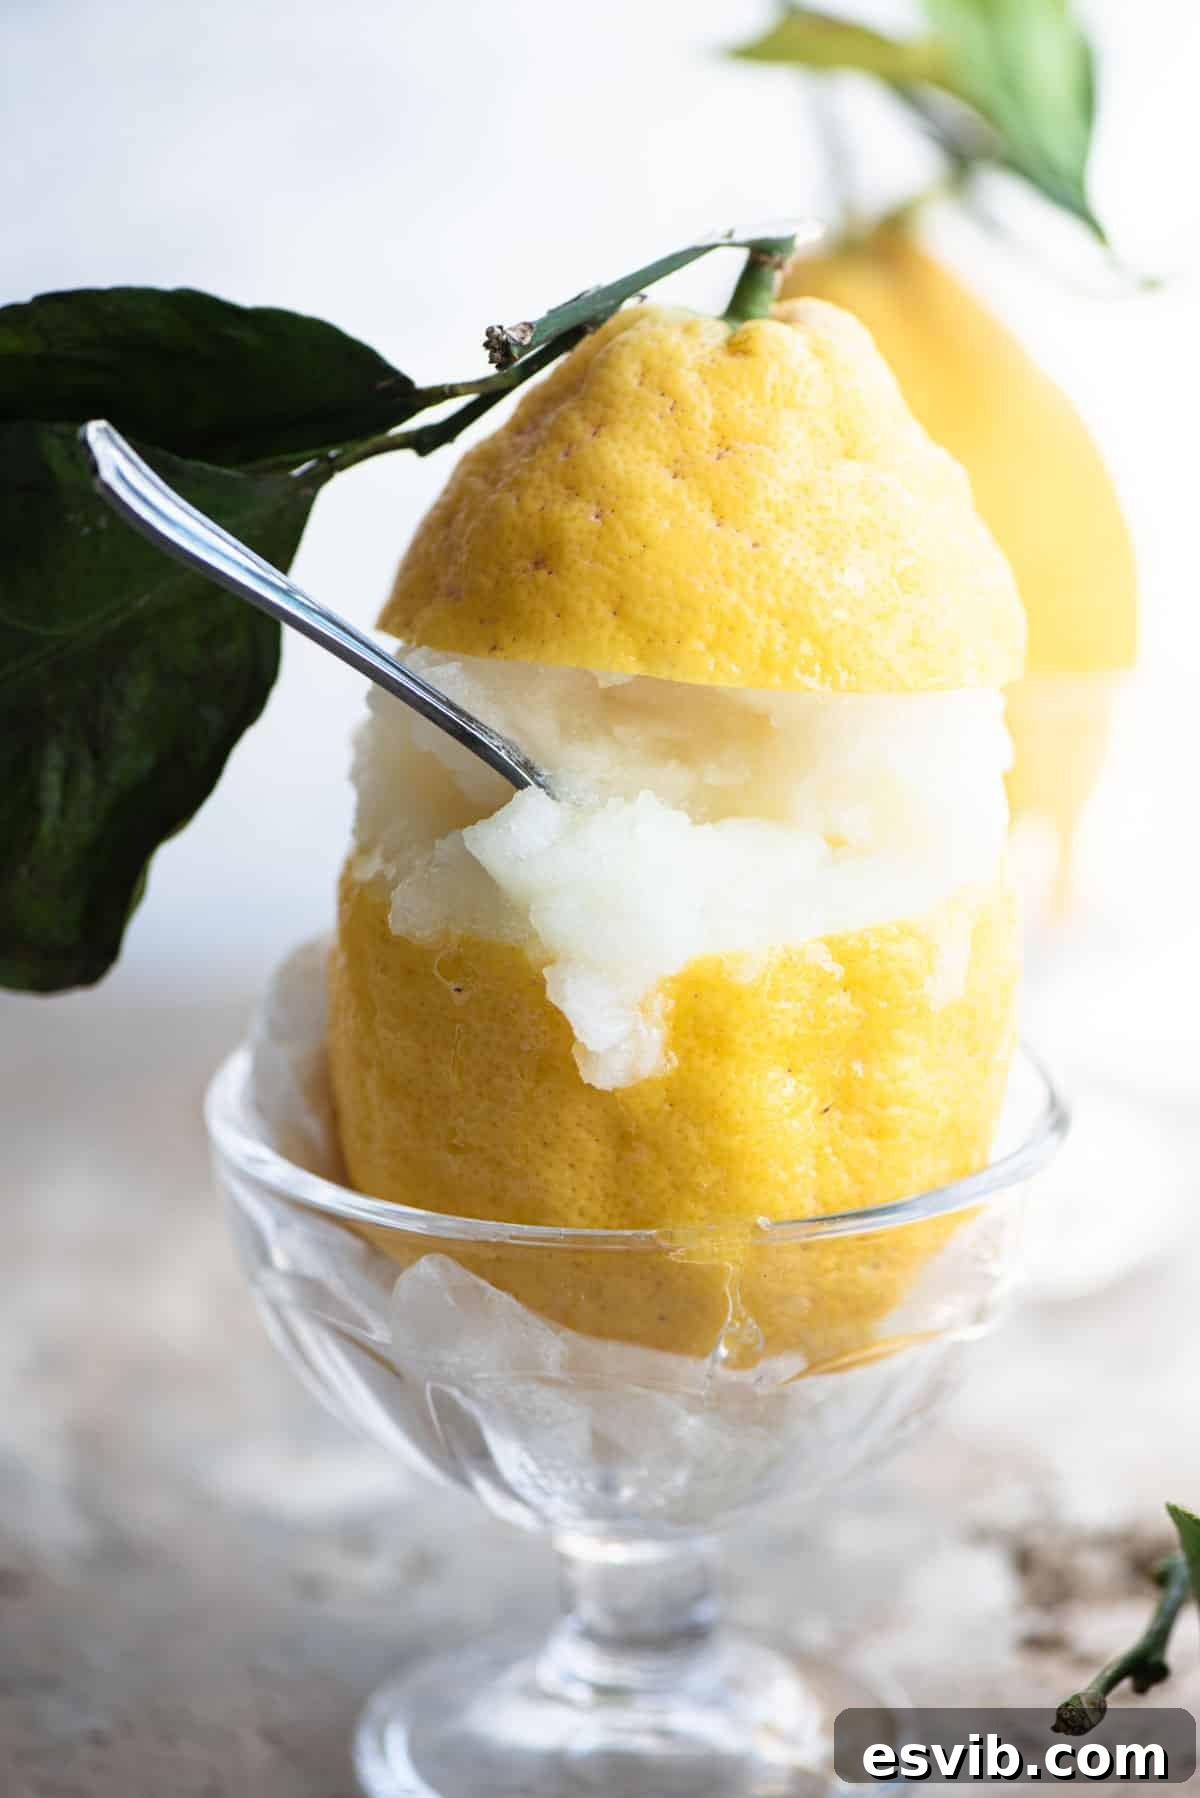
There’s a particularly famous shop nestled in the heart of Amalfi town that captivates visitors with its show-stopping giant lemons, each meticulously hollowed out and generously stuffed with their signature, intensely flavorful lemon sorbet. While a treat at approximately €10, many agree it’s an indulgence well worth the price for the truly authentic experience. Indeed, finding anything inexpensive on the stunning but often pricey Amalfi Coast is a rare feat, making this sorbet a memorable part of the Italian dolce vita.
Sadly, not everyone can embark on an annual pilgrimage to Amalfi for their cherished lemon sorbet fix. That’s precisely why I set out to recreate this magical dessert in my own kitchen, and I can assure you, the result is absolutely heavenly. This homemade version perfectly captures the essence of those sun-kissed Amalfi lemons, bringing a taste of Southern Italy directly to your table.
Beyond its incredible flavor, this recipe stands out for its surprising simplicity. Unlike some traditional Italian lemon sorbet recipes that call for egg whites, our streamlined method focuses on purity and ease. You’ll achieve a perfectly balanced blend of zingy acidity, refreshing tartness, and just the right amount of sweetness, creating a light and incredibly satisfying dessert that’s ideal for beating the heat. It’s also naturally dairy-free and vegan, making it a wonderful option for almost everyone.
Below, you’ll find the complete recipe, including detailed notes on selecting ingredients, step-by-step photos to guide you through the process, and helpful tips for achieving sorbet perfection. For a full, printable version of this delightful recipe, scroll down to the bottom of the page or click the dedicated recipe link.
Table of Contents
- The Essence of Amalfi Lemons: Ingredients
- Mastering the Method: Visual Walk-Through
- Pro Tips for Perfect Sorbet
- More Italian Summer Treats to Try
- Full Recipe: Homemade Italian Lemon Sorbet
The Essence of Amalfi Lemons: Ingredients
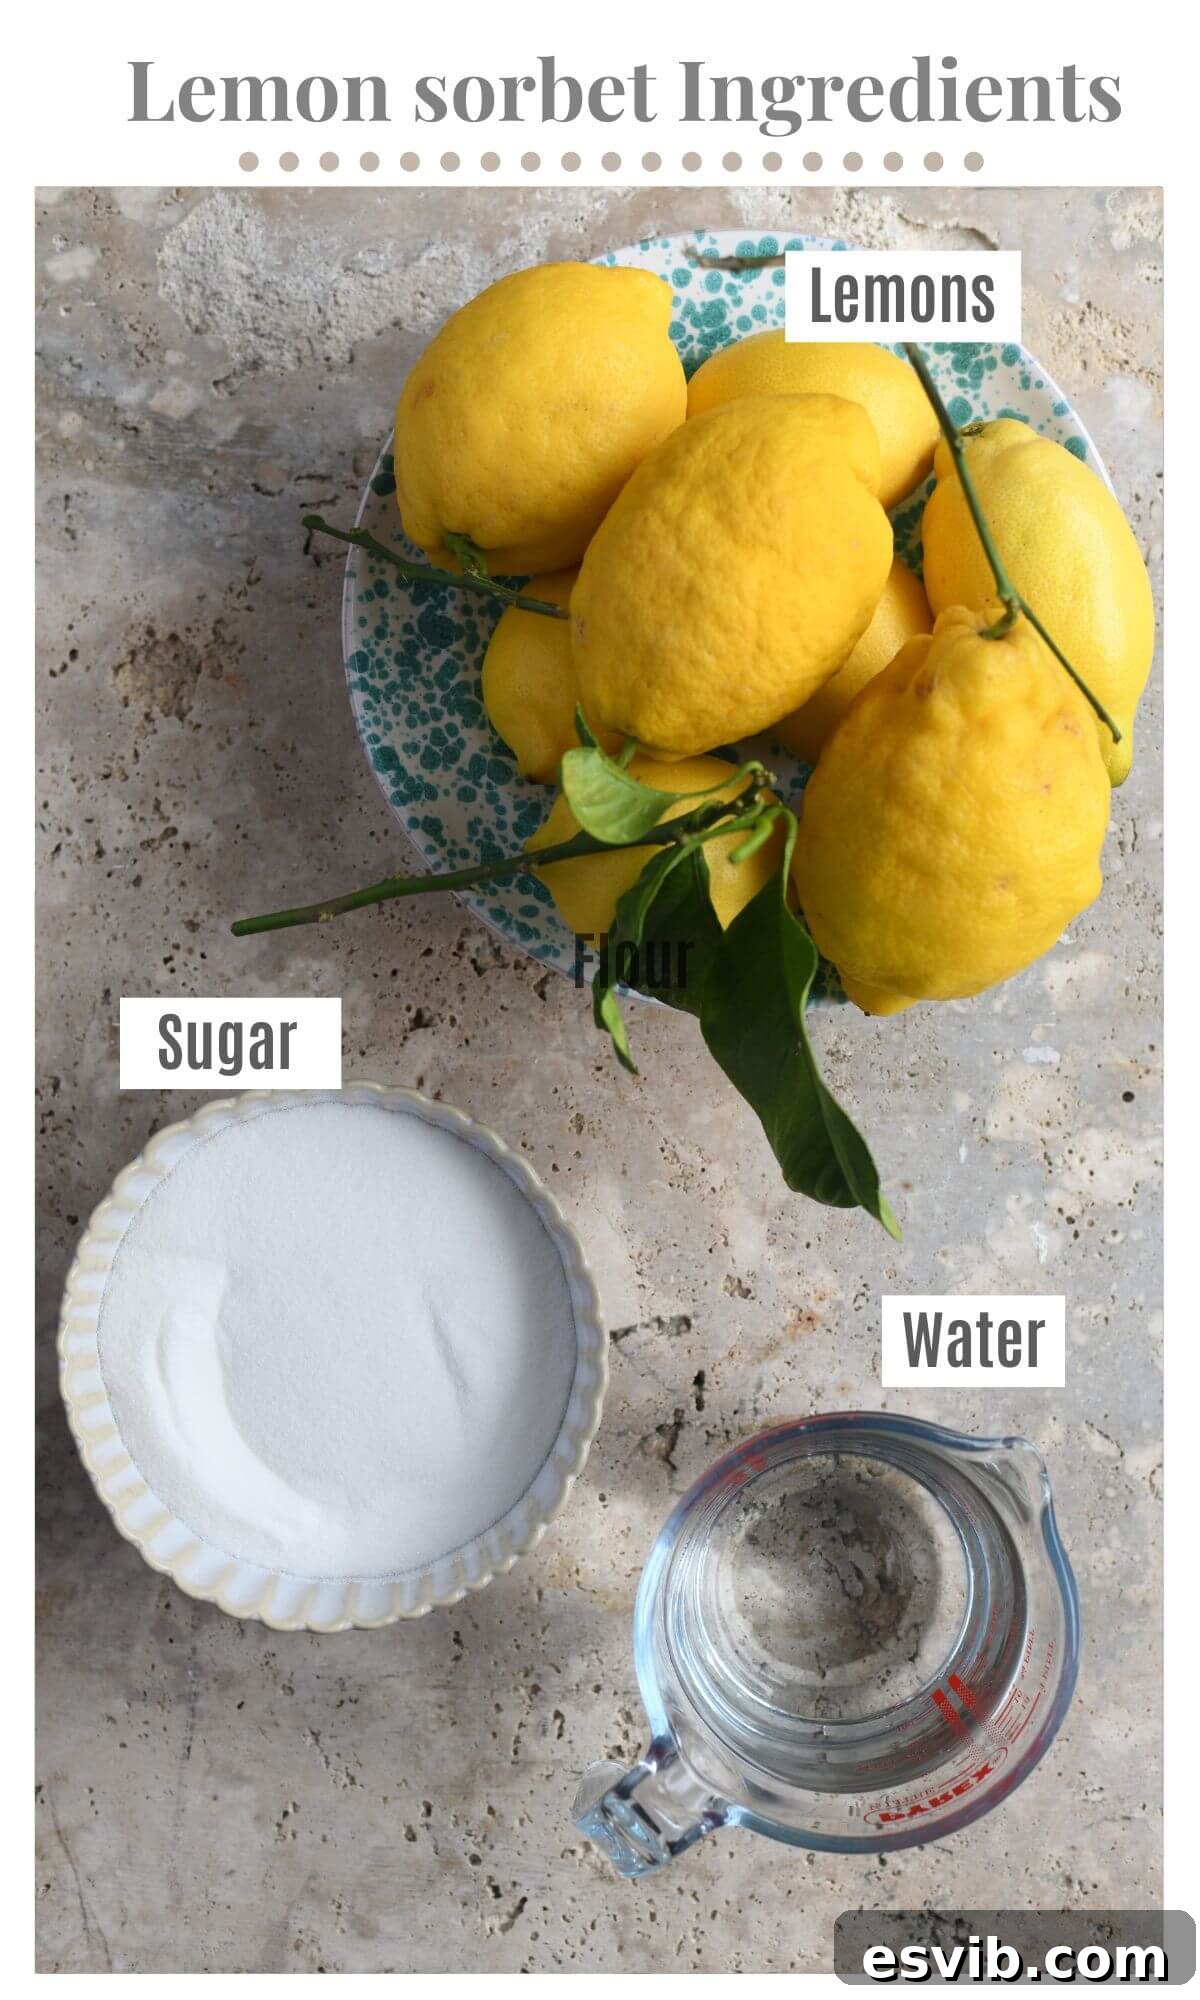
Crafting exceptional lemon sorbet starts with choosing the right ingredients. Our recipe keeps it beautifully simple with just three core components:
Ingredient Notes and Substitutions for Best Results
- Lemons: While authentic Amalfi lemons possess a unique sweetness and aroma, they can be quite costly and hard to find outside of Italy. For this recipe, we highly recommend using high-quality organic and unwaxed lemons. Varieties like Eureka or Meyer lemons work wonderfully, offering a robust flavor. The “unwaxed” part is crucial, as you’ll be using the lemon peel to infuse the sugar syrup, lending an extra layer of fragrant citrus essence. If you happen to find larger lemons, especially those with leaves attached, they make for an incredibly impressive serving vessel, though they are purely for aesthetic flair and not essential for the taste.
- Sugar: We prefer white caster sugar (also known as superfine sugar) for most of our dessert recipes. Its finer granules dissolve quickly and seamlessly into the syrup, creating a smooth base without any graininess. However, if you only have granulated sugar on hand, it will work perfectly fine. Just ensure you simmer the syrup a little longer to guarantee complete dissolution of the sugar crystals. The sweetness level can also be adjusted later if needed.
- Water: Since water forms the bulk of your sorbet, using good quality filtered water can subtly enhance the overall taste, allowing the bright lemon flavors to truly shine.
Mastering the Method: Visual Walk-Through
Making this refreshing lemon sorbet is a straightforward process. Follow these steps, guided by our visual aids, for a perfect batch every time.
- Prep the Lemons: Begin by carefully peeling the lemons using a vegetable peeler. The key here is to remove only the bright yellow zest, avoiding any of the bitter white pith directly underneath. The pith can impart an unpleasant bitterness to your sorbet, so take your time. Once peeled, juice the lemons, then strain the juice through a fine-mesh sieve. This step ensures you remove any pulp or seeds, resulting in a smooth, clear lemon juice.
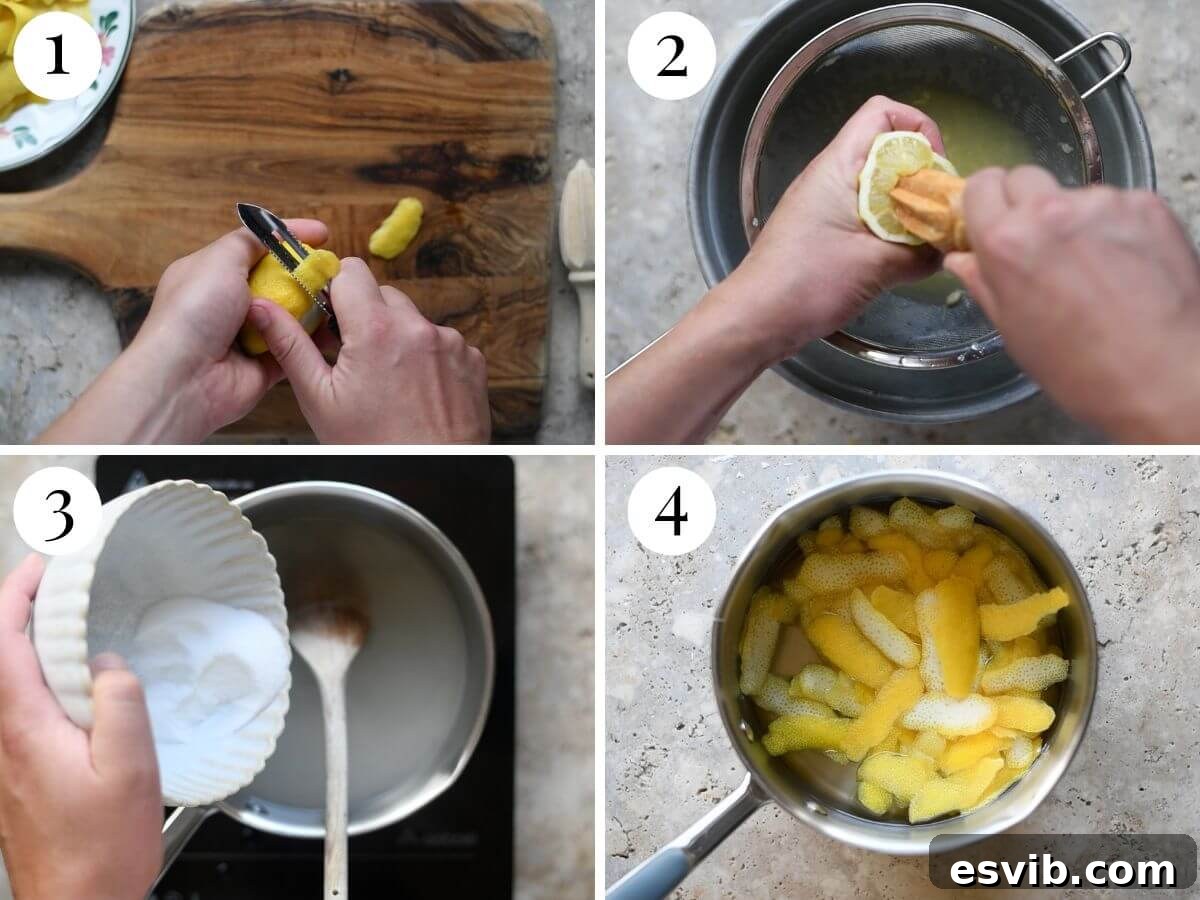
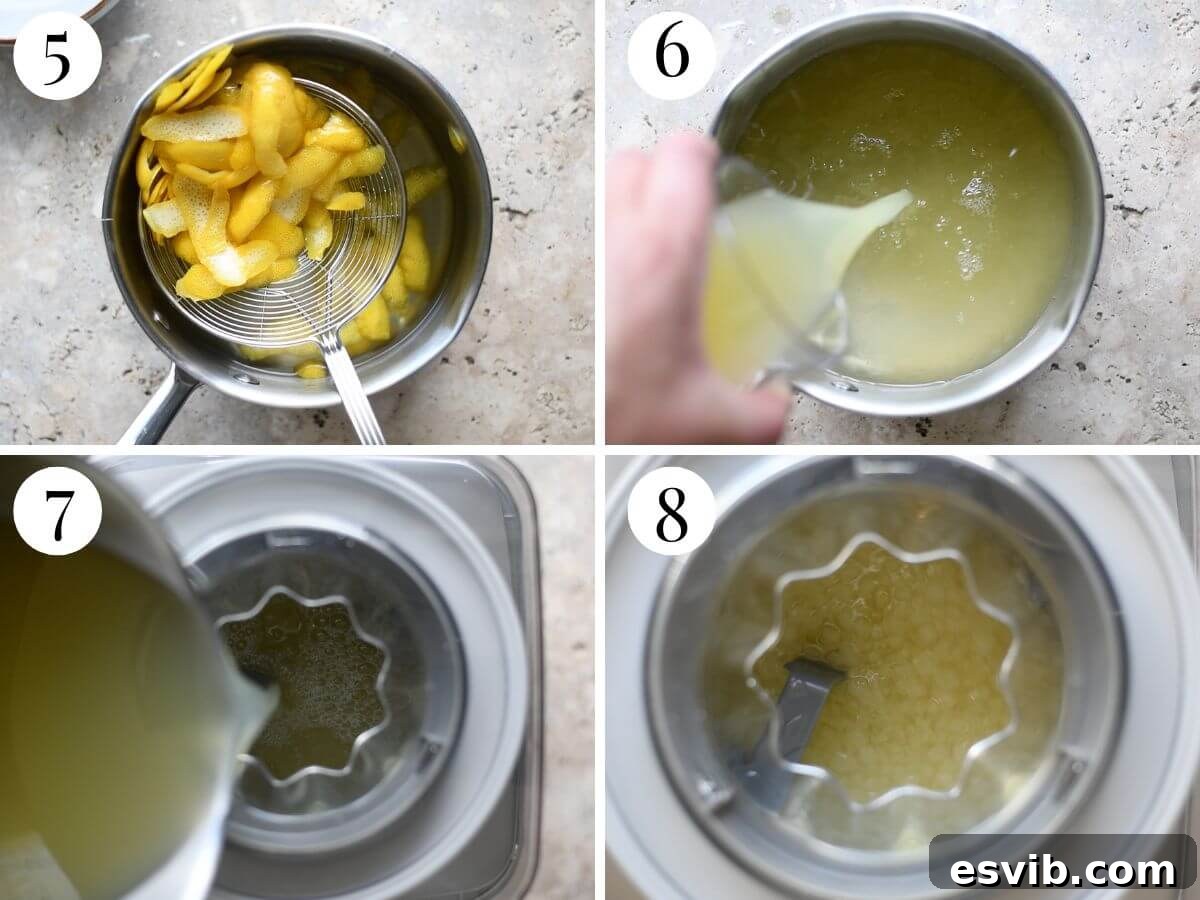
- Make the Sugar Syrup: In a medium saucepan, combine the measured water and sugar. Bring the mixture to a gentle boil over medium heat, stirring occasionally. Continue to simmer just until all the sugar has completely dissolved, and the syrup appears clear. Once dissolved, remove the saucepan from the heat and immediately add the reserved lemon peel to the hot syrup. This allows the essential oils from the peel to infuse into the syrup, enhancing the overall lemon flavor and aroma. Let the syrup cool down completely to room temperature, or even colder, before proceeding.
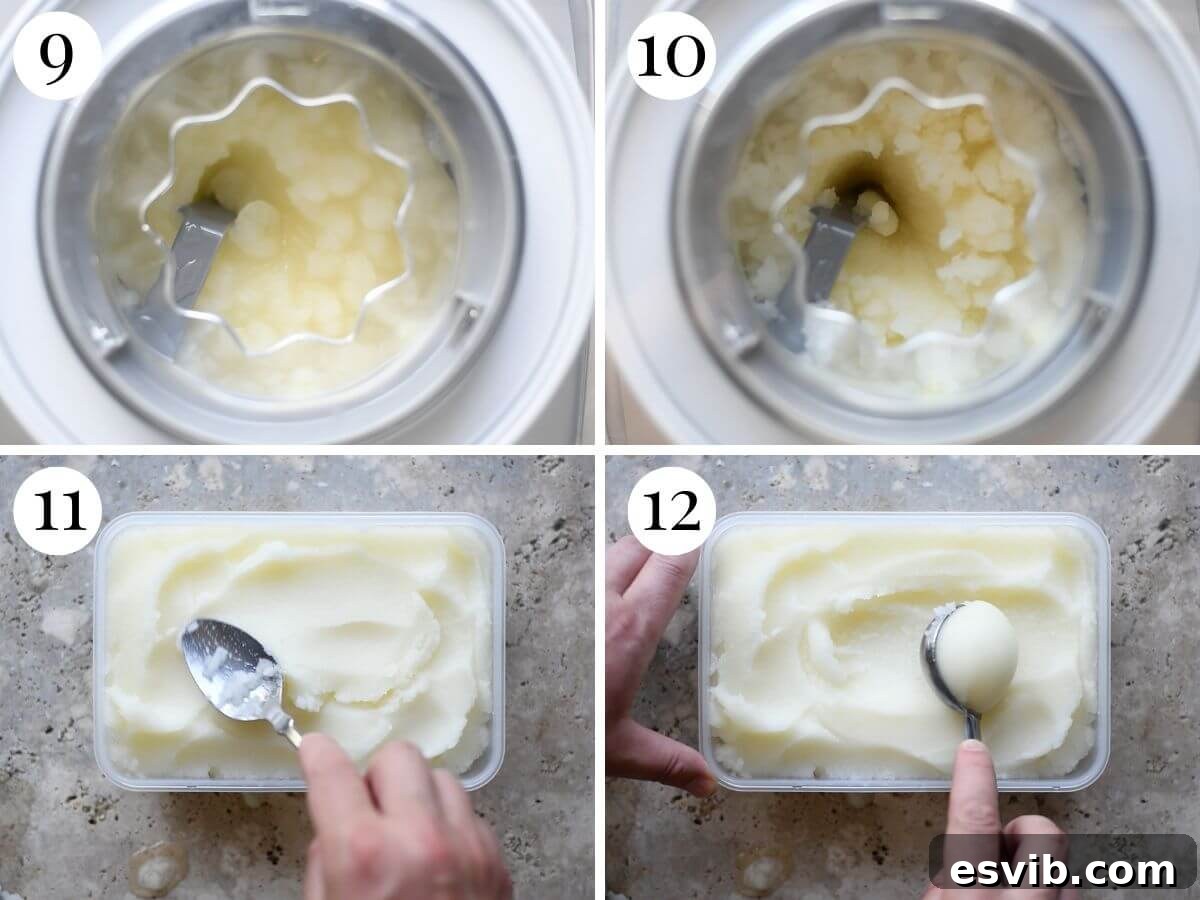
- Combine and Churn: Once the lemon-infused sugar syrup is thoroughly cooled, remove and discard the lemon peel. Stir in the freshly strained lemon juice. Give the mixture a taste – this is your chance to adjust the sweetness or tartness to your preference by adding a little more sugar syrup or lemon juice if needed. Once happy with the balance, pour the chilled mixture into your ice cream machine. Churn according to your machine’s instructions until the mixture transforms into a pale, soft, and somewhat slushy sorbet consistency.
- Freeze for Perfection: When your sorbet has reached the desired soft-serve texture from the churner, carefully transfer it to a freezer-safe airtight container. Place the container in the freezer for at least 2-4 hours, or until it firms up to a scoopable consistency. Allow it to freeze completely until needed for the best experience.
Pro Tips for Perfect Sorbet
- No Ice Cream Machine? No Problem!: You can still achieve fantastic results without an ice cream maker.
- **The Fork Method:** Once the sorbet mixture is ready and thoroughly chilled, pour it into a shallow freezer-safe container. Place it in the freezer. After 3-4 hours, remove it and vigorously stir or scrape it with a fork or whisk, breaking up any ice crystals. Return it to the freezer and repeat this process every 1-2 hours for another 3-4 hours, until it reaches a beautiful, granular sorbet consistency. Then, allow it to freeze completely.
- **The Ice Cube Method:** For an even quicker no-churn option, pour the cooled sorbet mixture into ice cube trays and freeze until solid. Once frozen, transfer the lemon sorbet cubes to a powerful food processor. Pulse and blend until it achieves a smooth, sorbet-like texture. Serve immediately for a granita-like consistency, or refreeze briefly for a firmer scoop.
- Choose Your Lemons Wisely: As mentioned, using unwaxed, organic lemons is paramount since their peel is used for infusing. Waxed lemons can contain chemicals that you don’t want in your sorbet, and their zest won’t infuse as effectively. Prioritize fresh, firm lemons with bright, unblemished skins for the best flavor and aroma.
- Temperature is Key: It is absolutely critical that your lemon and sugar syrup mixture is completely cold before it enters the ice cream machine or the freezer. Chilling the mixture thoroughly prevents the formation of large ice crystals, ensuring a smooth, velvety texture. To speed up the cooling process for the sugar syrup, you can place the saucepan over a larger bowl filled with ice water, stirring occasionally.
- Taste and Adjust: Don’t be shy to taste the sorbet mixture (before churning!) and adjust it to your liking. If you prefer it sweeter, stir in a little more sugar syrup. If you like it tangier, add a touch more fresh lemon juice. Remember, flavors become slightly less pronounced when frozen, so aim for a slightly stronger flavor than you desire at room temperature. Always ensure the mixture is completely cool after any adjustments before churning or freezing.
- Serving Suggestions: Serve your homemade Italian Lemon Sorbet in chilled glasses, small bowls, or for an extra special touch, scoop it back into hollowed-out lemon shells. Garnish with a fresh mint sprig, a lemon zest curl, or a drizzle of limoncello for an adult treat.
- Storage: Store the sorbet in an airtight container in the freezer for up to 2-3 weeks. For optimal texture, remove it from the freezer about 10-15 minutes before serving to allow it to soften slightly.
More Italian Summer Treats to Try
If you’re enchanted by the refreshing taste of Italian desserts, explore these other delightful recipes perfect for warm weather:
Italian Desserts
Ricotta al Caffè
Italian Desserts
Pistachio Ice Cream (Gelato al Pistacchio)
Italian Desserts
2 Ingredient Orange Sorbet
Italian Desserts
Stracciatella Gelato (No Churn)
If you’ve tried this delightful Italian Lemon Sorbet recipe or any other delicious creation on our blog, please don’t hesitate to share your experience! We’d love for you to rate the recipe and let us know how it turned out in the comments section below – your feedback truly inspires us. You can also follow us on Facebook, Instagram, and Pinterest for more culinary inspiration, or sign up for our Newsletter to receive our latest delicious recipes directly in your inbox.
Step By Step Photos Above
Many of our recipes feature detailed step-by-step photos, along with helpful tips and tricks to ensure your success the very first time!
Amalfi Lemon Sorbet
By Emily
2 hours
5 minutes
2 hours 5 minutes
1.1 litres or (38oz)
Equipment
-
Ice cream machine (highly recommended for best texture, but not essential)
-
Freezer-safe container (airtight)
-
Vegetable peeler
-
Fine-mesh sieve
-
Medium saucepan
Ingredients
- 450 ml (15.2 fl oz) water , (approx. 1 ¾ cups + 2 tablespoons)
- 360 g (2 cups) caster sugar, (superfine sugar; granulated sugar can also be used)
- 12 unwaxed lemons, (aim for about 550ml/18.6 fl oz of juice)
Instructions
-
1. Prepare the Lemons: Carefully peel the lemons using a vegetable peeler. It is crucial to remove only the yellow zest and avoid taking any of the white pith, as the pith will make your sorbet bitter. Set the lemon peels aside for later infusion.
-
2. Juice the Lemons: Halve the peeled lemons and juice them. You should aim for approximately 550-600ml (about 18.6-20 fl oz) of fresh lemon juice. Pour the juice through a fine-mesh sieve to catch and discard any seeds or thick pulp, ensuring a smooth base for your sorbet. Set the strained lemon juice aside.
-
3. Create the Sugar Syrup: In a medium saucepan, combine the measured water and sugar. Place the saucepan over medium heat and bring the mixture to a gentle boil, stirring continuously until all the sugar crystals have completely dissolved and the syrup appears clear. This typically takes about 5 minutes.
-
4. Infuse and Cool the Syrup: Once the sugar has fully dissolved, remove the saucepan from the heat. Immediately add the reserved lemon peels to the hot sugar syrup. Allow the peels to infuse their fragrant oils into the syrup as it cools completely to room temperature. For a quicker cooling process, you can place the saucepan into a larger bowl filled with ice and stir occasionally until thoroughly chilled.
-
5. Combine Lemon Juice and Syrup: Once the lemon-infused sugar syrup is completely cooled, remove and discard the lemon peels. Pour the strained lemon juice into the syrup and stir well to combine. At this point, you can taste the mixture and adjust the sweetness or tartness if desired by adding a little more sugar syrup or lemon juice. Ensure the mixture remains very cold.
-
6. Churn the Sorbet: Turn on your ice cream machine and pour the well-chilled lemon sorbet mixture into the freezing bowl. Churn the mixture according to your machine’s manufacturer instructions. This usually takes about 20-30 minutes, or until the sorbet has thickened to a pale, soft-serve consistency.
-
7. Freeze for Final Firmness: Once churned, transfer the soft sorbet mixture into a freezer-safe, airtight container. Place the container in the freezer for at least 2-4 hours, or until it has firmed up to a scoopable texture. This allows the flavors to fully develop and the sorbet to reach its ideal consistency.
Alternative Methods if You Don’t Have an Ice Cream Machine
Don’t have an ice cream machine? No worries! You can still enjoy this incredible lemon sorbet:
-
The “Fork Scrape” Method: Once your sorbet mixture is fully prepared and very cold, pour it into a shallow, freezer-safe dish or container. Place it in the freezer. After 3-4 hours, remove the container and use a fork or whisk to thoroughly scrape and stir the mixture, breaking up any ice crystals that have formed. Return it to the freezer and repeat this process every 1-2 hours for another 3-4 hours, until the sorbet achieves a light, granular, and icy-yet-smooth texture. Then, let it freeze completely until needed.
-
The “Ice Cube Blender” Method: For a slightly different approach, once the lemon mixture is completely cooled and combined, pour it into an ice cube tray and freeze until the cubes are solid. Once frozen, transfer the sorbet cubes to a powerful food processor or high-speed blender. Pulse and blend until the mixture becomes smooth and takes on a soft, sorbet-like texture. Serve immediately for a wonderful granita-style dessert.
Video Guide
Recipe Notes & Expert Tips
- Adjusting Sweetness and Tartness: Always taste your sorbet base before churning or freezing. Lemons can vary greatly in their acidity. If your mixture tastes too tart, add a little more simple sugar syrup (made from equal parts sugar and water, then cooled). If it’s too sweet, a splash more fresh lemon juice will balance it out. Remember that cold temperatures can dull flavors, so aim for a slightly more intense flavor than you’d prefer at room temperature.
- Crucial Chilling: The temperature of your sorbet base cannot be stressed enough. It must be completely cold – ideally refrigerator cold – before it goes into the ice cream machine or is placed in the freezer for no-churn methods. This slow, gradual cooling and chilling are what prevent large ice crystals from forming, ensuring a silky-smooth, creamy sorbet texture that’s free from graininess.
- Nutritional Disclaimer: The nutritional information provided is an approximation for a full batch of this recipe and may vary based on specific ingredient brands and preparation methods. Please use it as a guide.
- Enhance the Flavor: For an extra layer of complexity, consider adding a very small amount of finely chopped fresh mint or a few basil leaves to the sugar syrup during the infusion step. Remove them along with the lemon peels before chilling.
- Limoncello Boost: For an adult version, you can stir in 1-2 tablespoons of Limoncello (Italian lemon liqueur) into the chilled sorbet base just before churning. This adds a lovely alcoholic kick and further deepens the lemon flavor. Be careful not to add too much, as alcohol lowers the freezing point and can make the sorbet too soft.
Helpful Info for All Recipes
- I always use extra virgin olive oil in all of my recipes unless stated otherwise, preferring its robust flavor.
- When selecting canned or jarred tomatoes, I consistently choose Cirio or Mutti brands for their superior quality, vibrant flavor, and consistent results.
- Unless specified, all vegetables used in our recipes are of medium size.
- All recipes featured on this site are meticulously tested and developed using a fan (convection) oven to ensure reliable outcomes.
- Find out more about how nutrition is calculated and why it’s an approximation.
- Explore our essential guide to Italian Pantry Staples to stock your kitchen like a pro.
- Discover all our Essential Kitchen Tools for Italian Cooking to master authentic Italian cuisine.
Nutrition
Carbohydrates: 365g |
Protein: 2g |
Fat: 2g |
Saturated Fat: 0.2g |
Polyunsaturated Fat: 0.1g |
Monounsaturated Fat: 0.04g |
Sodium: 29mg |
Potassium: 586mg |
Fiber: 2g |
Sugar: 341g |
Vitamin A: 34IU |
Vitamin C: 218mg |
Calcium: 49mg |
Iron: 1mg
Nutrition information is automatically calculated and should only be used as an approximation. Individual results may vary.
Did you try this recipe?
Leave a comment below! We love to hear from you.