

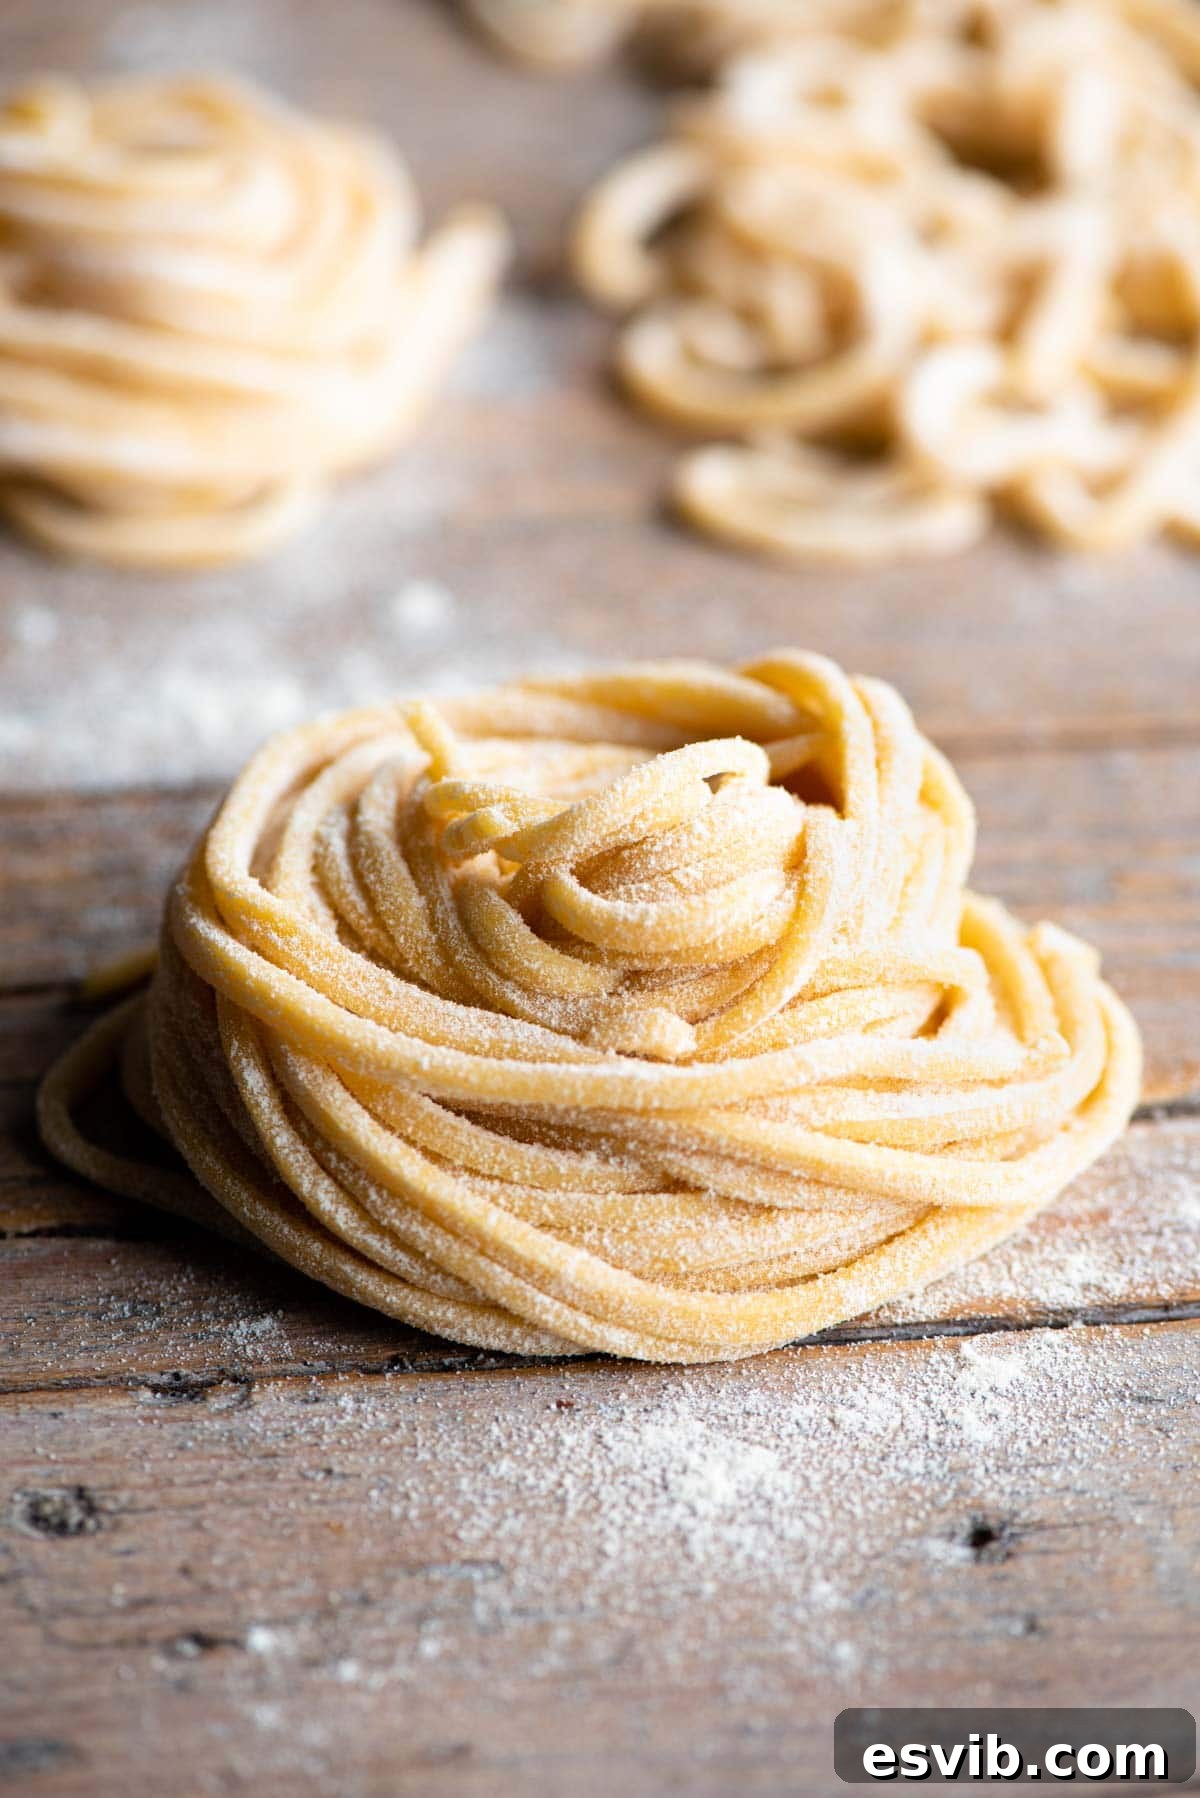
Embark on a culinary journey to the heart of Italy by mastering the art of **Homemade Tonnarelli Pasta**. This exquisite long pasta shape, affectionately known as *Spaghetti alla Chitarra*, is surprisingly simple to create in your own kitchen. It relies on a rich, flavorful semolina pasta dough and a charming, traditional pasta tool called *La Chitarra* (meaning “the guitar”). Prepare to transform simple ingredients into a deeply satisfying meal. Our easy, step-by-step guide will walk you through everything you need to know, from preparing the perfect dough to shaping these distinctive strands and discovering the most delicious sauces to serve them with!
Unveiling Tonnarelli Pasta: Spaghetti’s Square-Edged Cousin
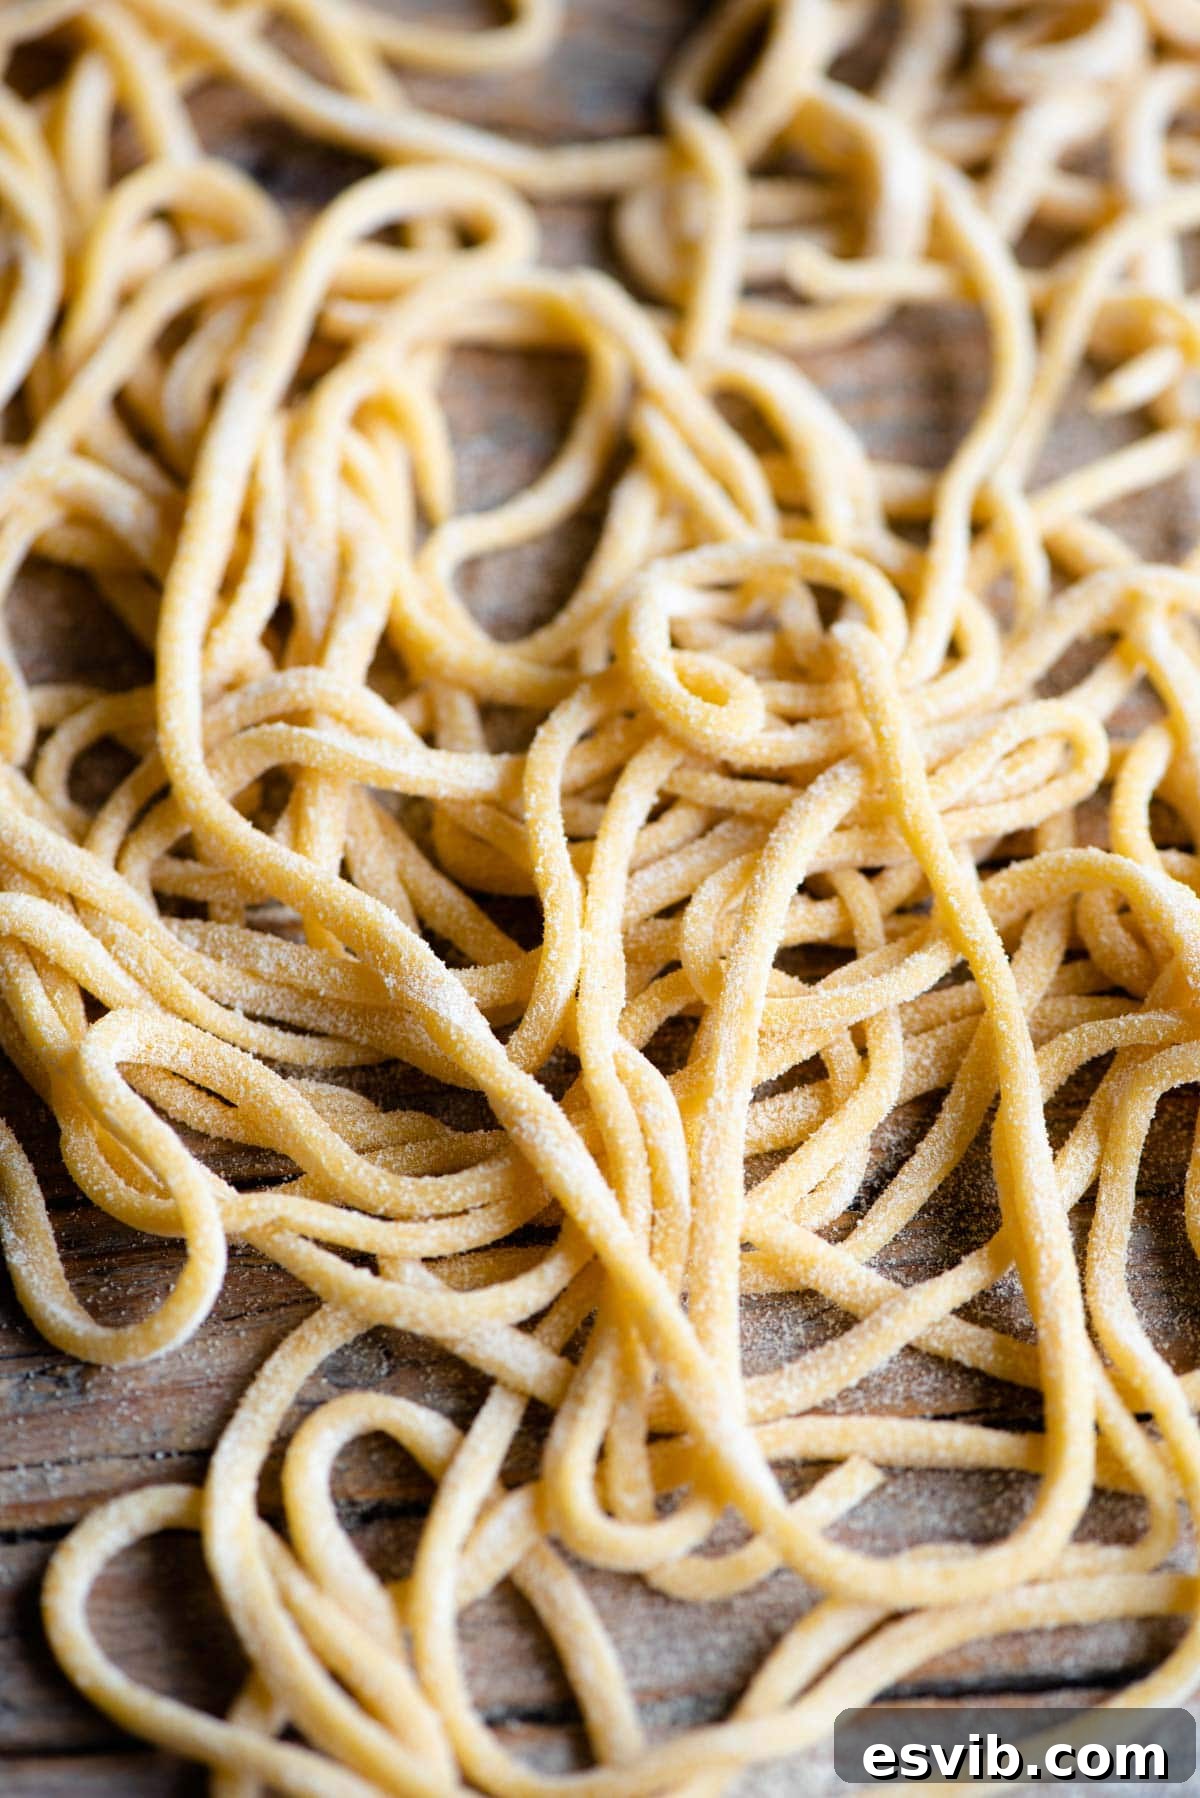
At first glance, Tonnarelli pasta bears a striking resemblance to classic spaghetti. However, a closer look reveals its unique charm: it’s notably thicker and boasts distinctive square edges, a departure from spaghetti’s typical round profile. This subtle difference is key to its exceptional texture and ability to cling to sauces, making it a favorite among pasta connoisseurs.
This delightful pasta holds a special place in Italian culinary traditions. It is famously paired with the iconic Cacio e Pepe in the Lazio region, particularly in Rome, where its robust shape perfectly captures the creamy, peppery sauce. Travel further east to Abruzzo, and you’ll find it served *alla Teramana* style, often accompanying tiny, flavorful meatballs nestled in a rich tomato sauce. Its versatility and hearty texture make it an ideal canvas for a variety of traditional Italian preparations.
The Magic of La Chitarra: Your Gateway to Authentic Pasta
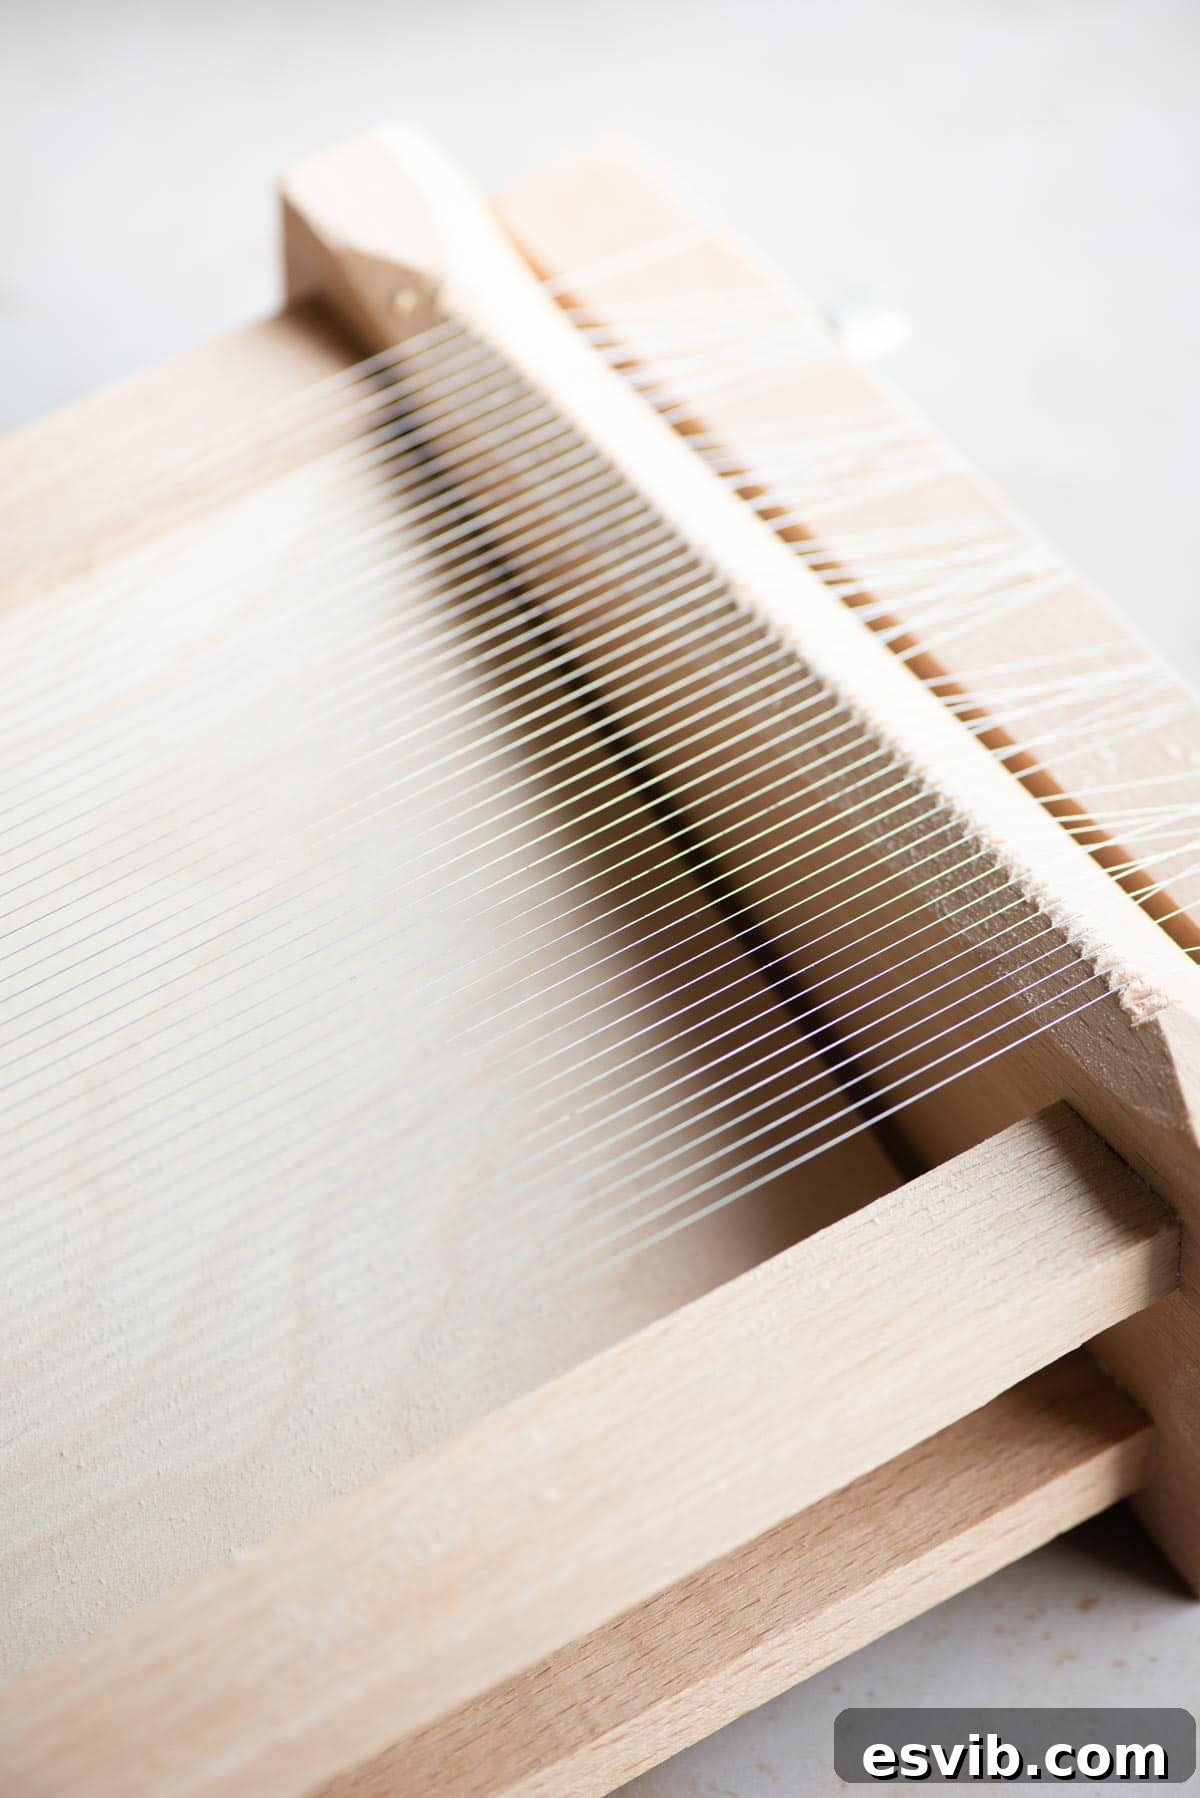
*La Chitarra* is more than just a pasta tool; it’s an heirloom-quality instrument that brings a touch of rustic Italian authenticity to your kitchen. Its name, “the guitar,” comes from its design: a wooden frame strung with parallel metal wires. It’s remarkably fun and surprisingly easy to use, allowing you to create perfectly uniform pasta strands with minimal effort. For anyone passionate about homemade pasta, a Chitarra makes an exceptional and thoughtful gift, opening up a world of traditional pasta-making possibilities.
Dive deeper into the full Tonnarelli pasta recipe below. You’ll find comprehensive notes on ingredients, illustrative step-by-step photos, essential tips for success, delicious variations, and even a video tutorial to guide you. For a quick overview, simply scroll down to the bottom for the complete recipe card.
Essential Ingredients for Homemade Tonnarelli
Crafting exceptional Tonnarelli begins with selecting the right ingredients. Below, you’ll find a detailed list of what you’ll need, along with crucial insights to ensure your pasta dough is perfect every time.
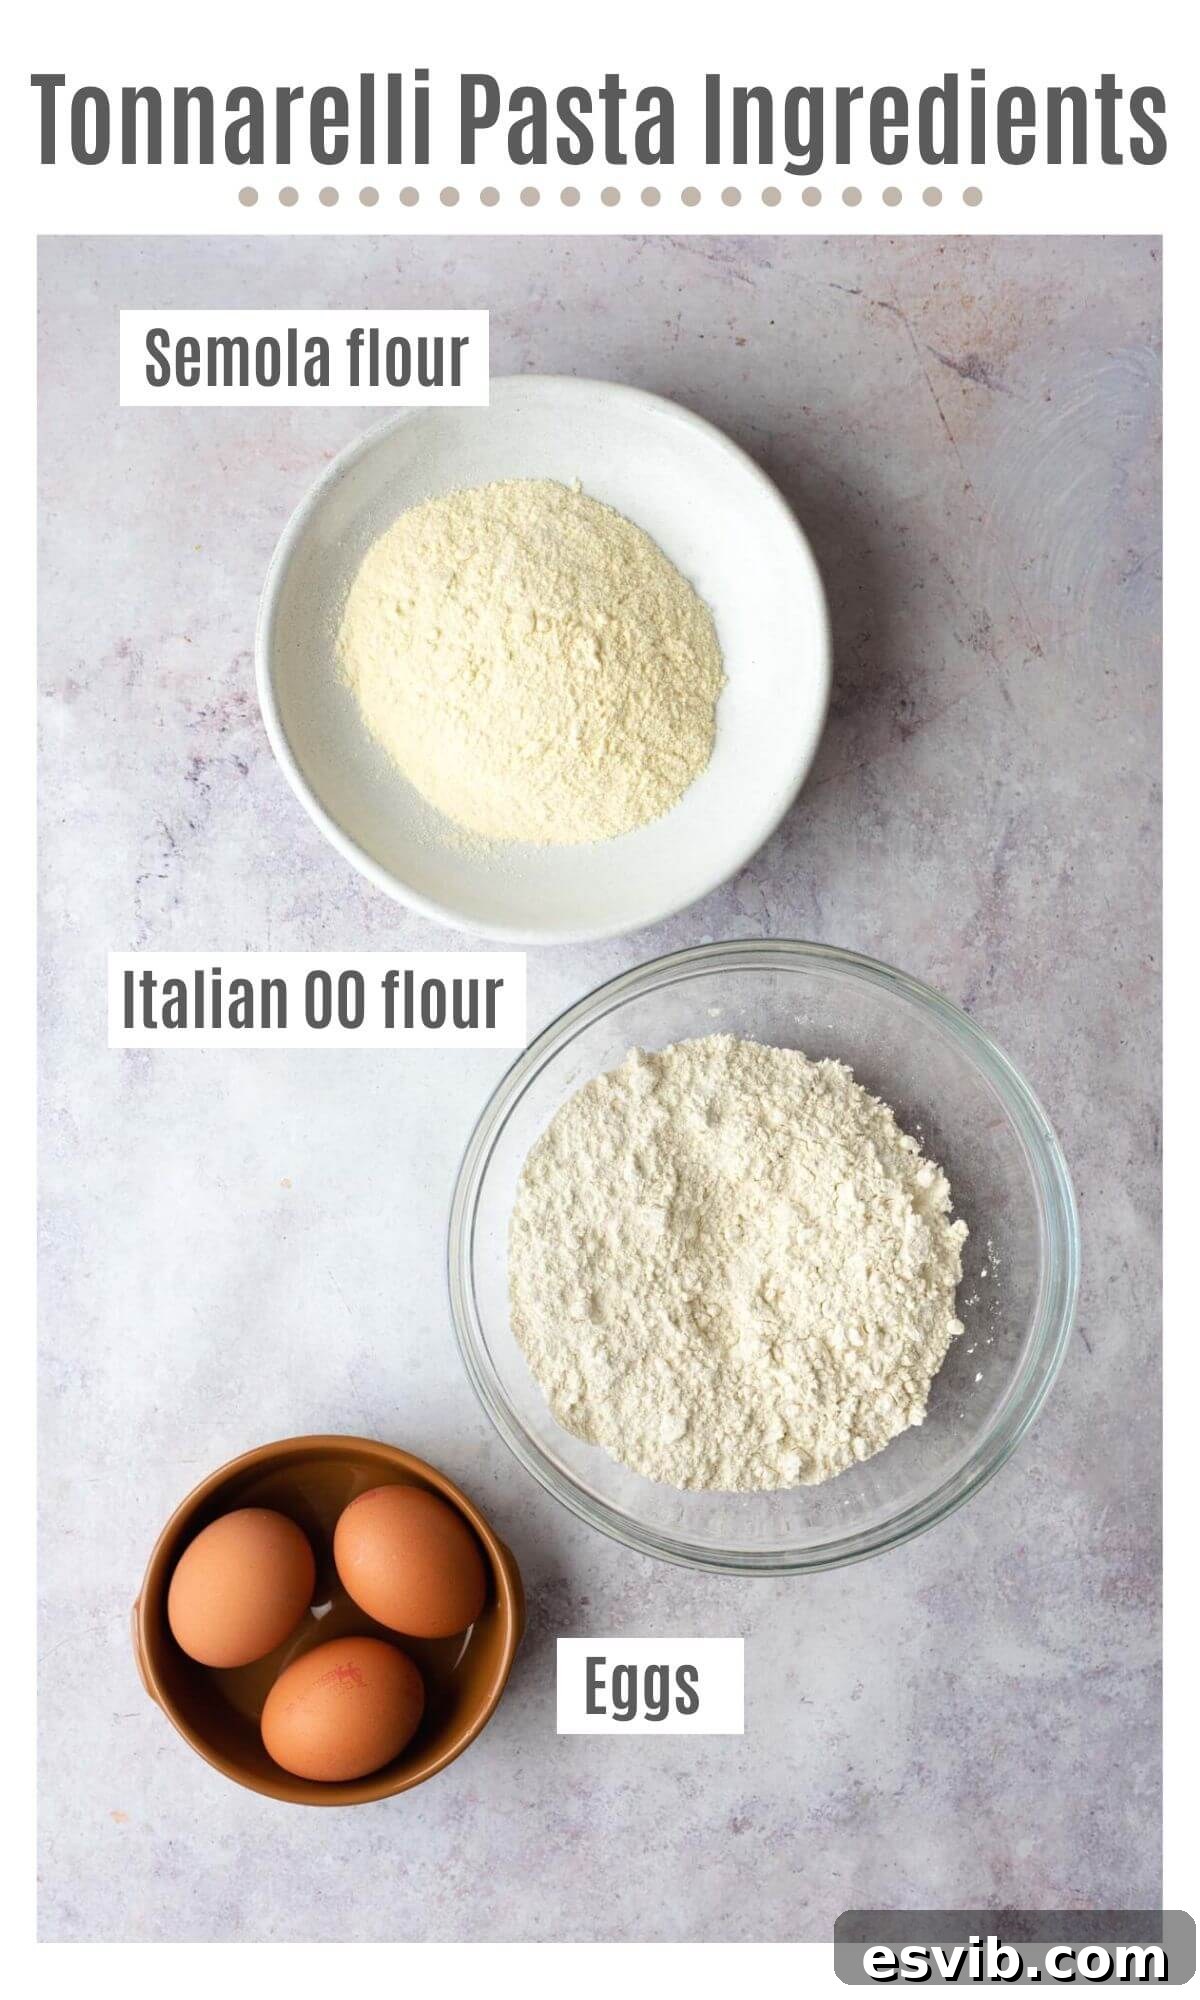
- Italian Tipo 00 Flour: While all-purpose flour can be used in a pinch, we wholeheartedly recommend Italian Tipo 00 flour. Its exceptionally fine texture and lower protein content create a silky, tender pasta with a distinct Italian character. This specialized flour is increasingly available in well-stocked supermarkets and online.
- Semola Rimacinata: This super-fine semolina flour is a game-changer for Tonnarelli. It contributes significantly to the pasta’s firm texture and desirable “bite,” a hallmark of authentic Italian pasta. If you can’t source semola rimacinata, don’t fret; you can substitute it with an equal amount of Tipo 00 flour, though the final texture will be slightly softer.
- Eggs: Use large, fresh eggs. Eggs bind the dough, provide richness, and contribute to the pasta’s vibrant color and elasticity. The exact size of eggs can subtly influence the dough’s hydration, so be prepared to adjust flour slightly during kneading if necessary.
Step-by-Step Guide to Crafting Tonnarelli Pasta
Follow these detailed instructions, complete with visual cues (refer to the photo collages provided), to create perfect Tonnarelli pasta from scratch. Precision and patience are your best tools here!
Phase 1: Preparing the Dough
Step 1: Combine Flours and Create a Well. In a spacious bowl, thoroughly mix both the Tipo 00 flour and the semola rimacinata. Once combined, transfer the flour mixture onto a clean, flat work surface (a large wooden board or countertop is ideal). Use the bottom of your mixing bowl or your fist to create a wide, deep well in the center of the flour mound. This well will hold the eggs. (Refer to visual guide photos 1 & 2 for technique).
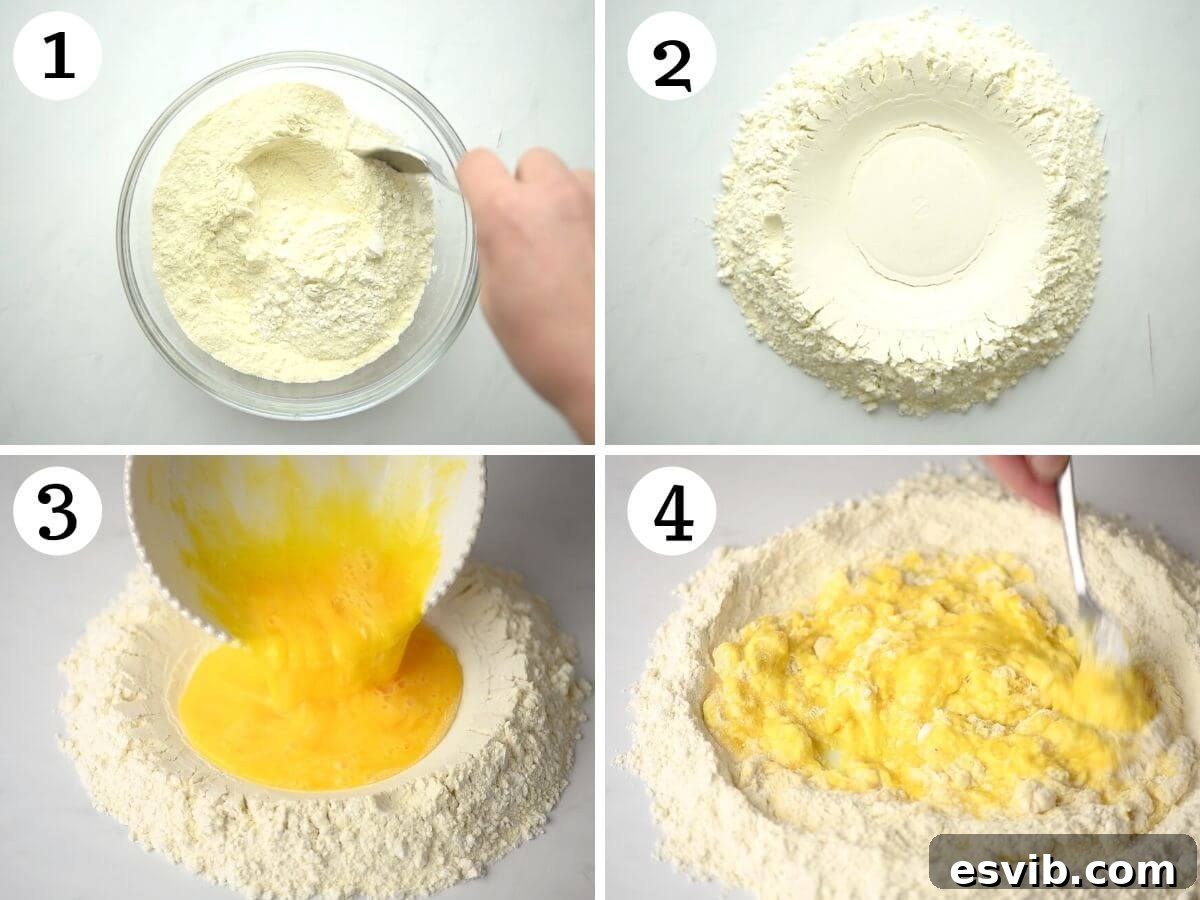
Step 2: Incorporate Eggs into Flour. In a separate, smaller bowl, gently whisk the large eggs until their yolks and whites are just combined and appear uniform. Carefully pour the whisked eggs into the well you’ve created in the flour mound. Using a fork, gradually begin to draw small amounts of flour from the inner edges of the well into the egg mixture. Continue this process, slowly incorporating more flour until the mixture starts to thicken and form a shaggy, rough dough. (Refer to visual guide photos 3-5 for detailed steps).
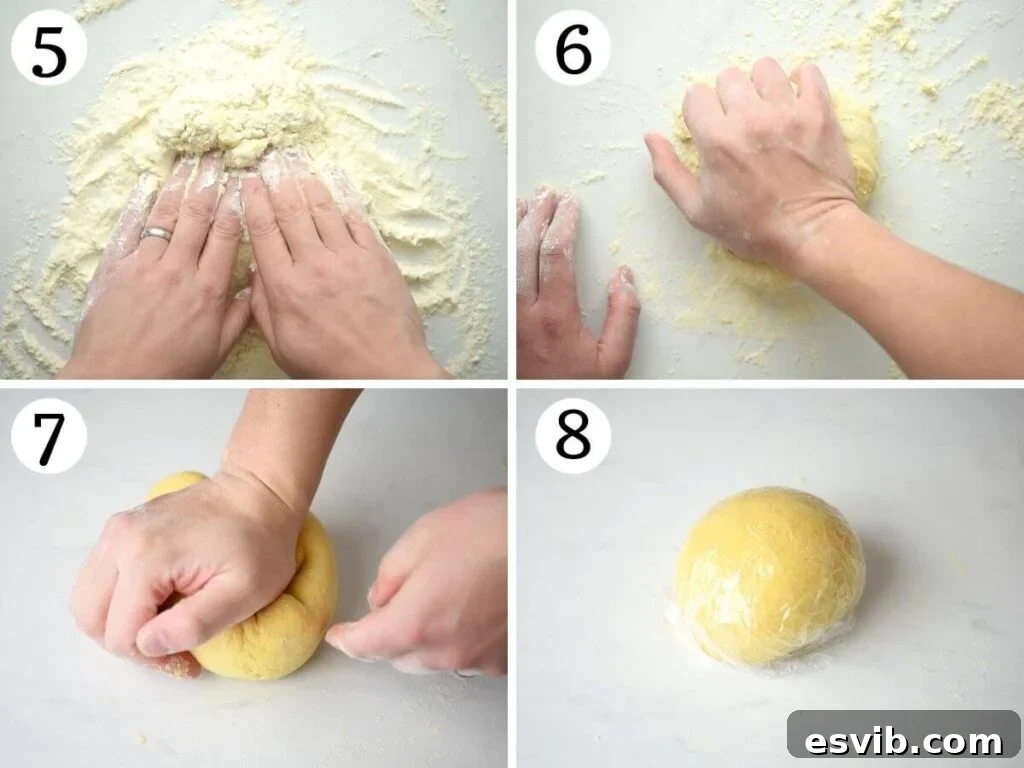
Step 3: Knead and Rest the Dough. Once a rough dough has formed, discard the fork and begin kneading with your hands. This is a crucial step that develops the gluten, giving the pasta its characteristic chewiness. Knead vigorously for approximately 10 minutes. The dough will gradually transform from sticky and uneven to smooth, elastic, and supple. It should feel firm to the touch but yield slightly when pressed. Wrap the kneaded dough tightly in plastic wrap or a clean kitchen towel to prevent it from drying out, then let it rest at room temperature for at least 30 minutes. This resting period allows the gluten to relax, making the dough much easier to roll. (Refer to visual guide photos 6-8 for kneading technique and resting).
Phase 2: Shaping Tonnarelli with La Chitarra
Step 4: Prepare Dough for Rolling. After the dough has rested, unwrap it and divide it into four equal portions. Take one portion and, using a rolling pin, roll it out into a rough rectangular shape. Aim for a thickness that is slightly less than the gap between the strings of your Chitarra tool (typically around 3mm or 1/8 inch). The sheet should be wide enough to span the Chitarra’s strings. (Refer to visual guide photos 9-11 for rolling technique).
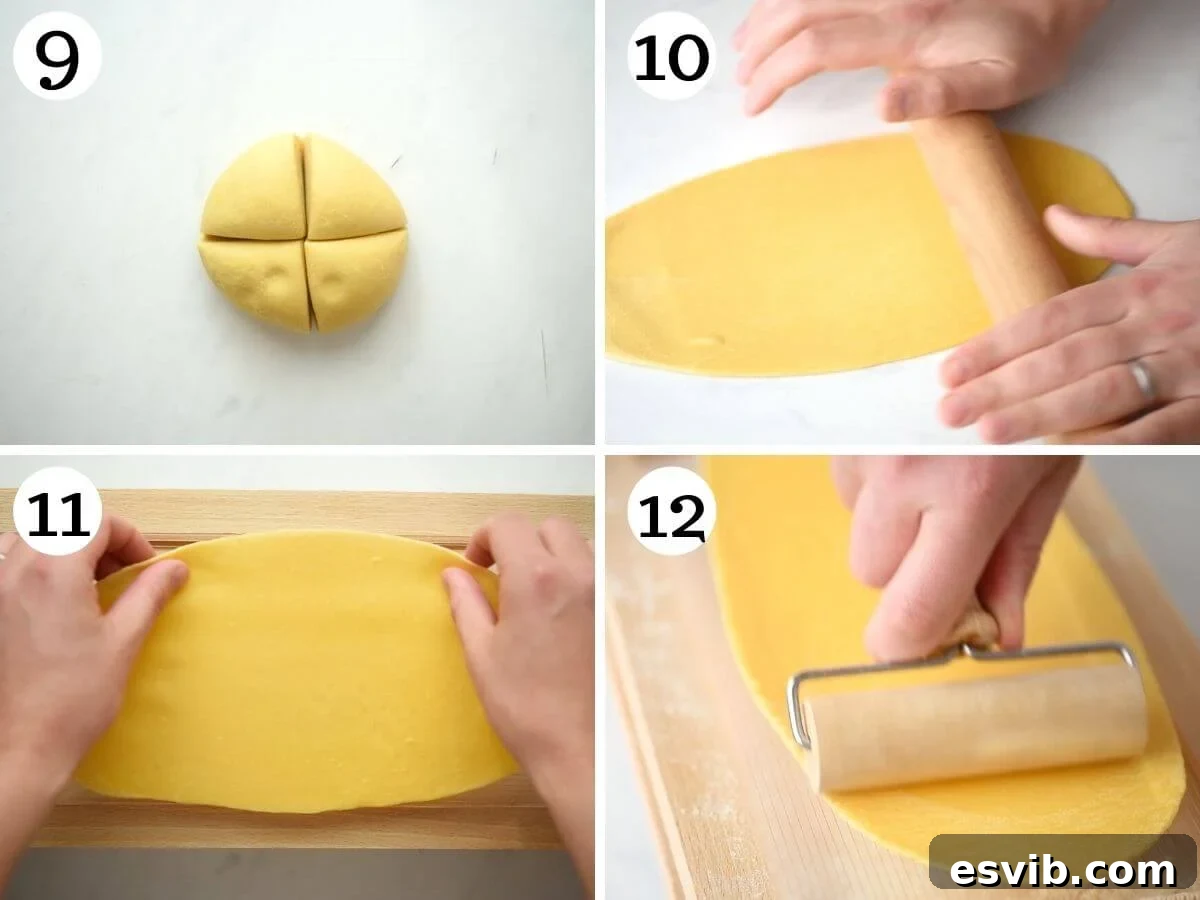
Step 5: Cut the Pasta Using La Chitarra. Lightly dust both your Chitarra tool and the rolled-out pasta sheet with a generous sprinkle of semola rimacinata (or regular flour if semola is unavailable). This prevents sticking. Carefully lay the pasta sheet evenly across the strings of the Chitarra. Position a rolling pin firmly on top of the pasta sheet and roll it back and forth with gentle but consistent pressure. The wires of the Chitarra will progressively cut the pasta into perfect square-edged strands, which will then fall through the strings onto the base of the tool. Continue rolling until all the pasta has been cut. (Refer to visual guide photos 12-15 for cutting action).
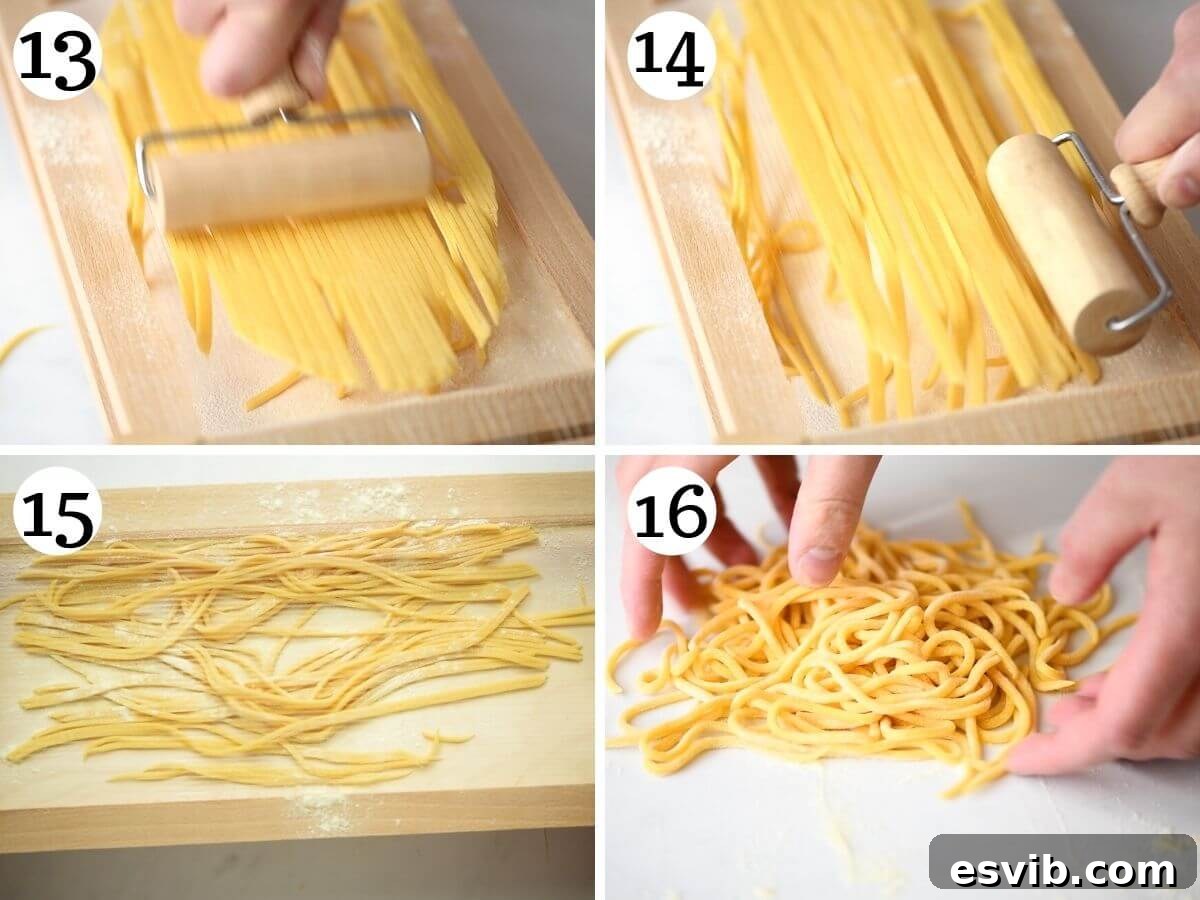
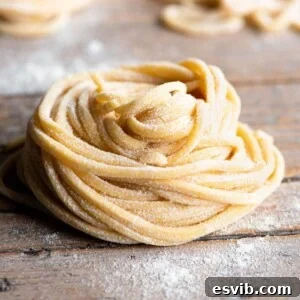
Step 6: Dust and Form Pasta Nests. Once cut, gather the freshly made Tonnarelli (Spaghetti alla Chitarra) and toss them liberally with more semola rimacinata. This is crucial to prevent the strands from sticking together. You may need to gently separate some strands by hand to ensure they are fully coated. To store them neatly and prevent tangling, wrap a small portion of the pasta around your hand to create elegant little nests. Place these nests on a baking tray or a clean, floured surface dusted with semola until you are ready to cook them. (Refer to visual guide photo 16 for forming nests).
Expert Tips for Perfect Tonnarelli Pasta
Achieving perfectly homemade Tonnarelli is simple with a few insider tricks. Here are some essential tips and answers to common questions:
- Kneading Dough Consistency: When kneading, you might find that not all the flour is absorbed into the dough. This is perfectly normal and usually indicates that your eggs were slightly smaller than average, requiring less flour. Don’t force the excess flour in; trust the dough’s feel. It should be smooth and elastic, not overly sticky or dry.
- Giving Space on the Chitarra: When placing your rolled pasta sheet onto the Chitarra tool, ensure there’s at least a 1-inch (2.5 cm) space at both the top and bottom of the sheet before you start rolling. This buffer allows the pasta to stretch slightly as you roll, ensuring an even cut and preventing the dough from bunching up at the ends.
- Generous Semola Dusting: Semola rimacinata is your best friend for preventing sticky pasta. Always dust your Chitarra tool thoroughly before placing the dough on it. After cutting, liberally toss the Tonnarelli strands with semola. This fine flour creates a protective barrier, ensuring your freshly made pasta remains separate and manageable until it hits the boiling water.
Frequently Asked Questions
My Chitarra strings are loose, what should I do?
If you notice the strings of your Chitarra are too slack, making it difficult to cut the pasta cleanly, check the bottom of the tool. Most Chitarra models are equipped with tension screws that allow you to tighten the strings, restoring optimal cutting performance.
Can I use only Tipo 00 flour instead of semola?
Yes, you can certainly make Tonnarelli pasta using only Tipo 00 flour. However, be aware that this substitution will result in a significantly softer pasta with less of the characteristic “bite” that semola provides. To do this, simply replace the 100g of semola with an additional 100g of Tipo 00 flour.
How do I store fresh Tonnarelli pasta?
To store your freshly made Tonnarelli, gently coil individual portions around your hand to form neat nests. Ensure the pasta is generously dusted with semola to prevent sticking. Place these nests on a baking tray that has also been lightly floured with semola. Loosely cover them with a clean kitchen towel to protect them from drying out. For best results, it’s highly recommended to cook and enjoy your homemade Tonnarelli on the same day it’s made to experience its freshest texture and flavor.
Delectable Sauces to Pair with Tonnarelli Pasta
The robust, square-edged nature of Tonnarelli pasta makes it an exceptional choice for a wide array of sauces. Its textured surface is designed to hold onto rich, hearty preparations, ensuring every bite is bursting with flavor. Here are some classic and delightful suggestions to complement your homemade Tonnarelli:
- Roman Classics: Embrace the culinary traditions of Rome by pairing your Tonnarelli with authentic Cacio e Pepe, where the simple combination of Pecorino Romano cheese, black pepper, and pasta water creates an unbelievably creamy and flavorful sauce. Other iconic Roman choices include Carbonara, with its rich guanciale, eggs, and cheese, or the equally delicious Gricia, a ancestor to Amatriciana without the tomatoes.
- Tomato-Based Sauces: For a more versatile option, Tonnarelli shines with a vibrant authentic Italian tomato sauce. Its thickness allows it to beautifully coat the pasta, providing a satisfying contrast in textures.
- Pesto Perfection: A fresh, aromatic basil pesto sauce also works wonderfully. The hearty strands of Tonnarelli provide a substantial base for the fragrant blend of basil, pine nuts, Parmesan, and olive oil.
- Meat Ragu: Given its sturdy structure, Tonnarelli is also an excellent match for slow-cooked meat ragùs, such as a traditional Bolognese or a hearty lamb ragù, allowing the rich sauce to cling to every square edge.
If you’ve ventured to try this **Homemade Tonnarelli recipe** or any other delicious recipe from our blog, please don’t hesitate to share your experience! We encourage you to rate the recipe and leave a comment below—we absolutely love hearing from you! You can also **FOLLOW US** on FACEBOOK, INSTAGRAM, and PINTEREST, or sign up for our exclusive NEWSLETTER to receive new, mouth-watering recipes directly in your inbox every week.
Step-by-step photos provided above
Many of our recipes include detailed step-by-step photos, helpful tips, and even video tutorials to guide you to perfect results on your first try!
Tonnarelli Pasta (Spaghetti alla Chitarra)
By Emily
30 mins
4 mins
30 mins
1 hr 4 mins
4 servings (450g/15.8oz)
Print Recipe
Equipment
-
Chitarra pasta tool
-
Rolling pin
Ingredients
- 200 g Italian Tipo 00 flour (1 and 1/2 cups)
- 100 g Semola rimacinata (extra fine semolina flour) (3/4 cup)
- 3 large eggs
Instructions
Make the dough
-
Mix the two flours together in a large mixing bowl then tip it out onto a clean work surface. Press the bottom of the bowl onto the flour to create a well in the middle.
-
Whisk the eggs together in a separate bowl then pour them into the middle of the well. Use a fork to incorporate the flour into the egg until a rough dough has formed.
-
Use your hands to knead the dough for 10 minutes until it’s smooth and elastic. It shouldn’t be sticky. Wrap in plastic wrap or clean kitchen towel and let it rest for 30 minutes.
Shape the pasta
-
Cut the dough into 4 portions and roll one portion out with a rolling pin until it’s the same thickness as the width of the chitarra strings (around 3mm).
-
Sprinkle the chitarra and pasta sheet with a little semola then lay the pasta on top of the strings of the chitarra. Use a rolling pin to roll over the pasta a few times until it’s cut and has fallen through the strings.
-
Repeat this with the remaining dough. You may need to separate the Tonnarelli from each other once cut.
-
Dust them again with semola then form them into nests until ready to use.
How to cook the Tonnarelli
-
Bring a large pot of water to a boil and salt it generously.
-
Boil the Tonnarelli for around 4-5 minutes then transfer them to your cooked pasta sauce.
Video Tutorial
Learn visually how to make Tonnarelli Pasta (Spaghetti alla Chitarra) with this comprehensive video guide, demonstrating each step from dough preparation to cutting the perfect strands.
Chef’s Notes
- Kneading the dough: When kneading, if you find that there is excess flour left that’s no longer absorbing into the dough, that’s fine. It simply means your eggs were slightly smaller, so you need less flour.
- Dust the pasta and surfaces: It’s important to lightly but thoroughly dust the pasta tool and pasta with semola to prevent any sticking.
- Give space for the pasta to stretch: Ensure there is at least a 1-inch space at the top and bottom of the chitarra once you place your pasta sheet. This allowance helps the pasta stretch naturally as you roll, facilitating an even cut.
Helpful Info for All Our Recipes
- We always recommend using extra virgin olive oil in all of our recipes unless explicitly stated otherwise.
- For canned or jarred tomatoes of any kind, we consistently use premium brands like Cirio or Mutti for the best possible results and authentic Italian flavor.
- All vegetables mentioned are assumed to be medium-sized unless specific dimensions are provided.
- All our recipes are meticulously tested and developed using a fan (convection) oven for consistent results.
- Find out more about how nutrition is calculated for our recipes.
- Explore our must-have Italian Pantry Staples to stock your kitchen.
- Discover all our recommended Essential Kitchen Tools for Italian Cooking.
Nutrition Information
Calories: 314kcal | Carbohydrates: 56g | Protein: 13g | Fat: 4g | Saturated Fat: 1g | Polyunsaturated Fat: 1g | Monounsaturated Fat: 1g | Trans Fat: 1g | Cholesterol: 123mg | Sodium: 48mg | Potassium: 207mg | Fiber: 1g | Sugar: 1g | Vitamin A: 178IU | Calcium: 34mg | Iron: 4mg
Nutrition information is automatically calculated and should only be used as an approximation.
Did you try this recipe?
Leave a comment below and share your experience!