
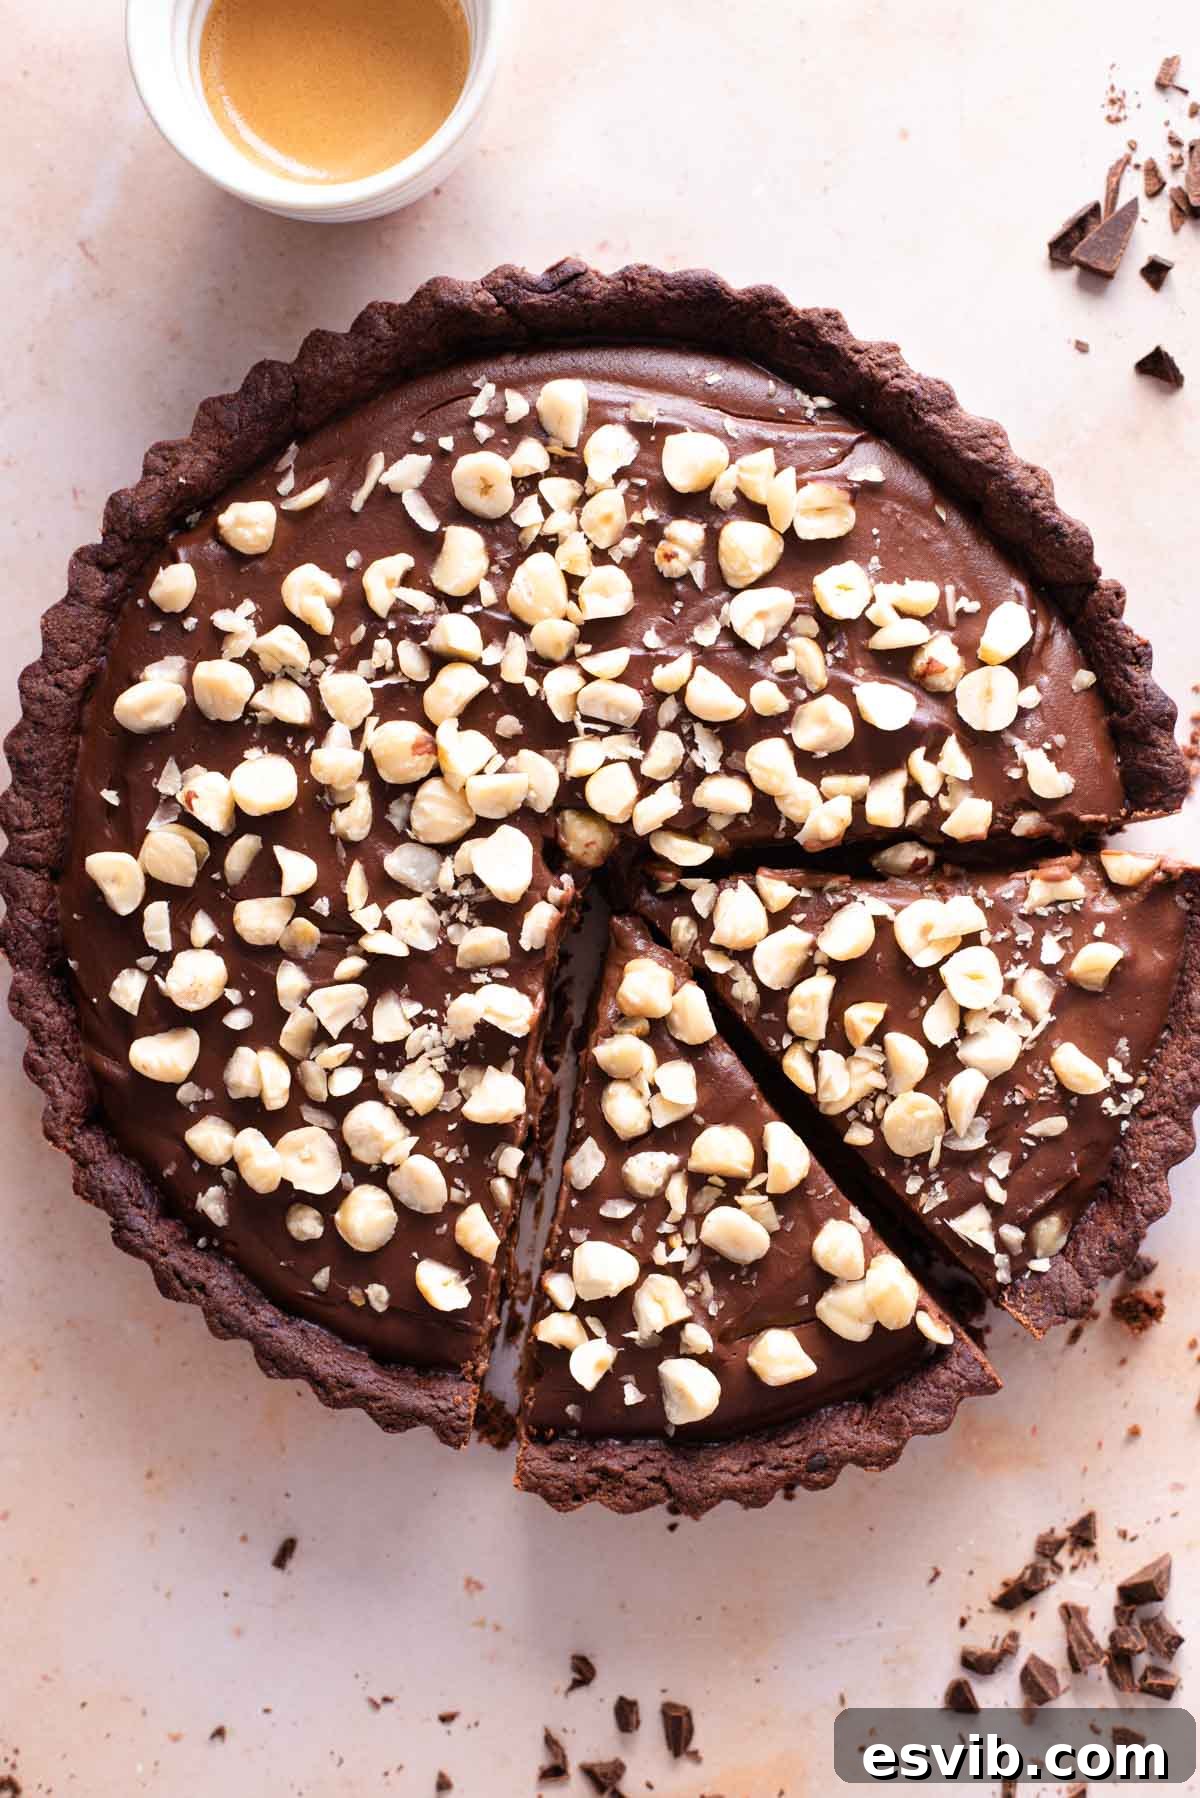
Indulge in the ultimate dessert experience with this rich and sophisticated Chocolate Tart, crafted with a delectable homemade chocolate shortcrust pastry, a silky-smooth, decadent chocolate pastry cream filling, and elegantly topped with crunchy, chopped hazelnuts. This isn’t just a dessert; it’s a celebration of chocolate, designed to captivate the senses of any true chocolate aficionado.
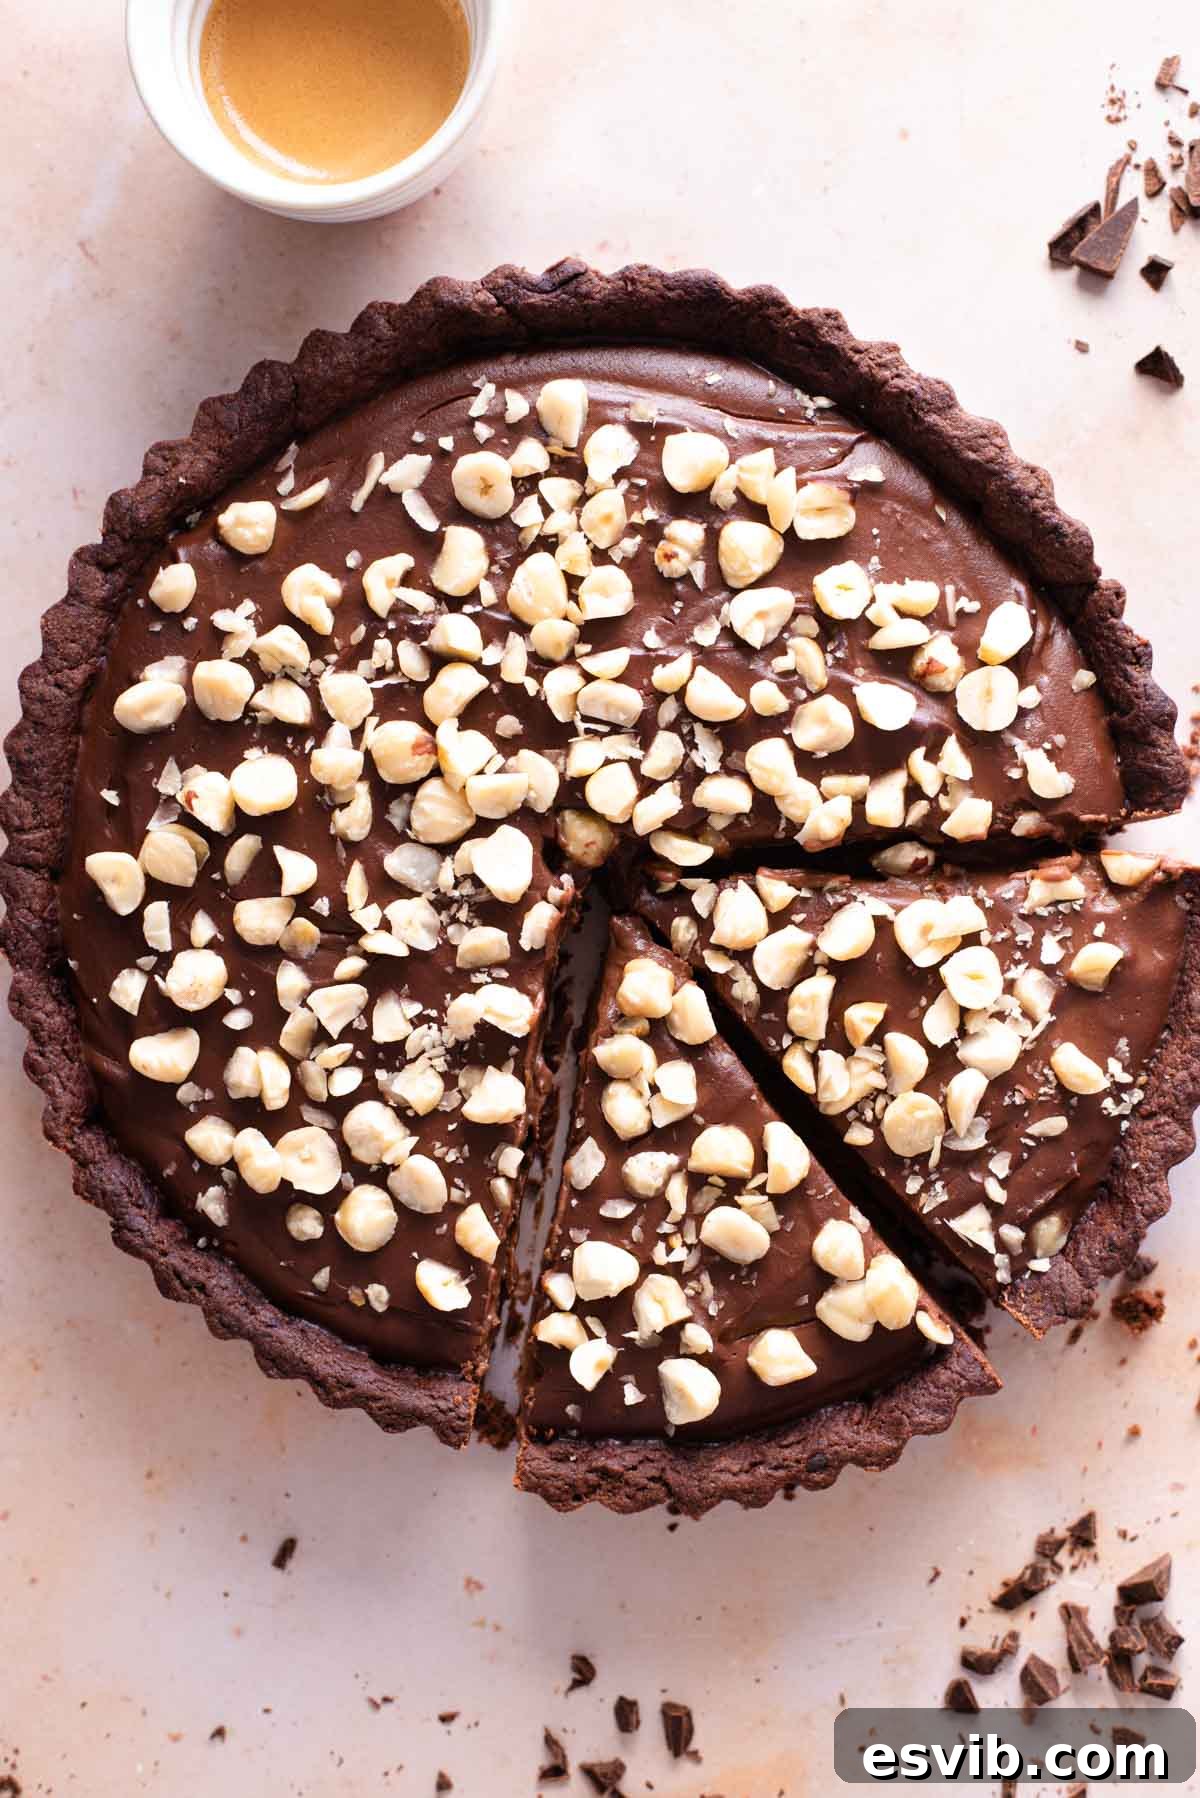
This chocolate tart stands out as my absolute favorite, renowned for its intensely chocolatey flavor, profound richness, and a texture that is both smooth and creamy. Every component of this tart is meticulously designed to deliver an unparalleled dessert experience.
The foundation of this exquisite tart is a crust made from scratch using our special chocolate pasta frolla, an Italian chocolate shortcrust pastry. This versatile dough, also perfect for making delicious cookies, boasts an incredible chocolate depth, a delightful buttery flavor, and a satisfyingly crumbly texture that melts in your mouth.
Following the perfect crust, the tart is generously filled with our extraordinary chocolate pastry cream (crema al cioccolato). Unlike conventional pastry creams, ours is specifically formulated to be much thicker and firmer, ensuring it sets flawlessly in the refrigerator, making it an ideal no-bake filling for this tart. This robust consistency not only simplifies the process but also guarantees a stable and luscious filling that holds its shape beautifully when sliced.
While the filling requires no baking, the chocolate pastry base needs to be blind-baked to achieve its desired crispness and prevent a soggy bottom. This step is surprisingly simple, and we provide comprehensive instructions below, complete with step-by-step photos, essential tips, and a helpful video guide to ensure your success. Prepare to create a masterpiece that will impress everyone at your table. Buon Appetito!
The Secret to a Perfect Chocolate Tart: Why This Recipe Shines
What truly elevates this Chocolate Tart above the rest is the harmony of its homemade components. Many tarts rely on store-bought crusts or simpler fillings, but here, every element is designed to enhance the overall chocolate experience. The chocolate shortcrust pastry isn’t just a container for the filling; it’s a flavor powerhouse in its own right, offering a buttery richness and a gentle bitterness from the cocoa that perfectly complements the sweet filling. The unique, robust texture of our chocolate pastry cream ensures a clean slice and a firm, satisfying mouthfeel, a stark contrast to runnier fillings that can detract from the tart’s elegance. By carefully crafting each layer, we achieve a balance of textures and flavors – the crisp, crumbly crust, the smooth, intense filling, and the nutty crunch of hazelnuts – that makes this tart an unforgettable indulgence. It’s a testament to the idea that sometimes, taking a little extra time with homemade elements yields truly extraordinary results.
Ingredients – What You Need for a Decadent Chocolate Tart
Below, you’ll find a detailed list of all the ingredients required to create this magnificent chocolate tart, along with crucial tips to help you select the best quality products for superior flavor and texture. Choosing the right ingredients is the first step towards achieving perfection in your baking.
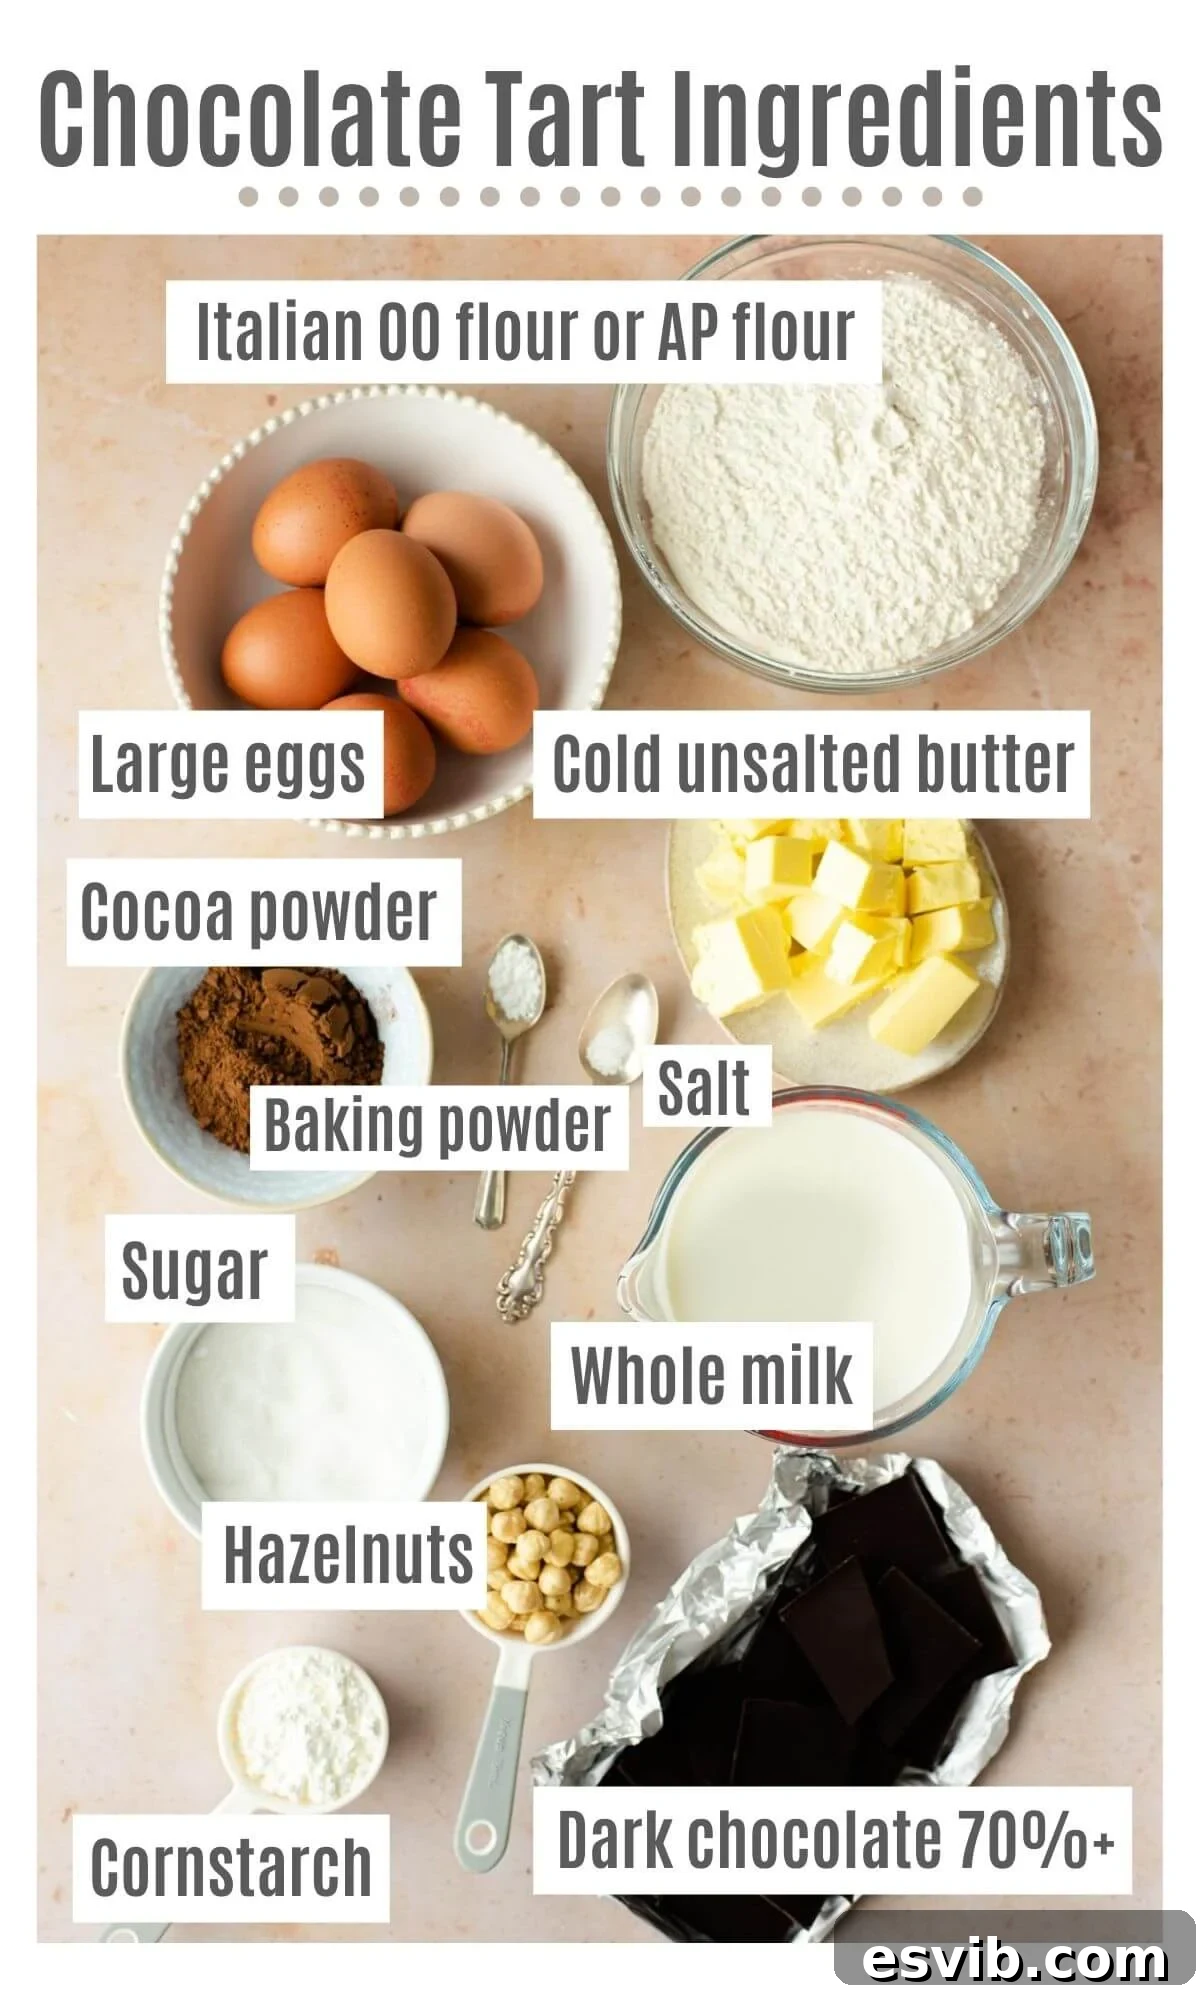
- Flour: For an authentic Italian chocolate pasta frolla, “00” (double zero) flour is highly recommended. Its fine texture contributes to a wonderfully tender and delicate pastry. However, high-quality all-purpose flour can be used as a readily available and equally effective alternative.
- Cocoa Powder: The quality of your cocoa powder directly impacts the tart’s chocolate intensity. Opt for a premium, unsweetened cocoa powder to ensure a deep, rich chocolate flavor in both the pastry and the cream.
- Egg: Always use large, fresh eggs. Free-range eggs are preferred for their superior flavor and vibrant yolks, which contribute to the richness and color of the pastry.
- Butter: Cold, unsalted butter is essential. Keeping the butter cold is key to creating a flaky pastry, as it prevents it from fully incorporating too quickly with the flour. Unsalted butter allows you to control the overall saltiness of the recipe.
- Baking Powder: A small amount of baking powder helps the pastry achieve a slightly lighter, more tender crumb, preventing it from becoming too dense.
- Sugar: You can choose between white caster sugar for a classic sweetness or light brown sugar for a subtle caramel note that complements the chocolate beautifully.
- Salt: Even in sweet recipes, a pinch of salt is vital. It acts as a flavor enhancer, balancing the sweetness and deepening the chocolate notes.
- Dark Chocolate: For the filling, choose a high-quality dark chocolate with at least 70% cocoa solids. This provides the intense, complex chocolate flavor that is the hallmark of this tart.
- Full-Fat Milk: Essential for a creamy, rich pastry cream.
- Cornstarch: Used as a thickener for the pastry cream, ensuring a firm, sliceable consistency.
- Hazelnuts: Roughly chopped hazelnuts add a delightful crunch and a complementary nutty flavor, perfectly contrasting the smooth chocolate.
Mastering the Chocolate Tart: Step-by-Step Instructions and Photos
Creating this decadent chocolate tart is a rewarding process. Follow these detailed steps, accompanied by visual aids, to achieve a professional-quality dessert right in your own kitchen.
Preparing the Chocolate Shortcrust Pastry
-
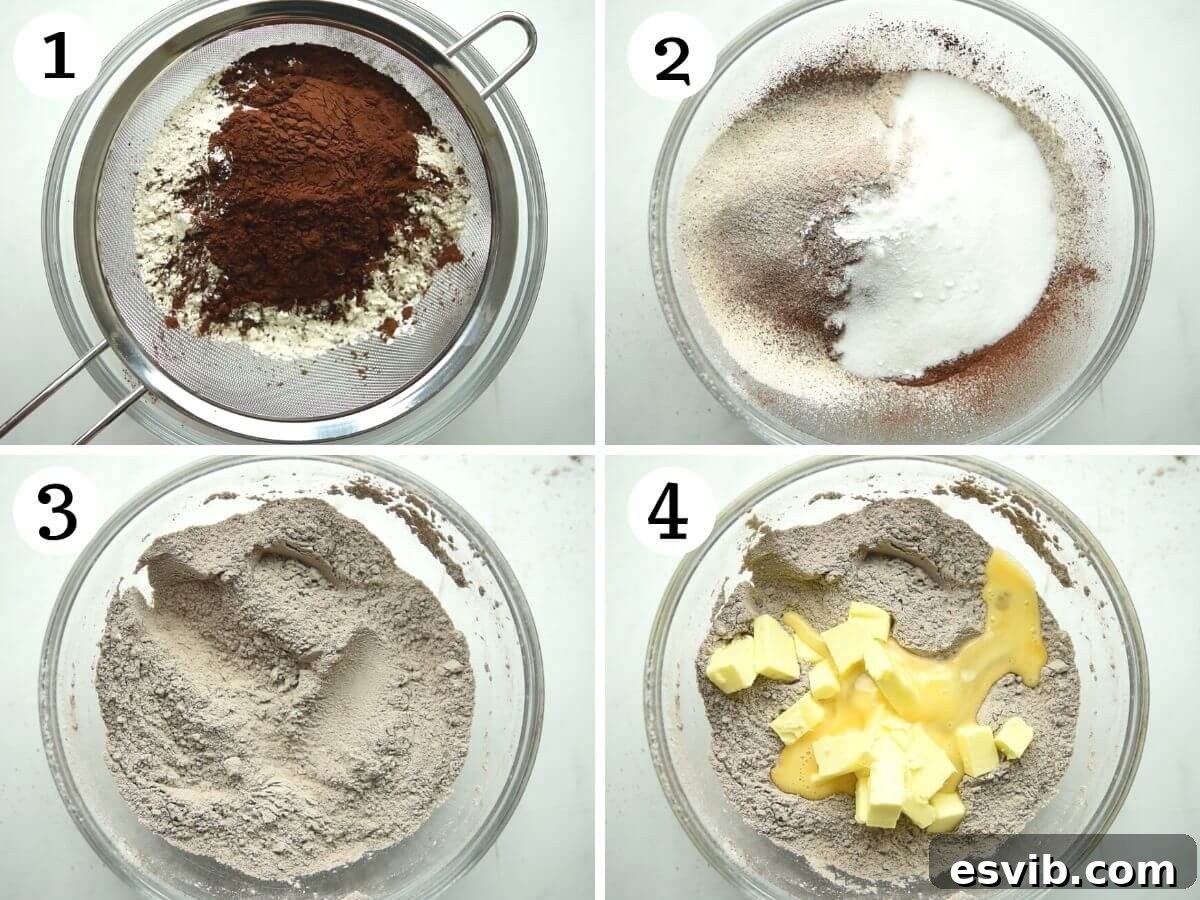
Begin by sifting the flour and cocoa powder into a large mixing bowl. Sifting ensures there are no lumps and helps aerate the dry ingredients. Next, add the remaining dry ingredients – sugar, baking powder, and a pinch of salt. Stir everything together thoroughly until well combined. This initial mixing prepares the base for your rich pastry.
-
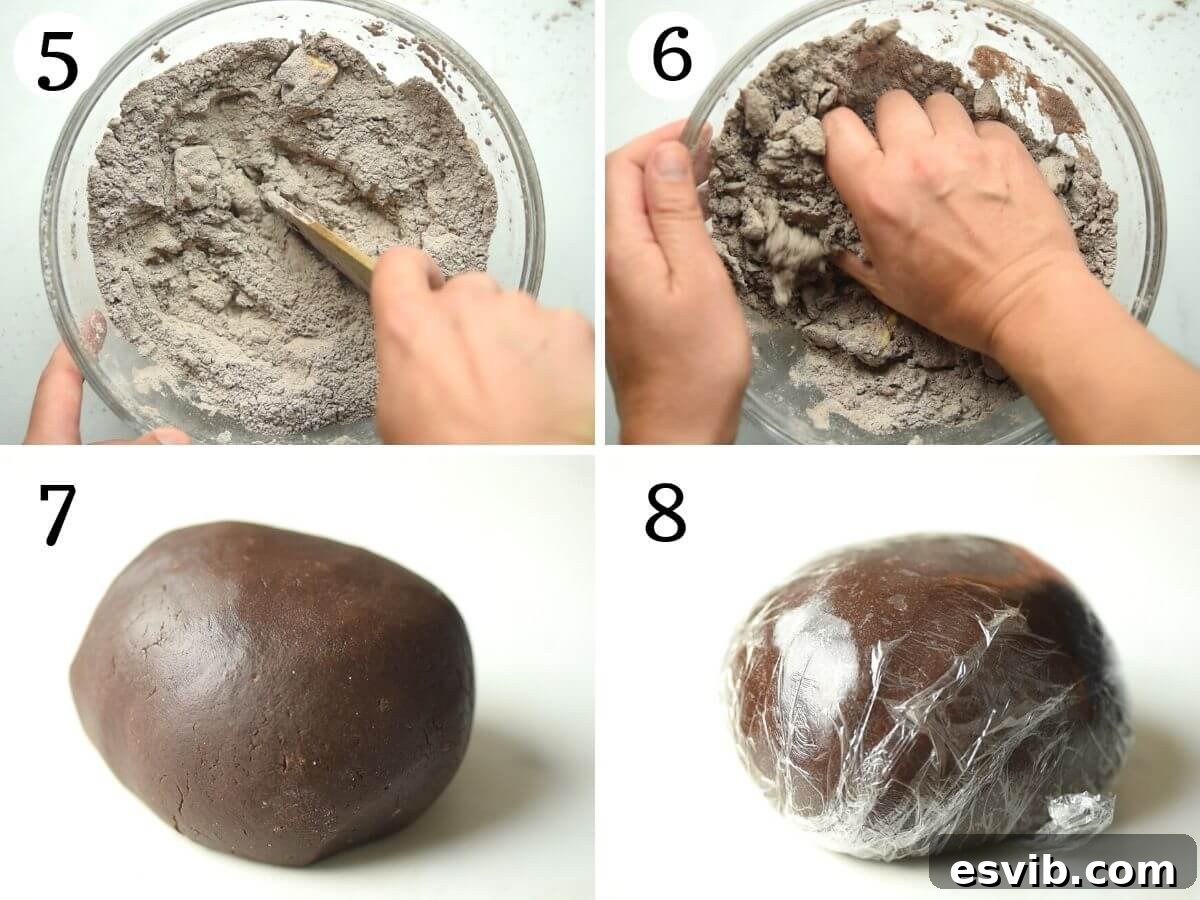
Introduce the cold, cubed butter and the egg to the dry mixture. Using a pastry scraper or a sturdy spatula, begin to cut the butter into the flour. This process involves incorporating the butter into the flour until you achieve a coarse, crumbly texture, similar to breadcrumbs. Avoid overworking the dough at this stage, as warmth from your hands can melt the butter too quickly.
-
Once you have a rough, crumbly mixture, gently bring the dough together with your hands. It might seem dry and reluctant to combine at first, but with a little patience and gentle kneading, the butter will start to soften slightly and bind the ingredients. Continue kneading until the pastry forms a smooth, cohesive ball. Wrap the dough tightly in plastic wrap and refrigerate for at least 1 hour. This chilling period is crucial; it allows the butter to firm up, prevents shrinkage during baking, and makes the dough easier to handle.
-
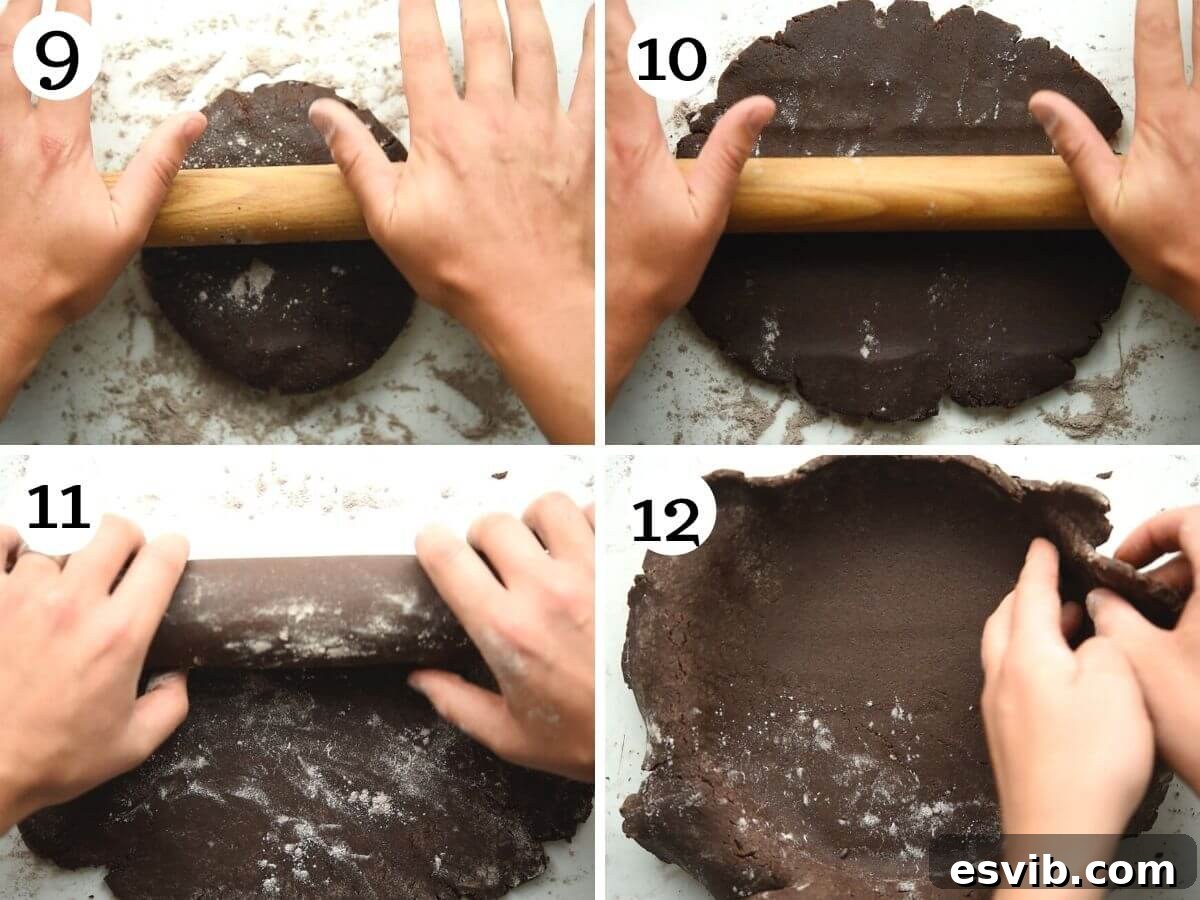
After the dough has thoroughly chilled, remove it from the fridge. Lightly dust your work surface with flour. For a seamless look without white flour marks, you can mix a small amount of cocoa powder with your dusting flour (never use cocoa powder alone as it can dry out the dough). Roll out the pastry using a rolling pin to an even thickness of approximately ¼ inch (½ cm). Aim for a consistent thickness to ensure even baking.
-
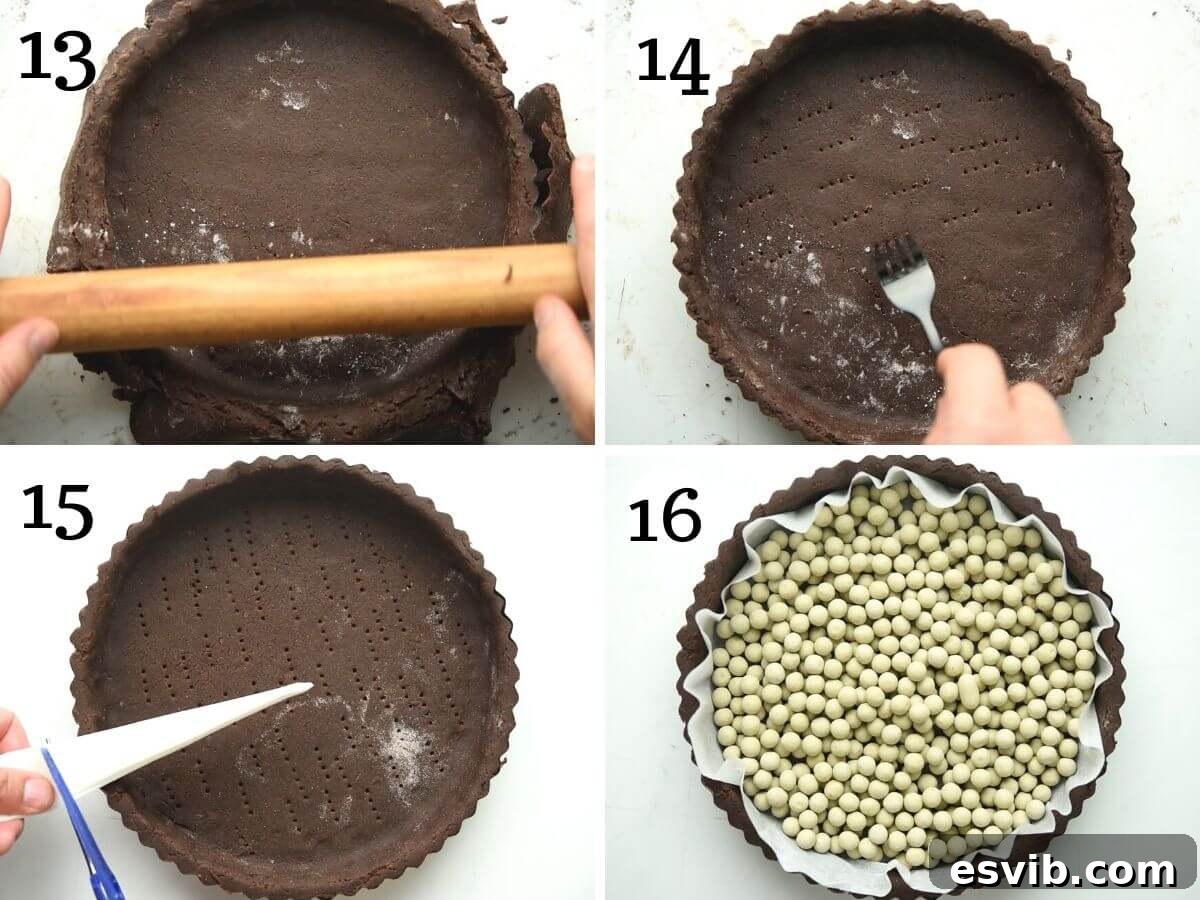
Carefully transfer the rolled-out pastry over your tart or pie tin. Gently ease the pastry into the tin, pressing it into the sides and corners until it fits evenly. For clean edges, roll your rolling pin over the top of the tart case to neatly cut off the excess pastry. Alternatively, you can trim the edges with a sharp knife.
-
Using a fork, lightly prick the base of the pastry shell. This helps prevent air bubbles from forming and ensures an even bake. Place the prepared tart shell back into the fridge for another 30 minutes. This second chilling period further stabilizes the pastry before blind baking.
How to Blind-Bake Your Chocolate Tart Crust
Blind baking is a crucial step for achieving a crisp, perfectly cooked tart shell, especially when the filling itself is not baked. This process prevents the pastry from becoming soggy and helps it maintain its shape. To blind bake your chocolate pastry:
-
After the pastry has been fitted into the tart pan and chilled, line the inside of the pastry shell with a piece of baking parchment paper. For best results, scrunch up the parchment first, then smooth it out to fit snugly into the contours of the tart. This helps it hold its shape more effectively.
-
Fill the parchment-lined shell with baking beads, ceramic pie weights, or uncooked rice. These weights prevent the pastry from bubbling up or shrinking excessively during baking. Distribute the weights evenly across the base of the tart.
-
Bake the tart shell in a preheated oven at 350°F (180°C) for 30 minutes. This initial bake sets the crust without browning it too much.
-
Carefully remove the tart from the oven. Gently lift out the baking parchment along with the baking beads or rice. Allow the blind-baked crust to cool completely on a wire rack before adding the filling. A cool crust prevents the warm filling from melting or softening it prematurely.
How to Make the Velvety Chocolate Pastry Cream Filling
The heart of this tart is its rich, smooth chocolate pastry cream. Follow these steps to create a truly decadent filling:
-
Begin by gently warming the full-fat milk in a saucepan over medium-low heat. The goal is to warm it, not to boil it. Once warmed, remove it from the heat and set aside. Simultaneously, chop your chosen dark chocolate into small, uniform pieces. Smaller pieces will melt more easily and evenly into the hot cream.
-
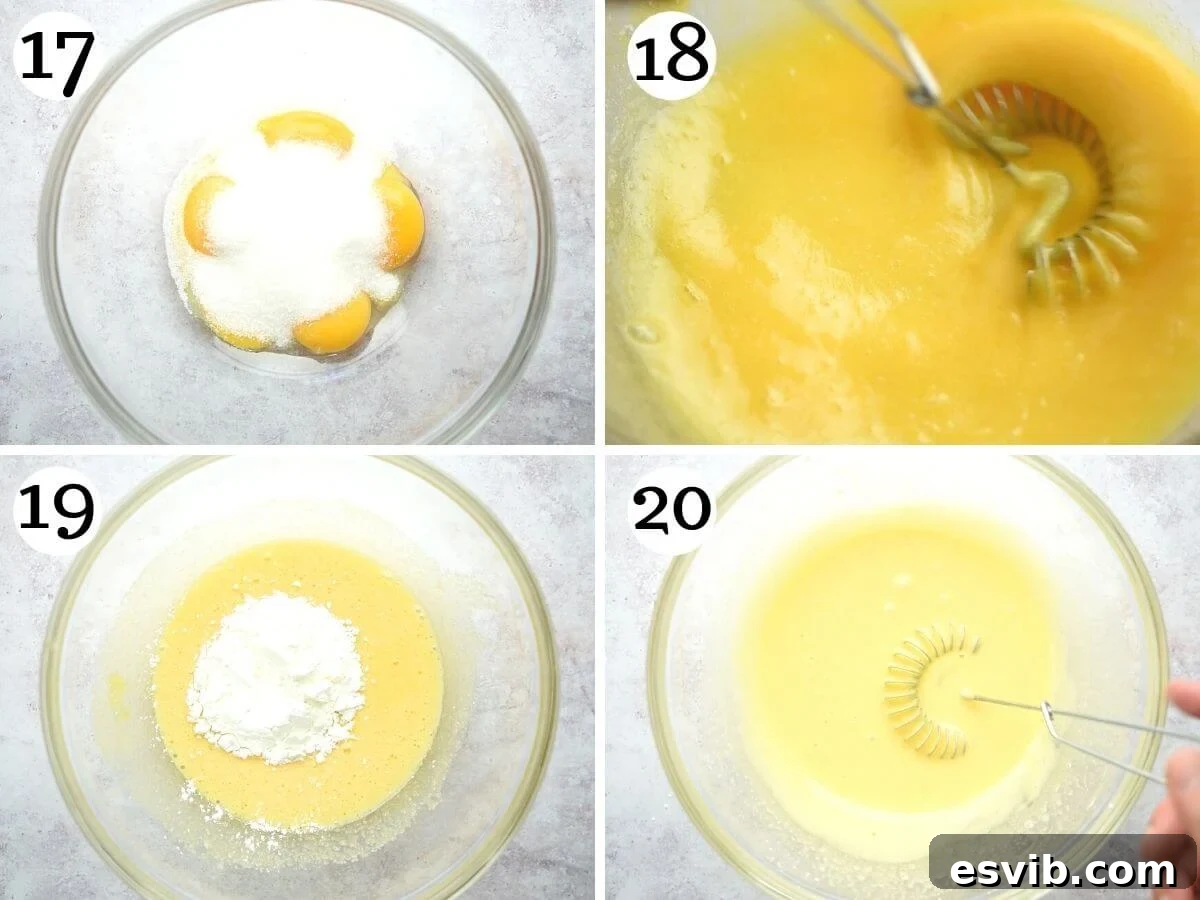
In a large mixing bowl, whisk together the egg yolks and sugar until the mixture is pale yellow and creamy. The sugar should be mostly dissolved. Then, add the cornstarch to this mixture and whisk thoroughly until completely smooth and lump-free. This creates a stable base for your pastry cream.
-
Slowly, in a thin stream, pour the warm milk into the egg yolk mixture while continuously whisking. This process, known as tempering, gradually raises the temperature of the egg yolks, preventing them from scrambling. Keep whisking vigorously to ensure no lumps form.
-
Once the milk and egg mixture are fully incorporated, pour the entire contents back into the saucepan. Return the saucepan to a low heat on the stovetop.
-
Stir the mixture constantly with a wooden spoon. This continuous stirring is essential to prevent sticking and burning at the bottom of the pan, and to ensure even thickening. Continue stirring for about 10 minutes, or until the pastry cream becomes very thick and custardy. It should coat the back of the spoon.
-
Important Tip: Should you notice any lumps beginning to form in your pastry cream, immediately remove the saucepan from the heat. Vigorously whisk the mixture until the lumps disappear, then return it to a lower heat to continue cooking. This quick action will save your cream!
-
Once the pastry cream has thickened to the desired consistency, turn off the heat. Immediately add the chopped dark chocolate into the hot cream. Stir continuously until the chocolate is completely melted and smoothly incorporated into the cream, creating a rich, glossy chocolate filling.
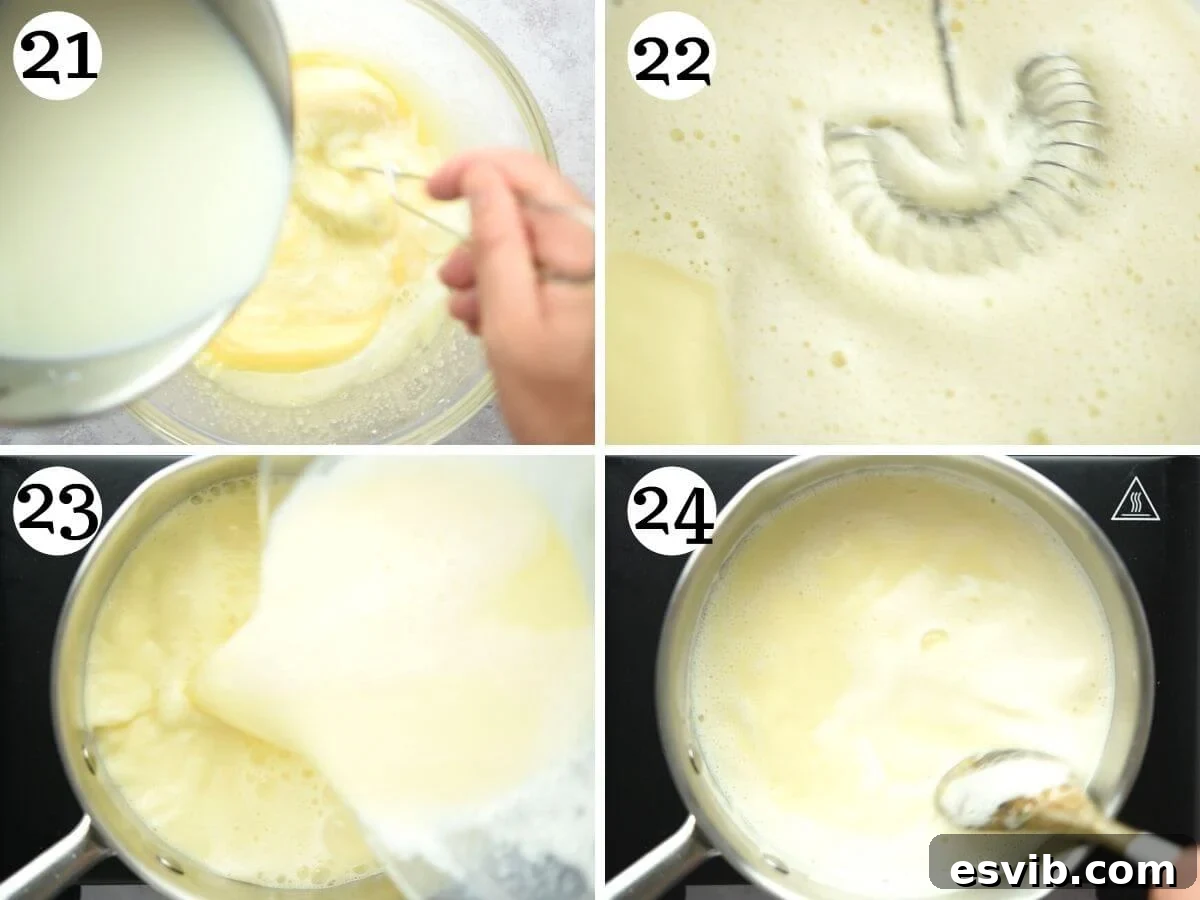
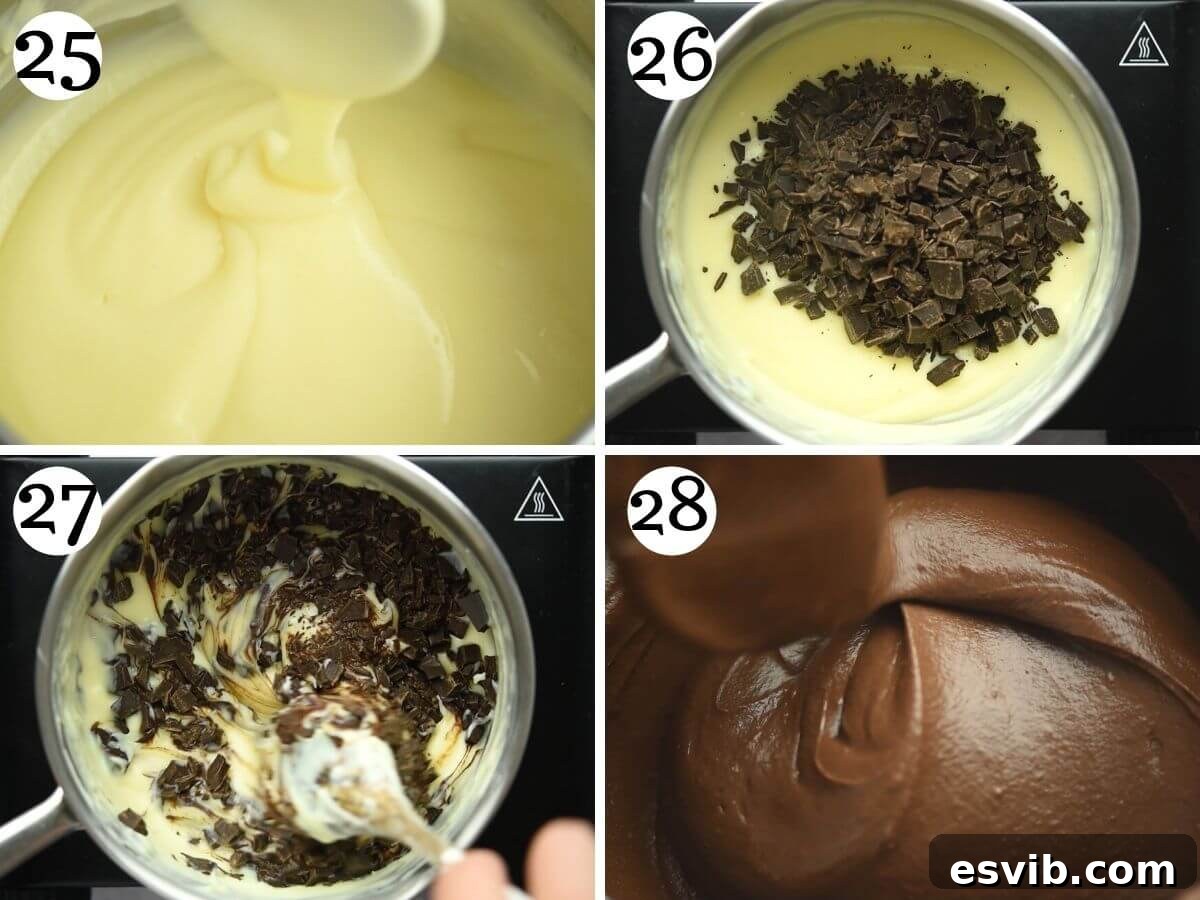
Assembling and Chilling Your Chocolate Hazelnut Tart
With both the crust and the filling ready, the final steps bring your chocolate tart to life:
-
While the chocolate pastry cream is still warm (but not scalding hot), pour it into your completely cooled, blind-baked tart crust. Use a spatula or the back of a wooden spoon to gently smooth out the top, creating an even surface. Working with warm cream makes it easier to achieve a perfectly smooth finish.
-
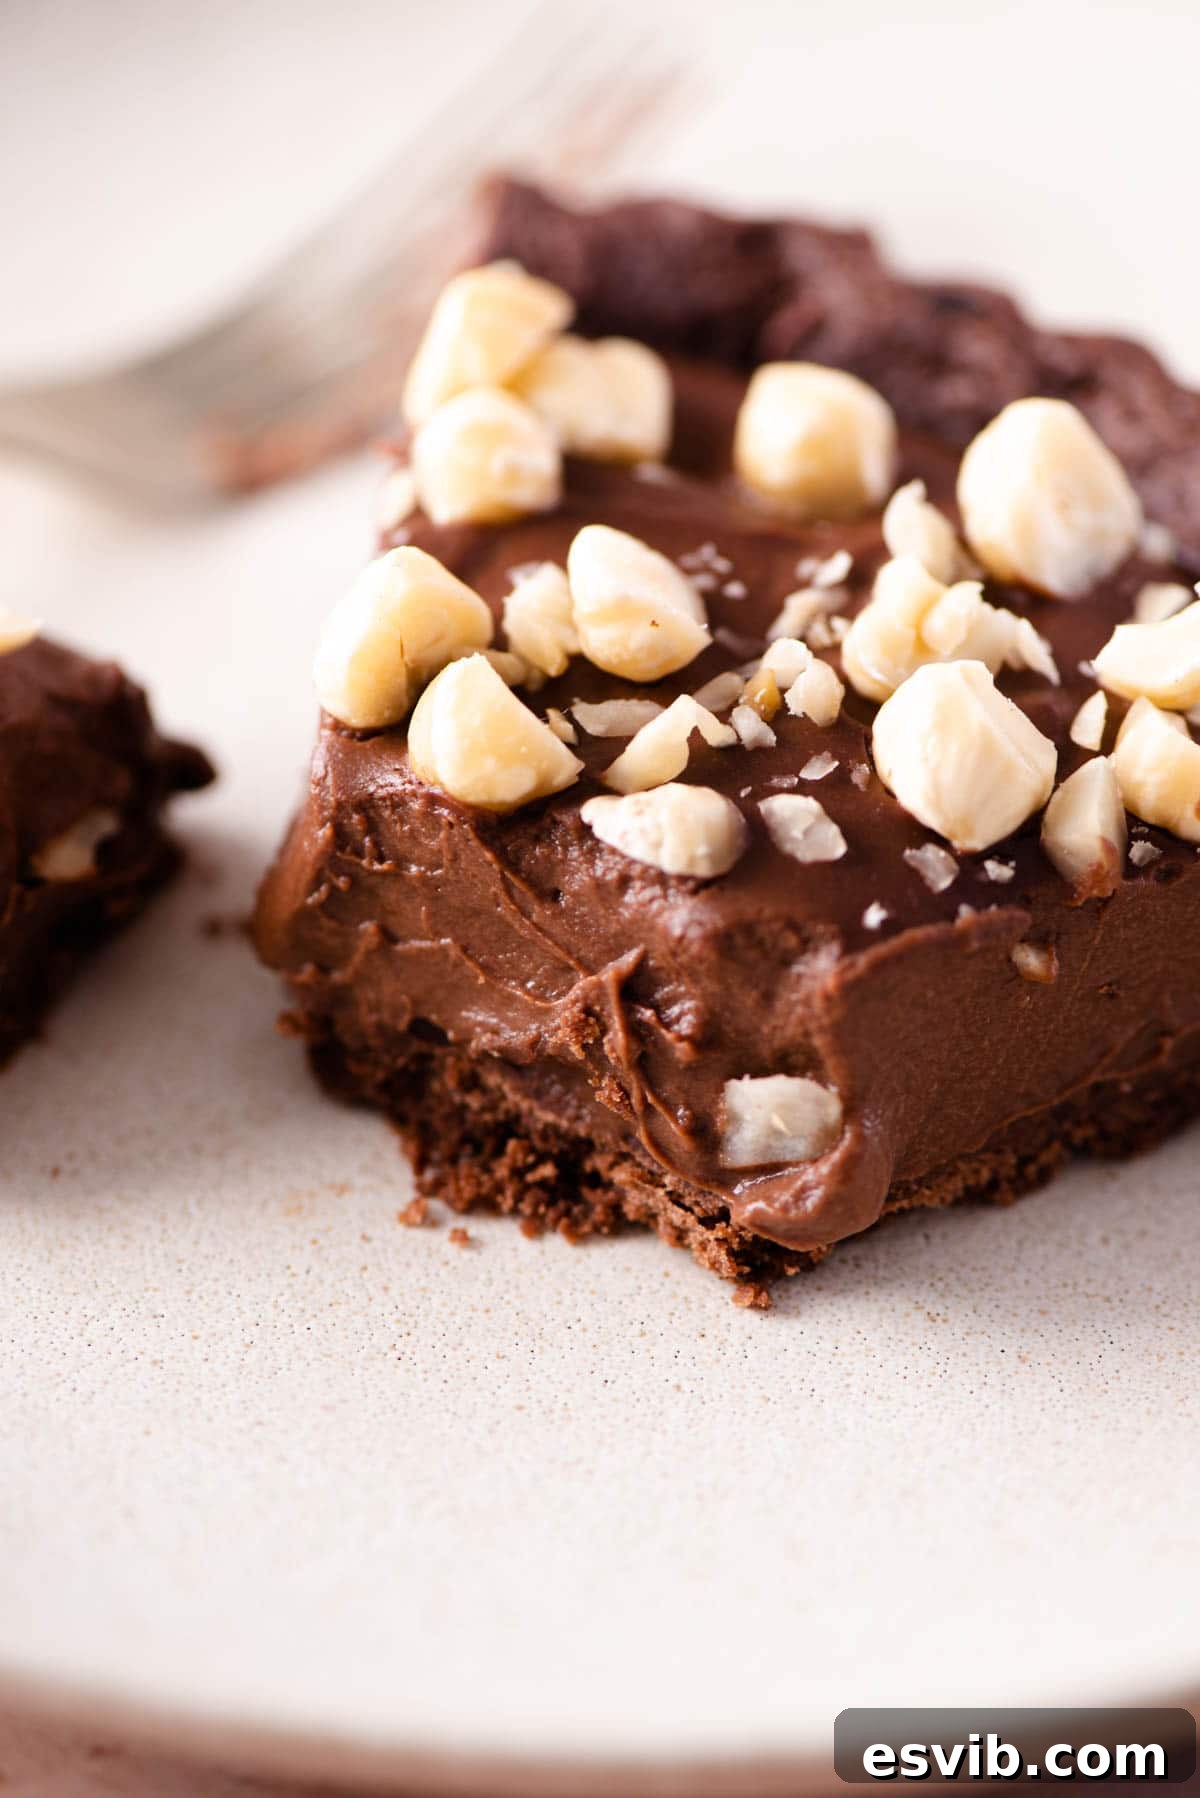
Generously sprinkle the top of the tart with roughly chopped hazelnuts. The visual appeal and the added texture are significant. Allow the tart to cool completely at room temperature. Once cooled, transfer it to the refrigerator and let it set for a minimum of 6 hours, or ideally, overnight. This chilling time is vital for the pastry cream to firm up completely, allowing for clean, beautiful slices.
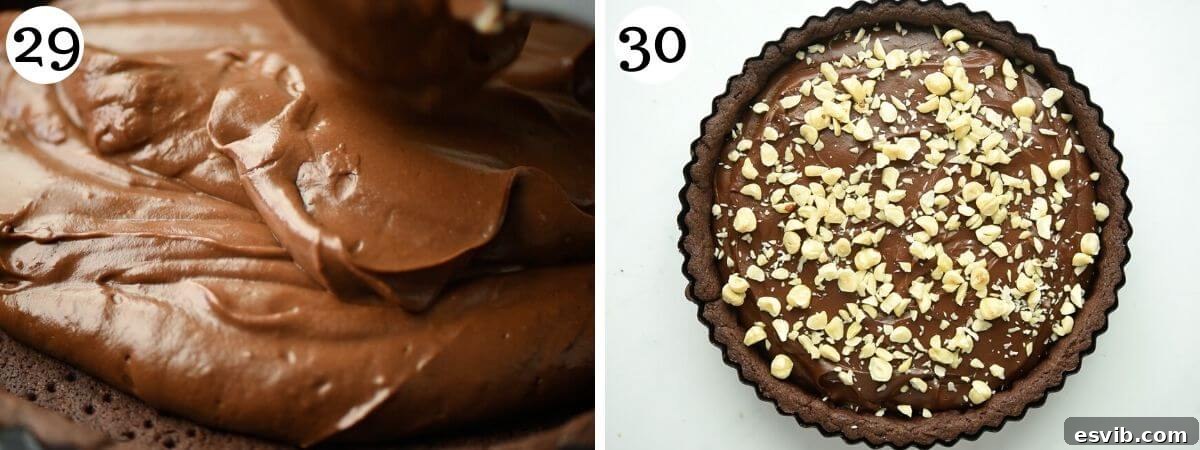
Recipe Tips and FAQs for Chocolate Tart Perfection
Here are some essential tips and answers to frequently asked questions to help you achieve the best possible results with your chocolate tart:
Shortcrust pastry is naturally quite crumbly and it’s common for it to crack or break a little when you’re transferring it to a tart or pie case. Don’t worry, this is completely normal and easily fixed! Simply use your fingers to gently press the pastry back together in the tin, patching up any gaps or cracks. The warmth from your hands will help it meld seamlessly.
Blind baking is a very important step, especially for tarts with wet fillings that aren’t baked. It ensures your pastry base is crisp and fully cooked, preventing a soggy bottom. It’s crucial to use a weight to keep the pastry flat and prevent it from shrinking or puffing up. If you don’t have specialized baking beads or ceramic pie weights, uncooked rice, dried beans, or even small metal balls work perfectly as substitutes.
For a truly luxurious and intensely chocolatey flavor, we highly recommend using dark chocolate with at least 70% cocoa solids. This provides a deep, robust chocolate foundation that is then perfectly balanced and sweetened by its combination with the pastry cream. Avoid milk chocolate as it will be overly sweet and lack depth, and steer clear of chocolate chips as they contain stabilizers that prevent them from melting smoothly.
This chocolate tart stores wonderfully in the refrigerator for 4-5 days. To keep it fresh and prevent it from absorbing refrigerator odors, make sure to keep it tightly covered with plastic wrap or in an airtight container.
Absolutely! This chocolate tart is an excellent make-ahead dessert. In fact, it requires at least 6 hours of chilling time once assembled for the filling to properly set, making it perfect to prepare a day in advance for effortless entertaining. Making it ahead allows the flavors to meld and the texture to achieve its optimal firmness.
Freezing is generally not recommended for tarts with custard-based fillings. Custard has a tendency to change in texture and can split or become watery upon thawing, compromising the tart’s smooth and creamy consistency.
For this recipe, a 9-inch (23cm) loose-bottom tart dish is ideal. The loose bottom makes it incredibly easy to remove the tart cleanly without damaging the delicate crust, ensuring a perfect presentation.
Delicious Variations to Customize Your Chocolate Tart
While the classic Hazelnut Chocolate Tart is undeniably perfect, there are many exciting ways to customize the flavors and make this dessert uniquely yours:
- Citrus Burst: For a delightful chocolate-orange combination, add 1-2 teaspoons of orange extract or the zest of one orange to the chocolate pastry cream while it’s still warm. This vibrant citrus note cuts through the richness of the chocolate beautifully.
- Minty Fresh: Introduce a refreshing twist by adding a few drops of high-quality mint extract to the pastry cream for a sophisticated mint-chocolate tart. Start with a small amount and taste, adding more if desired, as mint can be potent.
- Salty-Sweet Indulgence: If you appreciate the popular salty-sweet flavor profile, replace the chopped hazelnuts with salted peanuts or even a sprinkle of flaky sea salt over the finished tart. The salt crystals will enhance the chocolate’s depth and provide a delightful contrast.
- Berry Bliss: For a lighter, fruitier touch, omit the hazelnuts and instead top the set tart with fresh strawberries, raspberries, or a mix of seasonal berries just before serving. A light dusting of powdered (icing) sugar will add an elegant finish.
- Nut-Free Option: If you or your guests have nut allergies, simply omit the hazelnuts. The tart is still incredibly delicious on its own. Alternatively, you can use toasted coconut flakes for a different textural element.
- Classic Crust Alternative: If you prefer a non-chocolate crust or wish to explore another traditional option, you can use our classic pasta frolla recipe for the tart base. This traditional Italian sweet shortcrust pastry offers a buttery, vanilla-scented complement to the rich chocolate filling.
Serving Suggestions for Your Chocolate Masterpiece
This chocolate tart is a showstopper on its own, but a few thoughtful serving accompaniments can elevate the experience even further. Serve slices chilled, directly from the refrigerator, for the best firm texture. A light dusting of cocoa powder or a few extra toasted hazelnuts can add a professional finishing touch. For an extra touch of decadence, pair a slice with a dollop of freshly whipped cream, a scoop of vanilla bean ice cream, or a drizzle of raspberry coulis. The tartness of berries or a berry sauce can provide a wonderful counterpoint to the richness of the chocolate. A strong espresso or a glass of dessert wine, such as a rich Port or a sweet Moscato, would also make perfect pairings.
More Chocolate Desserts You Might Like
If this Hazelnut Chocolate Tart has awakened your inner chocolate lover, you’ll be delighted by these other irresistible chocolate creations from our kitchen:
- Triple Chocolate Biscotti (Cantucci al Cioccolato): Crunchy Italian cookies packed with three kinds of chocolate.
- Italian Nutella Cookies (Nutellotti): Soft, chewy cookies with a rich Nutella center.
- Chocolate Salami (Salame di Cioccolato): A fun, no-bake dessert resembling a salami, made with chocolate, cookies, and nuts.
- Homemade Nutella – Hazelnut Chocolate Spread: Craft your own luscious hazelnut chocolate spread from scratch.
- Chocolate Semifreddo Recipe: A rich and creamy frozen Italian dessert, perfect for hot days.
- Chocolate Panna Cotta: A silky-smooth, elegant Italian dessert with a deep chocolate flavor.
We hope you thoroughly enjoy preparing and savoring this Hazelnut Chocolate Tart. If you’ve tried this recipe or any other recipe on our blog, please don’t forget to rate the recipe and share your experience in the comments below – we genuinely love hearing from you! You can also FOLLOW US on FACEBOOK, INSTAGRAM, and PINTEREST, or sign up for our NEWSLETTER to receive more of our delicious recipes directly in your inbox.
Step By Step Photos Above
Most of our recipes come with step by step photos, helpful tips and tricks to make it perfectly first time and even video!
Chocolate Tart with Hazelnuts
By Emily
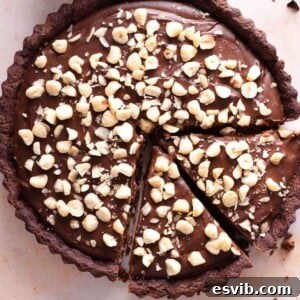
A rich and indulgent Chocolate Tart made with homemade chocolate shortcrust pastry, smooth and decadent chocolate pastry cream and topped with chopped hazelnuts. The ultimate dessert for chocolate lovers!
Equipment
- 9 inch (23cm) loose bottom tart dish
Ingredients
For the chocolate pastry
- 2 cups Italian 00 flour or all-purpose flour (250g)
- 3 tbsp cocoa powder (30g)
- ½ cup caster sugar, golden or white (80g)
- 8.5 tbsp cold butter, cubed (120g)
- 1 large egg
- ¼ tsp baking powder
- 1 pinch of salt
For the filling
- 5 large egg yolks
- ⅓ cup sugar (70g)
- ¼ cup cornstarch (30g)
- 2.5 cups full-fat milk (590ml)
- 5.5 oz dark chocolate 70%+ cocoa solids (150g)
- ½ cup hazelnuts, roughly chopped
Instructions
To make the pastry
- Sift the flour and cocoa powder into a large bowl then add the rest of the dry ingredients, stir to combine.
- Add the egg and butter and cut it into the flour mixture with a spatula or pastry scraper to form rough crumbs.
- Start to bring the mixture together with your hands to form a dough. Knead the pastry until all the flour is fully absorbed and it becomes a smooth ball. Wrap in plastic wrap and place in the fridge for 1 hour.
- After the dough is chilled, remove it from the fridge and roll out using a rolling pin until ¼ inch (½ cm) thick. You’ll need to lightly dust your work surface with flour. We used flour mixed with a little cocoa powder (don’t use cocoa powder on its own) to avoid bright white marks but it’s not a necessary step.
- Lay the pastry over a tart or pie tin tucking in the sides until it fits evenly. Roll the rolling pin over the tart case to cut the edges (you can also trim the edge with a knife).
- Prick the base with a fork then place back in the fridge for 30 minutes.
To blind-bake
- To blind bake the pastry, add the pastry to a tart pan as directed above then place a piece of scrunched up baking parchment over the tart/pie case. Top with baking beads or uncooked rice and bake in a preheated oven at 350F/180C for 30 minutes.
- Remove from the oven, remove the baking parchment and baking beads and allow to cool.
To make the filling
- Warm the milk in a saucepan then set aside (do not let it boil) Chop up the dark chocolate into small pieces and set aside.
- Mix the egg yolks and sugar together in a large bowl until combined then add the cornstarch and mix it thoroughly.
- Slowly pour the warm milk into the egg mixture whilst whisking constantly to avoid any lumps.
- Once incorporated, pour the egg and milk mixture back into the saucepan and heat it on a low heat.
- Stir the mixture constantly with a wooden spoon until the mixture is very thick in consistency (about 10 minutes).
- Important tip: If at any point you notice the pastry cream getting lumpy, take it off the heat and use a whisk to get rid of any lumps then return to a lower heat.
- Once thickened, turn the heat off and add the chopped chocolate. Stir it in until completely melted and incorporated.
Assemble
- Pour the chocolate pastry cream into the tart case/crust and smooth out with a spatula or wooden spoon.
- Top with roughly chopped hazelnuts then let it cool. Once cooled place in the fridge for at least 6 hours or overnight to set.
Notes
- Size of tart dish: I used a 9 inch (23cm) loose bottom tart dish.
- If your pastry cracks or splits: Shortcrust pastry is crumbly and often breaks when adding it to a tart/pie case. Don’t worry this is normal just press the pastry back together.
- Blind baking: It’s important when blind baking that you use a weight to keep the pastry flat. If you don’t have baking beads you can use uncooked rice.
- Chilling time: The chocolate filling thickens up pretty quickly but cuts better the longer it’s chilled. I recommend chilling it in the fridge for at least 6 hours to overnight.
- Storage and freezing: The chocolate tart will keep well in the fridge for 4-5 days, make sure to keep it covered. I don’t recommend freezing as custard can split.
Helpful Info for All Recipes
- I always use extra virgin olive oil in all of my recipes unless stated otherwise
- When I use canned or jarred tomatoes of any kind I always use Cirio or Mutti brands for the best results and flavour.
- All vegetables are medium sized unless stated otherwise
- All recipes are tested and developed using a fan (convection) oven
- Find out more about how nutrition is calculated.
- Check out our must have Italian Pantry Staples.
- You can also find all our Essential Kitchen Tools for Italian Cooking.
Nutrition
Nutrition information is automatically calculated, so should only be used as an approximation.