
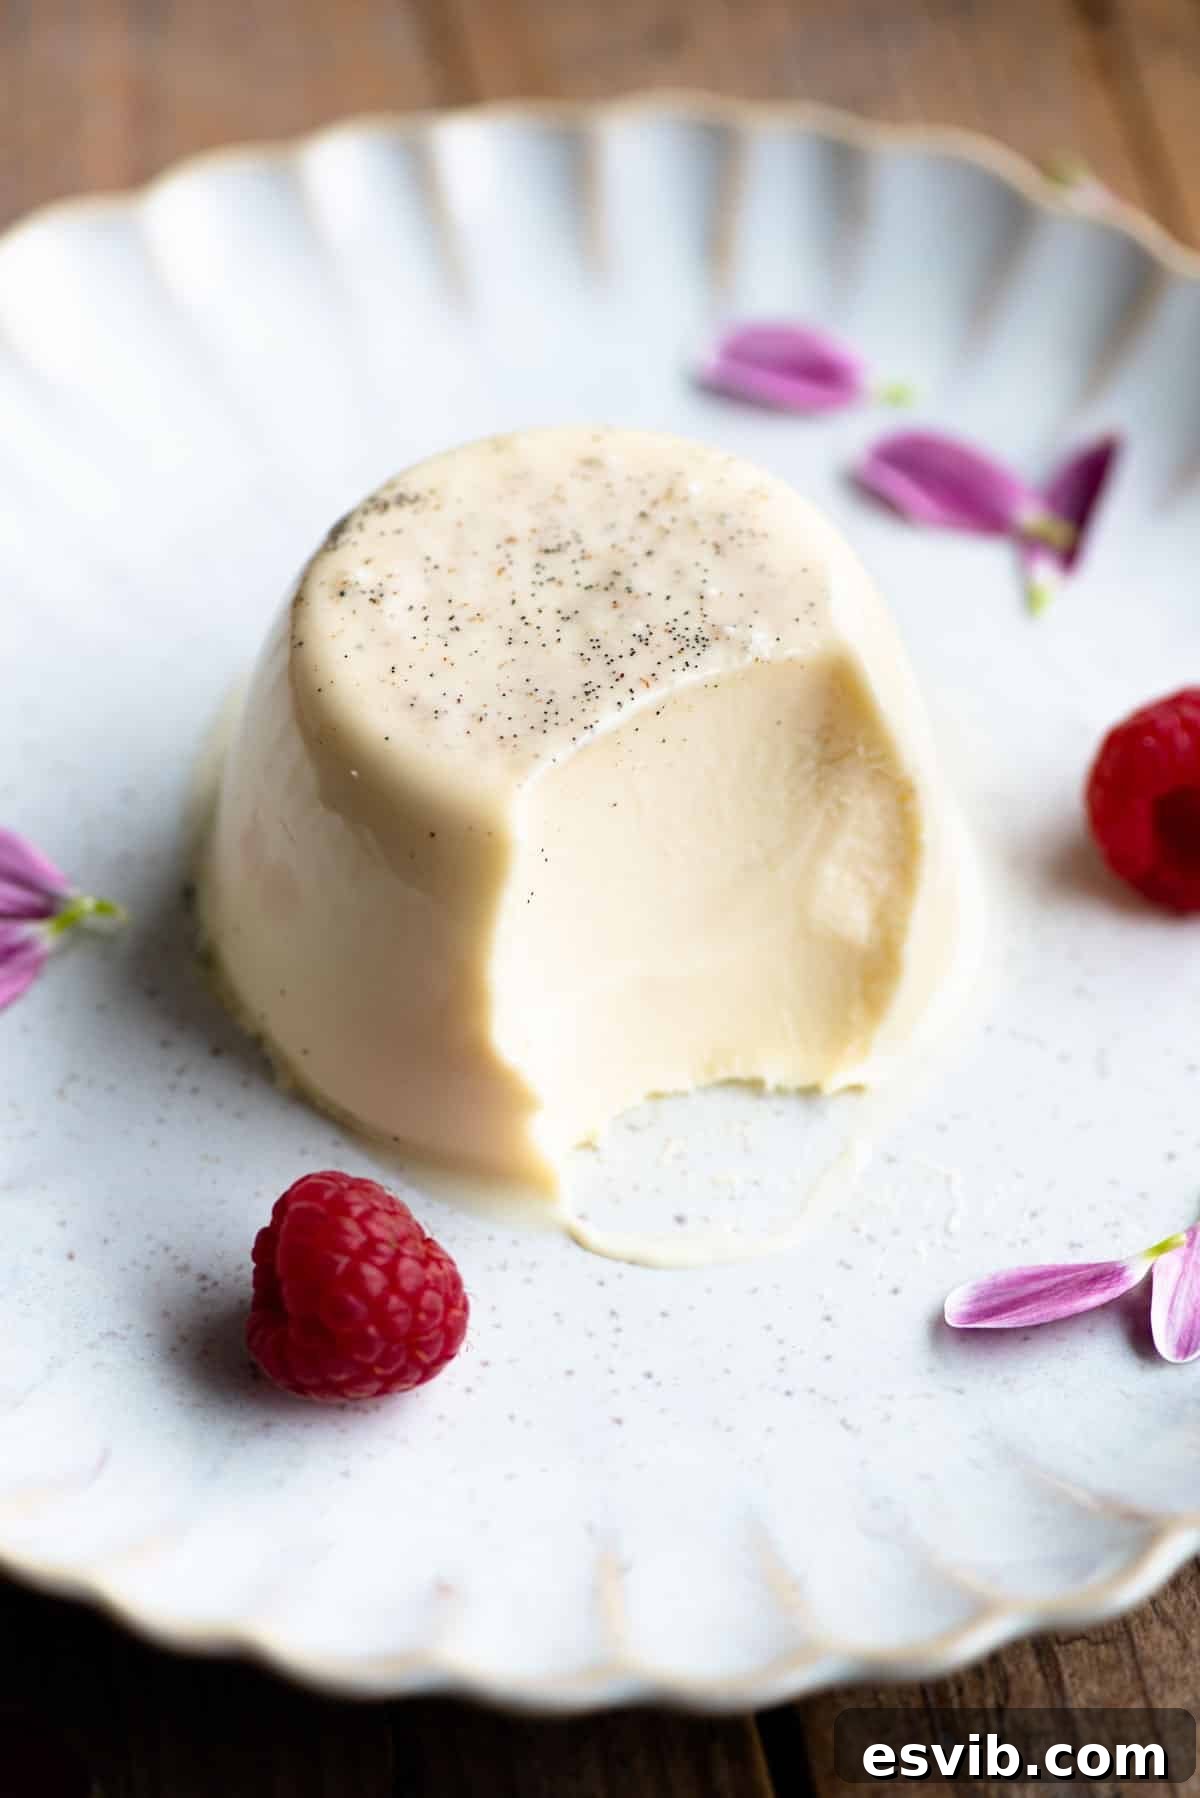
Prepare to create a truly exquisite, velvety smooth, and lusciously creamy Vanilla Panna Cotta. This timeless Italian dessert is remarkably simple to craft, requiring just 10 minutes of active preparation before it’s left to chill and set in the refrigerator. An absolute showstopper, it’s the perfect make-ahead dessert that promises to leave a lasting impression and deliver that much-desired ‘wow factor’ at any gathering.
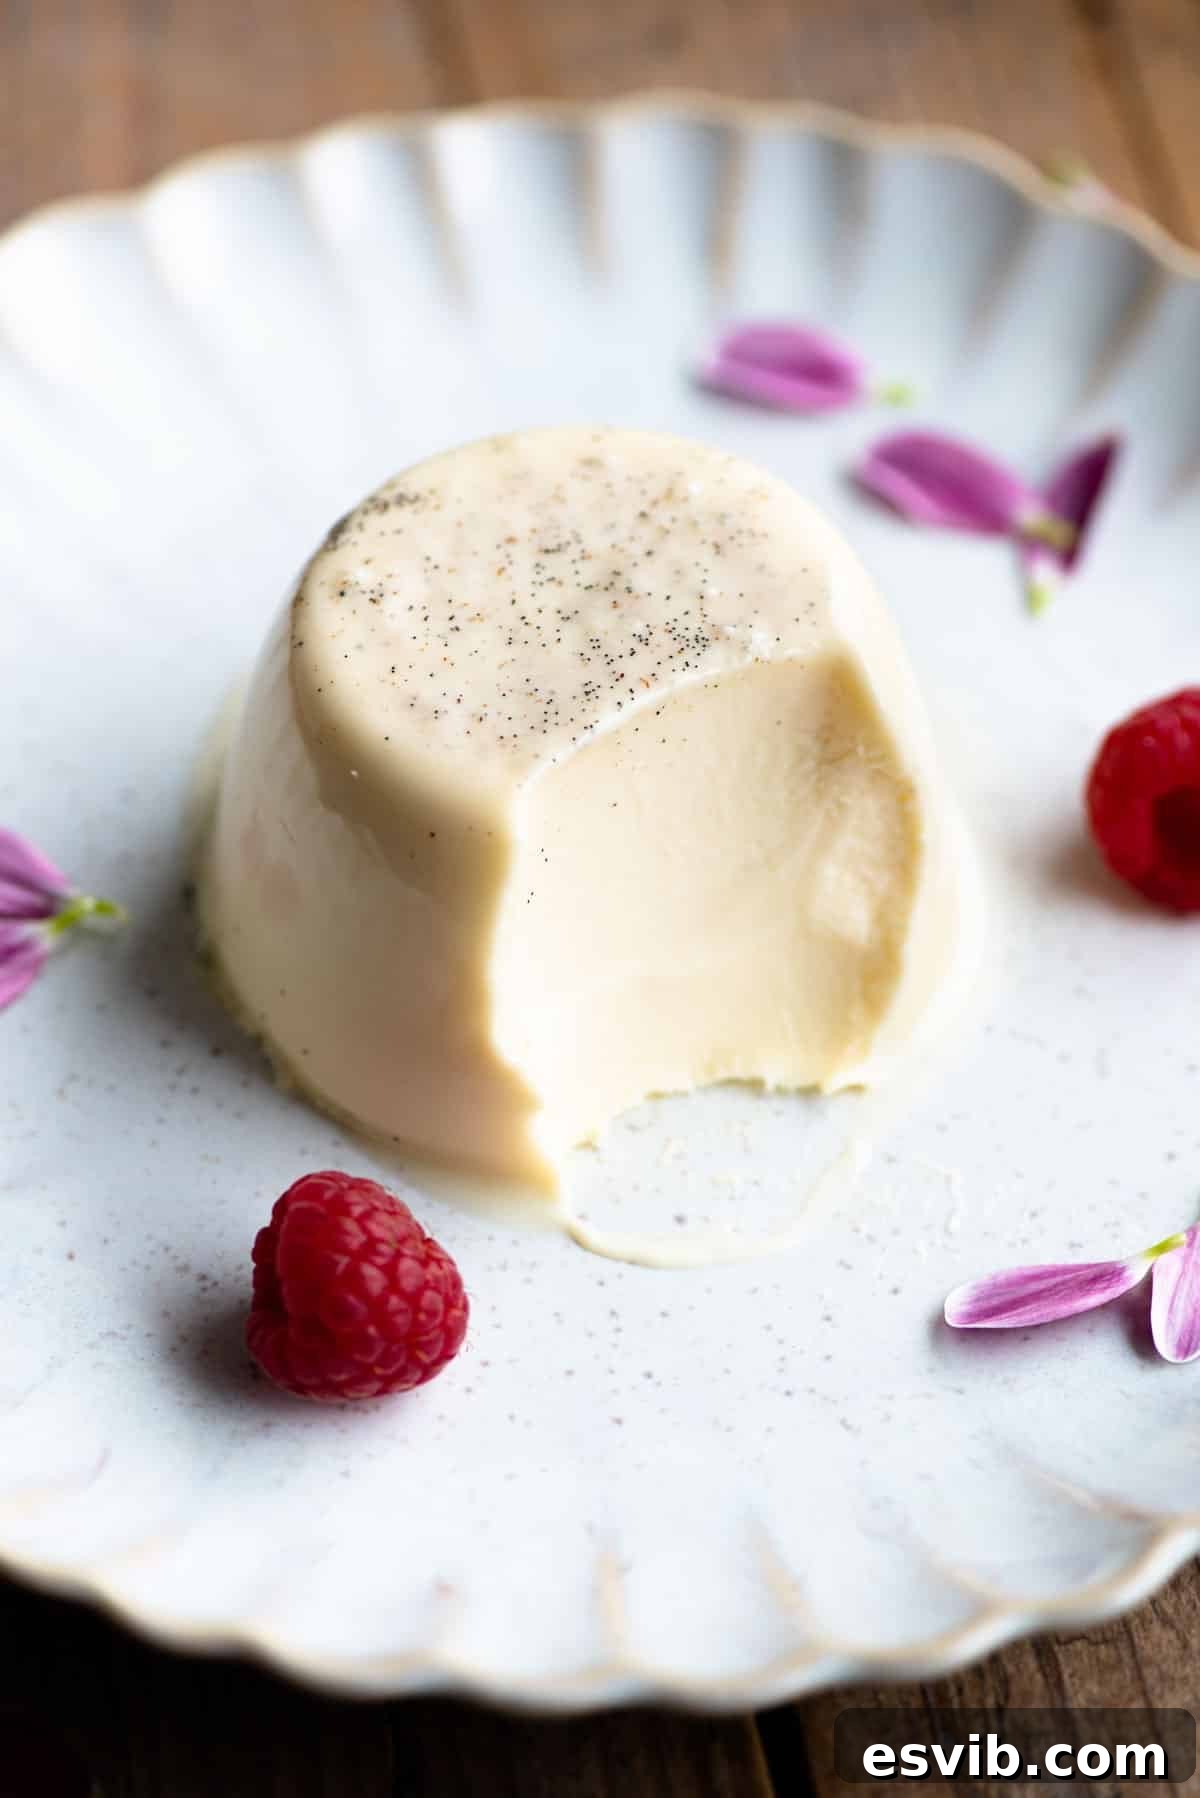
What is Panna Cotta? A Classic Italian Delight
Hailing from the picturesque region of Piedmont in northern Italy, Panna Cotta, literally translating to ‘cooked cream,’ is a testament to the simplicity and elegance of Italian cuisine. This revered dessert is characterized by its rich, smooth, and utterly luxurious texture, traditionally infused with the warm, aromatic notes of vanilla. It achieves its signature delicate ‘wobble’ through the gentle setting power of gelatin, creating a dessert that is firm enough to hold its shape yet melts delightfully in your mouth.
Despite its sophisticated appearance and reputation for being a staple in upscale restaurants, Panna Cotta is surprisingly straightforward to prepare at home. Its minimal prep time makes it an ideal choice for busy hosts or anyone looking to impress without the stress. In just about 10 minutes, you can assemble the components for this exquisite dessert, allowing it to chill in the fridge overnight or for a few hours. This makes it an unparalleled make-ahead option, perfect for dinner parties, special celebrations, or simply indulging in a moment of culinary luxury.
Serve this versatile dessert simply adorned with a handful of fresh berries to complement its creamy sweetness, or elevate it further with a vibrant, homemade berry sauce. The beauty of Panna Cotta lies in its understated elegance and the endless possibilities for customization, making it a beloved classic that continues to captivate palates worldwide.
Why You’ll Love This Vanilla Panna Cotta Recipe
- Effortlessly Elegant: Impress your guests with a dessert that looks sophisticated but is incredibly easy to make.
- Minimal Prep Time: Just 10 minutes of hands-on work is all it takes to get this delicious dessert ready for chilling.
- Perfectly Make-Ahead: Prepare it hours or even a day in advance, freeing up your time on the day of serving.
- Creamy & Smooth Texture: This recipe guarantees a luscious, melt-in-your-mouth consistency with that perfect signature “wobble.”
- Versatile Serving Options: Enjoy it plain or customize it with a wide array of toppings and sauces.
- Rich Vanilla Flavor: Using quality vanilla ensures a deeply aromatic and satisfying taste that defines classic panna cotta.
Key Ingredients for Perfect Vanilla Panna Cotta
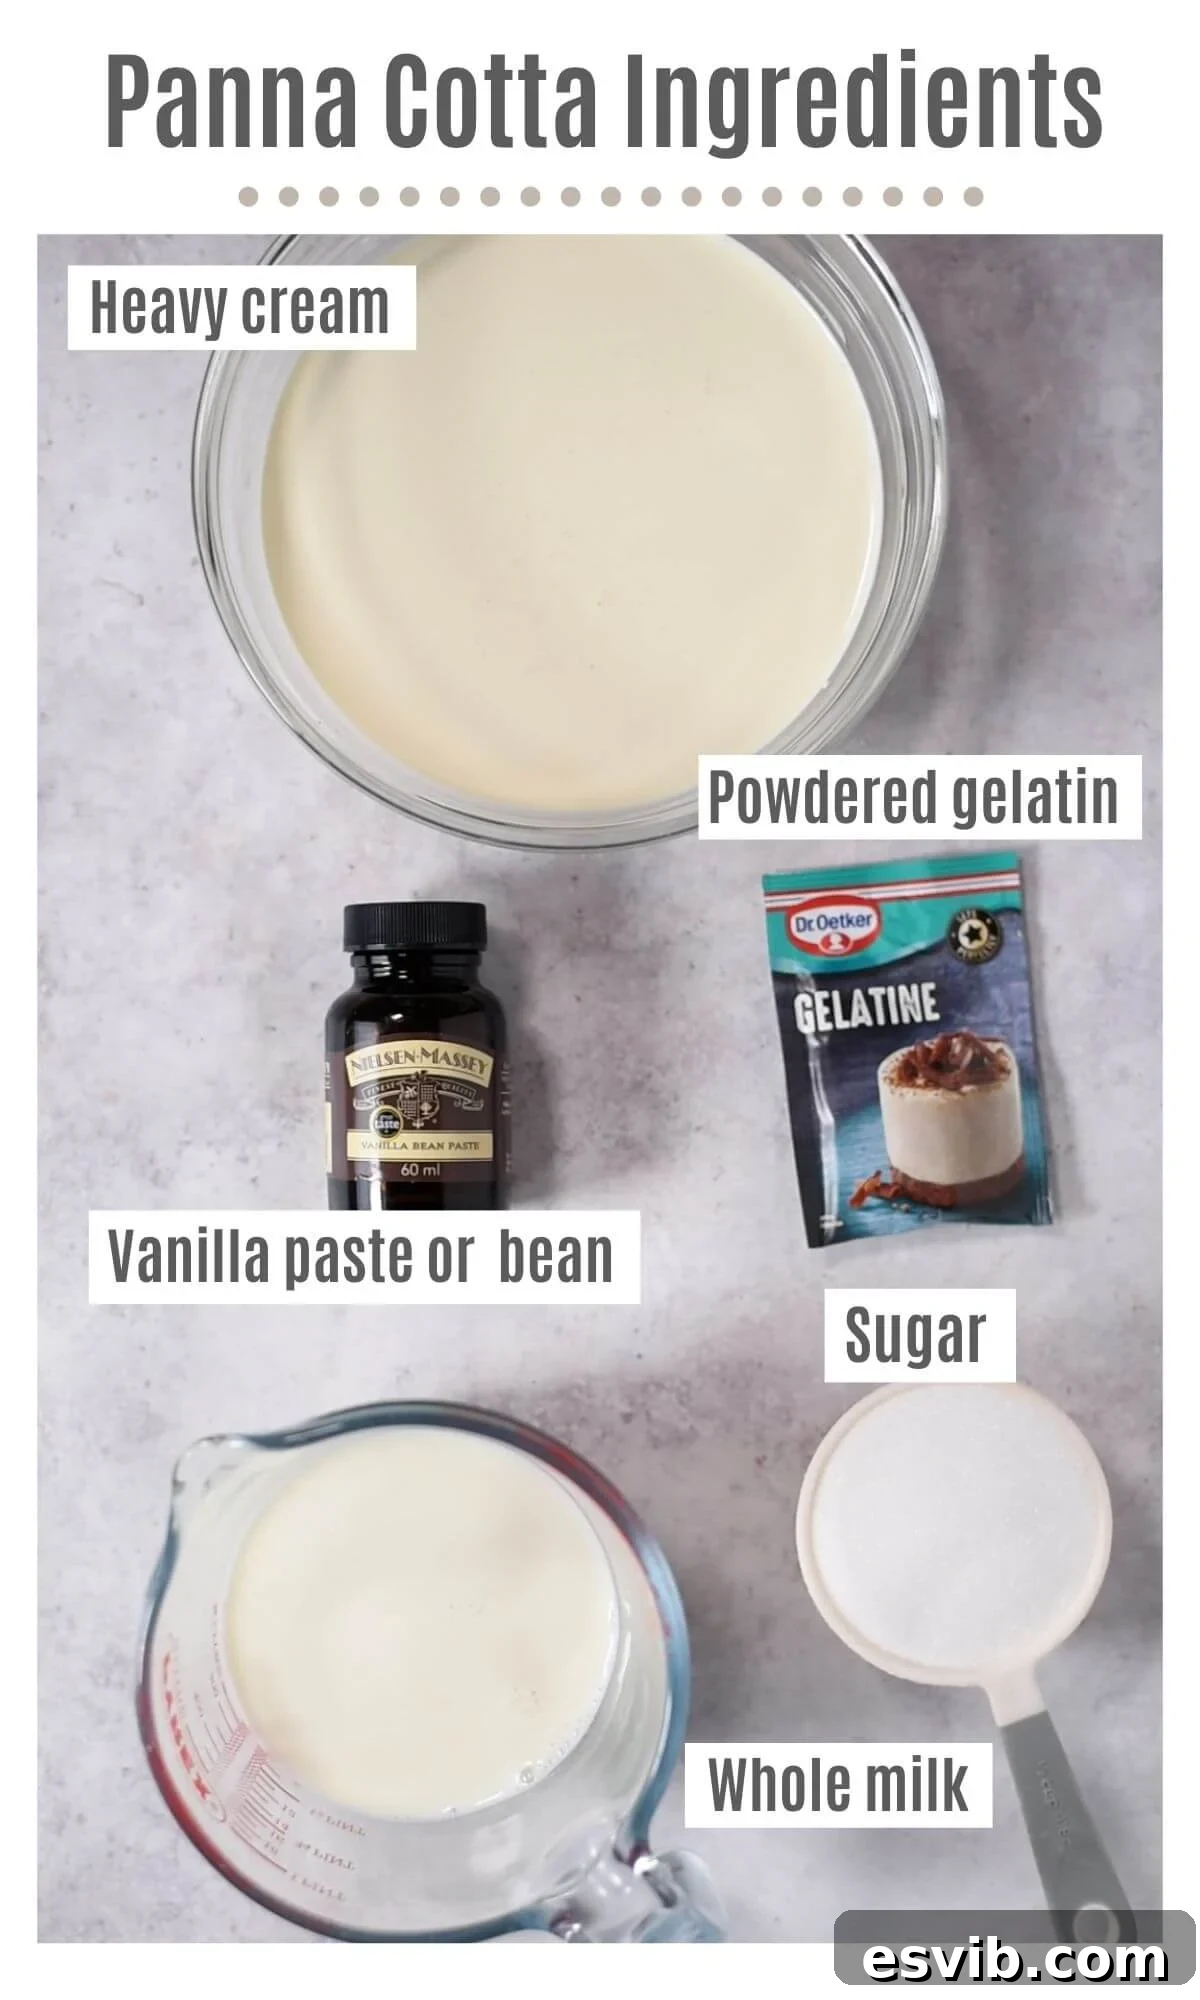
The beauty of panna cotta lies in its simplicity, which means the quality of your ingredients is paramount. Below, you’ll find a visual guide to all the essential components for a classic vanilla panna cotta, along with important notes and potential substitutions to ensure your dessert turns out perfectly.
Ingredient Notes and Substitutions
- Heavy Cream (Double Cream): This is arguably the most crucial ingredient, as panna cotta literally means ‘cooked cream.’ For the richest, silkiest texture and most authentic flavor, do not compromise by using a low-fat alternative. Full-fat heavy cream is essential for achieving the desired luxurious mouthfeel.
- Whole Milk: Similar to the cream, whole milk is recommended for optimal results. Its higher fat content contributes to the overall richness and creamy consistency of the panna cotta. While semi-skimmed milk can be used in a pinch, it may result in a slightly less decadent dessert.
- Sugar (Caster or Granulated): We prefer using superfine caster sugar because its fine crystals dissolve quickly and evenly into the warm liquid, ensuring a smooth texture without any graininess. However, regular granulated sugar will also work perfectly fine; just ensure it is fully dissolved before proceeding to the next steps.
- Vanilla (Bean or Paste): For a truly sublime vanilla flavor, investing in high-quality vanilla is a game-changer. A whole vanilla bean, split and scraped for its aromatic seeds, offers the most intense and authentic flavor profile. Alternatively, a good quality vanilla bean paste, which contains real vanilla seeds, is an excellent and convenient substitute. Vanilla extract can be used, but it won’t provide the same depth or visual appeal (from the seeds).
- Unflavored Gelatin Powder or Sheets: Gelatin is what gives panna cotta its delicate set and characteristic “wobble.” Powdered gelatin is widely available and easy to use. If you opt for gelatin sheets, remember that they need to be soaked in cold water (bloomed) to soften before being added to the warm cream mixture. Always check the packet instructions for the precise amount needed, as conversion ratios can vary between brands. Typically, 3 gelatin sheets are equivalent to 1 (12g) sachet of gelatin powder for this quantity of liquid.
Step-by-Step Guide to Making Vanilla Panna Cotta
Creating a beautiful vanilla panna cotta is simpler than you might imagine. Follow these detailed steps to achieve a perfectly smooth and creamy dessert every time.
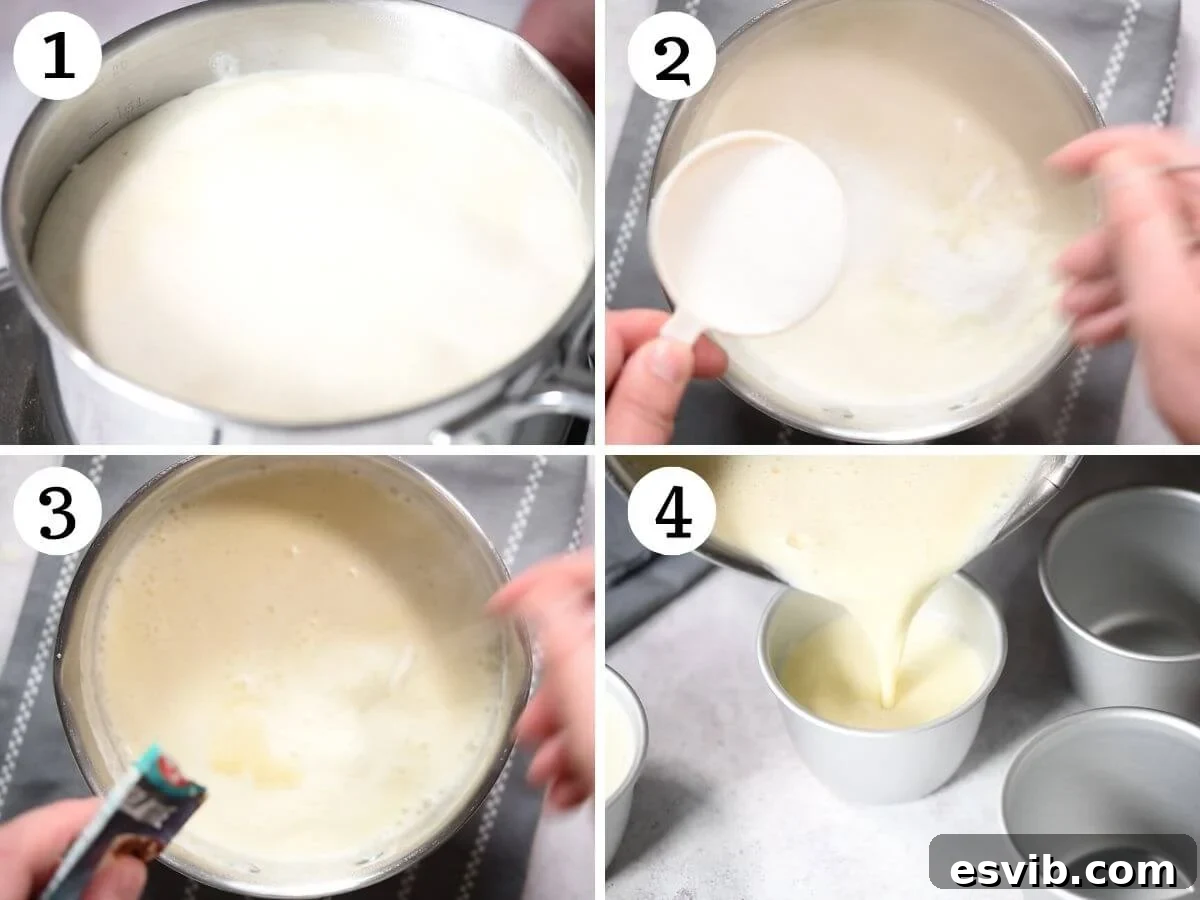
- Heat the Cream Mixture: Combine the heavy cream, whole milk, and your chosen vanilla (vanilla paste or the scraped seeds of a vanilla bean) in a medium saucepan. Gently bring the mixture to a boil over medium heat. It’s crucial to watch it carefully to prevent it from boiling over. As soon as it reaches a rolling boil, immediately remove the saucepan from the heat.
- Dissolve the Sugar: Add the caster sugar (or granulated sugar) to the hot cream mixture. Stir continuously with a whisk until the sugar has completely dissolved. The residual heat from the cream will help the sugar melt quickly and seamlessly.
- Incorporate the Gelatin: While continuously whisking the warm cream mixture, gradually sprinkle the unflavored gelatin powder over the surface. Whisk vigorously for 1-2 minutes to ensure the gelatin dissolves fully and no lumps form. If using gelatin sheets, squeeze out excess water from the bloomed sheets and stir them into the warm mixture until fully melted.
- Pour into Moulds: Carefully pour the panna cotta mixture into individual serving moulds or ramekins. Ensure they are clean and dry before pouring.
- Cool at Room Temperature: Allow the filled moulds to cool at room temperature for approximately 30 minutes. This initial cooling period prevents the panna cotta from setting too quickly or unevenly when introduced to the cold refrigerator, which can sometimes lead to a less smooth texture.
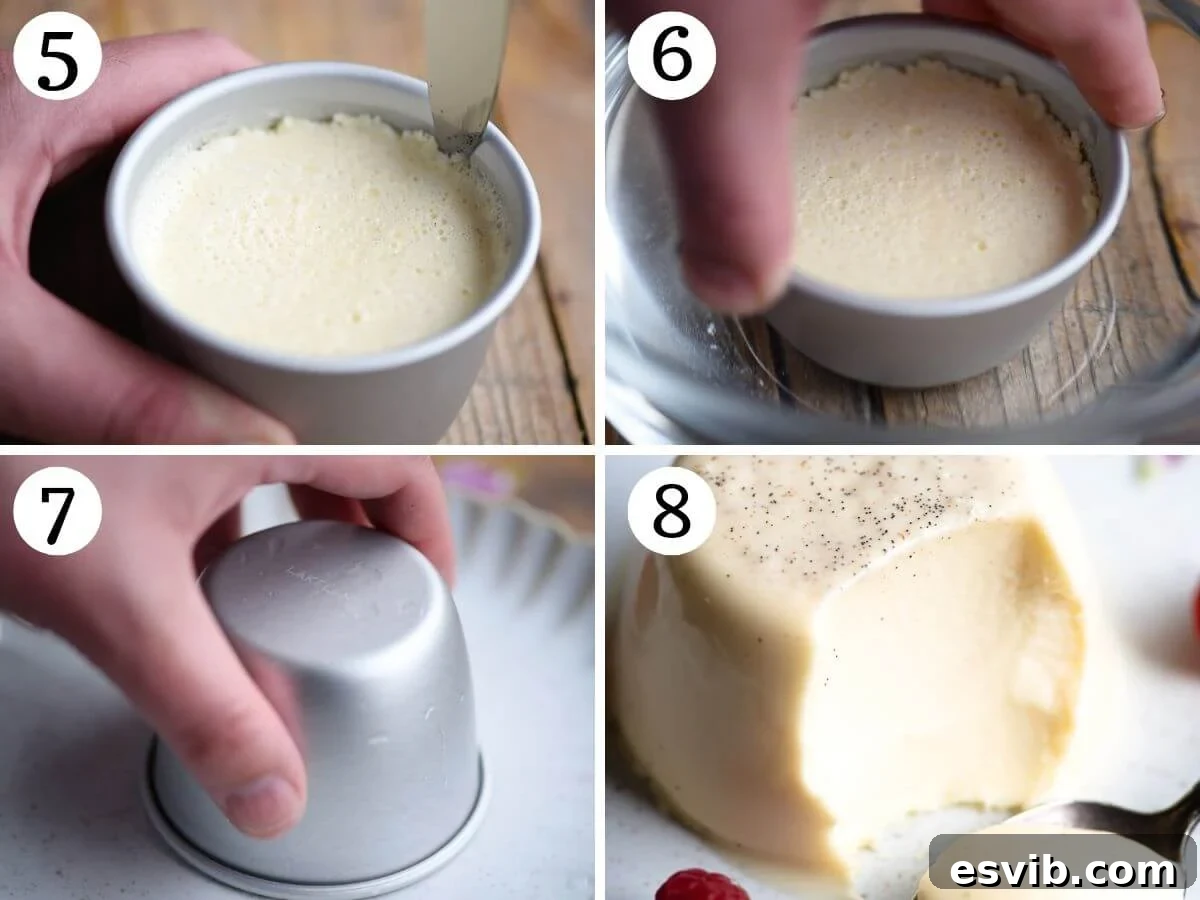
- Address “Skin” Formation (Optional): During the cooling phase, a thin skin might form on the surface of the panna cotta due to the milk. If you prefer a perfectly smooth top, you can gently remove this skin with a spoon while the panna cotta is still liquid, before refrigeration. However, this step is entirely optional and does not affect the flavor or overall enjoyment of the dessert.
- Chill to Set: After the 30-minute room temperature cooling, transfer the panna cottas to the refrigerator. Chill them for a minimum of 4-6 hours, or ideally, overnight. Proper chilling time is essential for the panna cotta to fully set and achieve its characteristic delicate wobble. Do not rush this step, as insufficient chilling will result in a runny dessert.
How to Unmold Panna Cotta Like a Pro
Unmolding panna cotta to reveal its elegant shape is surprisingly simple and adds a touch of professional flair to your presentation. Follow these steps for perfect results:
- Loosen the Edges: Once fully chilled and set, use a small, sharp knife to gently run around the inner edge of each mould. Be careful not to cut into the panna cotta itself, but rather to create a slight separation from the mould walls. This will help release the vacuum holding it in place.
- Warm Water Bath: Fill a shallow bowl with hot (but not boiling) water. Dip the bottom of each panna cotta mould into the hot water for just a few seconds – typically no more than 5 to 10 seconds. This brief warming melts a thin layer of gelatin around the edges, allowing for easy release. Be careful not to leave it in for too long, as the panna cotta will start to melt and lose its shape.
- Invert and Serve: Quickly remove the mould from the hot water, wipe the bottom dry, and immediately invert it onto your chosen serving plate. Give the mould a gentle shake or tap; the panna cotta should slide out cleanly. If it doesn’t, you can gently twist the mould or repeat the warm water dip for another couple of seconds. Serve immediately once unmolded.
For the easiest and most impressive results, we highly recommend using individual non-stick moulds. These are specifically designed to release delicate desserts with minimal effort. Alternatively, if you don’t have moulds, you can stylishly serve the panna cotta directly in the ramekins, small glass jars, or dessert glasses they were set in.
Delicious Serving Suggestions for Vanilla Panna Cotta
Vanilla Panna Cotta is a delightful canvas for a myriad of toppings, allowing you to customize it for any season or preference. Here are some of our favorite ways to serve this creamy dessert:
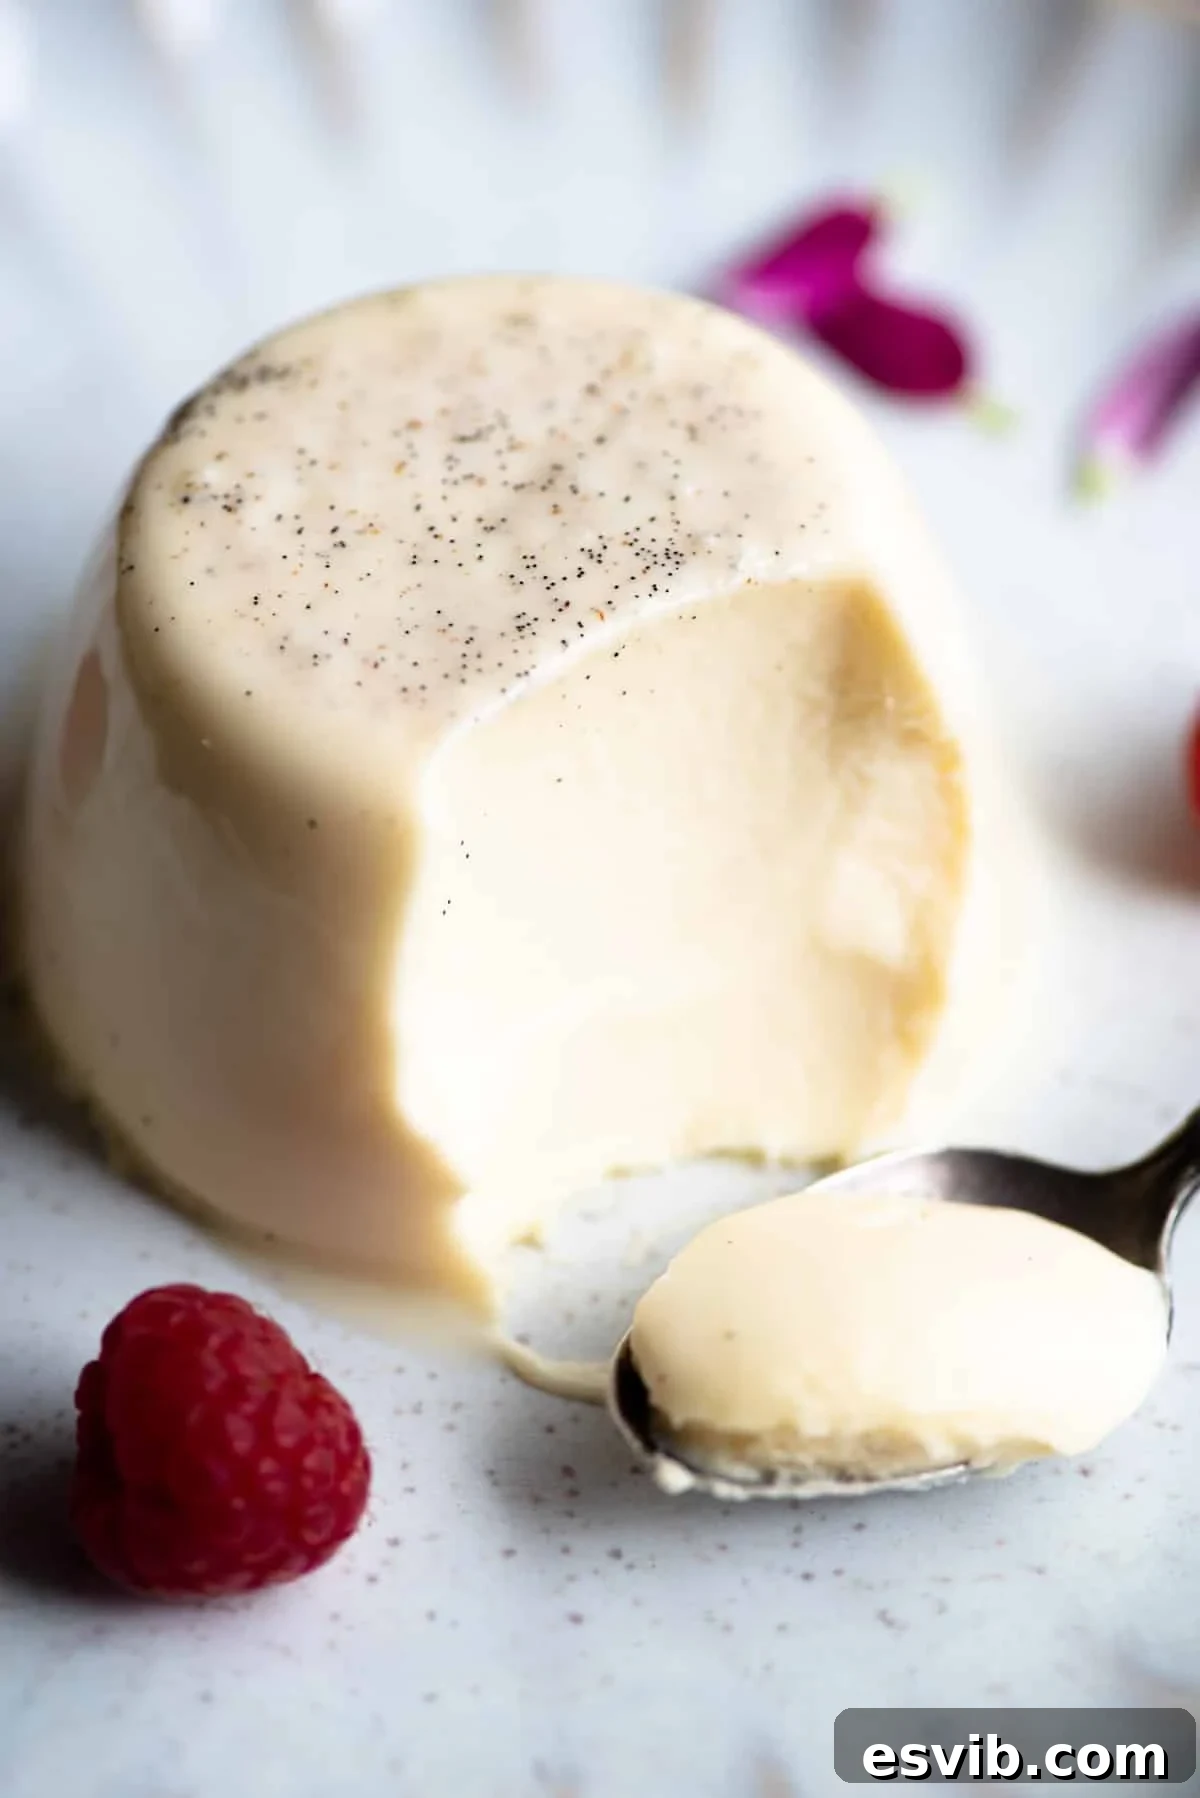
- Fresh Berries: The quintessential pairing! A medley of fresh seasonal berries like raspberries, strawberries, blueberries, or blackberries offers a beautiful contrast in color, texture, and a burst of tart freshness against the sweet, creamy panna cotta. It’s simple, elegant, and always a crowd-pleaser.
- Passion Fruit Coulis: For an exotic and vibrant twist, drizzle a spoonful of tangy passion fruit coulis over your panna cotta. The bright, tropical notes of passion fruit are a fantastic counterpoint to the rich vanilla.
- Berry Sauce: Elevate the fresh berry experience with a homemade berry sauce. A quick strawberry or raspberry coulis, made by simmering berries with a touch of sugar and lemon juice, adds a concentrated fruit flavor and a beautiful sheen.
- Salted Caramel or Chocolate Sauce: If you’re craving something more indulgent and comforting, a drizzle of rich salted caramel sauce or a decadent dark chocolate sauce will transform your panna cotta into a luxurious treat. Add a sprinkle of sea salt flakes with the caramel for an extra flavor dimension.
- Nutella & Toasted Hazelnuts: For a truly decadent Italian-inspired combination, warm up some hazelnut chocolate spread (like Nutella) slightly until it’s drizzly, then pour it over the panna cotta. Garnish with a sprinkle of chopped, toasted hazelnuts for added crunch and nutty flavor.
- Lemon Curd: A dollop of bright, zesty lemon curd provides a wonderful tangy and citrusy contrast that cuts through the creaminess of the panna cotta beautifully.
- Roasted Stone Fruits: In warmer months, serve with gently roasted peaches, plums, or apricots. Roasting brings out their natural sweetness and softens them perfectly.
Expert Tips for a Flawless Panna Cotta
Achieving panna cotta perfection is within reach with a few key considerations:
- Prioritize High-Quality Ingredients: Since panna cotta relies on just a few core ingredients, their quality profoundly impacts the final taste and texture. Opt for the best heavy cream, whole milk, and most importantly, vanilla that you can find. While a vanilla bean or vanilla paste may be an investment, their superior flavor is truly worth it compared to extract.
- Blooming the Gelatin (If Required): Some brands of gelatin powder recommend “blooming” it first. If your packet instructions specify this, sprinkle the gelatin over a few tablespoons of cold water (as directed on the package) and let it sit for 5-10 minutes until it hydrates and softens before adding it to the warm milk mixture. Gelatin sheets always require blooming.
- Avoid Boiling Gelatin: It is critically important that the milk and cream mixture is *removed from the heat* before you add the dissolved gelatin. If the gelatin is exposed to prolonged high heat or boils, it can lose its setting power, resulting in a panna cotta that won’t set properly or will have a rubbery texture.
- Proper Chilling is Key: After pouring the mixture into moulds, allow them to cool completely at room temperature for about 30 minutes before transferring them to the refrigerator. Never place hot moulds directly into the fridge, as this can affect the setting process and potentially compromise the texture of your panna cotta. Ensure they chill for at least 4-6 hours, or ideally overnight, for a perfectly firm and wobbly set.
- Moulds vs. Ramekins: For an impressive and elegant presentation, especially when garnished with fresh berries or a beautiful sauce, using individual non-stick moulds is an excellent choice. They simplify the unmolding process significantly. However, if moulds aren’t available, panna cotta sets beautifully in small glass jars, dessert glasses, or ramekins, and can be served directly from them for a charming, rustic presentation.
- Gentle Whisking: When mixing ingredients, especially when dissolving sugar and gelatin, whisk gently but thoroughly to prevent introducing too many air bubbles, which can lead to a less smooth final texture.
Recipe FAQs: Your Vanilla Panna Cotta Questions Answered
Our Vanilla Panna Cotta recipe offers a rich, smooth, and velvety texture that truly melts in your mouth, infused with a delicate and aromatic vanilla flavor. We add just enough gelatin to ensure it holds its beautiful shape with that perfect, characteristic wobble. Panna cotta should never be rubbery; a rubbery texture is a clear sign that too much gelatin was used.
Gelatin is derived from animal collagen, making it unsuitable for vegetarians and vegans. If you’re looking for a plant-based alternative, I highly recommend using agar-agar. Agar-agar is a seaweed-derived gelling agent that works similarly to gelatin, though it produces a slightly firmer set. Follow the package instructions carefully for proper conversion and usage, as it sets more quickly than gelatin.
Once prepared and fully set, your vanilla panna cotta will keep beautifully in an airtight container in the refrigerator for up to 3 days. For best results, cover individual servings or the entire batch with plastic wrap to prevent a skin from forming and to absorb any refrigerator odors.
Yes, absolutely! Gelatin sheets are a fantastic alternative to powder and are often preferred by professional chefs for their clean set. To use gelatin sheets, you’ll need to “bloom” them by soaking them in cold water for about 5-10 minutes until softened. Then, squeeze out any excess water before stirring them into the warm cream mixture until fully dissolved. While conversion ratios can vary slightly between brands, a good general rule of thumb for this recipe is that 3 sheets of gelatin will work well to replace a 12g sachet of gelatin powder.
Yes, you can! The amount of sugar in this recipe provides a balanced sweetness that pairs well with the richness of the cream and the vanilla. However, feel free to adjust the sugar quantity to your personal preference. You can reduce it by a tablespoon or two for a less sweet dessert, or add a little extra if you prefer it sweeter. Always taste the mixture before adding the gelatin to ensure the sweetness is to your liking.
More Panna Cotta Recipes to Try
If you loved this classic vanilla version, expand your panna cotta repertoire with these equally delicious variations:
Explore Other Decadent Desserts
Italian Desserts
Chocolate Panna Cotta
Italian Desserts
White Chocolate Panna Cotta
Italian Desserts
Boozy Bailey’s Panna Cotta
Italian Desserts
Chocolate Budino (Budino al Cioccolato)
We hope you thoroughly enjoy this Vanilla Panna Cotta recipe! If you try this, or any other recipe from our blog, please don’t hesitate to share your experience by leaving a comment and rating the recipe below. We always love hearing from you! You can also follow us on Facebook, Instagram, and Pinterest, or sign up for our Newsletter to receive more of our delicious recipes directly in your inbox.
Vanilla Panna Cotta
A beautiful, smooth, and creamy Vanilla Panna Cotta. This classic Italian dessert is unbelievably easy to make with just 10 minutes of prep time, then it’s left to set in the fridge. A stunning make-ahead dessert that will deliver that wow factor!
By Emily
Print Recipe
Ingredients
- 1 ½ cups plus 1 tablespoon heavy cream (double cream) (375ml)
- 1 cup + 1 tablespoon whole milk (250ml)
- ½ cup caster sugar (can also use granulated sugar) (95g)
- 4 teaspoons gelatin powder (12g sachet)
- 3 teaspoons vanilla paste or 1 vanilla bean (*see note 1)
Instructions
-
Put the milk, cream and vanilla in a saucepan and bring to a boil (watch it carefully so it doesn’t over boil). Once boiling turn off the heat.
-
Add the sugar and stir until the sugar has dissolved.
-
Sprinkle the gelatin powder into the mixture whilst whisking to avoid any lumps forming.
-
Pour the mixture into individual moulds or ramekins and leave to cool at room temperature for about 30 minutes.
-
Note: A skin can form on the top of the panna cotta from the milk. If this happens you can easily remove it with a spoon while the panna cotta is still liquid (before refrigerating) although it’s entirely optional and doesn’t have to be removed.
-
After 30 minutes, refrigerate the panna cottas for at least 4-6 hours or overnight before serving.
How to remove panna cotta from moulds
-
Fill a bowl with hot water. Remove the panna cotta from the fridge and place them one at a time into the water for a few seconds (no more than 10 seconds to prevent melting).
-
Overturn the panna cotta onto a serving plate and gently remove the mould, serve immediately.
Notes
- Note on vanilla – if using vanilla bean paste, use the amount stated on the bottle that equals one vanilla bean. We used 15ml (3 teaspoons) to equal 1 vanilla bean. Alternatively, scrape out the seeds from 1 whole vanilla bean and add that to the milk. You can keep the used bean for another use or add it to a jar of sugar to create vanilla sugar.
- Storage – the panna cotta will keep well in the fridge for up to 3 days, ideally covered to prevent drying out or absorbing other odors.
Helpful Info for All Recipes
- I always use extra virgin olive oil in all of my recipes unless stated otherwise.
- When I use canned or jarred tomatoes of any kind, I always use Cirio or Mutti brands for the best results and flavor.
- All vegetables are medium sized unless stated otherwise.
- All recipes are tested and developed using a fan (convection) oven.
- Find out more about how nutrition is calculated.
- Check out our must-have Italian Pantry Staples.
- You can also find all our Essential Kitchen Tools for Italian Cooking.
Nutrition
Carbohydrates: 22g |
Protein: 5g |
Fat: 24g |
Saturated Fat: 15g |
Polyunsaturated Fat: 1g |
Monounsaturated Fat: 6g |
Cholesterol: 76mg |
Sodium: 39mg |
Potassium: 125mg |
Sugar: 22g |
Vitamin A: 994IU |
Vitamin C: 0.4mg |
Calcium: 96mg |
Iron: 0.1mg
Nutrition information is automatically calculated, so should only be used as an approximation.
Did you try this recipe?
Leave a comment below and let us know what you thought!