
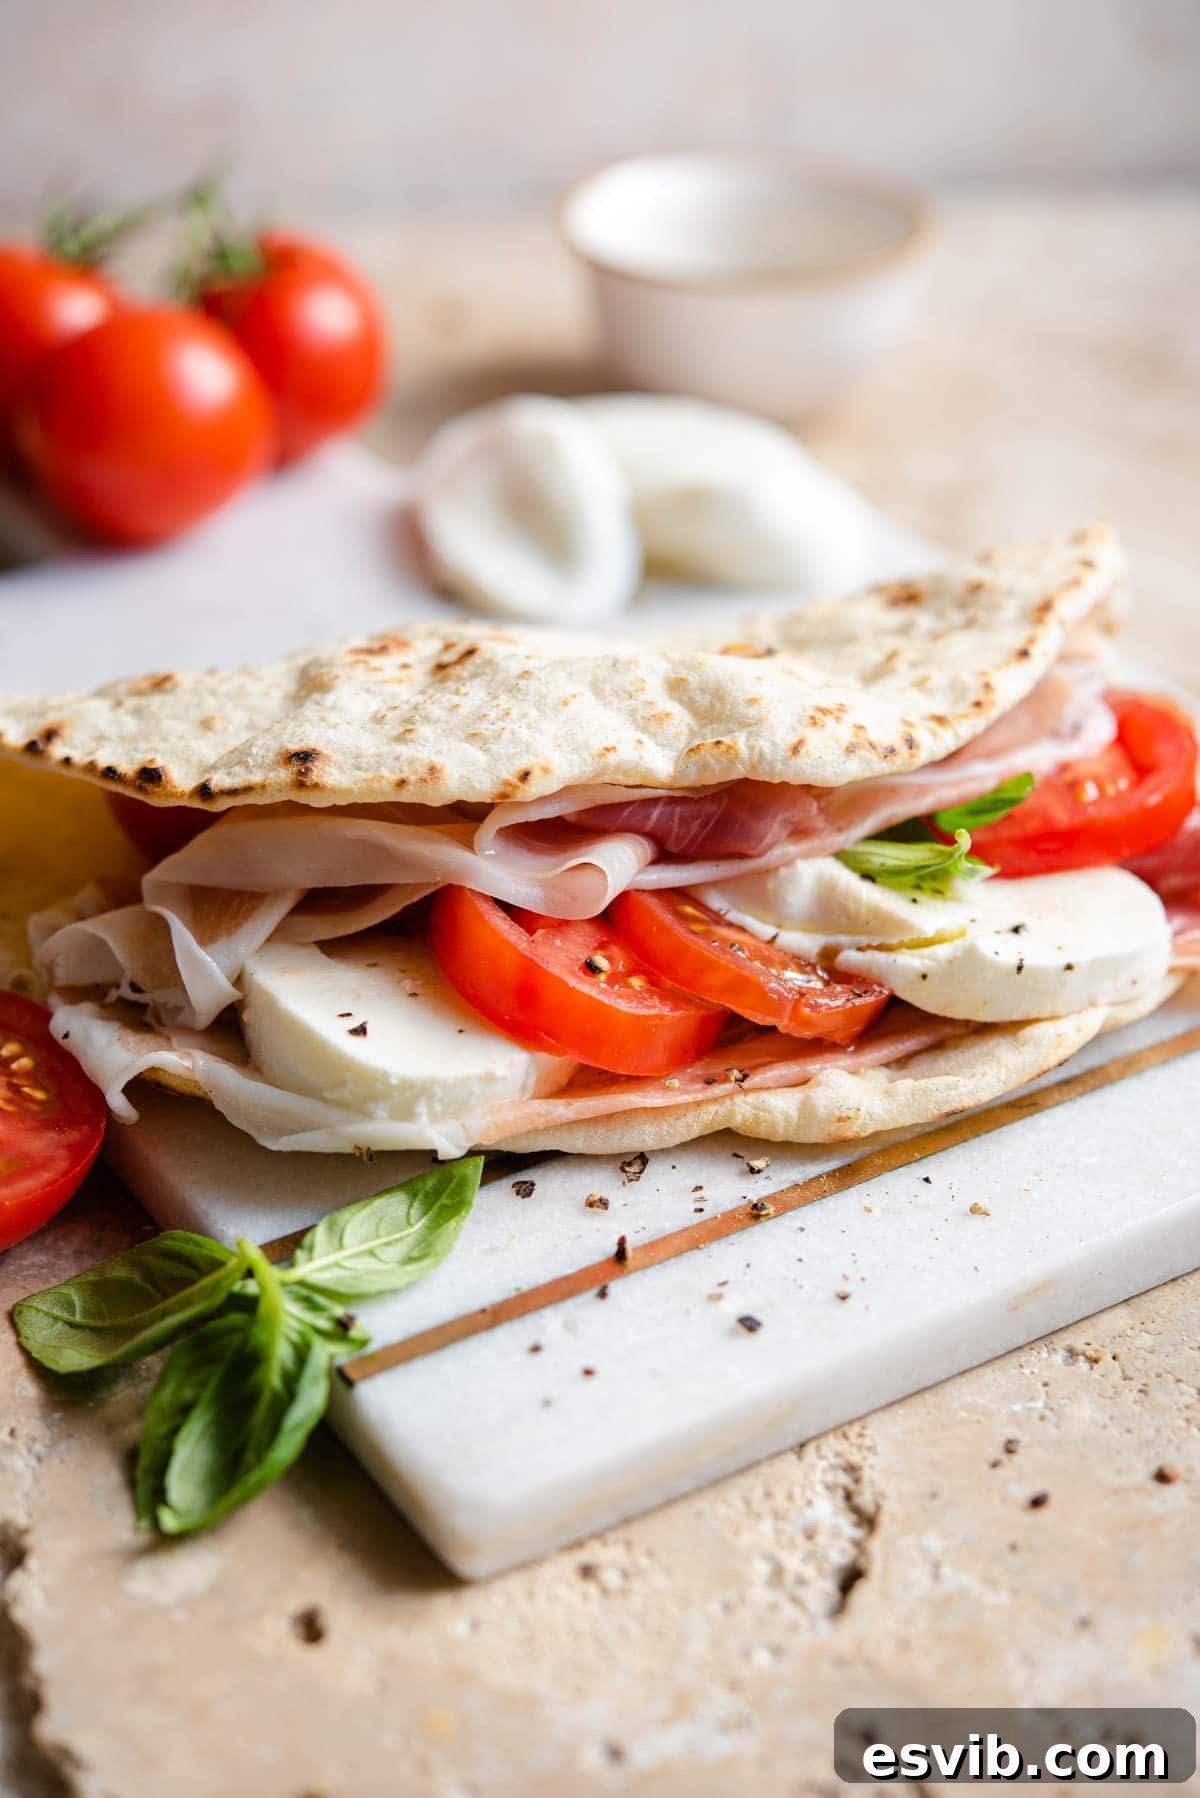
La Piadina is more than just a flatbread; it’s a culinary icon from the Emilia-Romagna region of Italy, renowned for its incredibly soft, fluffy texture and remarkable versatility. This beloved Italian staple, often called the “bread of Romagna,” offers a delightful canvas for a myriad of fillings, ranging from savory cured meats and creamy cheeses to vibrant grilled vegetables. What makes this recipe truly special is its simplicity: it’s incredibly easy to make from scratch, requires no yeast, and delivers an authentic taste experience that rivals any you’d find across Italy. Perfect for a satisfying lunch, a quick snack, or an elegant appetizer, homemade Piadina brings a piece of Italian tradition right into your kitchen.
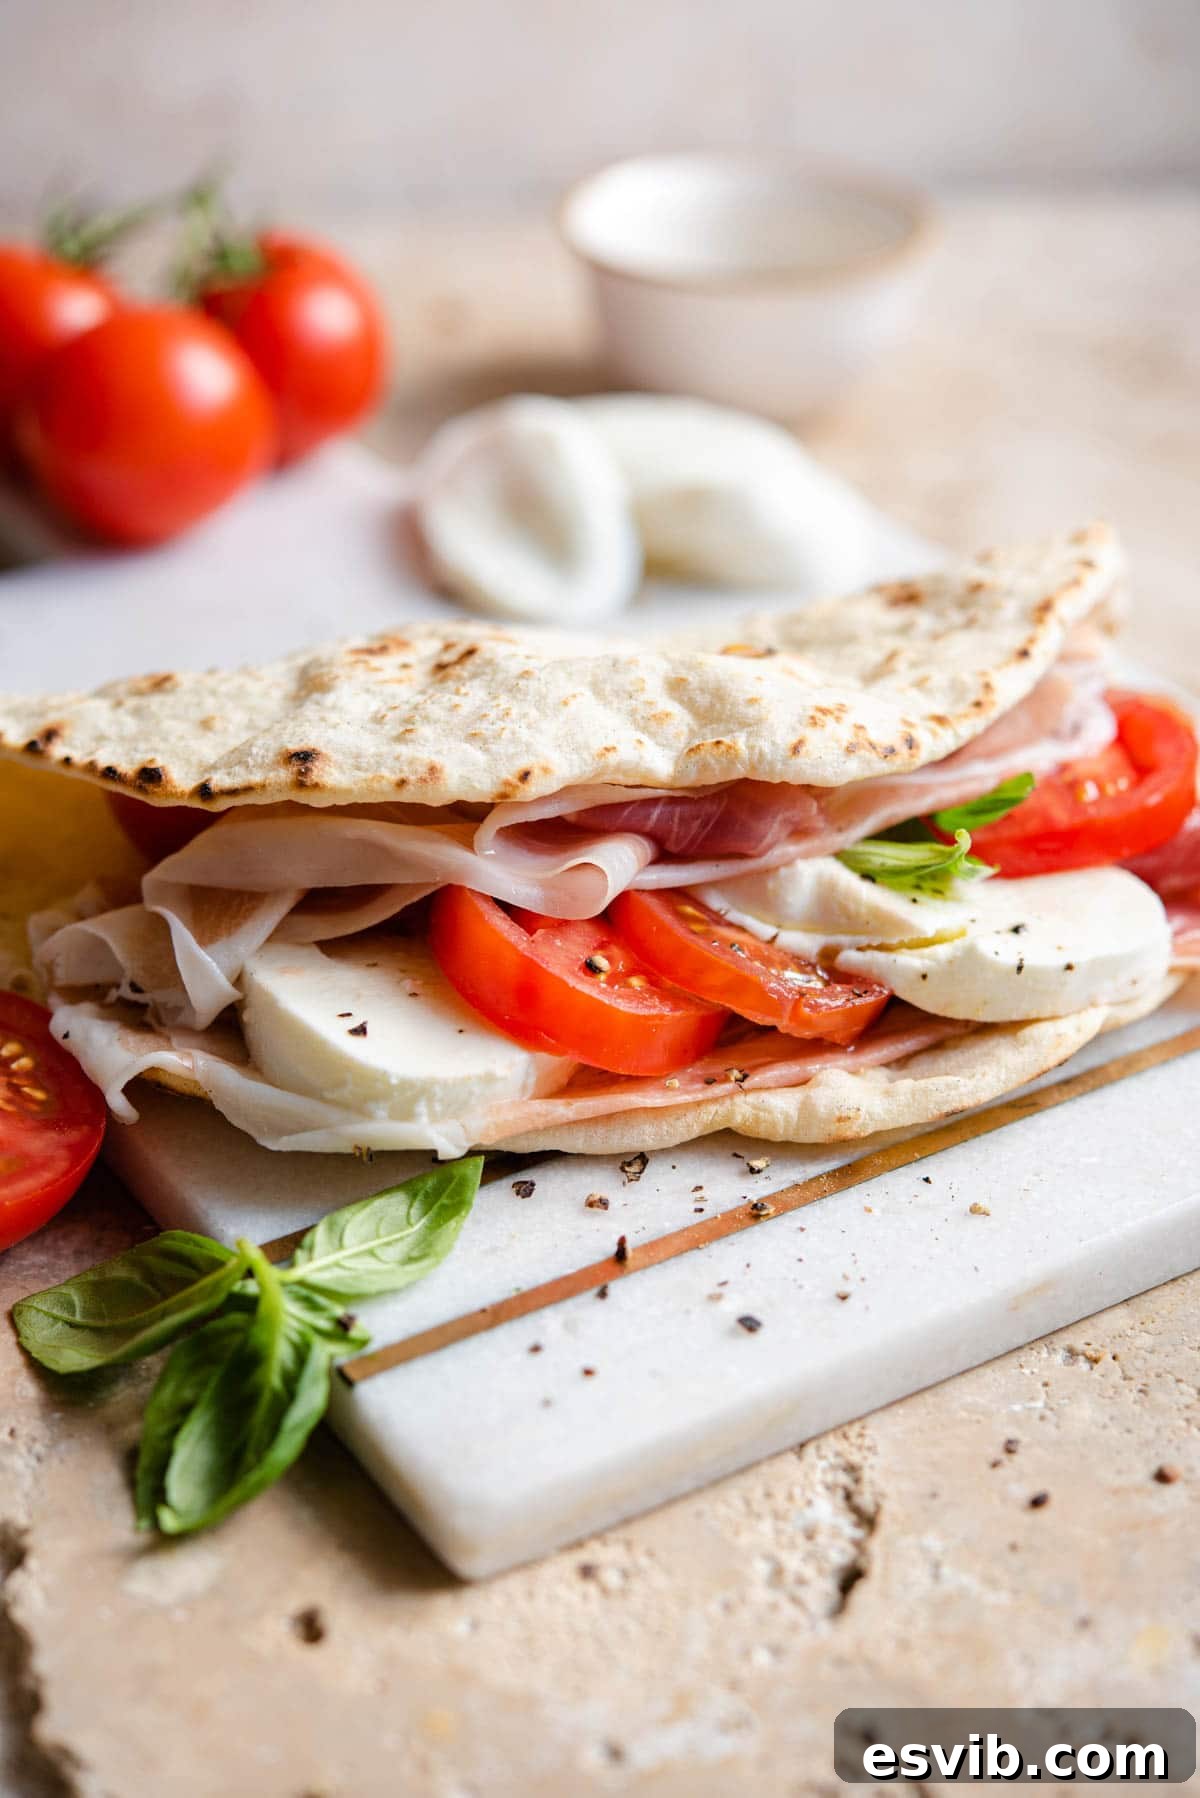
Hailing from the picturesque Emilia-Romagna region, La Piadina Romagnola is a traditional Italian flatbread deeply embedded in local culture and culinary history. Traditionally, it’s made with lard for its characteristic richness and tenderness and cooked on terracotta griddles called “testi.” However, for a lighter, equally delicious version, this recipe thoughtfully substitutes lard with olive oil, without compromising on flavor or texture. Piadina holds a special place in the hearts of Italians and travelers alike; it’s a common sight at picnics, a go-to for quick and satisfying lunches, and an undeniable treat that embodies the warmth of Italian home cooking.
During my time in Italy, I quickly discovered a significant difference between the Piadina offered in charming local bars and artisanal sandwich shops versus the pre-packaged versions found in supermarkets. The latter often left much to be desired, tending to be dry, bland, and brittle. This revelation sparked a quest: to create a homemade Italian flatbread dough that was consistently soft, wonderfully flavorful, and pliable enough to wrap around any filling without cracking. After much experimentation and refinement, I developed this very recipe – a tried-and-tested method that has been a staple in our kitchen for years, ensuring perfect Piadina every single time.
The Simple Ingredients You Need for Authentic Piadina
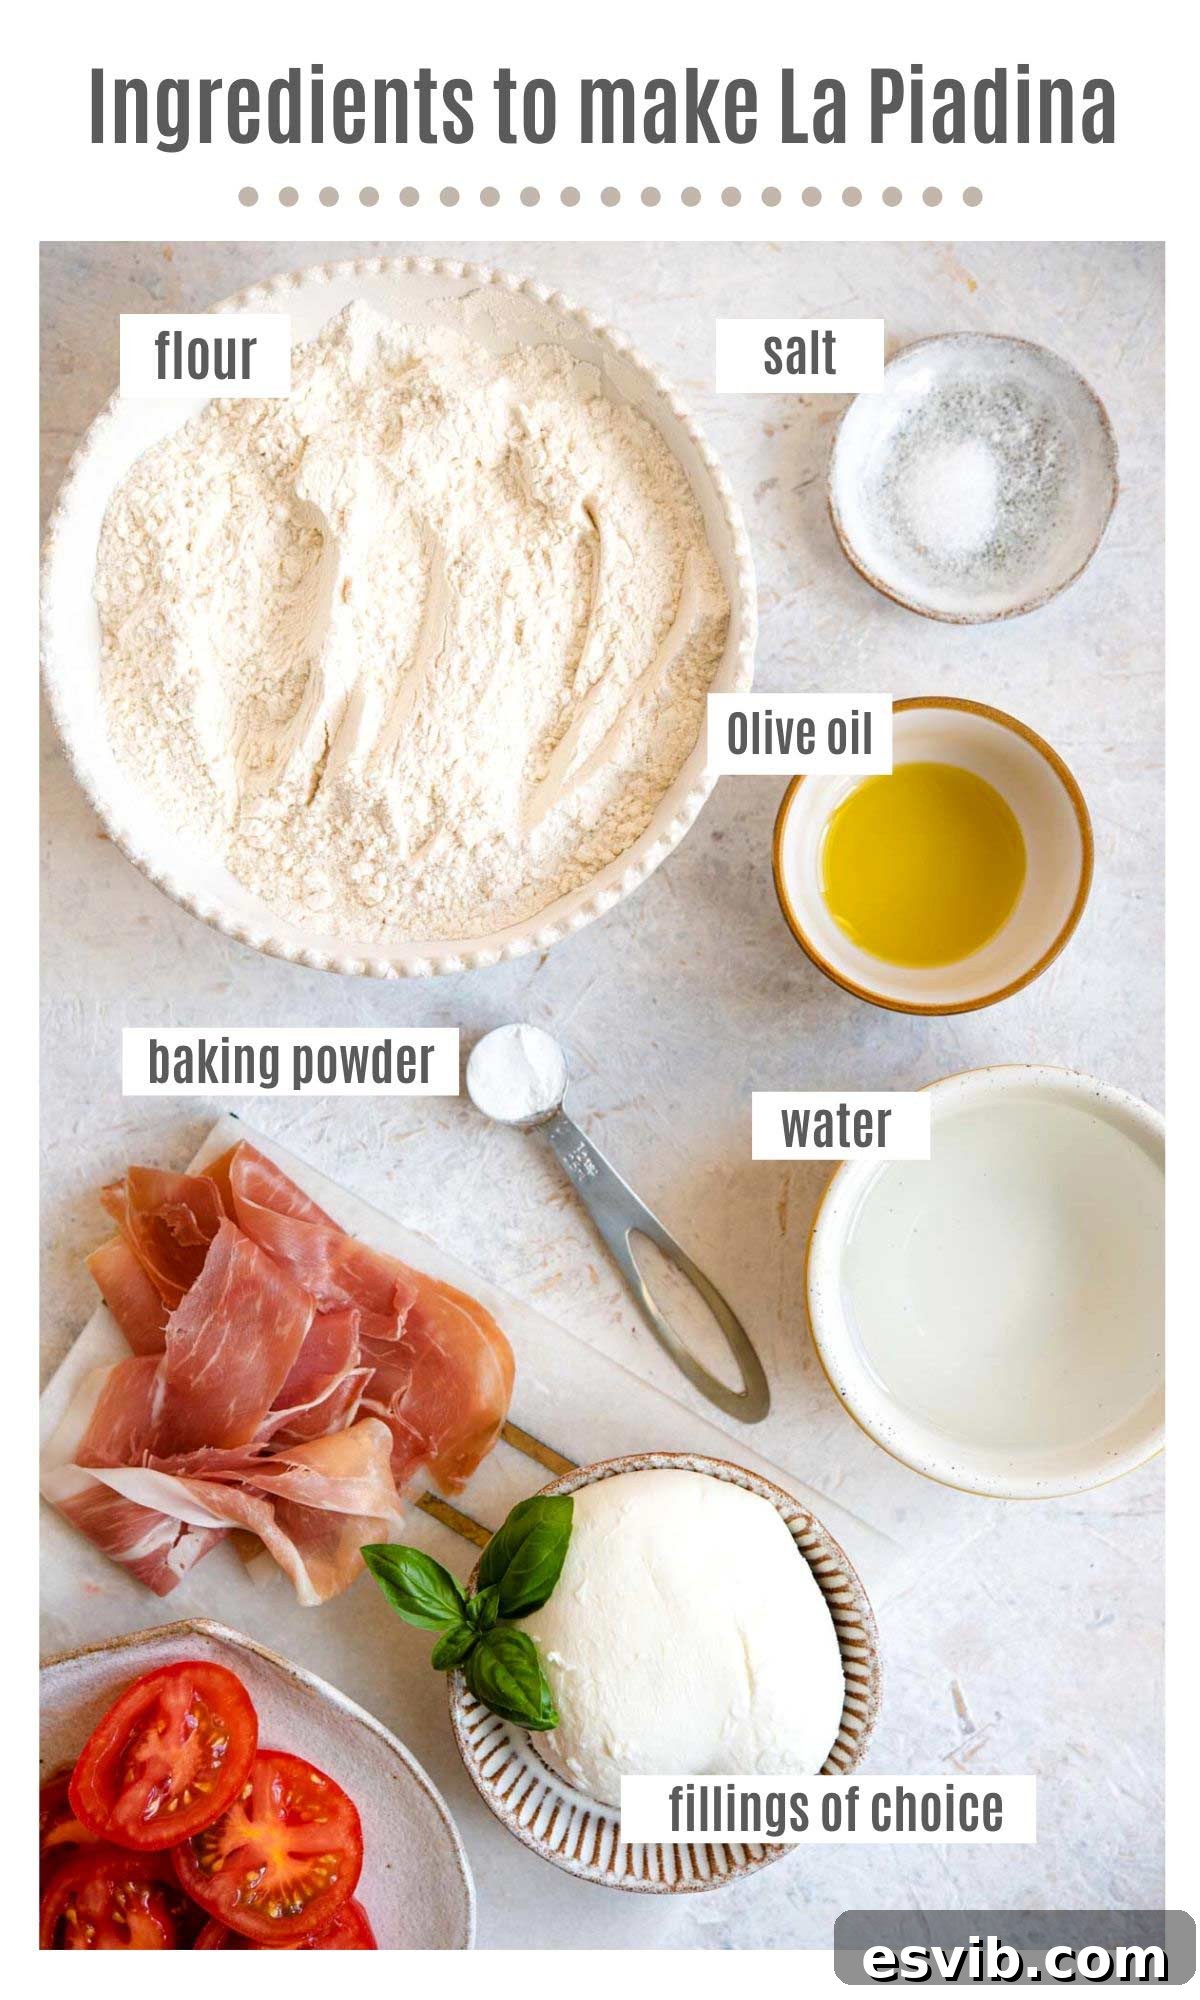
One of the beauties of La Piadina is that it requires just a handful of basic ingredients, likely already residing in your pantry. To create these delightful flatbreads, you will need: flour, warm water, olive oil, baking powder, and salt. Each component plays a vital role in achieving the signature soft and pliable texture of Piadina. The flour forms the structure, warm water helps activate the dough and allows for easy mixing, olive oil contributes to its tender crumb and flavor, baking powder provides a subtle lift, making the flatbread light, and salt enhances all the flavors. Below, you’ll find a visual guide to all the essential ingredients, making your preparation even smoother.
A Closer Look at Each Ingredient
- Flour: Traditionally, Italian “00” flour is preferred for its fine texture, which results in a wonderfully smooth and tender dough. However, all-purpose flour works beautifully as well and has been thoroughly tested in this recipe to ensure consistent results. The key is to measure it correctly, as described in our tips section.
- Warm Water: The warmth of the water is essential for helping the dough come together easily and creating a pliable texture. It also helps to slightly activate the baking powder. Ensure it’s warm to the touch, but not hot.
- Olive Oil: While traditional Piadina often uses lard for richness, extra virgin olive oil is an excellent, healthier alternative that still imparts a lovely flavor and contributes to the dough’s softness. Choose a good quality olive oil for the best results.
- Baking Powder: This is our secret ingredient for a yeast-free flatbread that still achieves a pleasant puffiness and lightness. It acts as a leavening agent, creating tiny air pockets within the dough during cooking. While optional, it’s highly recommended for the best texture.
- Salt: A crucial flavor enhancer, salt balances the richness of the dough and brings out the subtle sweetness of the flour.
How to Make Piadina Italian Flatbreads – A Detailed Step-by-Step Guide
Making homemade Piadina is a surprisingly simple and rewarding process. Follow these detailed steps to create perfectly soft and flavorful Italian flatbreads:
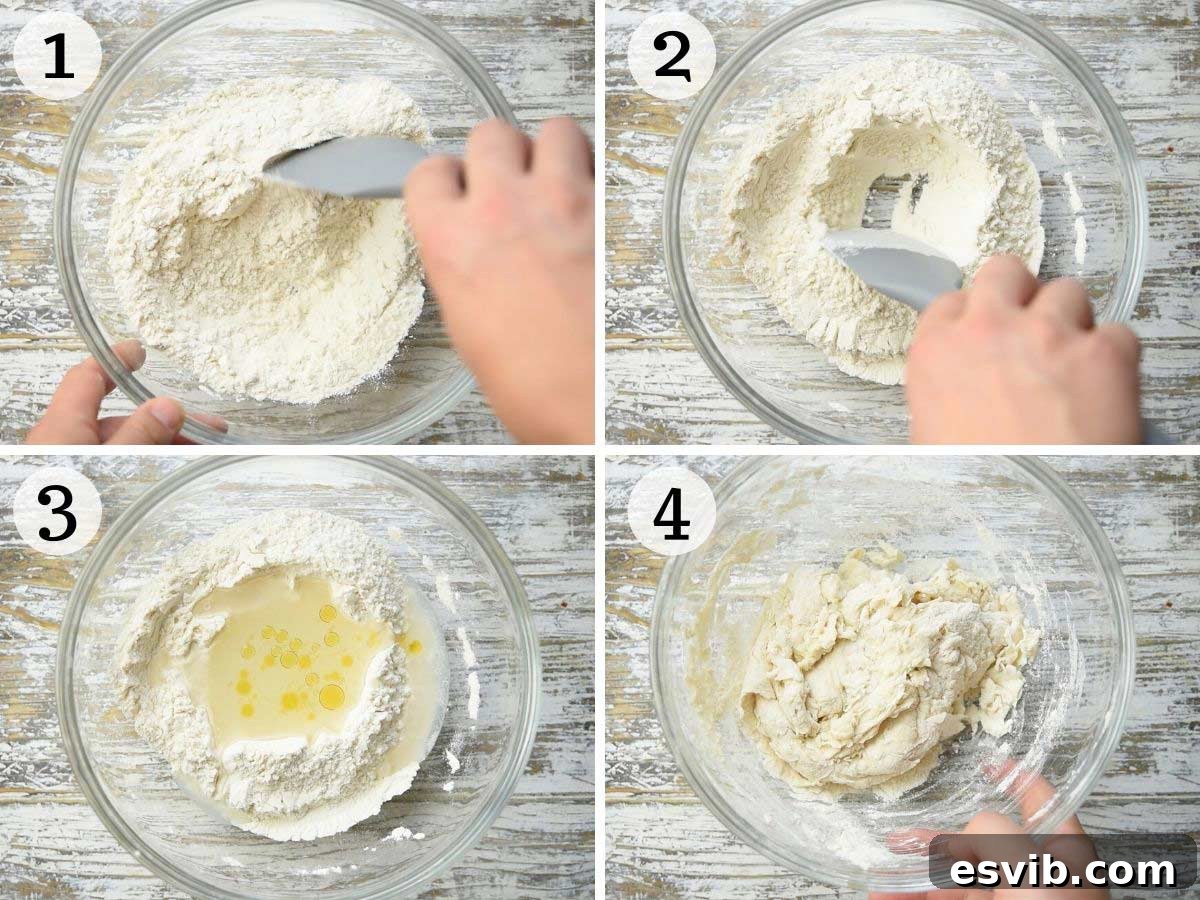
Step 1: Combine Dry Ingredients. In a large mixing bowl, add the flour, baking powder, and salt. Use a whisk or a fork to thoroughly combine these dry ingredients, ensuring the baking powder and salt are evenly distributed throughout the flour. This initial mixing step is important for consistent texture and flavor in your final Piadina. (Refer to photo 1 for visual guidance.)
Step 2: Add Wet Ingredients and Form the Dough. Create a well in the center of your dry ingredients. Pour the warm water and olive oil into this well. Gradually incorporate the dry ingredients into the wet by stirring with a spoon or your hands until a shaggy dough begins to form. Continue mixing until all ingredients are combined and you have a cohesive dough ball. (Refer to photos 2-4 for visual guidance on dough formation.)
Step 3: Knead the Dough. Lightly flour a clean work surface. Turn the dough out onto this surface and knead it gently for about one minute, or until it forms a smooth and elastic ball. Be careful not to over-knead, as this can make the Piadina tough; a minute or so is usually sufficient for this yeast-free dough to become smooth and uniform.
Step 4: Rest the Dough. Wrap the kneaded dough ball tightly in plastic wrap (cling film). Let it rest at room temperature for a minimum of 30 minutes. This resting period is crucial as it allows the gluten in the flour to relax, making the dough much easier to roll out and ensuring a wonderfully tender Piadina. (Refer to photo 5 for visual guidance on resting the dough.)
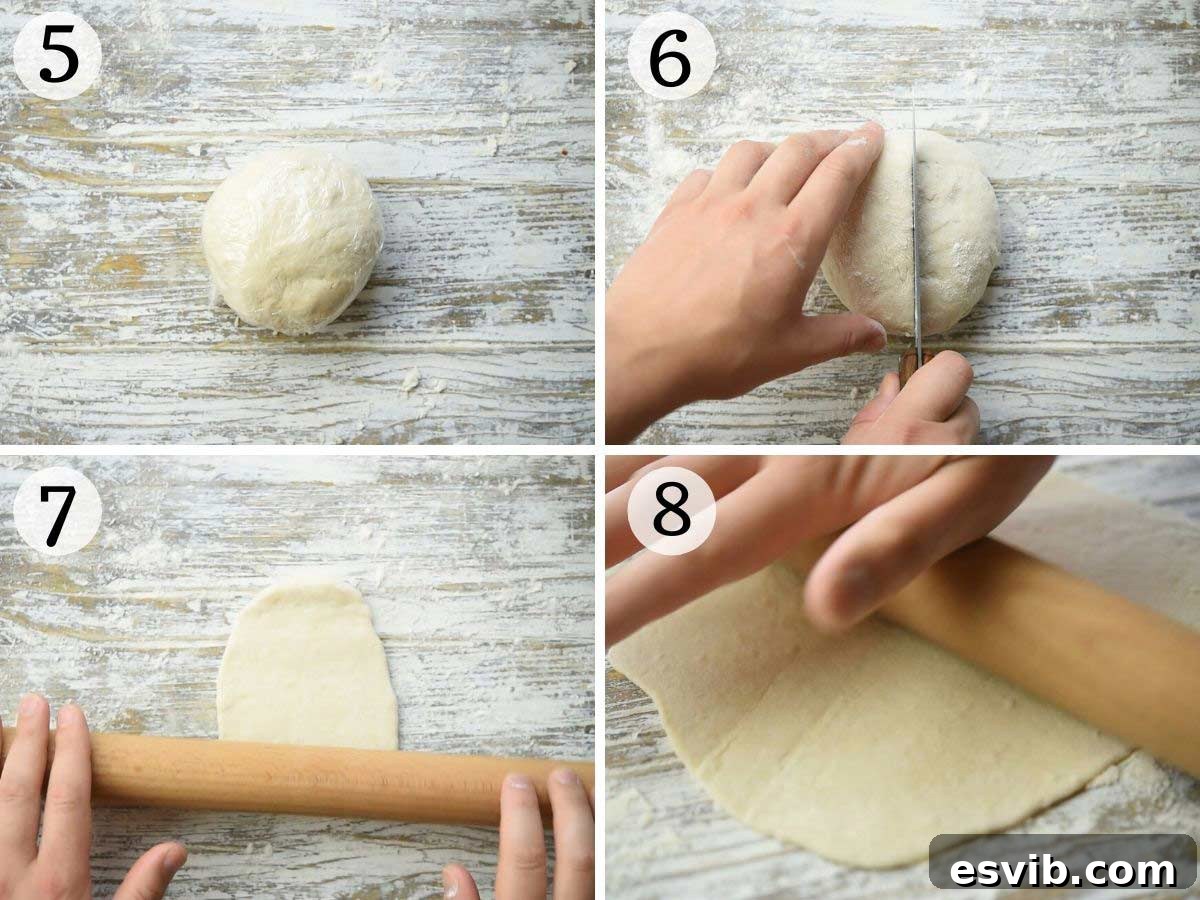
Step 5: Prepare for Cooking and Roll Out the Flatbreads. While the dough is resting, pre-heat a large, round skillet or frying pan on the stove over medium heat. Divide the rested dough into four equal portions. Take one portion and, on a lightly floured surface, use a rolling pin to roll it into a thin, round flatbread shape, approximately 8-10 inches (20-25 cm) in diameter. Don’t worry if your circles aren’t perfectly symmetrical; rustic charm is part of the appeal! Repeat this process for the remaining dough portions. (Refer to photos 6-8 for visual guidance on rolling.)
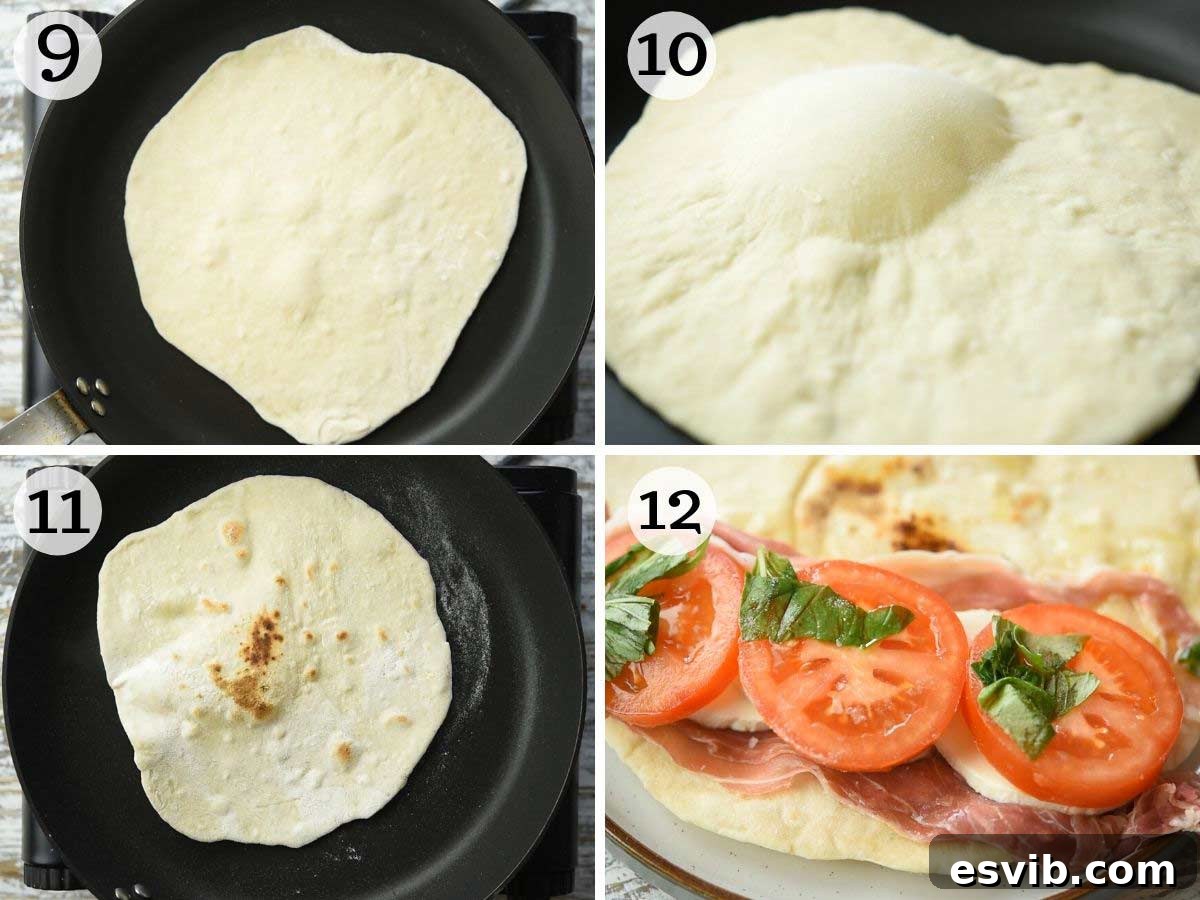
Step 6: Cook the Piadina. Place one rolled flatbread onto the pre-heated skillet. Cook for about 2 minutes per side. You’ll know it’s ready to flip when it begins to puff up slightly and golden-brown spots appear on the underside. Once flipped, cook the other side until it also develops similar golden spots and is cooked through. The slight puffing indicates a well-developed, tender interior. (Refer to photos 9-11 for visual guidance on cooking.)
Step 7: Fill and Serve. Once cooked, immediately transfer the Piadina to a plate. Fill it generously with your desired ingredients while it’s still warm and pliable. Fold the Piadina in half to create a delicious, portable sandwich. Serve immediately and enjoy the fresh, authentic taste of homemade Italian flatbread! (Refer to photo 12 for visual guidance on filling.)
Creative Filling Ideas for Your Piadina
The beauty of Italian flatbreads lies in their incredible versatility, offering endless possibilities for creative fillings. From traditional Italian pairings to modern interpretations, you can truly customize your Piadina to suit any palate or occasion. Here are some of my favorite combinations to inspire your culinary creations, allowing you to get as creative as you like:
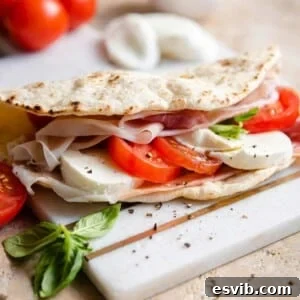
- Classic Prosciutto, Mozzarella, and Tomato: A timeless combination that perfectly balances salty prosciutto, fresh mozzarella, and juicy tomatoes. Add a drizzle of olive oil for extra flavor.
- Mozzarella, Tomato, and Homemade Pesto: Elevate the classic with a generous spread of vibrant homemade basil pesto, adding an aromatic and herbaceous dimension.
- Grilled Zucchini or Eggplant, Mozzarella, and Red Pepper Flakes: For a delicious vegetarian option, layer tender grilled zucchini or eggplant with melted mozzarella and a pinch of red pepper flakes for a subtle kick.
- Tuna Salad with Tomato, Mozzarella, and Arugula: A hearty and fresh option featuring flaked tuna mixed with mayonnaise, fresh tomato slices, mozzarella or smoked scamorza cheese, and a handful of peppery arugula (rocket).
- Mortadella and Burrata: Indulge in the rich flavors of thinly sliced mortadella paired with the creamy, luxurious texture of fresh burrata cheese.
- Mortadella and Insalata Russa: A truly Italian classic, combine mortadella with a spoonful of creamy Insalata Russa (Russian Salad), a delightful blend of diced vegetables in mayonnaise.
- Ricotta and Spinach: A simple yet flavorful vegetarian option, perfect for a lighter meal. Season the ricotta with a pinch of nutmeg and salt.
- Nutella and Strawberries: For a sweet treat, spread a generous amount of Nutella and add fresh sliced strawberries. A perfect dessert Piadina!
- Sausage and Stracchino Cheese: A heartier, more robust filling often found in Northern Italy, combining crumbled cooked sausage with soft, tangy stracchino cheese.
- Pancetta and Scamorza: Crispy pancetta paired with smoked scamorza cheese, which melts beautifully and adds a depth of flavor.
Expert Tips and Frequently Asked Questions for Perfect Piadina
Achieving the perfect Piadina is simple with a few key tips and answers to common questions. Here’s everything you need to know to master this Italian flatbread:
Essential Tips for Success:
- Accurate Flour Measurement: If you’re using measuring cups for flour, always spoon the flour into the cup and then level it off with a straight edge. Never scoop directly from the bag, as this can compact the flour, leading to an overly stiff dough and a dry Piadina.
- Baking Powder’s Role: While not strictly mandatory, the baking powder in this recipe helps to lighten the dough, contributing to a softer, more pliable flatbread that puffs up beautifully. I’ve made Piadina many times without it, and they are still delicious, but the baking powder does make a noticeable difference in texture.
- Rolling Technique: When rolling out your dough, ensure your work surface and rolling pin are very lightly dusted with flour. Too much flour can dry out the dough, while too little will cause sticking. Aim for a thin, even thickness for optimal cooking and texture. Avoid excess flour on the flatbreads before placing them in the pan, as it can burn.
- Keeping Piadina Soft: To maintain the Piadina’s delightful softness once cooked, stack them on a plate and immediately cover them with a clean kitchen towel. The towel traps the steam, preventing the flatbreads from drying out. This tip is especially useful if you are making them in advance or cooking multiple batches.
Frequently Asked Questions (FAQs):
For the most traditional results and incredibly tender texture, Italian “00” flour is ideal. However, I have extensively tested this recipe with standard all-purpose flour, and it works wonderfully, producing equally delicious flatbreads. So, feel free to use whichever is more accessible to you.
Absolutely! While letting the Piadina dough rest for at least 30 minutes at room temperature before use is highly recommended, you can prepare the dough up to two days in advance. Simply wrap it tightly in plastic wrap and store it in the refrigerator. When you’re ready to use it, let it come to room temperature for about 15-20 minutes before rolling.
Yes, you can! Raw Piadina dough freezes very well. After kneading, wrap the dough ball tightly in plastic wrap, then an additional layer of aluminum foil. Freeze for up to 1-2 months. When ready to use, thaw it completely in the refrigerator overnight, then bring it to room temperature before rolling and cooking.
Cooked Piadina can be gently reheated in a dry skillet over medium-low heat for about 1-2 minutes per side until warmed through and pliable again. You can also lightly toast it in a toaster oven for a few minutes. Avoid microwaving, as it can make the flatbread chewy.
A large, heavy-bottomed skillet or frying pan is best. Cast iron or a good quality non-stick pan will work perfectly. The key is to have a pan that heats evenly and maintains a consistent temperature to ensure even cooking and beautiful golden spots on your Piadina.
There could be a few reasons. Ensure your dough is rolled thinly and evenly. Your skillet should be hot enough (medium heat) before adding the Piadina. Also, make sure not to open the skillet too often while cooking, as this releases steam. While baking powder helps, some Piadina don’t puff as much as others, and they will still be delicious.
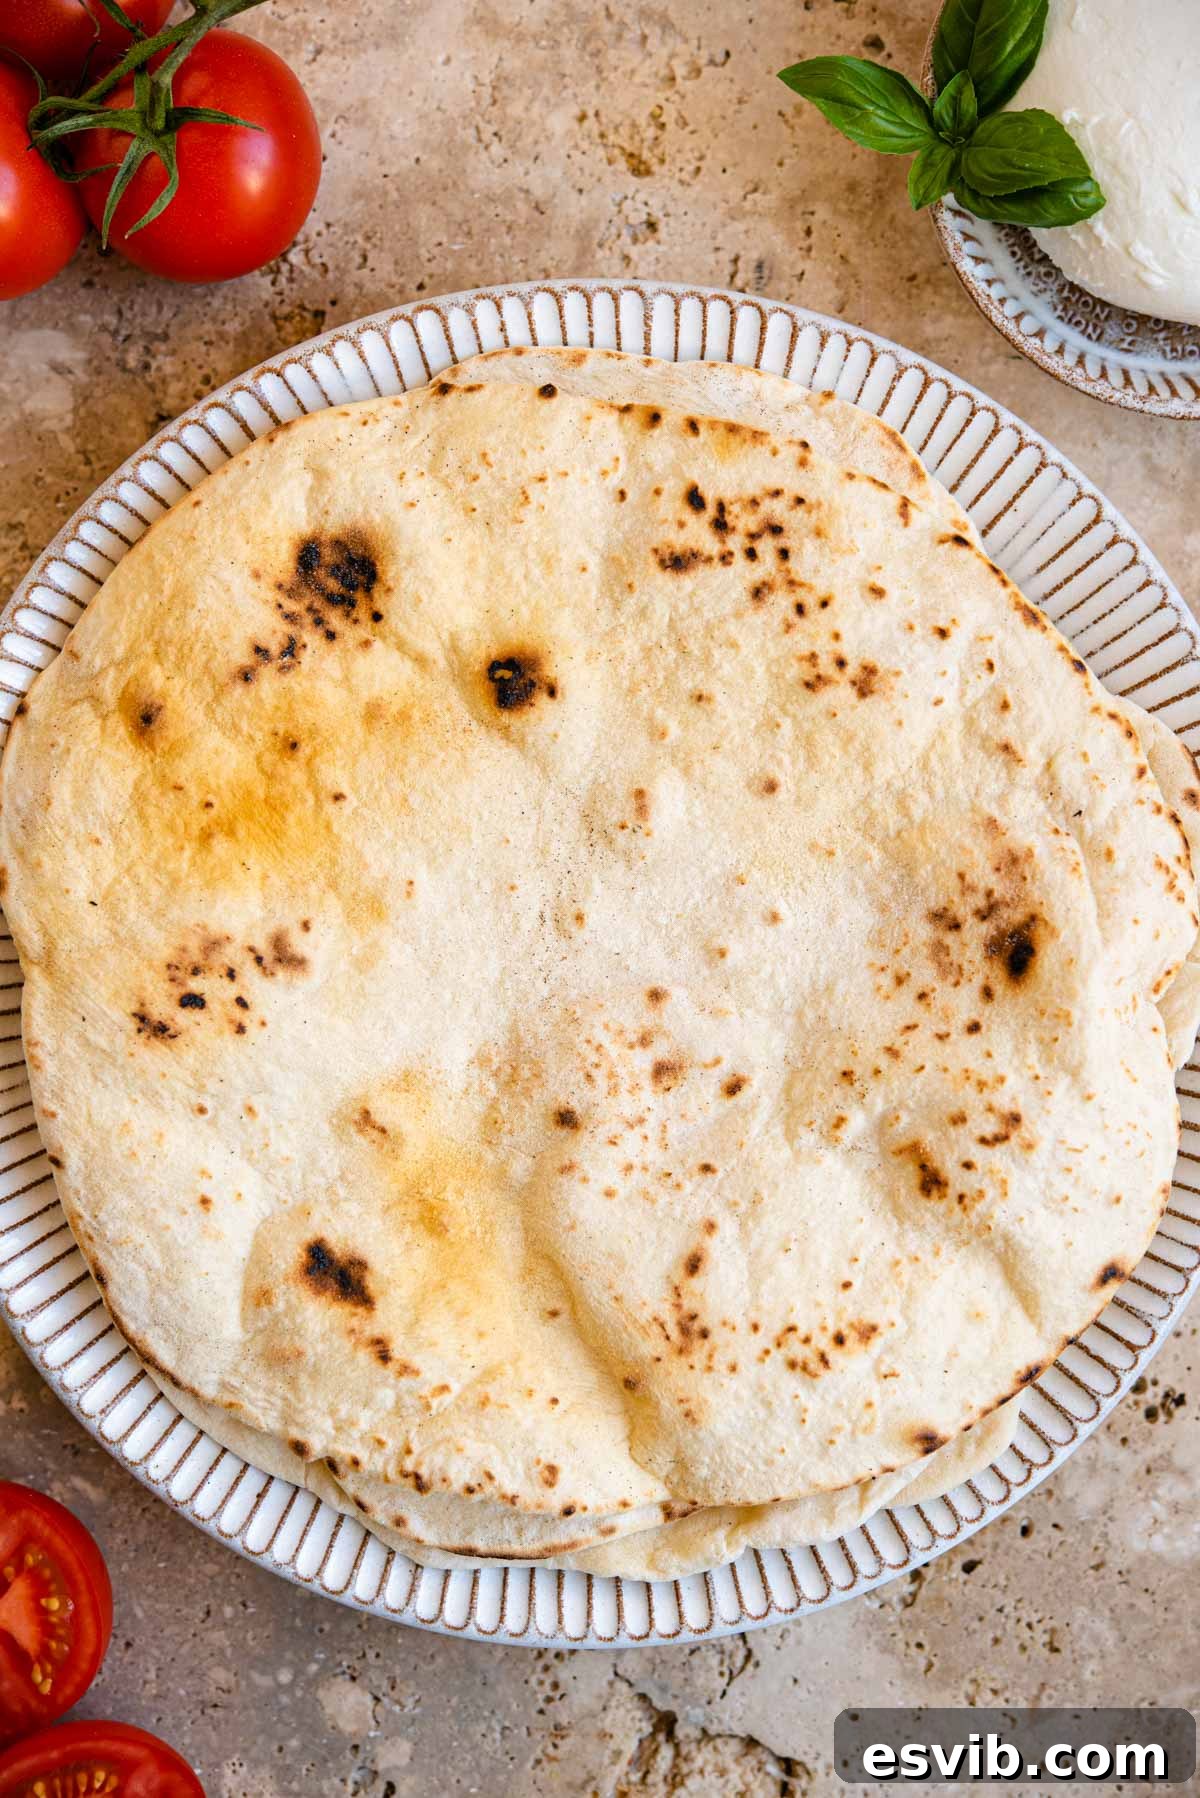
The Culinary Heritage of Piadina
Piadina is not merely a recipe; it is a vital part of Emilia-Romagna’s identity, with roots stretching back centuries. Historical records suggest its origins can be traced to ancient Roman times, evolving from simple unleavened bread made by peasants. For generations, Piadina has been the sustenance of farmers and a symbol of hospitality. Each family traditionally had its own cherished recipe, passed down through generations, often varying slightly in thickness, size, and fat content (some regions favored lard, others olive oil). It was cooked over open fires or on specially crafted clay plates. Today, Piadina remains a beloved street food, a quick lunch, and a treasured family meal, embodying the rustic charm and rich culinary tradition of central Italy. Its simplicity and deliciousness have allowed it to endure and thrive, becoming a culinary ambassador for its region across the globe.
More Italian Lunch and Snacks to Try
If you’ve fallen in love with the ease and flavor of Piadina, there’s a whole world of Italian lunch and snack delights waiting for you to explore. Italy’s culinary landscape is rich with simple, satisfying dishes perfect for any time of day. Here are some more irresistible Italian treats to expand your repertoire:
- Gnocco Fritto (Italian Fried Dough): Light, airy, and wonderfully savory fried dough, often served with cured meats and cheeses.
- Mozzarella in Carrozza – Fried Mozzarella Sandwiches: A comforting classic, featuring mozzarella melted between bread slices, then breaded and fried to golden perfection.
- Eggplant Bruschetta with Mozzarella: A flavorful and vibrant appetizer, combining grilled eggplant, fresh mozzarella, and aromatic seasonings on crisp bread.
- Bruschetta al Pomodoro: The quintessential Italian appetizer, showcasing the freshest tomatoes, basil, and garlic on toasted bread, drizzled with olive oil.
- La Cecina – Tuscan Chickpea Flatbread: A naturally gluten-free, savory flatbread made from chickpea flour, offering a unique texture and earthy flavor.
- Panzerotti: Small savory turnovers, often filled with mozzarella and tomato, then fried until golden and bubbly.
- Tramezzini: Elegant Italian sandwich triangles with various fillings, typically made with soft white bread and no crusts.
We hope you’ve enjoyed making these delightful Piadina Flatbreads! If you tried this recipe or any other recipes on our blog, please be sure to leave a comment below to let us know how you got on. We absolutely love hearing from you and seeing your culinary creations. You can also FOLLOW ME on FACEBOOK, INSTAGRAM, and PINTEREST to discover more delicious food and stay updated on what we’re cooking up next.
Step-By-Step Photos Above
Most of our recipes come with detailed step-by-step photos and helpful tips to ensure perfect results every time!
La Piadina Italian Flatbread
By Emily
35 mins
10 mins
45 mins
4 flatbreads
Ingredients
- 1.5 cups 00 flour or all-purpose flour, (200g)
- ½ cup warm water, (120ml)
- ½ tbsp olive oil
- 1 tsp baking powder
- ¼ tsp salt
Instructions
-
Add the flour, baking powder and salt to a bowl, stir so everything is evenly mixed through.
-
Make a well in the flour and add the water and olive oil. Stir everything together to form a dough.
-
Tip the dough onto a lightly floured surface and knead to form a smooth ball (make sure not to over knead the dough it only takes a minute or so).
-
Wrap the dough in plastic wrap (cling film) and let it rest at room temperature for 30 minutes.
-
Pre-heat a large round skillet or frying pan on the stove. Divide the dough in four and roll each piece into a thin round flatbread shape (don’t worry if they aren’t perfectly round).
-
Heat each flatbread one at a time on the skillet, once it’s puffed up and looks golden turn it over and cook on the other side. It should take around 2 minutes each side.
-
Fill each flatbread with your desired fillings and fold in half.
Notes
- Using cups – If you’re using cups to measure the flour make sure to spoon it into the cups instead of scooping or it’ll be too tightly packed. Lightly level off any excess flour.
- Baking powder – you can leave the baking powder out if you need to I’ve made these many times without it and they are still delicious it just helps lighten the dough slightly.
- Rolling out – make sure you dust your work surface very lightly with flour and that there’s not too much excess on the flatbreads before cooking.
- To keep them soft – place the Piadina flatbreads on a plate and wrap them with a clean kitchen towel to help keep them soft. This is a great tip if you’re making them in advance.
Helpful Info for All Recipes
- I always use extra virgin olive oil in all of my recipes unless stated otherwise
- When I use canned or jarred tomatoes of any kind I always use Cirio or Mutti brands for the best results and flavour.
- All vegetables are medium sized unless stated otherwise
- All recipes are tested and developed using a fan (convection) oven
- Find out more about how nutrition is calculated.
- Check out our must have Italian Pantry Staples.
- You can also find all our Essential Kitchen Tools for Italian Cooking.
Nutrition
Calories: 187kcal
|
Carbohydrates: 36g
|
Protein: 5g
|
Fat: 2g
|
Saturated Fat: 1g
|
Sodium: 270mg
|
Potassium: 50mg
|
Fiber: 1g
|
Sugar: 1g
|
Calcium: 75mg
|
Iron: 2mg
Nutrition information is automatically calculated, so should only be used as an approximation.
Did you try this recipe?
Leave a comment below!