
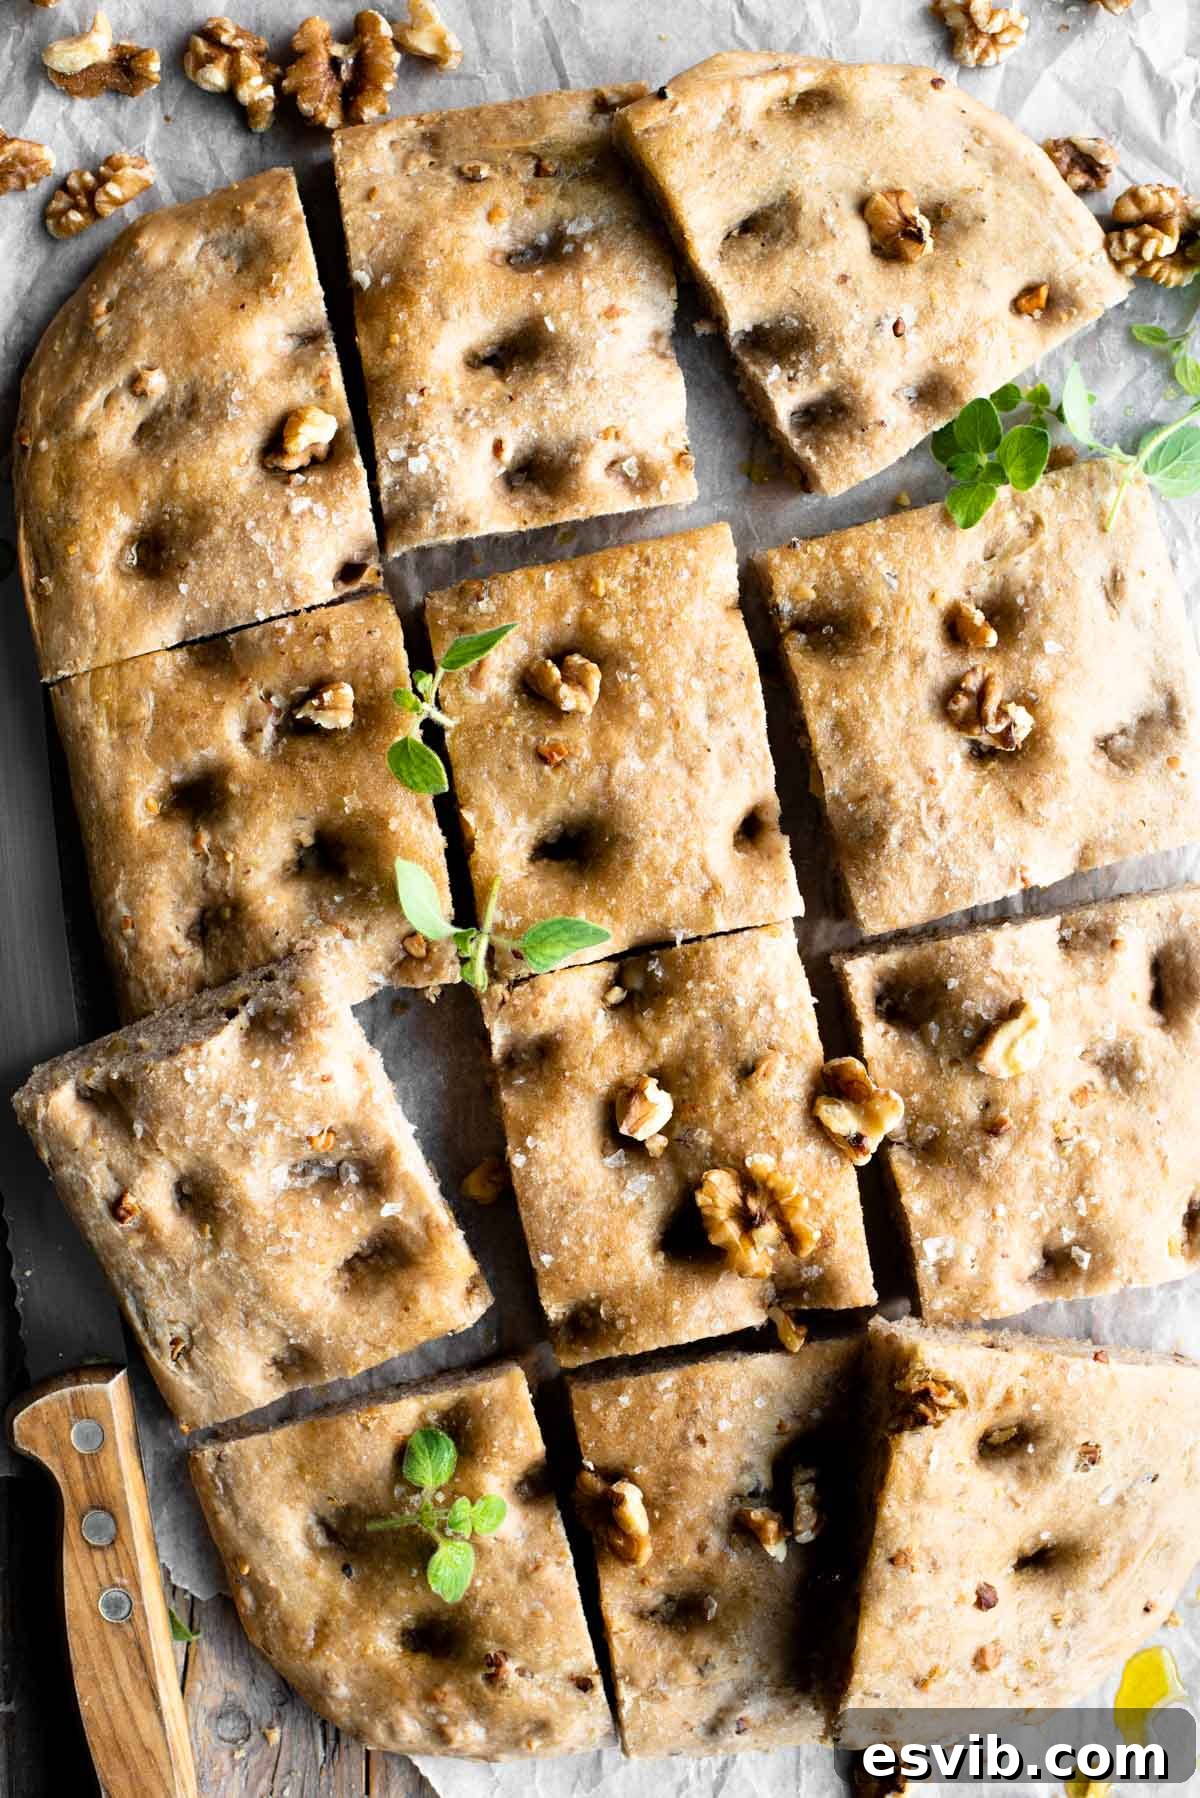
Ultimate Walnut Focaccia: Your Guide to a Nutty Italian Bread Masterpiece
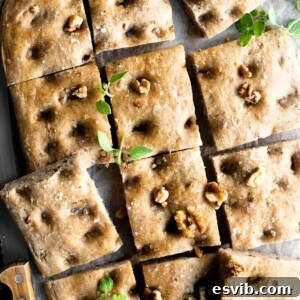
Step into the delightful world of Italian baking with our irresistible Walnut Focaccia recipe. This is more than just bread; it’s a culinary experience that blends the rustic charm of classic focaccia with the unique crunch and subtly sweet, earthy notes of walnuts. Perfectly suited for the crisp air of autumn and the cozy comfort of winter, this versatile bread is destined to become a staple in your kitchen and a favorite among family and friends. Imagine pulling a warm, aromatic loaf from the oven, its golden-brown crust giving way to a soft, airy interior speckled with fragrant walnuts. Whether you use it for soaking up the rich flavors of a hearty ragu, dunking into a steaming bowl of soup, or simply spreading with creamy Gorgonzola cheese for a luxurious treat, this Walnut Focaccia promises an authentic and deeply satisfying taste sensation.
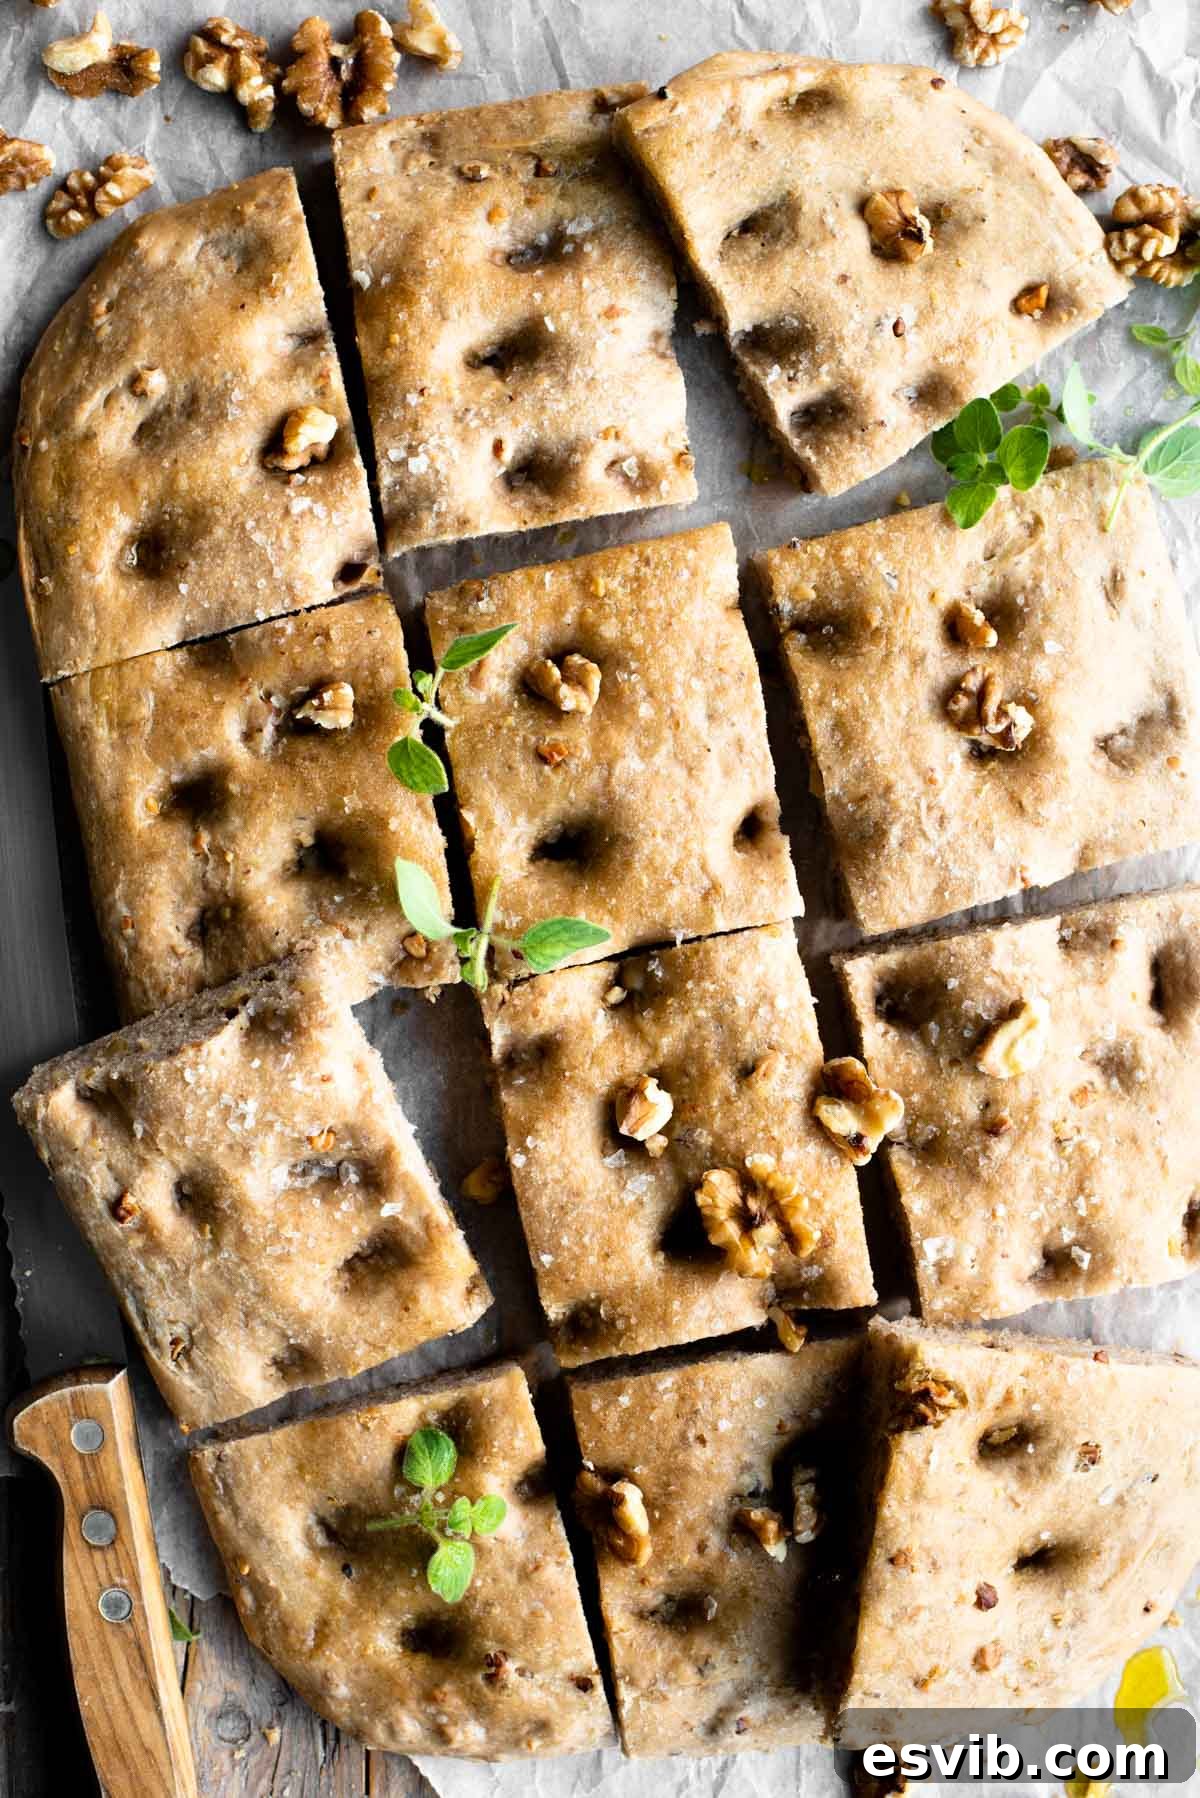
Focaccia bread, a celebrated cornerstone of Italian cuisine, is adored for its remarkable adaptability and the endless possibilities for customization. While many traditional recipes highlight simple, fresh toppings like aromatic rosemary and coarse sea salt, or savory additions such as juicy tomatoes and briny olives, this particular recipe embarks on a delightful journey by integrating finely chopped walnuts directly into the dough. This inspired inclusion imparts a wonderful nutty aroma and a delicate sweetness that perfectly complements the focaccia’s inherent savory profile. The result is a distinctly flavored bread that stands apart, offering a complex symphony of tastes and textures in every mouth-watering bite. It’s surprisingly straightforward to prepare, yet yields impressively gourmet results, making it an excellent choice for bakers of all skill levels, from enthusiastic beginners to seasoned pros.
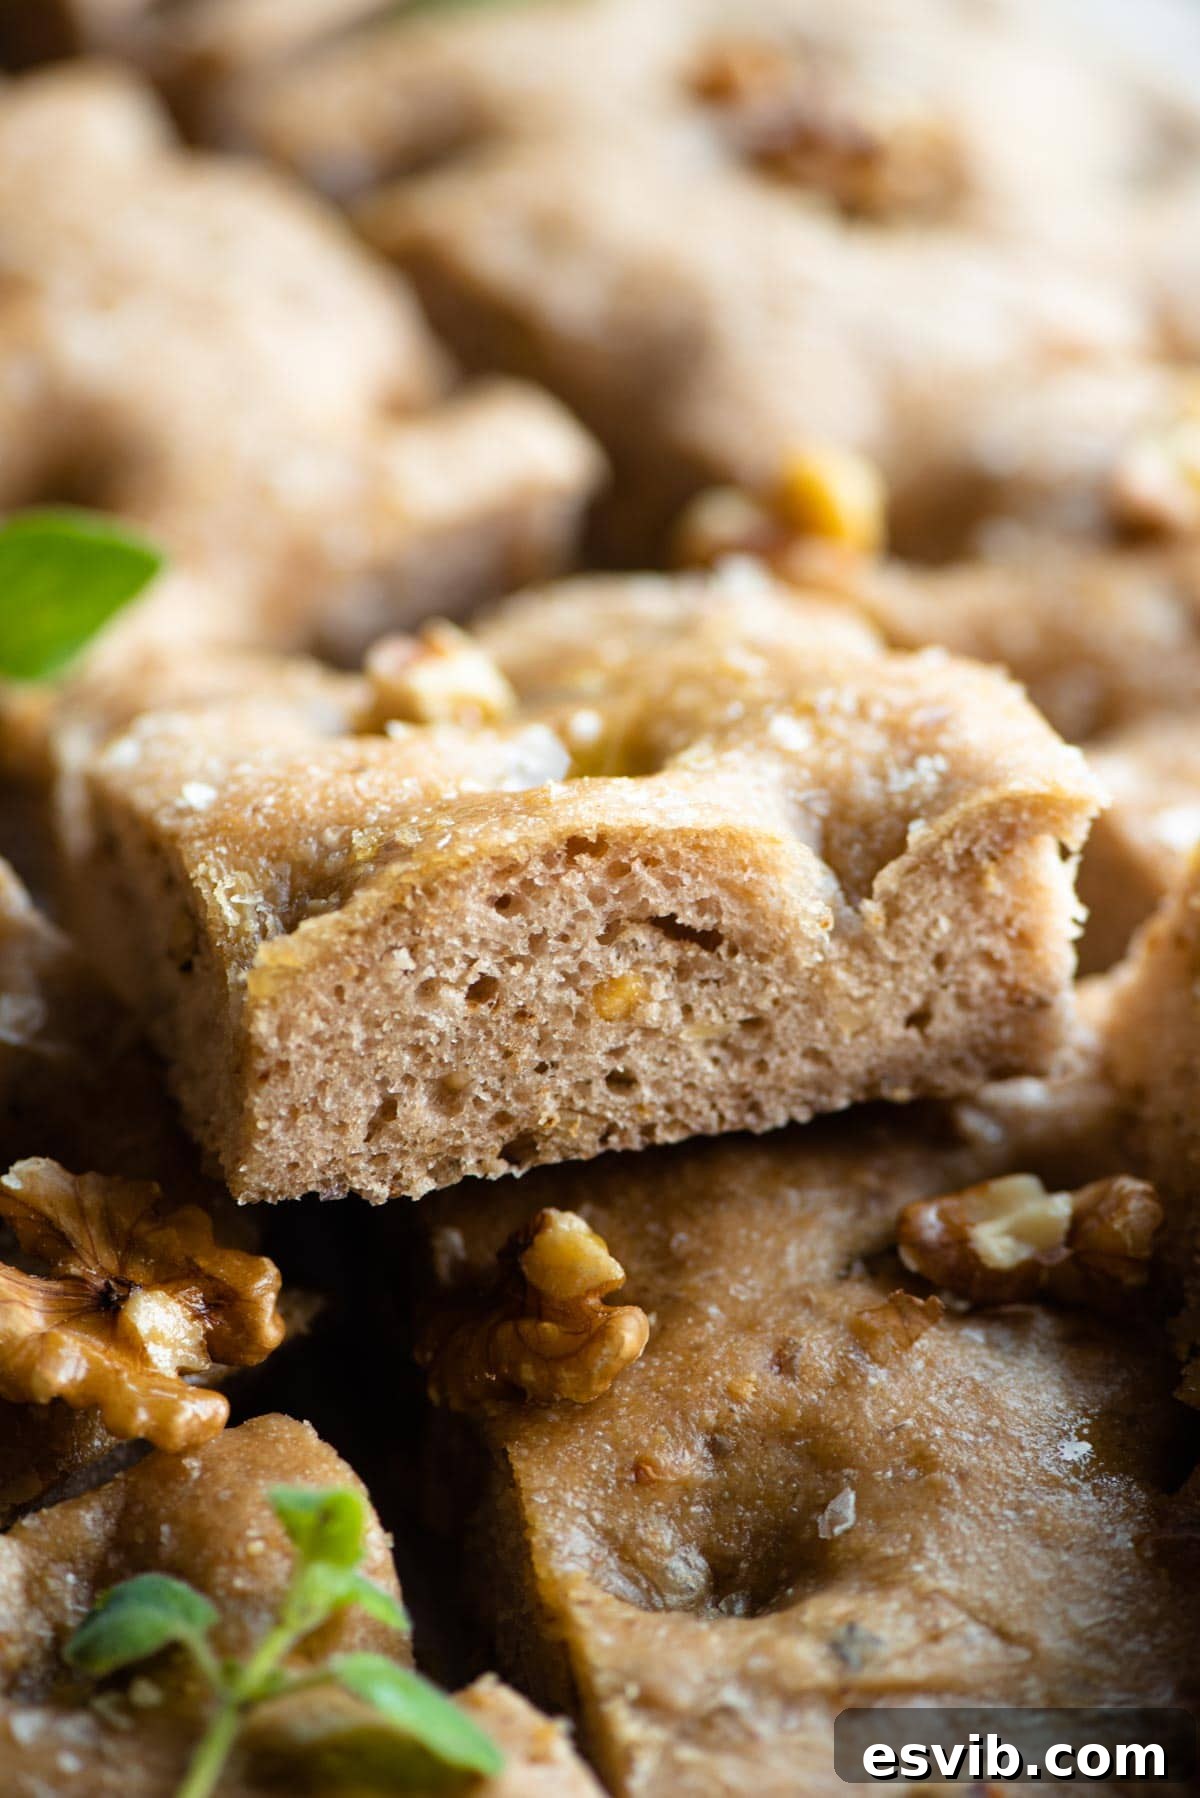
Indulge in this exquisite bread immediately after it emerges from the oven, drizzled with a generous amount of high-quality extra virgin olive oil and a sprinkle of flaky sea salt to accentuate its natural flavors. For those seeking a more decadent experience, transform it into an unforgettable sandwich. Simply slice the focaccia horizontally and layer it with slices of robust Gorgonzola cheese, thinly sliced cured Italian meats like prosciutto or salami, and perhaps some fresh arugula or a touch of fig jam. The harmonious blend of sweet walnuts, pungent cheese, and savory meats creates a flavor profile that is truly sensational and embodies the essence of Italian gastronomy. This bread is not just food; it’s an invitation to savor the moment.
Why Walnut Focaccia? A Perfect Harmony of Flavors and Textures
While the allure of traditional focaccia is undeniable, the thoughtful addition of walnuts elevates this classic Italian bread to an extraordinary level. Walnuts introduce a unique combination of texture and flavor that truly distinguishes this focaccia from its simpler counterparts. Their inherent earthiness, coupled with a subtle bitterness and natural sweetness, deepens and harmonizes beautifully during the baking process. When finely chopped and distributed throughout the dough, walnuts create tantalizing pockets of rich flavor and contribute a satisfying, tender crunch that provides a wonderful contrast to the soft, pillowy, and airy crumb of the focaccia.
Beyond their remarkable taste and texture, walnuts are also a nutritional powerhouse. They are abundantly rich in heart-healthy omega-3 fatty acids, powerful antioxidants, and essential minerals, making this focaccia a wholesome and nutritious choice. The gentle sweetness imparted by the walnuts makes this bread incredibly versatile; it can effortlessly complement both savory and slightly sweet dishes. This dual nature makes it an ideal accompaniment for a diverse array of meals, from robust stews and hearty pasta sauces to light, refreshing salads and sophisticated cheese boards. It holds a special place during the cooler months, as its warm, nutty flavor evokes a profound sense of comfort and culinary satisfaction, turning any meal into a more inviting and memorable occasion.
Essential Ingredients for Your Homemade Walnut Focaccia
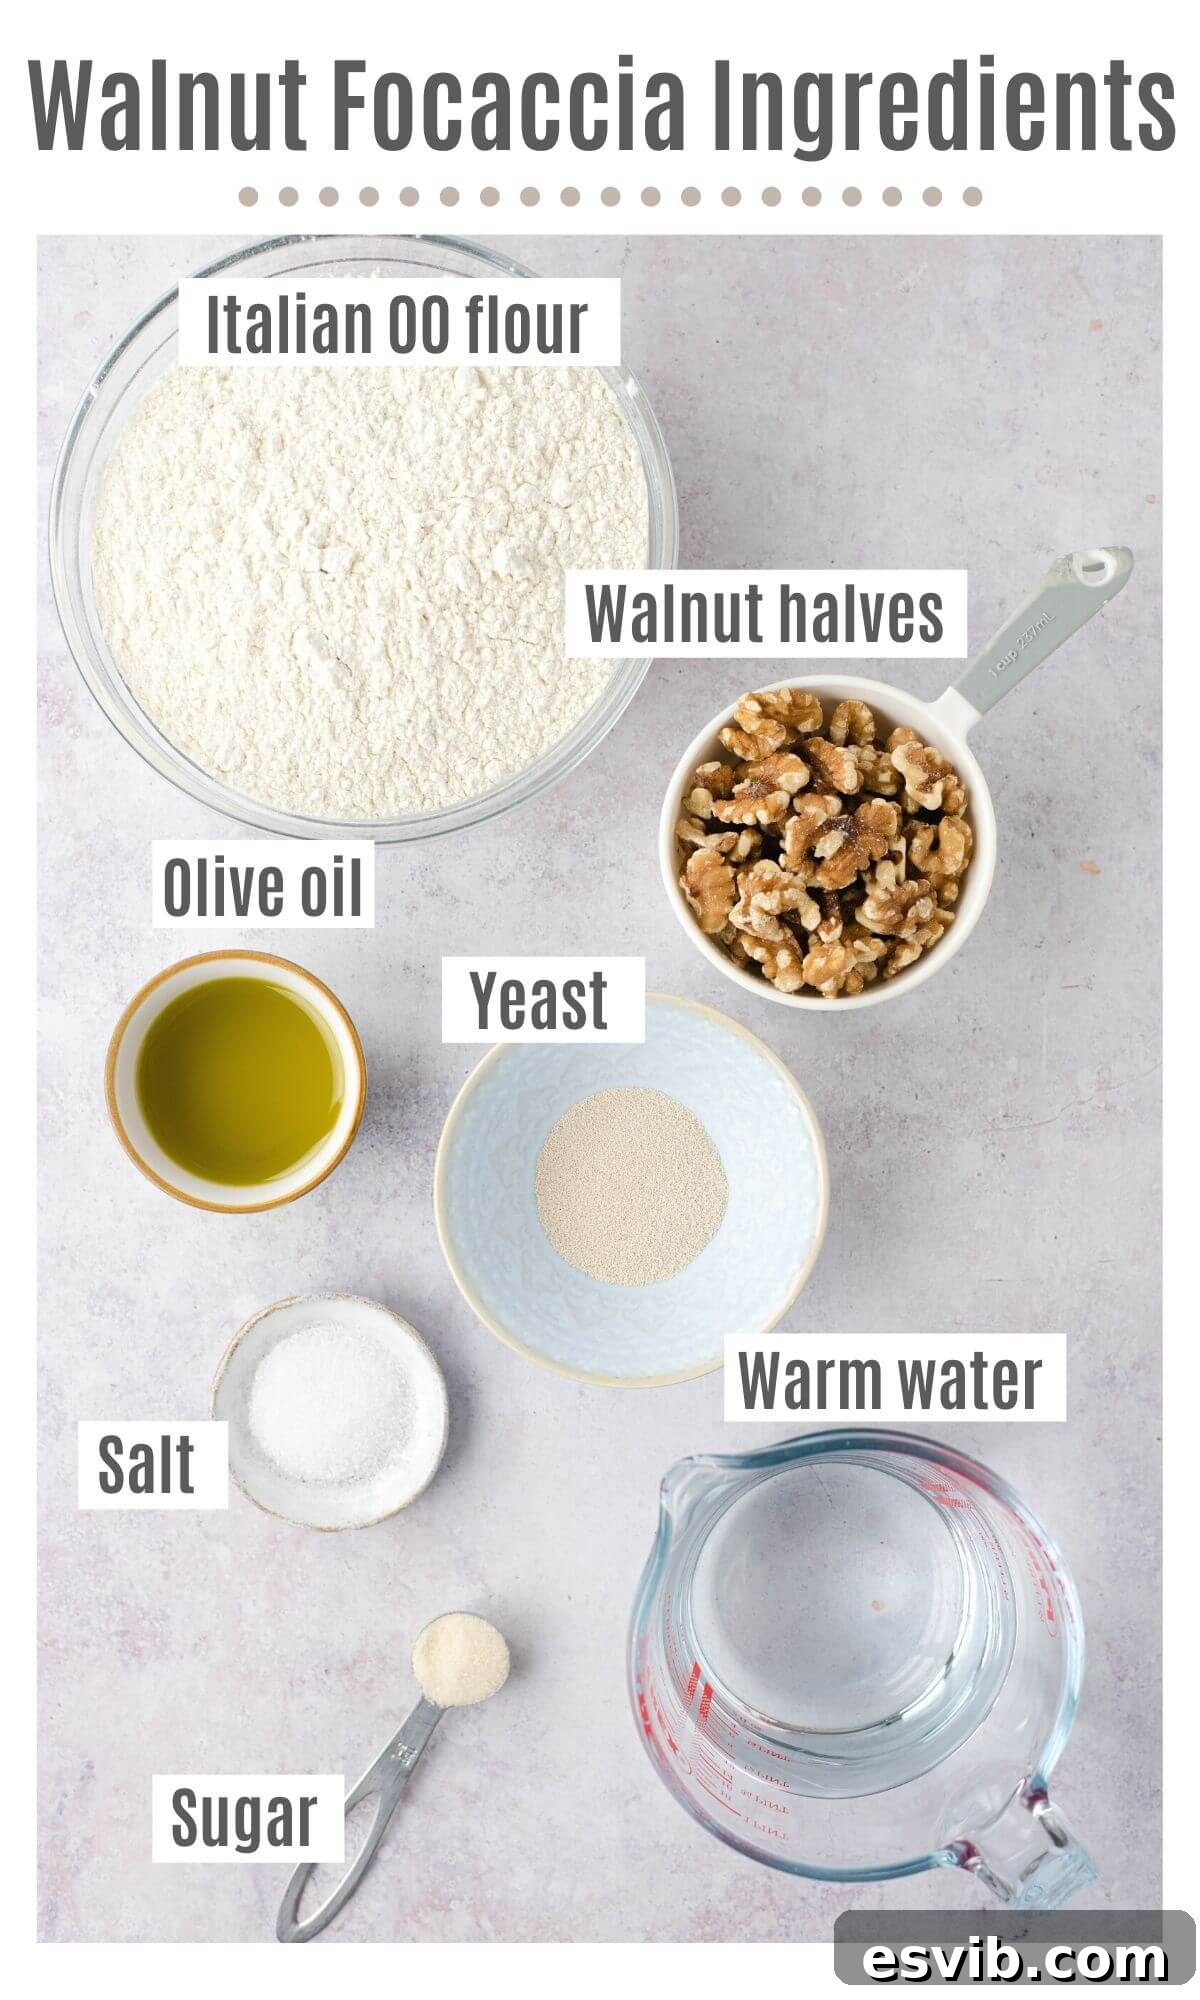
The journey to crafting the perfect Walnut Focaccia begins with the careful selection of high-quality ingredients. Below, you will find a comprehensive list of everything required for this recipe, accompanied by important notes designed to ensure the finest possible outcome for your homemade Italian bread. Paying close attention to these ingredient details is paramount, as they play a significant role in determining the final texture, flavor, and overall success of your focaccia.
Detailed Notes on Ingredients
- Italian 00 Flour: This particular type of flour is distinguished by its incredibly fine milling, which results in a smooth, silky texture. It is the gold standard for authentic Italian baked goods such as focaccia, pizza dough, and fresh pasta. Utilizing 00 flour will impart an exceptionally light, airy crumb and a wonderfully crisp crust to your focaccia, elevating it to true Italian bakery quality. If you are passionate about recreating authentic Italian dishes, it is an invaluable ingredient to keep in your pantry. Should 00 flour be unavailable, you may substitute it with a good quality all-purpose flour. Be aware that this might result in a slightly denser texture, but your focaccia will still be undeniably delicious.
- Walnuts: These are the undeniable stars of our recipe! For optimal flavor and texture, it is highly recommended to start with whole walnut halves and finely chop them yourself. This method grants you precise control over the size of the pieces, allowing for a delightful mix of small fragments that permeate the dough with flavor and slightly larger chunks that provide appealing textural contrast and visual interest in the finished bread. Whenever possible, avoid pre-chopped walnuts, as they can sometimes be too fine, lacking freshness, or even harbor a slightly stale taste.
- Yeast: Our recipe calls for fast-action yeast, which is also widely known as instant yeast. This type of yeast is remarkably convenient because it can be incorporated directly into your dry ingredients without the need for prior activation in warm water. This streamlines the baking process and saves valuable time. However, it is always a good practice to thoroughly read the instructions on your specific yeast packet, as certain brands or types of yeast (like active dry yeast) may still necessitate activation (proofing) in warm water with a pinch of sugar before being combined with the flour. Ensuring your yeast is fresh and active is absolutely critical for achieving a successful and robust rise.
- Warm Water: The temperature of the water used in this recipe is far more critical than you might initially assume! Lukewarm water, ideally between 105-115°F (40-46°C), is essential for gently activating the yeast without inadvertently killing it. Water that is too cold will significantly slow down yeast activity, leading to a much longer and less vigorous proofing period. Conversely, water that is excessively hot will destroy the delicate yeast organisms, completely preventing your dough from rising. Aim for a temperature that feels comfortably warm to the touch, similar to a baby’s bath, never hot.
- Extra Virgin Olive Oil: As is customary with many authentic Italian recipes, the quality of your olive oil genuinely makes a profound difference in the final product. Opt for a good quality extra virgin olive oil, not only for incorporating into the dough but also for generously drizzling over the focaccia before it bakes and perhaps even after. Its characteristic fruity, slightly peppery notes will beautifully complement the earthy, nutty flavors of the walnuts and significantly enhance the overall Mediterranean profile and richness of the bread.
- Salt and Sugar: Fine salt, preferably sea salt, is incorporated into the dough to enhance its overall flavor and to help regulate the activity of the yeast. A small amount of sugar serves as readily available food for the yeast, encouraging its activation and promoting a robust, even rise. For the final flourish, flaky sea salt is highly recommended as a topping; it adds a delightful textural crunch and a burst of savory flavor that elevates the finished focaccia.
Step-by-Step Guide to Baking Your Perfect Walnut Focaccia
Embark on the journey of creating a truly beautiful and irresistibly delicious Walnut Focaccia by following these comprehensive, detailed instructions. The entire process has been carefully broken down into easily manageable steps, complemented by visual cues to guide you at every turn. Remember, baking bread is a therapeutic art form; embrace each stage and enjoy the rewarding experience of bringing this Italian masterpiece to life!
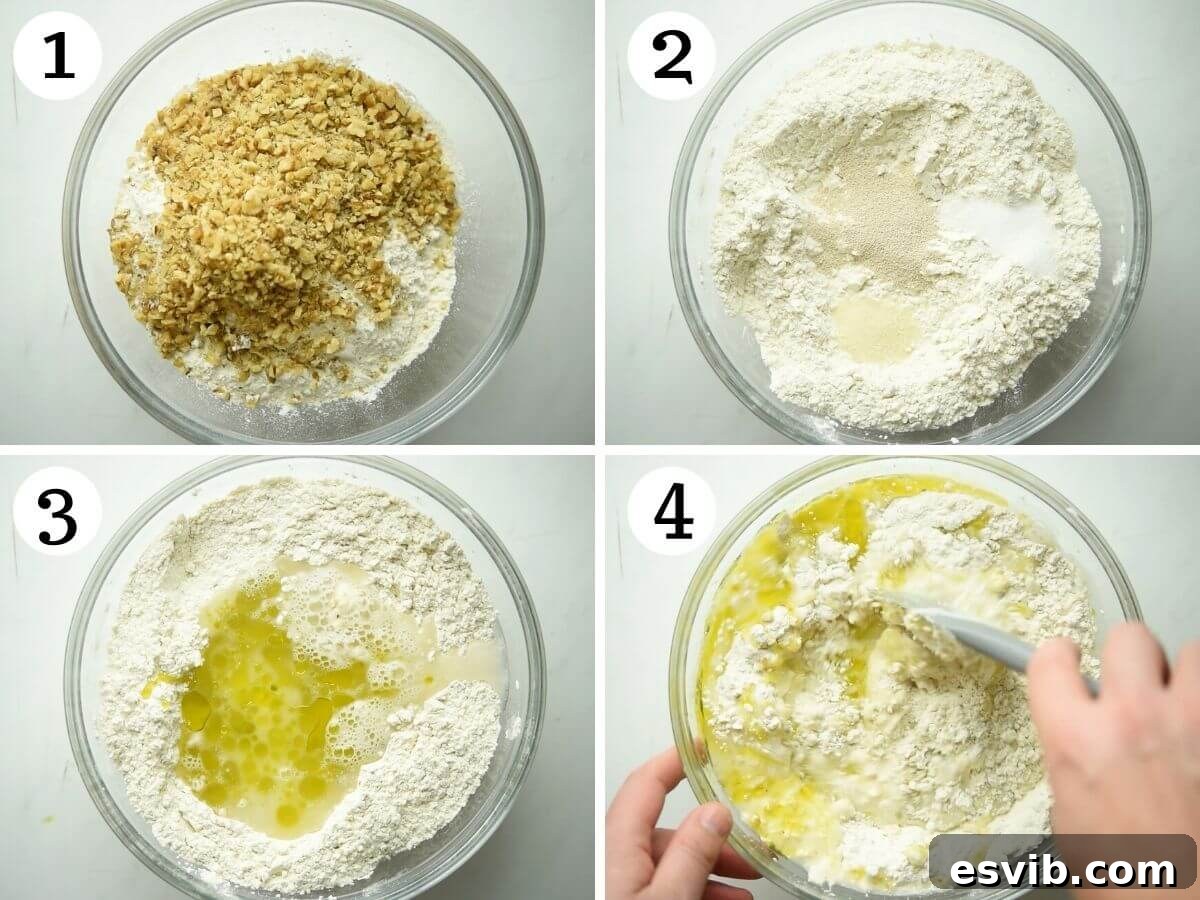
- Prepare Your Dry Ingredients: Start by taking your walnut halves and finely chopping them. The goal is to have a mix of small, fine pieces and slightly larger chunks to ensure a delightful textural element throughout your focaccia. Transfer all the chopped walnuts to a large mixing bowl. Add the Italian 00 flour (or your chosen all-purpose flour) to the bowl with the walnuts. Use a spoon, whisk, or your clean hands to thoroughly mix these ingredients until the walnuts are evenly distributed among the flour particles (photo 1).
- Incorporate Yeast, Sugar, and Salt: Now, carefully add the fast-action yeast, granulated sugar, and fine salt to the bowl. It’s a good practice to initially place the yeast and salt on opposite sides of the bowl before mixing, as direct, prolonged contact between them can sometimes hinder yeast activity. Give the entire mixture another gentle but thorough stir to evenly distribute these crucial ingredients among the flour and walnuts (photo 2).
- Combine Wet Ingredients: Pour the warm water and the four tablespoons of extra virgin olive oil directly into the bowl containing your prepared dry ingredients. Using a sturdy spoon, a spatula, or your clean hands, begin to mix everything together. Continue mixing until all the ingredients are fully combined and a rough, shaggy dough begins to form. At this stage, the dough will not be smooth or uniform, but it’s important that all the flour is hydrated and no dry pockets remain (photos 3 & 4).
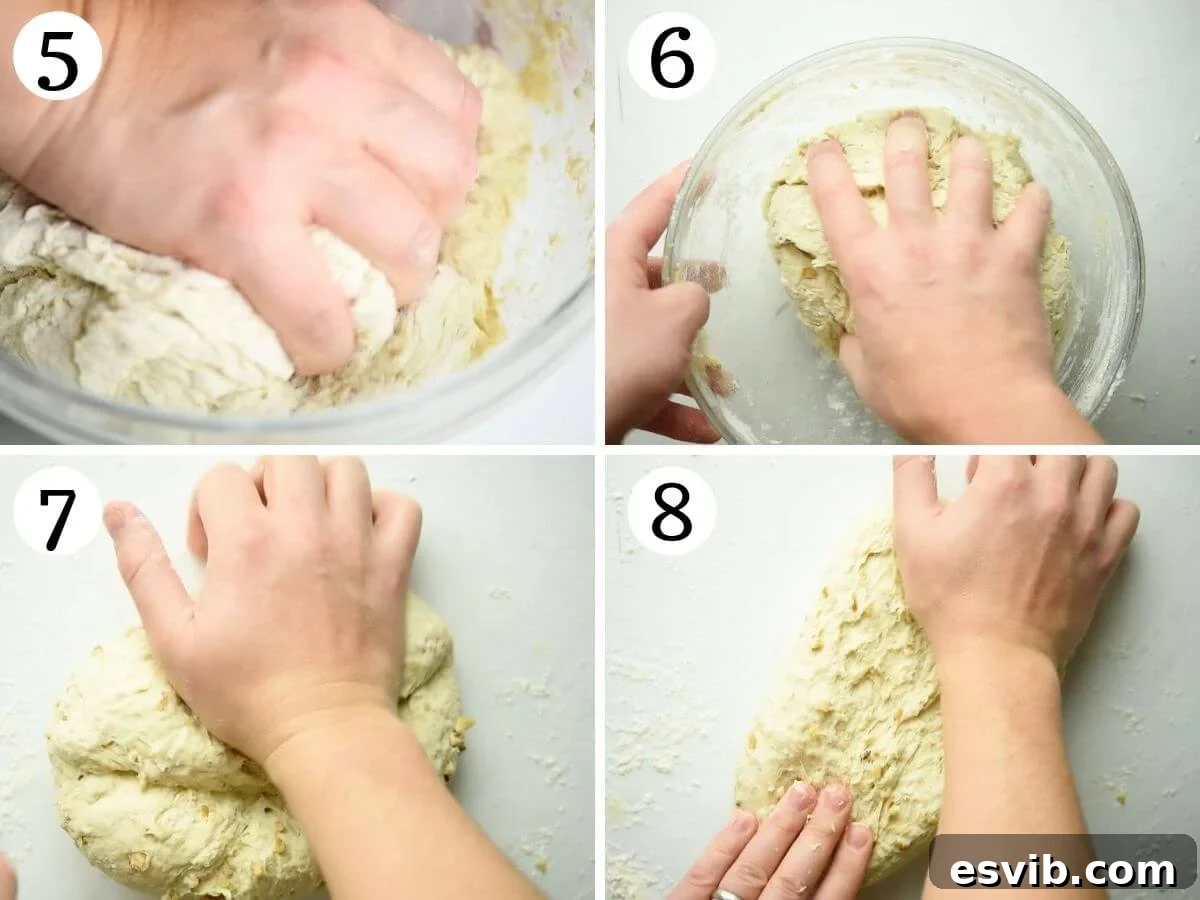
- The Essential Kneading Process: Lightly flour your clean work surface and turn the shaggy dough out onto it. Begin kneading the dough with energy and enthusiasm for approximately 10 minutes. This vital process is where gluten is developed, which is absolutely essential for achieving the focaccia’s characteristic light, airy, chewy texture, and its signature open crumb. As you knead, you will observe the dough transforming from sticky and somewhat unruly into a smooth, elastic, and wonderfully pliable mass. It should feel resilient and spring back slowly when gently poked. If you opt for a stand mixer, attach the dough hook and knead on medium speed for about 7-8 minutes until the desired consistency is reached (photos 5-9).
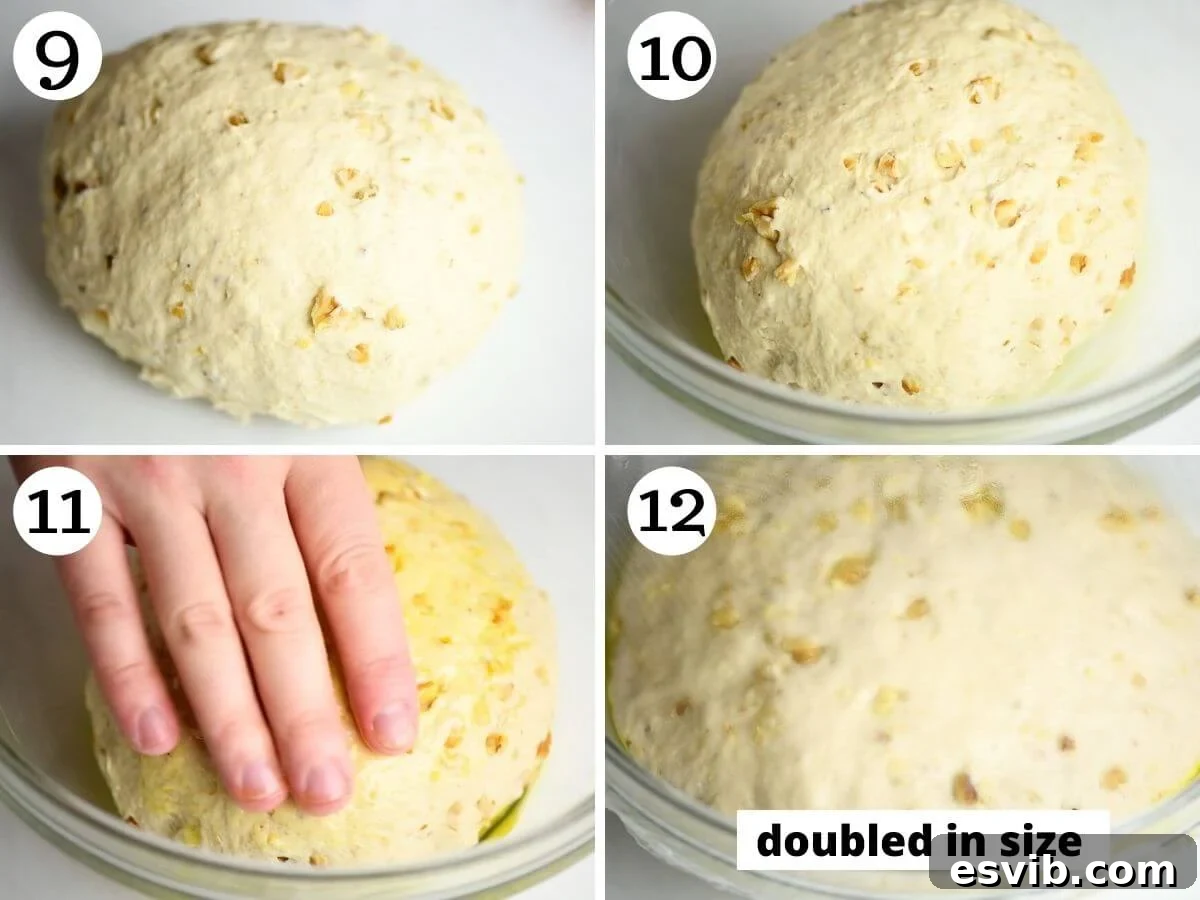
- First Proof (Bulk Fermentation): Lightly but generously grease a clean, large mixing bowl with a swirl of olive oil. Transfer your kneaded dough to this bowl, turning it over once to ensure all sides are lightly coated with the oil. This step is crucial for preventing the dough from sticking and drying out during the rise. Cover the bowl tightly with plastic wrap (cling film) or a clean, damp kitchen towel. Place the covered bowl in a warm (but not hot), draft-free area of your kitchen. Allow the dough to proof until it has visibly doubled in size. This initial rise, known as bulk fermentation, typically takes between 1.5 to 2 hours, though the exact time can vary depending on the ambient temperature of your environment (photos 10-12).
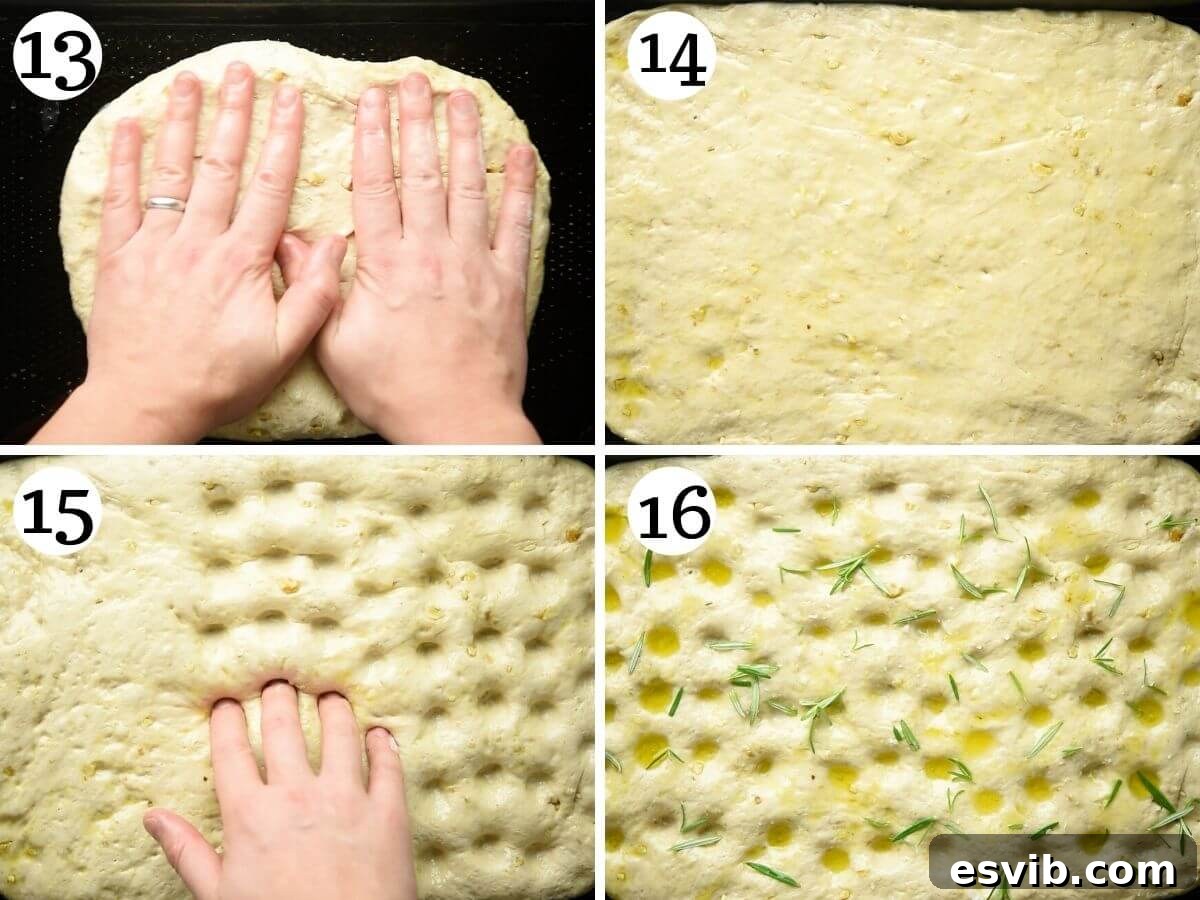
- Shape Your Focaccia: Once your dough has beautifully doubled in size and looks wonderfully puffy, lightly grease a large baking tray. An approximate size of 10×15 inches (25×38 cm) or similar is ideal. Gently transfer the risen dough to the prepared tray. Using your fingertips, delicately press and stretch the dough to evenly fit the entire surface of the tray. Work carefully to avoid deflating all the precious air that has developed during the first proofing stage (photo 13 & 14).
- Second Proof (Final Proof): After shaping, lightly drizzle a small amount of extra virgin olive oil over the surface of the dough. Cover the tray loosely again with plastic wrap or a damp kitchen towel. Return the dough to a warm spot for a second proofing stage, allowing it to double in size once more. This final rise usually takes approximately 1 hour. During this period, the dough will become incredibly puffy and develop its characteristic airy texture, ready for baking.
- Pre-heat Oven & Prepare for Baking: While your dough is undergoing its second and final proof, pre-heat your oven to a high temperature of 450°F (230°C). This high heat is absolutely essential for achieving that gorgeous golden, crisp crust and maintaining a soft, moist interior, hallmarks of a perfect focaccia.
- Dimple and Adorn: Once the dough has completed its second rise and has become wonderfully puffy and inviting, carefully remove the plastic wrap. Using your fingertips, gently but firmly press deep dimples all over the entire surface of the dough. These dimples are crucial; they create the signature focaccia texture, allowing olive oil and any chosen toppings to nestle beautifully. Drizzle generously with more extra virgin olive oil, sprinkle liberally with flaky sea salt, and if desired, scatter fresh rosemary or oregano leaves over the top for an aromatic flourish (photos 15 & 16).
- Bake to Golden Perfection: Carefully place the baking tray into your pre-heated oven. Bake for approximately 15-18 minutes, or until the focaccia develops a beautiful golden-brown hue on top and is cooked through. The crust should be wonderfully crisp, while the interior remains soft, tender, and incredibly fragrant, filling your kitchen with an irresistible aroma.
- Cool and Serve: Once baked to perfection, remove the focaccia from the oven. For the best texture and to prevent it from becoming gummy when sliced, allow it to cool slightly on a wire rack before cutting and serving. While it’s utterly delicious warm, the brief cooling period is important. Enjoy this homemade Walnut Focaccia on the same day for optimal freshness, flavor, and texture.
Expert Tips & Frequently Asked Questions for Perfect Walnut Focaccia
Achieving bakery-quality focaccia in your own kitchen is a rewarding experience that’s easier than you might think, especially with a few insightful pointers. Here are some essential tips and clear answers to frequently asked questions to ensure your Walnut Focaccia turns out perfectly baked, fragrant, and utterly delicious every single time.
- Mastering Yeast Temperature: As previously emphasized in our ingredient notes, the temperature of your water is paramount. Utilize warm water (ideally between 105-115°F or 40-46°C) to gently activate your yeast. Water that is too cold will cause the yeast to be sluggish, leading to a significantly prolonged and weak rise; conversely, water that is too hot will destroy the yeast, resulting in a dense, flat focaccia. When in doubt, a kitchen thermometer is your best friend for precision.
- Embrace Patient Proofing: Patience truly is a virtue when working with yeast dough. It is crucial to allow the dough to fully complete both its initial bulk fermentation and its subsequent final proof. The dough should genuinely double in size, not just expand slightly. A slow, steady rise, preferably at a comfortable room temperature (or a slightly warmer, draft-free spot), will develop superior flavor and a more desirable texture in the finished bread.
- The Importance of Quality Olive Oil: Investing in a high-quality extra virgin olive oil is not just a recommendation; it’s a key factor. Olive oil is not merely a cooking fat in focaccia; it’s a fundamental flavor component. Drizzle it generously both before and after baking to achieve an authentic Italian taste, a rich aroma, and a beautifully crisp crust.
- Creative Toppings and Flavor Variations: While the walnuts provide a fantastic and flavorful foundation, feel encouraged to experiment with additional toppings to personalize your focaccia. Classic fresh herbs like fragrant rosemary or pungent oregano pair exquisitely with walnuts. For an extra layer of flavor, consider adding a light sprinkle of freshly grated Parmesan cheese, finely diced sun-dried tomatoes, or thinly sliced red onion before baking.
- Precision in Measurement: For consistently excellent baking results, particularly when dealing with flour, a reliable kitchen scale is indispensable. Measuring flour by weight (grams) offers far greater accuracy than measuring by volume (cups), as the amount of flour in a cup can vary significantly depending on how tightly it’s packed. If you must use cups, remember the technique: spoon the flour into the measuring cup and then level it off with a straight edge to prevent overpacking, which can lead to a dry, dense dough.
- The Art of Kneading: Do not underestimate the importance of adequate kneading time. Proper kneading vigorously develops the gluten network within the dough, which is precisely what gives focaccia its signature chewy texture and desirable airy pockets. If kneading by hand feels too strenuous or time-consuming, a stand mixer fitted with a dough hook attachment can perform the task efficiently, delivering excellent results with less effort.
- Deep Dimples for Delight: When creating the characteristic dimples on the focaccia’s surface, don’t be timid! Press your fingertips deeply into the dough. This technique is vital for creating those wonderful valleys and peaks that not only trap and hold the olive oil and toppings but also contribute significantly to the focaccia’s irregular, rustic, and incredibly appealing appearance.
Frequently Asked Questions
Focaccia is undoubtedly at its best when served on the day it’s baked, offering peak freshness, softness, and aroma. As time passes, it will naturally begin to dry out. However, when stored correctly, it can remain delicious for up to 3 days. To store, wrap it tightly in plastic wrap (cling film) and then in aluminum foil to minimize exposure to air. You can gently refresh leftover slices by warming them in a pre-heated oven (around 350°F/175°C) for a few minutes.
Absolutely! Using a stand mixer is a fantastic option if you prefer not to knead the dough by hand. Simply fit your stand mixer with a dough hook attachment. Knead the dough on medium speed for approximately 7-8 minutes, or until the dough achieves a smooth, elastic consistency and pulls cleanly away from the sides of the bowl. This method can save you significant time and effort while consistently producing excellent results.
Yes, focaccia freezes remarkably well! Once your focaccia has completely cooled, you can either wrap the entire loaf or individual slices very tightly first in plastic wrap, then in aluminum foil, and finally place it into a freezer-safe bag. It can be stored in the freezer for up to 2-3 months without compromising quality. To reheat, thaw the frozen focaccia overnight in the refrigerator, then warm it in a pre-heated oven (350°F/175°C) for 10-15 minutes until it’s heated through and the crust is delightfully crispy again.
Several factors contribute to that irresistible crispy crust. Firstly, baking the focaccia in a very hot oven (450°F/230°C) is crucial. Secondly, generously drizzling extra virgin olive oil over the top of the dough just before baking helps create that coveted golden-brown, crisp exterior. Thirdly, ensure the focaccia bakes until it’s deeply golden brown, not just lightly colored. A slightly longer bake time at the correct high temperature will reliably yield a more satisfying and pronounced crunch.
Irresistible Serving Suggestions for Your Walnut Focaccia
The true beauty of Walnut Focaccia lies not only in its profoundly delicious taste but also in its incredible versatility. Here are some inspiring ideas to enjoy this savory and subtly sweet bread, transforming it into a highlight of any meal:
- The Classic Italian Experience: Serve your focaccia warm, accompanied by a generous pour of your finest extra virgin olive oil and a delicate sprinkle of flaky sea salt. This simple, elegant presentation allows the nuanced flavors of the bread and the earthy walnuts to truly shine through.
- The Ultimate Soup & Stew Dipper: Its uniquely sturdy yet wonderfully soft crumb makes this focaccia absolutely perfect for dipping into hearty, comforting soups such as minestrone, a rich lentil soup, or a creamy tomato bisque. It’s also exceptionally well-suited for soaking up every last drop of flavorful, slow-cooked stews and rich pasta sauces, like a tender beef ragu or a rustic chicken cacciatore.
- A Star on Any Cheese Board: Walnut focaccia is an outstanding and sophisticated addition to any cheese board or antipasto platter. Its distinctive nutty flavor pairs magnificently with a diverse array of cheeses, particularly strong blue cheeses such as Gorgonzola, aged cheddars, or creamy, tangy goat cheese. For an elevated experience, consider adding a drizzle of local honey or a spoonful of sweet fig jam.
- Gourmet Sandwich Base: Transform your everyday sandwich into a gourmet delight! Slice the focaccia horizontally and fill it with classic Italian cured meats (think paper-thin prosciutto, spicy salami, or delicate mortadella), fresh mozzarella cheese, vibrant roasted red peppers, crisp arugula, and a finishing drizzle of balsamic glaze.
- Elegant Bruschetta Foundation: Lightly toast slices of focaccia and use them as a sturdy, flavorful base for a variety of gourmet bruschetta toppings. Imagine caramelized onions with crumbled goat cheese, sautéed wild mushrooms with a hint of garlic, or the timeless simplicity of fresh diced tomatoes and fragrant basil.
- A Brunch or Breakfast Delight: Serve slices of warm focaccia alongside fluffy scrambled eggs, crispy bacon, and savory roasted vegetables for a truly delightful and substantial brunch. Its unique flavor profile adds a sophisticated touch to your morning meal.
- Perfect Side Dish: A simple, yet profoundly satisfying side dish that complements grilled chicken, baked fish, or virtually any Italian-inspired main course, adding depth and authenticity to your meal.
Explore More Authentic Italian Breads and Snacks
If the joy of baking this Walnut Focaccia has ignited your passion for Italian cuisine, you’ll be thrilled to explore our other traditional Italian baked goods. Each recipe is designed to bring the true taste and spirit of Italy directly to your kitchen. Expand your baking repertoire with these delightful creations:
- Rosemary Focaccia Bread
- Focaccia Pizza
- La Piadina: Italian Flatbread
- Grissini – Italian Breadsticks
- Taralli Pugliesi (Italian Snack)
- Easy Pumpkin Bread Rolls
We absolutely love connecting with our community of food enthusiasts! If you’ve had the pleasure of trying this Walnut Focaccia recipe or any other delightful recipe from our extensive collection, please don’t hesitate to rate the recipe and generously share your experience, tips, and personal stories in the comments section below. Your invaluable feedback and heartwarming stories genuinely inspire us to create even more culinary wonders! You can also FOLLOW US on FACEBOOK, INSTAGRAM, and PINTEREST for a daily dose of culinary inspiration, mouth-watering photos, and behind-the-scenes glimpses. Alternatively, sign up for our exclusive NEWSLETTER to receive exciting new recipes and cooking tips delivered directly to your inbox every single week, ensuring you never miss out on our latest delicious creations.
Step By Step Photos Above
Most of our recipes come with step by step photos, helpful tips and tricks to make it perfectly first time and even video!
Walnut Focaccia Recipe
By Emily
Print Recipe
Ingredients
- 4 cups Italian 00 Flour, (500g) see note 1
- 1 1/3 cups + 1 tablespoon warm water, (320ml)
- 1 cup walnut halves, (100g)
- 4 tablespoons olive oil, plus extra for drizzling
- 1 teaspoon sugar
- 1 teaspoon fine salt
- 1 pinch sea salt flakes, for topping
- Fresh rosemary or oregano, for topping (optional)
Instructions
- Finely chop the walnuts so you have fine and slightly bigger pieces. Add them to a large mixing bowl with the flour and stir until combined.
- Next, add the yeast, salt and sugar at separate sides of the bowl. Add the warm water and 4 tablespoons of olive oil and mix to form a rough dough.
- Tip the dough out onto a lightly floured work surface and knead for 10 minutes until it’s smooth and elastic.
- Lightly grease a clean, large mixing bowl with olive oil and add the dough to the bowl rubbing a little oil on top of the dough too. Cover with plastic wrap (cling film) or a damp kitchen towel and leave in a warm but not hot place until doubled in size.
- Once doubled in size, lightly grease a large baking tray (10×15 inch or similar) with oil and transfer the dough, squashing it down to fit the tray using your hands. Cover with plastic wrap again and leave it until it has doubled in size (about 1 hour).
- Pre-heat the oven to 450F/ 230C.
- Remove the plastic wrap and make dimples all over the focaccia using your fingertips. Sprinkled with a little salt, add rosemary or oregano at this point if desired and drizzle with a few tablespoons of olive oil.
- Bake in the oven for 15-18 minutes, until browned and crispy on top. Let it cool before serving (best served on the same day).
Recipe Video
Watch the full recipe video to guide you through each step for making perfect Walnut Focaccia.
Important Notes
- Italian 00 flour is recommended but you can use all-purpose flour in a pinch. Important! – if measuring flour in cups you must spoon the flour into your cup and level it off with a knife to avoid overpacking.
- Use a kitchen scale if possible – flour is very easy to measure wrong using cups so I highly recommend using a kitchen scale if possible.
- Yeast – use fast-action yeast also known as instant yeast which you can add directly to the flour. Make sure to read the packet just in case your yeast has to be activated in water first.
- Storage – the focaccia is best served on the same day it’s made but will keep up to 3 days and can be reheated in a hot oven. Wrap leftover tightly in plastic wrap and foil to avoid it drying out.
Helpful Info for All Our Recipes
- I always use extra virgin olive oil in all of my recipes unless stated otherwise.
- When I use canned or jarred tomatoes of any kind I always use Cirio or Mutti brands for the best results and flavor.
- All vegetables are medium sized unless stated otherwise.
- All recipes are tested and developed using a fan (convection) oven.
- Find out more about how nutrition is calculated.
- Check out our must-have Italian Pantry Staples.
- You can also find all our Essential Kitchen Tools for Italian Cooking.
Nutrition Information
Nutrition information is automatically calculated, so should only be used as an approximation.
Leave a comment below!