
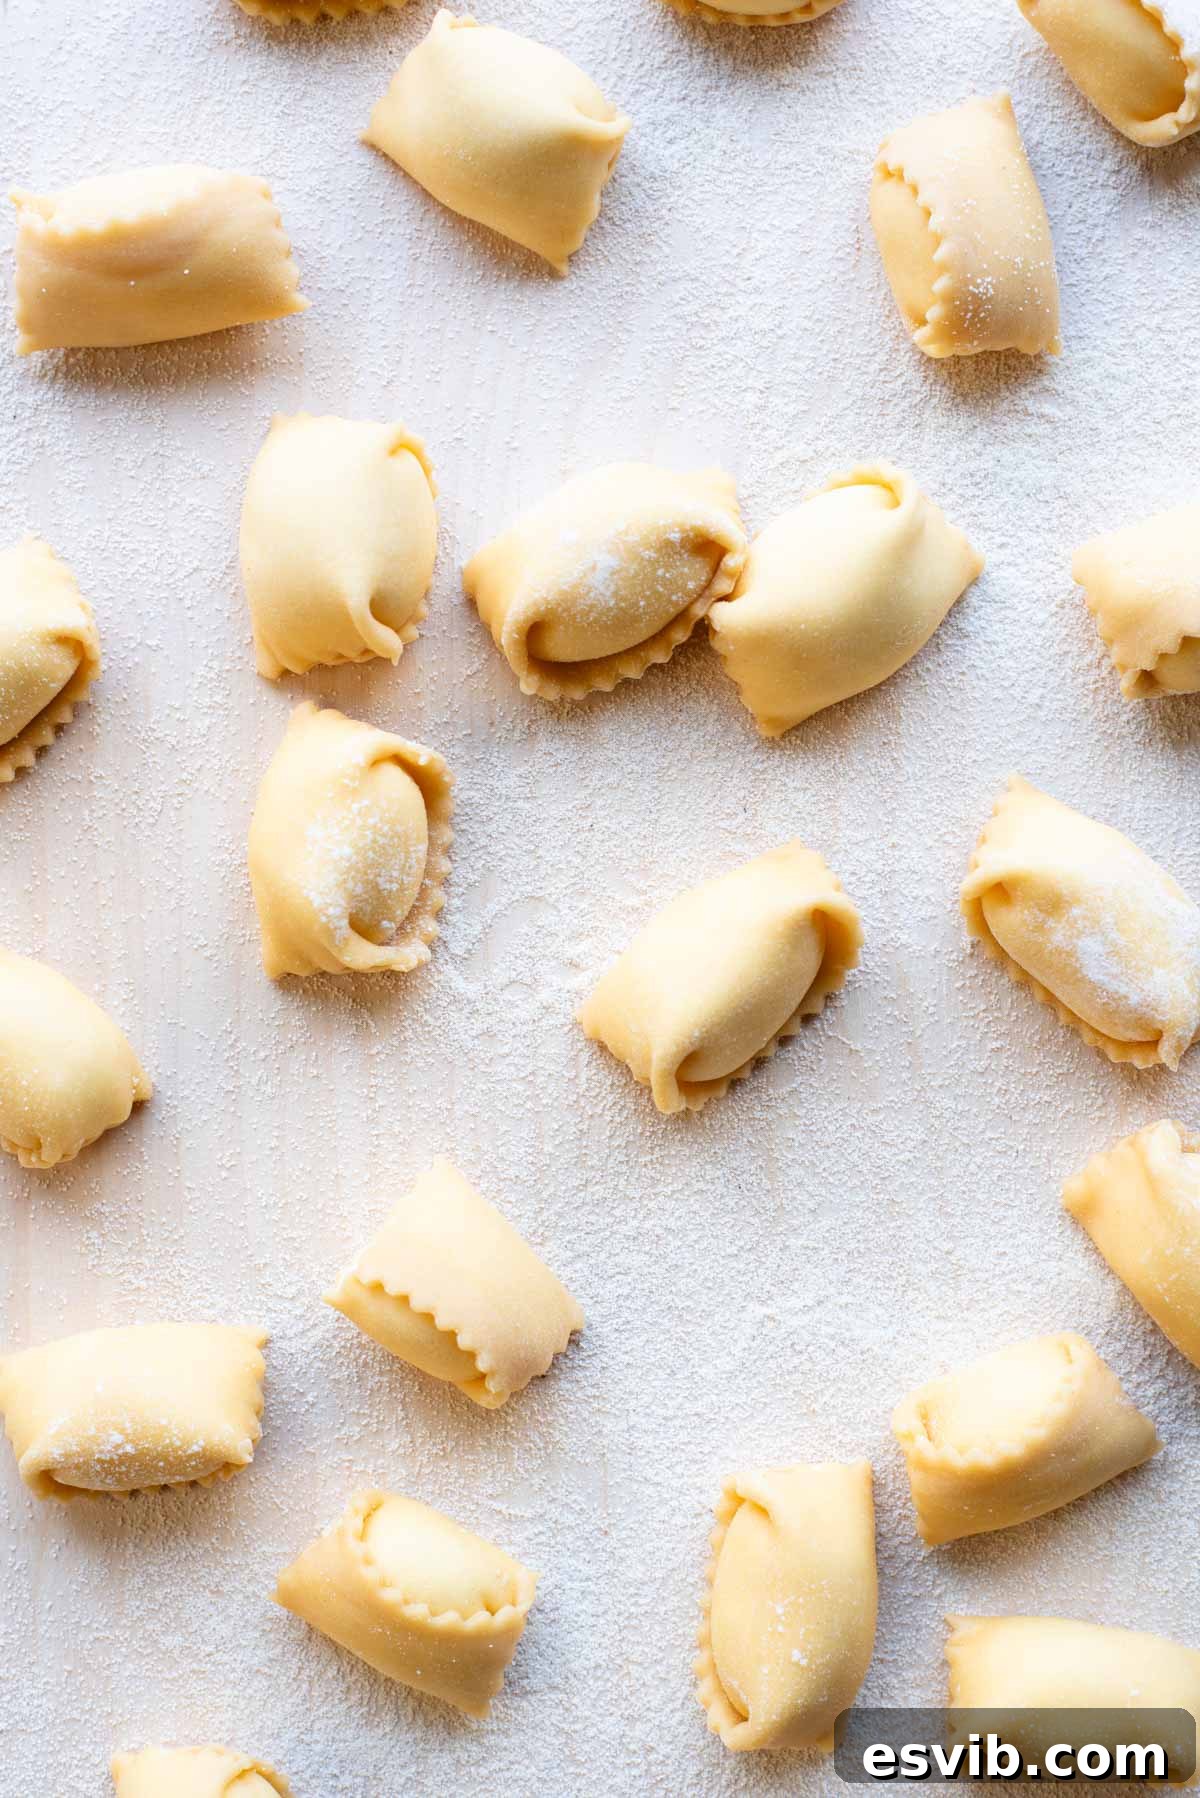
Embark on a culinary journey to Piedmont, Italy, and discover the art of making Homemade Agnolotti from scratch. This exquisite filled pasta, often celebrated for its delicate bite and rich flavors, might appear daunting, but our detailed, step-by-step tutorial demystifies the process, making it surprisingly accessible for home cooks. From preparing the silky pasta dough to crafting delectable fillings and mastering the signature “plin” pinch, we’ll guide you through every stage, ensuring a rewarding and delicious experience.
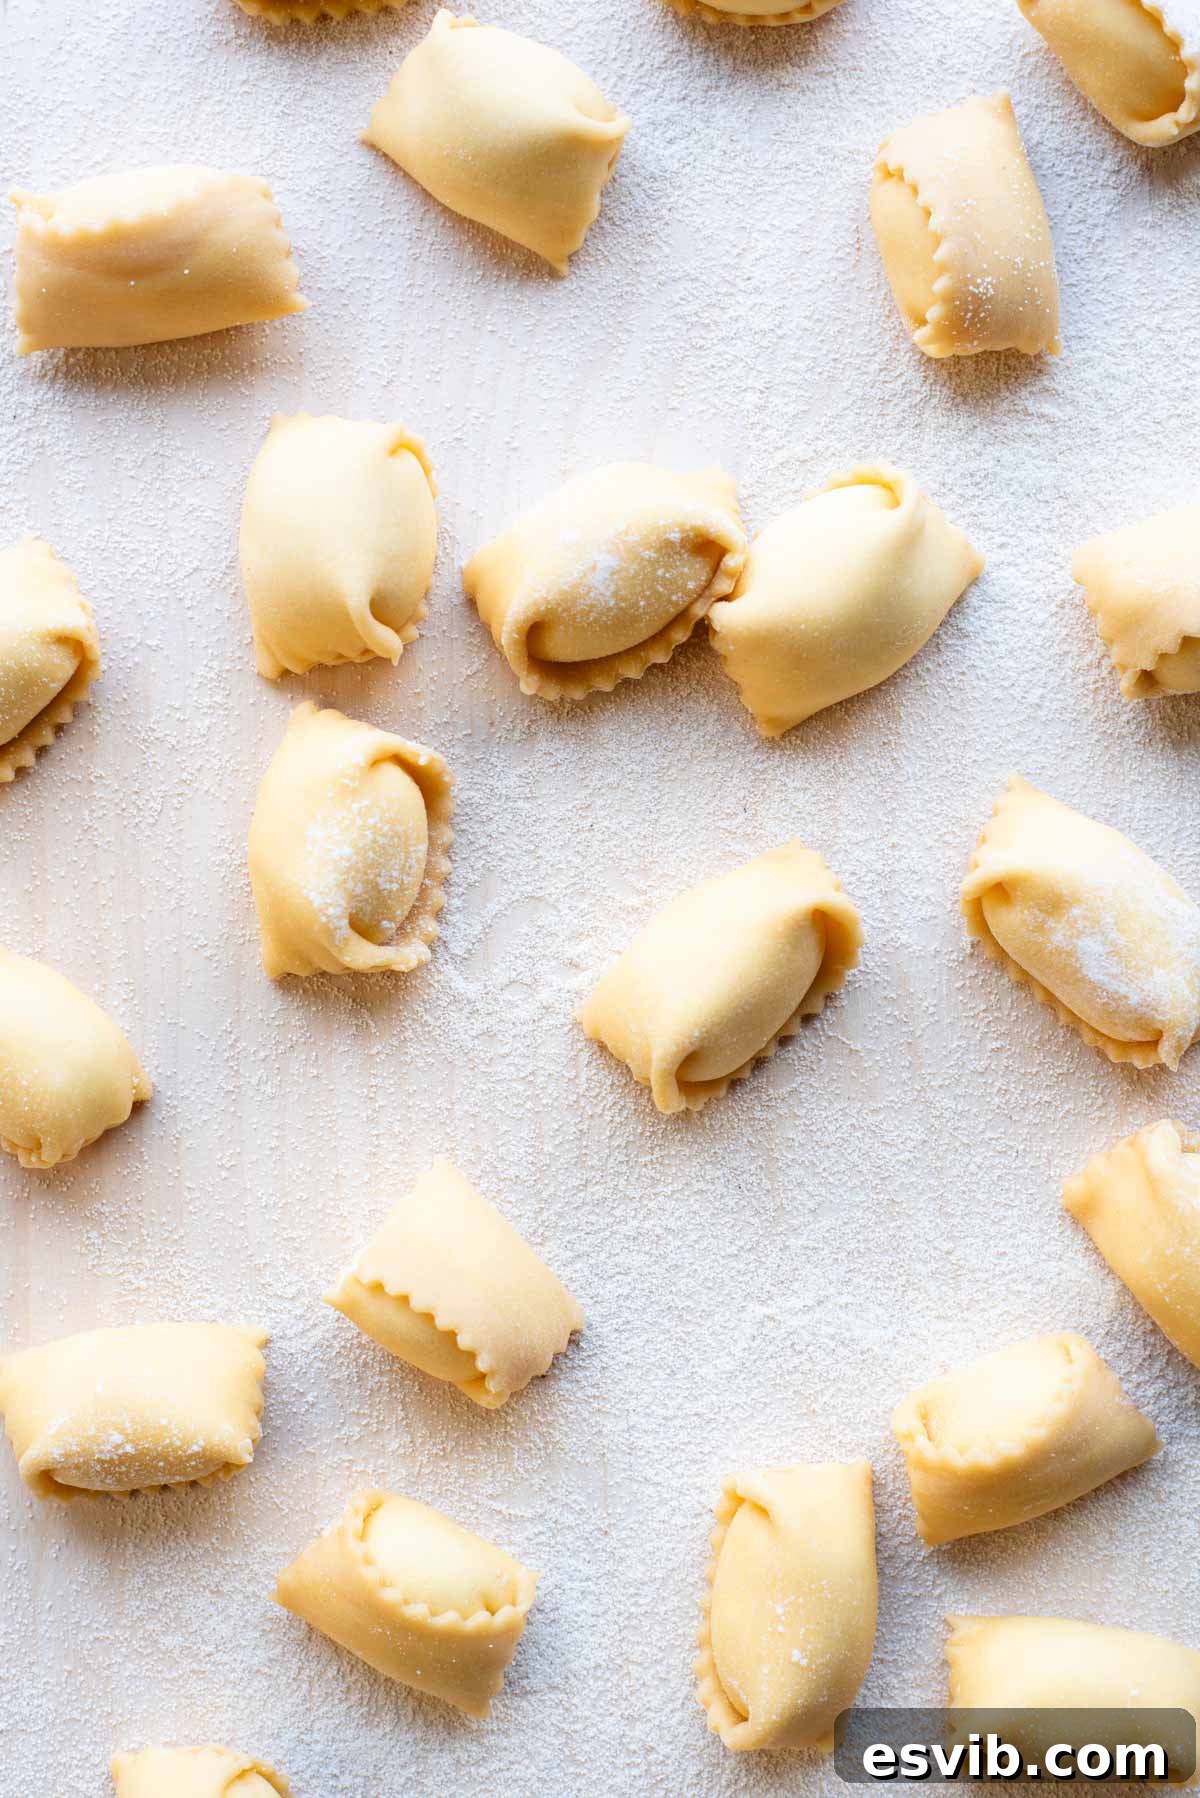
What is Agnolotti del Plin?
Agnolotti del Plin is a cherished traditional filled pasta originating from the Piedmont region of northern Italy. Its name, “plin,” refers to the characteristic pinch made along the edge of the pasta to seal the filling. Traditionally, these small, flavorful parcels are filled with succulent stewed meats and tender vegetables, often served simply with a luxurious butter sauce or the aromatic braising liquid from the meat filling itself. This minimal dressing allows the rich flavors of the filling and the delicate texture of the pasta to truly shine, offering a comforting and profoundly delicious culinary experience.
While similar in concept to ravioli, Agnolotti distinguishes itself through its unique folding method. Unlike ravioli, which typically involves placing one sheet of pasta over another and cutting four edges, Agnolotti is formed from a single sheet of pasta folded over its filling. This distinct technique not only gives it a slightly different, more compact shape but also, in our experience, reduces the likelihood of air bubbles forming inside the pasta, making it a potentially easier option for beginners seeking to master homemade filled pasta.
Crafting Agnolotti, much like making homemade ravioli, is indeed a labor of love. It requires patience and a little time, but the outcome is unbelievably rewarding. The superior taste and texture of freshly made Agnolotti elevate any meal, making it an ideal choice for special occasions such as festive Christmas dinners, memorable birthday celebrations, or heartwarming family gatherings. The act of creating this pasta from scratch is an experience in itself, connecting you to generations of Italian culinary tradition.
This comprehensive guide features a delightful cheesy ricotta filling, a versatile option that can be easily customized to your preference. However, the beauty of Agnolotti lies in its adaptability; you can fill your pasta with virtually any ingredient you desire. The same goes for the sauce, allowing for endless creative pairings. Below, you’ll find our complete tutorial, packed with essential tips, variations, and step-by-step photos to help you along the way. Get ready to embark on your pasta-making adventure!
Explore the full recipe below, including detailed notes on ingredients, step-by-step photographs, expert tips, exciting variations, and a complete recipe card. For a quick reference or to print, simply scroll to the bottom of this page.
Essential Ingredients for Homemade Agnolotti
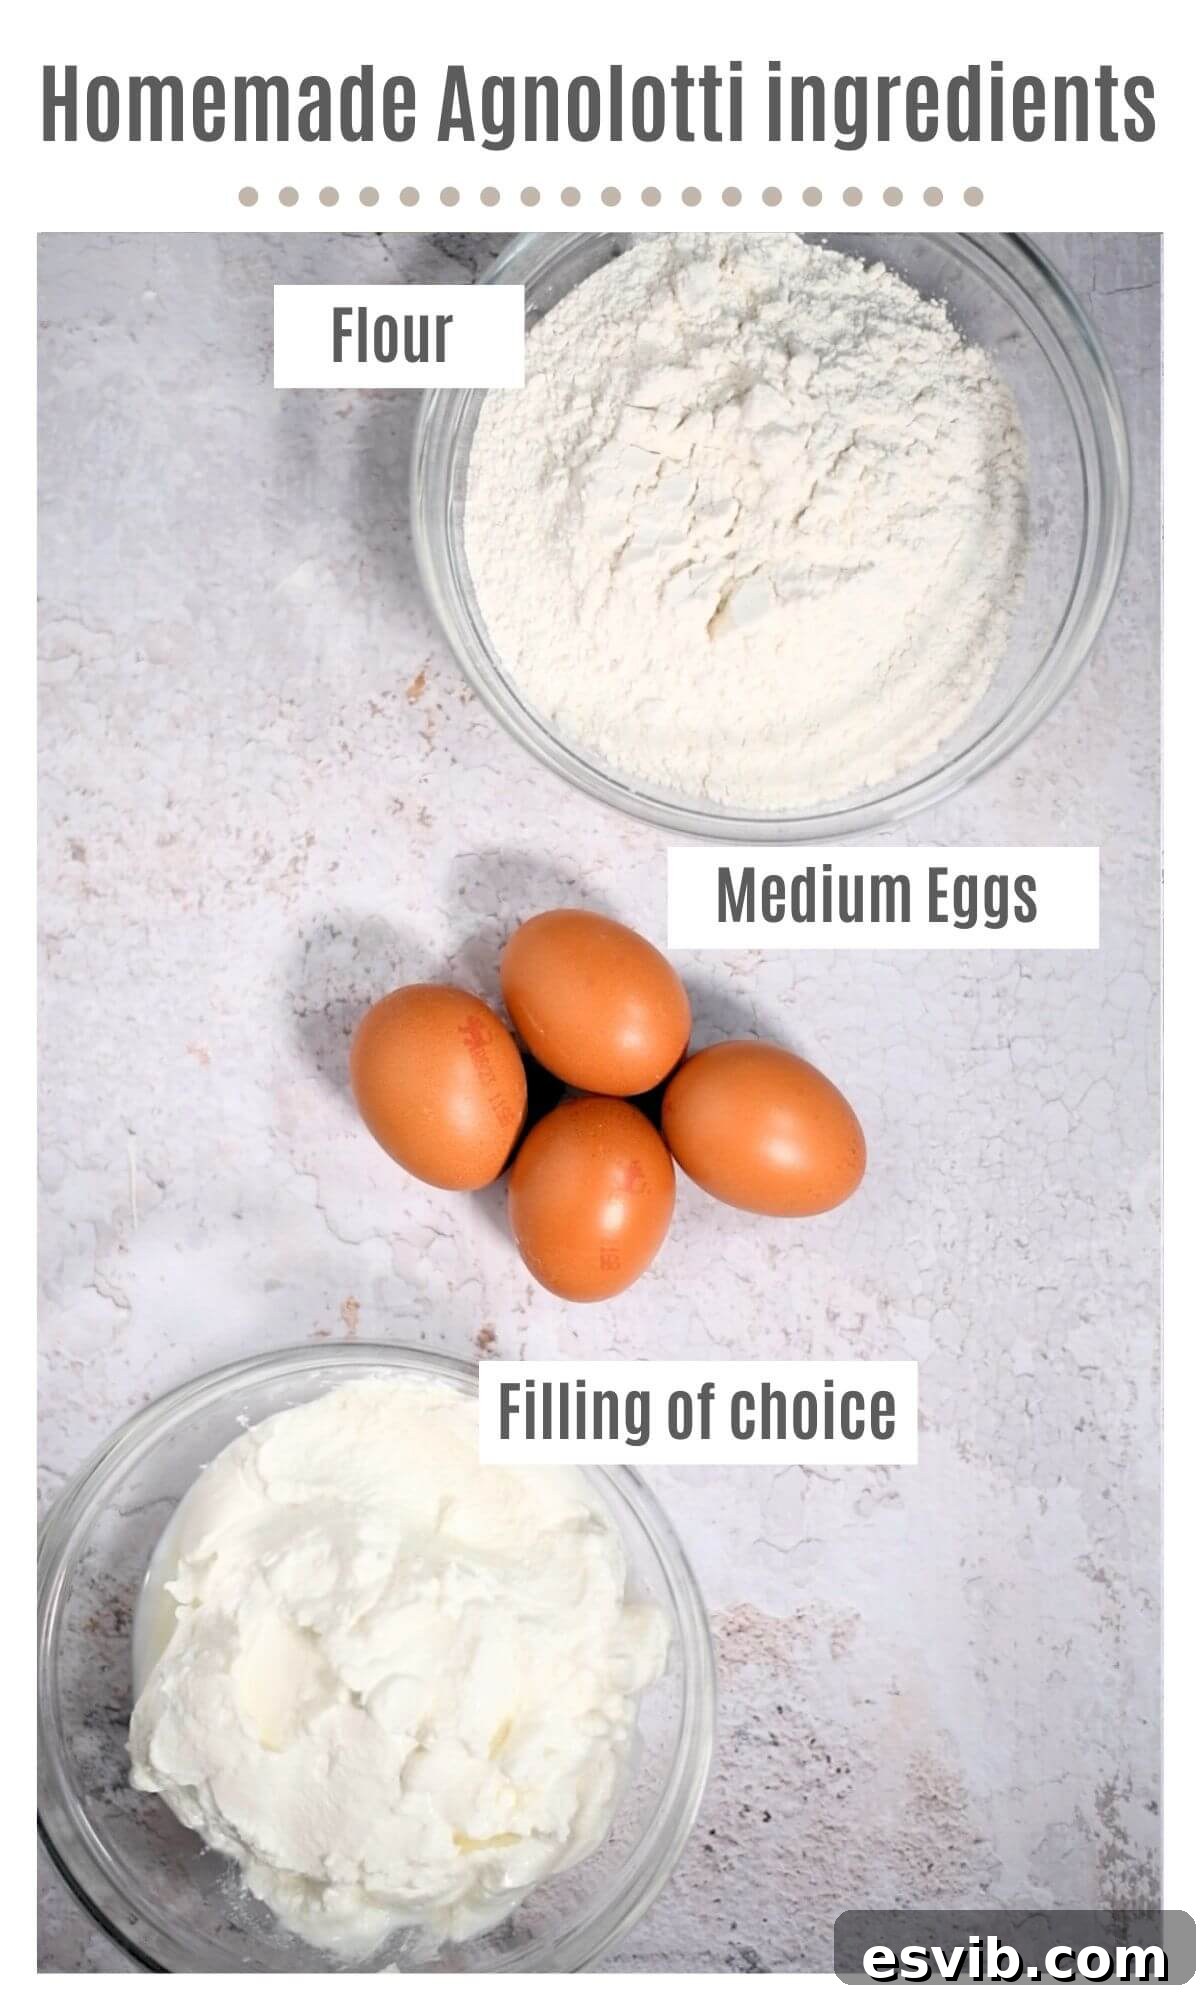
Creating authentic Agnolotti begins with selecting the right ingredients. Each component plays a vital role in achieving that perfect balance of flavor and texture.
Ingredient Notes and Expert Tips
- Flour: For pasta making, Italian 00 flour is highly recommended. Its extra-fine consistency and lower protein content produce a remarkably silky, tender, and pliable dough that is a joy to work with. While all-purpose flour can be used in a pinch, 00 flour will yield superior results, making your Agnolotti truly exceptional.
- Eggs: This recipe calls for medium-sized eggs, along with an extra egg yolk. The additional yolk contributes significantly to the dough’s richness, color, and elasticity, creating a more robust and flavorful pasta. If you only have large eggs, you might consider omitting the extra yolk to maintain the correct dough consistency.
- Filling – Ricotta: Ricotta forms a fantastic base for Agnolotti fillings due to its creamy texture and mild flavor. Our recipe uses a classic combination of ricotta, provolone piccante cheese, and black pepper. However, this is just a starting point! You can easily adapt the filling by adding other cheeses like Parmigiano Reggiano or smoked scamorza, fresh herbs, or a touch of lemon zest for a brighter, fresher taste. For the best results, always strain your ricotta for at least one hour (or ideally, overnight) to remove excess moisture, which prevents a watery filling and helps the pasta seal properly.
- Sauce Pairings: The beauty of Agnolotti lies in its versatility with sauces. While traditionally served with butter or braising liquid, you have a wealth of options. Consider a vibrant easy homemade tomato sauce for a classic taste, a fragrant butter and sage sauce that complements creamy fillings, or a decadent creamy mushroom sauce for an indulgent meal. The choice is truly yours, depending on your filling and personal preference.
A Detailed Guide: Step-by-Step Agnolotti Making
Essential Preparation Tips for Success
This recipe provides a flexible framework for crafting homemade Agnolotti, allowing you to choose your preferred filling and sauce. To ensure a smooth and enjoyable pasta-making process, we highly recommend a few preparatory steps:
- Strain Your Ricotta: If you opt for a ricotta-based filling, it’s crucial to strain the ricotta for at least 1 hour before mixing it. This removes excess moisture, preventing a soggy filling and ensuring your Agnolotti hold their shape beautifully during cooking. Place the ricotta in a fine-mesh sieve lined with cheesecloth and let it drain over a bowl in the refrigerator.
- Prepare Your Sauce in Advance: To minimize last-minute stress, prepare your chosen sauce ahead of time. This way, all you’ll need to do is gently reheat it when your fresh Agnolotti are ready to cook. For a simple butter sauce, however, you can easily prepare this in the final minutes before serving.
Crafting the Perfect Pasta Dough
The foundation of exceptional Agnolotti is a supple, elastic pasta dough. Here’s how to make it:
- Form the Well: On a clean, flat work surface (a large wooden board or clean countertop is ideal), pour your Italian 00 flour and create a sizable well in the center, much like a volcano crater.
- Add Liquids: Crack the eggs and the extra egg yolk directly into the well. Using a fork, gently beat the eggs together, being careful not to break the flour walls. Slowly begin to incorporate small amounts of flour from the inner edge of the well into the beaten egg mixture. Continue this process, gradually widening the well, until a shaggy, rough dough forms. (Refer to photos 1 and 2 in the accompanying visual guide for clarity.)
- Knead the Dough: Once the dough has come together, use your hands to gather it completely. Begin kneading the dough with a firm, rhythmic motion. Push the dough away from you with the heel of your hand, then fold it back towards you, rotating it slightly after each push. Continue kneading for approximately 10 minutes. The dough should transform from sticky and rough into a smooth, elastic, and non-sticky ball. If it feels too sticky during kneading, dust your work surface and hands with a minimal amount of extra flour. Avoid adding too much flour, as this can make the pasta tough. (Visual guidance for kneading is provided in photos 3-7.)
- Rest the Dough: This step is crucial for achieving a pliable pasta. Wrap the kneaded dough tightly in plastic wrap (cling film) to prevent it from drying out. Let it rest at room temperature for a minimum of 30 minutes. This resting period allows the gluten to relax, making the dough much easier to roll out thinly. You can even prepare the dough the night before and store it in the refrigerator overnight; just be sure to bring it back to room temperature before you start rolling. (See photo 8 for dough resting.)
Prepare Your Chosen Filling
While the pasta dough rests, prepare your Agnolotti filling:
- Ricotta Filling (Recommended): If you’re using our suggested ricotta filling, combine the strained ricotta cheese in a bowl with the grated provolone piccante cheese. Season with a generous pinch of freshly ground black pepper. Mix everything thoroughly until well combined. Set this mixture aside.
- Other Fillings: For meat-based fillings, ensure the meat is finely minced or pureed for easier piping/spooning. For vegetable fillings (like spinach or squash), make sure they are cooked, well-drained, and pureed to a smooth consistency.
Rolling Out the Pasta Dough to Perfection
Achieving uniformly thin pasta sheets is key for delicate Agnolotti:
- Divide the Dough: Unwrap your rested pasta dough. Cut the dough in half and immediately re-wrap one half in plastic wrap to prevent it from drying.
- Initial Flattening: Take the working half of the dough and gently flatten it with your hands or a rolling pin until it’s narrow enough to fit comfortably into the widest setting of your pasta machine. (Visual aid in photos 9 and 10.)
- Folding and Strengthening: Pass the flattened dough through the widest setting of your pasta machine (usually labeled number 0 or 1). You will get a rough, oblong sheet. Now, take one end of this sheet and fold it into the middle, then fold the other end directly over it, as if you were folding a letter into thirds. Gently flatten this folded dough again and pass it through the widest setting once more. Repeat this folding and rolling process another two times. This technique laminates the dough, making it stronger, smoother, and more elastic, which is essential for thin pasta sheets that won’t tear. (Witness this technique in photos 11 and 12.)
- Thinning the Sheets: Your dough is now prepared for its final thinning. Pass the dough sheet through each subsequent setting of your pasta machine, starting from the widest and moving to the narrowest (typically finishing on number 6 or 7, depending on your machine and desired thinness). Pass the dough through each setting only once. As the pasta sheet lengthens, you may need to cut it in half or even thirds to make it more manageable. Ensure you work quickly to prevent the pasta from drying out. If it becomes slightly sticky, a very light dusting of flour can be used. (Observe the rolling process in photos 13-16.)
Filling and Shaping Agnolotti: Method 1 (The Long Line)
This is the most common and efficient method for shaping Agnolotti:
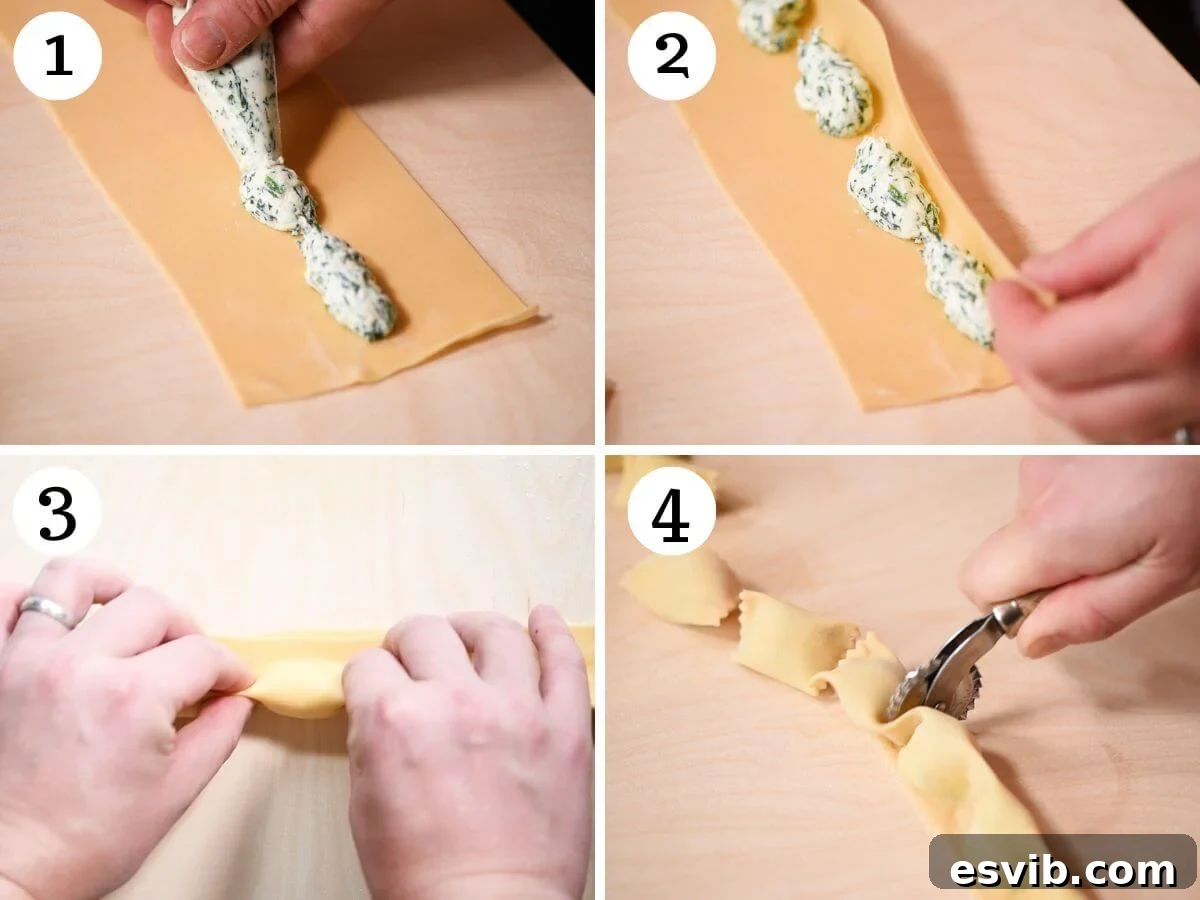
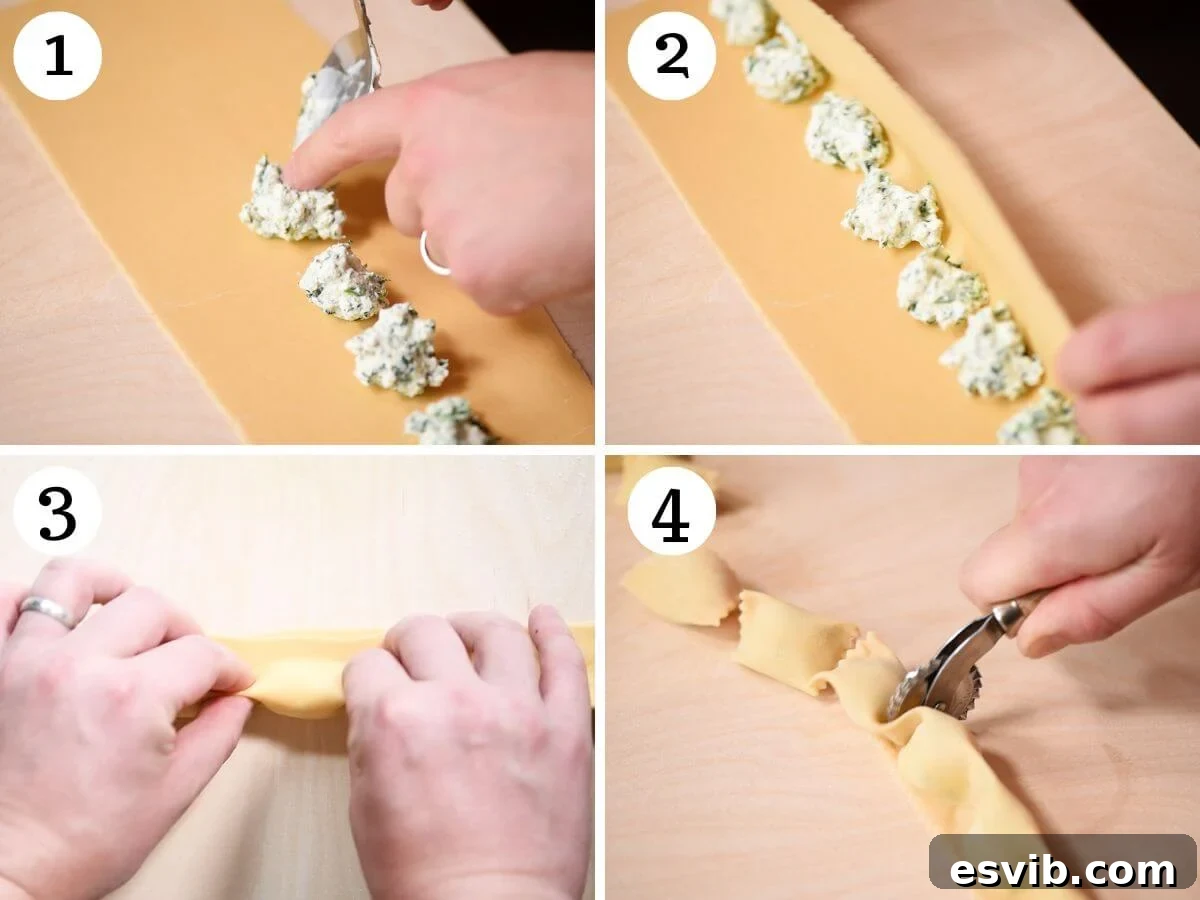
- Pipe the Filling: Lay one of your thinly rolled pasta sheets flat on a lightly floured work surface. Using a piping bag fitted with a wide round nozzle (or simply a piping bag with the tip snipped off), pipe your chosen filling in a continuous, long line along the middle of the pasta sheet. Ensure you leave about 1 inch (2.5 cm) of pasta free at both ends and along the top and bottom edges. (See photo 17 for piping illustration.)
- Fold and Seal: Carefully fold the bottom edge of the pasta sheet directly over the filling, meeting the top edge. Press down firmly along the seam and around the filling line with the side of your hand or your fingers to create a tight seal. This is crucial to prevent the filling from escaping during cooking. Ensure no air bubbles are trapped. (Refer to photos 18 and 19 for the folding technique.)
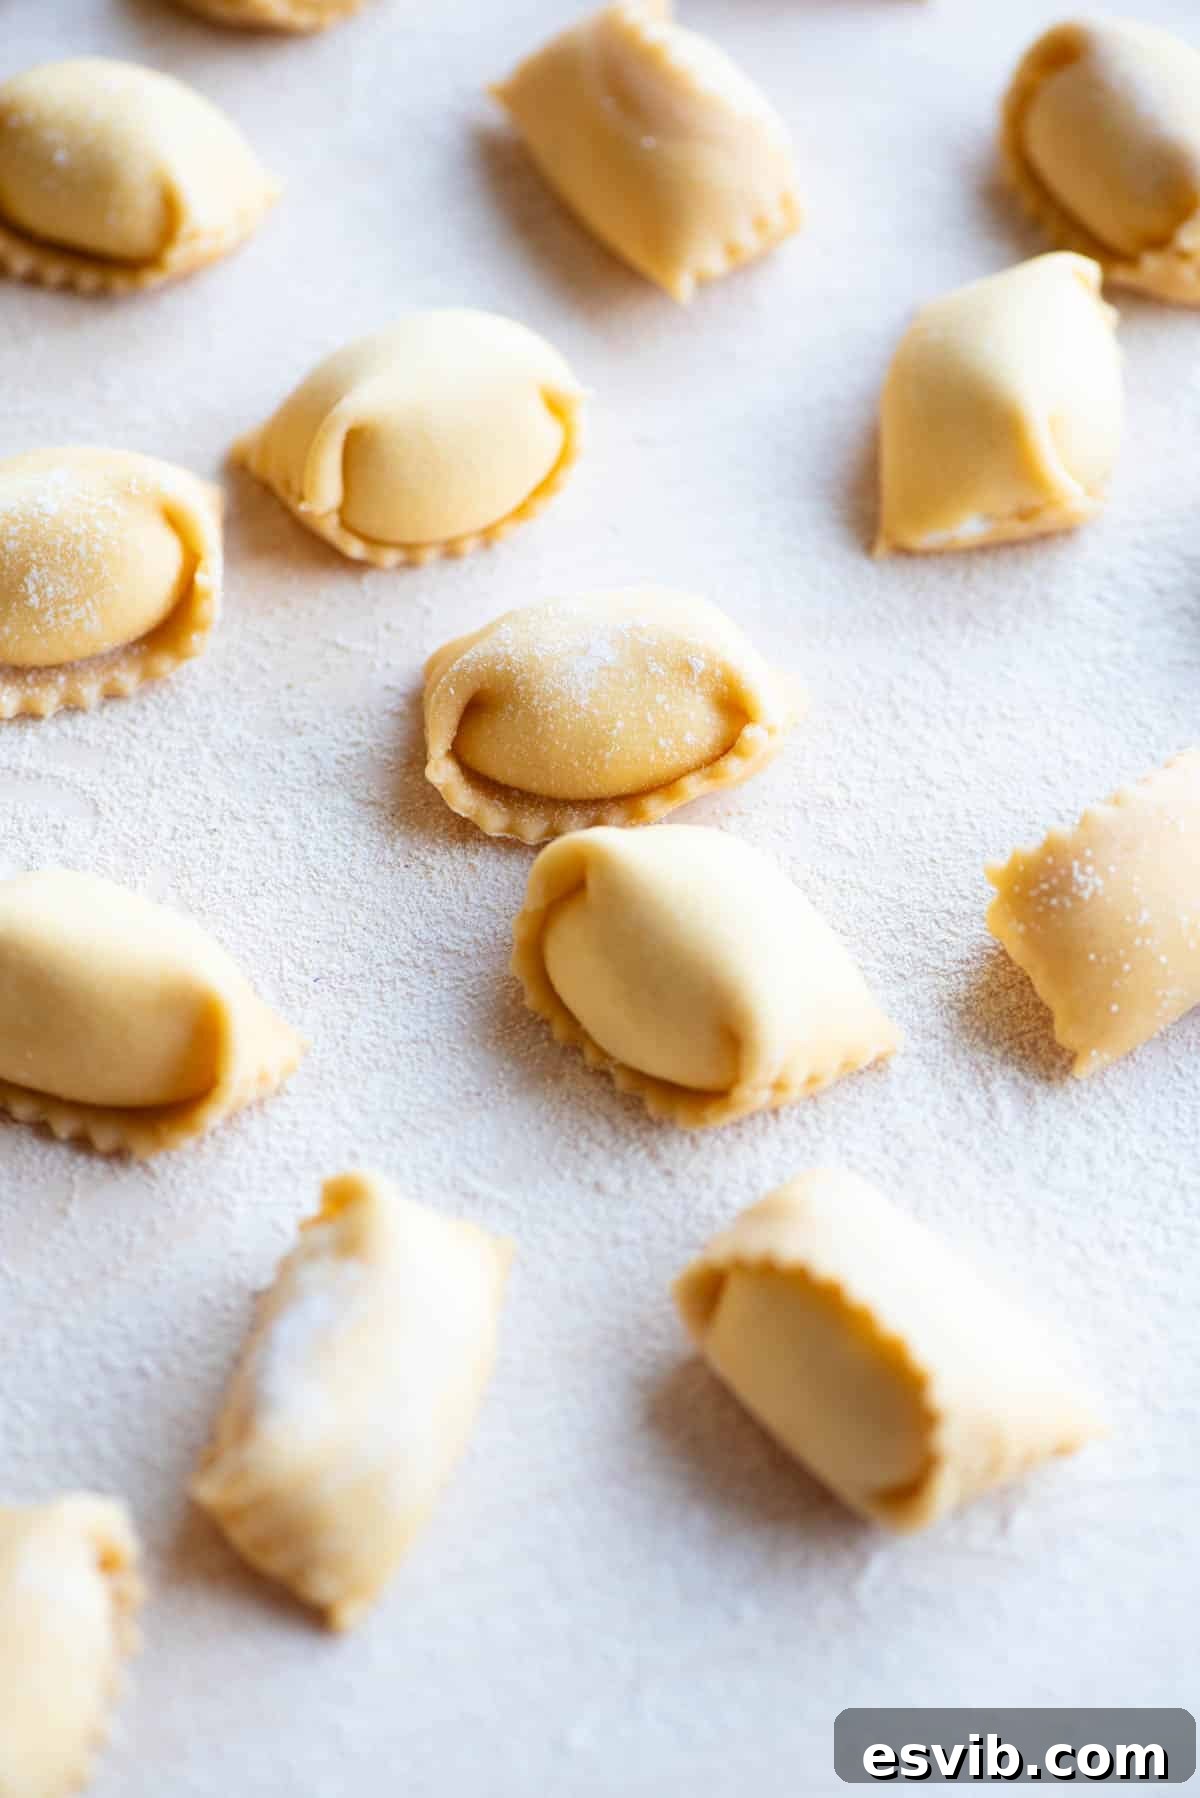
- Pinch and Cut: Now, working along the length of the sealed pasta, use your thumb and forefinger to pinch the pasta firmly every 1 inch (2.5 cm) or so, creating the characteristic “plin” shape and individual Agnolotti segments. Once pinched, use a sharp pasta wheel or a knife to trim any excess pasta along the long sealed edge. Finally, swiftly cut through each pinched section with your pasta wheel to separate the individual Agnolotti. (Photos 20-24 demonstrate the pinching and cutting steps.)
- Store Agnolotti: As you cut each Agnolotti, gently lay them on a baking sheet or tray that has been lightly dusted with flour or fine semolina. Ensure they are not touching each other to prevent sticking. Continue this process with the remaining pasta dough and filling.
Alternative Filling Method: Individual Portions
This method is particularly useful if your filling is not entirely smooth, perhaps containing finely chopped vegetables or larger chunks that might get caught if piped in a continuous line.
- Pipe in Sections: Instead of a single long line, use a piping bag to pipe small, evenly spaced mounds of filling along the middle of the pasta sheet. Maintain consistent spacing, leaving enough room between each mound for pinching.
- Fold and Pinch First: Fold the pasta sheet over the filling as in Method 1. However, before firmly sealing the long edge, gently pinch the pasta between each filling mound to create the Agnolotti shape. This allows any trapped air to escape easily.
- Secure and Cut: Once pinched, press firmly along the long edge to seal the pasta completely. Then, use a pasta wheel to trim excess dough and cut the individual Agnolotti.
Tip: When using this individual piping method, there’s a higher chance of trapping air bubbles within the pasta. To counteract this, pinch the Agnolotti sections before fully securing the long edge. This allows air to escape, preventing puffiness during cooking.
Alternative Filling Method: Spooning the Filling
For those without a piping bag or who prefer a more rustic approach, using a spoon is a perfectly viable method:
- Spoon Small Mounds: Lay your pasta sheet flat. Using a small spoon (a teaspoon works well), place small, evenly spaced mounds of filling along the center of the pasta sheet.
- Fold and Shape: Carefully fold the pasta over the filling. Gently press around each mound to seal and remove air. Pinch and cut as described in Method 1 or Method 2. This method requires a bit more care to ensure a tight seal and even filling distribution.
Cooking Your Fresh Agnolotti
Fresh pasta cooks incredibly quickly, so ensure your sauce is ready and warm before you begin:
- Boil Water: Bring a large pot of generously salted water to a rolling boil. Salting the water properly is essential for flavoring the pasta itself. It should taste like the sea.
- Add Agnolotti: Gently add the fresh Agnolotti to the boiling water. Do not overcrowd the pot; cook in batches if necessary.
- Cook Briefly: Fresh Agnolotti will cook in approximately 3 minutes, or until they float to the surface and are tender yet firm to the bite (al dente).
- Serve Immediately: Using a slotted spoon or a fine-mesh spider, carefully drain the cooked Agnolotti directly from the water into your warm pasta sauce. Toss gently to ensure each piece is beautifully coated. Serve immediately, perhaps with a garnish of fresh herbs or grated cheese.
Inspiring Agnolotti Fillings and Sauce Pairings
The versatility of Agnolotti makes it a perfect canvas for various culinary creations. Here are some ideas to spark your imagination:
- Classic Meat Ragu Filling: Truly traditional Agnolotti are often filled with a rich, slow-cooked stewed meat mixed with vegetables, such as braised beef (like a tender short rib ragu) and finely minced cabbage or carrots. This hearty filling is incredibly satisfying and pairs beautifully with a simple butter sauce or its own braising liquid.
- Creamy Ricotta Filling Variations: Beyond our suggested provolone and ricotta blend, explore other ricotta-based options:
- Cheesy Deluxe: Strain ricotta thoroughly and mix with a generous amount of freshly grated hard cheeses like Parmigiano Reggiano, Pecorino Romano, or even a smoked scamorza for a deeper flavor. You’ll typically need around 2 cups (500g) of strained ricotta.
- Lemon & Herb: For a brighter, fresher taste, add finely grated lemon zest and a mix of fresh herbs such as parsley, chives, or mint to your ricotta.
- Earthy Mushroom Filling: Our popular mushroom ravioli filling is a firm favorite and receives rave reviews. It can be easily adapted to fill your Agnolotti, offering a rich, umami-packed experience.
- Sweet & Savory Squash or Pumpkin Filling: Utilize the delicious filling from our butternut squash ravioli recipe. The natural sweetness of the squash creates a wonderful contrast with savory elements and pairs exceptionally well with a brown butter and sage sauce.
- Simple Tomato Sauce: A versatile and widely loved choice. You can follow our recipe for an authentic quick tomato sauce, or simply sauté some garlic and/or onion, then add high-quality tomato passata (tomato puree in the US) for a rapid and delicious sauce. Finish with fresh basil leaves.
- Brown Butter & Sage Sauce: A quick, elegant, and incredibly flavorful sauce. This needs to be made just before serving to ensure its nutty aroma and crisp sage leaves are at their best. Follow the same sauce method from our butternut squash ravioli recipe for perfect results.
- Rich Cream or Cheesy Sauces: For a more indulgent meal, there are numerous delicious cream and cheese-based sauces to choose from. Our top recommendations include a pungent Gorgonzola cream sauce, a classic Parmesan cream sauce, or the comforting Cream, Parmigiano, and Peas sauce.
Expert Recipe Tips and Frequently Asked Questions
- Always Weigh Your Flour: This cannot be stressed enough for consistent results in baking and pasta making. Using a kitchen scale to weigh your flour (in grams) is the only truly accurate method. While cup measurements are provided as an approximation, variations in how flour is scooped can lead to significant differences. If you must use cups, spoon the flour into the measuring cup and level it off with a straight edge for the most precise measurement.
- Adjusting for Egg Size: Our recipe uses medium eggs and an extra yolk for richness. If you are using large eggs, you might consider skipping the additional egg yolk to prevent the dough from becoming too wet. Conversely, if your dough feels overly soft or sticky after kneading, incorporate a little extra flour, a teaspoon at a time, until the desired consistency is achieved.
- Ensuring a Tight Pasta Seal: If you find your pasta dough isn’t sufficiently tacky to seal firmly around the filling, lightly dab a tiny amount of water along the edges before pressing them together. This added moisture will help create a strong, secure seal, preventing your precious filling from escaping during cooking.
- Avoid Excessive Flour: While a light dusting of flour is necessary to prevent sticking during kneading and rolling, be cautious not to overdo it. Too much added flour can dry out the dough, making it tough and difficult to work with. Use just enough to keep the surfaces non-stick.
- The Importance of Resting Dough: Allowing the pasta dough to rest for at least 30 minutes after kneading is a critical step. This period enables the gluten network within the dough to relax, making it significantly more pliable, elastic, and easier to roll out into thin, even sheets without tearing. Do not skip this step!
What’s the difference between ravioli and agnolotti?
The primary difference between these two beloved filled pastas lies in their shape and construction. Ravioli typically involves placing a mound of filling onto one sheet of pasta, then covering it with a second sheet of pasta, which is then sealed and cut, resulting in four distinct cut edges (or sometimes rounded, like our egg yolk ravioli). Agnolotti, on the other hand, is made from a single sheet of pasta that is folded over a line of filling, then pinched and cut, often having one folded edge and three cut edges, creating its unique, compact form.
How to Freeze Fresh Agnolotti for Future Meals
A common and excellent question among homemade pasta enthusiasts is how to best preserve your creations. Freezing homemade pasta, especially filled varieties like Agnolotti, is a fantastic way to enjoy a delicious home-cooked meal even on busy days when time or energy for scratch cooking is limited. Proper freezing techniques ensure your pasta retains its quality and texture.
Here’s our recommended method for freezing homemade Agnolotti or any other filled pasta:
- The Crucial Step: Blanching Before Freezing. Filled pasta, such as ravioli or Agnolotti, can become quite brittle once frozen. This means they are highly susceptible to cracking or breaking, either while in the freezer or when dropped into boiling water. To prevent this disheartening outcome, the best approach is to blanch them briefly before freezing. While it adds a small extra step to the process, it’s a worthwhile investment to protect your homemade pasta and ensure your efforts don’t go to waste.
- How to Blanch Your Pasta: Bring a large pot of generously salted water to a rolling boil. Carefully add the freshly made Agnolotti to the boiling water. As soon as they begin to float to the top (which usually happens after just 1 to 2 minutes), swiftly remove them using a slotted spoon or a fine-mesh spider. Immediately transfer the blanched Agnolotti to a clean kitchen towel laid out on a baking sheet to air dry completely. Ensure they are in a single layer to facilitate even drying.
- Freeze or Refrigerate: Once blanched and thoroughly air-dried, your pasta is ready for storage. It will keep beautifully in the refrigerator for up to 3 days, making it convenient for weeknight meals. For longer storage, proceed with freezing: arrange the blanched Agnolotti in a single, even layer on a baking sheet (still dusted with flour or semolina) and place it in the freezer. Once completely frozen solid (this usually takes 1-2 hours), you can transfer the Agnolotti to freezer-safe bags or airtight containers. This “flash-freezing” step prevents them from clumping together and allows you to easily take out individual portions as needed. Store frozen Agnolotti for up to 3 months. Cook directly from frozen, adding an extra minute or two to the cooking time.
Explore More Homemade Pasta Tutorials
If you enjoyed making Agnolotti, you’ll love exploring other fresh pasta varieties. Delve into our collection of tutorials to expand your pasta-making repertoire:
Tips & Tricks
How to Make Homemade Ravioli – The Ultimate Guide
Fresh Pasta
Homemade Tonnarelli Pasta (Spaghetti alla Chitarra)
Fresh Pasta
Homemade Cavatelli Pasta
Fresh Pasta
How to make Pici Pasta
We hope you thoroughly enjoyed this Homemade Agnolotti Recipe. If you’ve tried this, or any other recipe from our blog, please don’t hesitate to rate the recipe and share your experience in the comments section below – we truly love hearing from you! For more delicious Italian food inspiration and recipes, you can also follow us on Facebook, Instagram, and Pinterest, or sign up for our Newsletter to get weekly updates straight to your inbox.
Step-by-step photos and video tutorial are provided above for visual guidance.
Homemade Agnolotti (Step-by-Step Guide)
By Emily
Prep time: 1 hr
Cook time: 5 mins
Resting time: 30 mins
Total time: 1 hr 35 mins
Servings: 4 servings (approx. 40-50 Agnolotti)
Print Recipe
See step-by-step photos and video above for visual guidance! Learn how to make Homemade Agnolotti from scratch. This beautiful filled pasta may look intricate, but it’s actually quite achievable at home. Our comprehensive tutorial will walk you through the entire process, from dough to plate.
Equipment
- Pasta machine or rolling pin
- Piping bag (optional, but recommended for filling)
Ingredients
For the Pasta Dough:
- 3 medium eggs
- 1 medium egg yolk
- 300 g Italian 00 flour, plus extra for dusting (approx. 2 ¼ cups)
For the Filling (Optional – see notes for more ideas):
- 2 cups ricotta (500g), strained for at least 1 hour
- 1 cup grated provolone piccante cheese (100g) (can also use smoked scamorza or Fontina)
- Pinch of black pepper
Instructions
Preparation Tips:
- This recipe guides you on making homemade Agnolotti that can be customized with any filling or sauce. If using ricotta, ensure it’s strained for at least 1 hour beforehand.
- Prepare your chosen sauce in advance. This means it will only need reheating when the Agnolotti are ready. Butter sauces can be made last minute.
Making the Pasta Dough:
- Place the flour on a clean work surface and create a large well in the middle. Add the eggs and egg yolk into the well and beat them with a fork.
- Gradually incorporate the flour into the beaten eggs until a rough dough forms. Use your hands to bring the dough together and knead for about 10 minutes until it’s smooth and elastic. If sticky, use a little extra flour sparingly.
- Wrap the dough tightly in plastic wrap (cling film) and let it rest at room temperature for at least 30 minutes. You can also make the dough the night before and store it in the fridge overnight (bring to room temperature before use).
Making Your Filling:
- If using our suggested filling, combine the strained ricotta in a bowl with grated provolone cheese and a pinch of black pepper. Mix well and set aside.
Rolling Out the Pasta Dough:
- Cut the pasta dough in half, keeping one half wrapped in plastic wrap. Press the working dough piece flat enough to fit into the widest setting of your pasta machine (a rolling pin can help).
- Pass the dough through the widest setting (usually #0). Fold one end into the middle, then fold the other end over it (like a leaflet). Flatten and pass through the widest setting again. Repeat this process two more times.
- The dough is now ready to be thinned. Pass the dough through each setting once, finishing on setting #6 (or your preferred thinness). If the sheet becomes too long to handle, cut it in half.
- Lay a sheet of pasta on your lightly floured work surface. Pipe the filling along the middle of the pasta in one continuous line, leaving about 1 inch (2.5 cm) free at both ends.
- Carefully fold the pasta sheet over the filling and securely press it down along the seam with the side of your hand or fingers (refer to photos or video for visual guidance).
- Pinch along the filling to create individual Agnolotti, roughly 1 inch (2.5 cm) wide. Trim any excess pasta along the long edge. Then, using a pasta wheel, swiftly cut through each pinched section to separate the Agnolotti.
- Place the cut Agnolotti on a surface lightly dusted with flour or semolina while you continue with the rest of the dough and filling.
Cooking the Agnolotti:
- Bring a large pot of generously salted water to a boil. Add the Agnolotti and boil for approximately 3 minutes, or until tender and floating.
- Use a slotted spoon to drain the Agnolotti from the water and transfer them directly into your warm pasta sauce. Toss gently to coat evenly and serve immediately.
Video Tutorial
A video tutorial demonstrating the Agnolotti making process is available in the main article content above.
Notes
- Weigh your flour: Always use a kitchen scale for accurate flour measurements to ensure consistent results.
- Eggs: If using large eggs, you might omit the extra egg yolk. Adjust flour slightly if the dough feels too soft or sticky.
- Sealing the pasta: If pasta edges aren’t tacky enough, lightly dab with water before sealing.
- Don’t use too much flour: Use flour sparingly when kneading and rolling to prevent the dough from drying out and becoming tough.
- Resting the dough: Resting the dough for at least 30 minutes after kneading is essential for a pliable, easy-to-work-with pasta.
Helpful Information for All Recipes
- We consistently use extra virgin olive oil in all our recipes unless otherwise specified.
- For superior flavor and results, we always recommend Cirio or Mutti brands for canned or jarred tomatoes.
- All vegetables are assumed to be medium-sized unless specifically stated otherwise.
- Our recipes are developed and tested using a fan (convection) oven.
- Learn more about how nutrition information is calculated on our site.
- Discover our essential Italian Pantry Staples for authentic cooking.
- Find all our must-have Essential Kitchen Tools for Italian Cooking.
Nutrition Information (per serving)
Calories: 625 kcal | Carbohydrates: 62g | Protein: 32g | Fat: 27g | Saturated Fat: 16g | Polyunsaturated Fat: 2g | Monounsaturated Fat: 8g | Trans Fat: 0.01g | Cholesterol: 204mg | Sodium: 335mg | Potassium: 292mg | Fiber: 2g | Sugar: 1g | Vitamin A: 954IU | Calcium: 477mg | Iron: 5mg
Nutrition information is automatically calculated and should only be used as an approximation.
Did you try this recipe?
Leave a comment below and share your experience!