
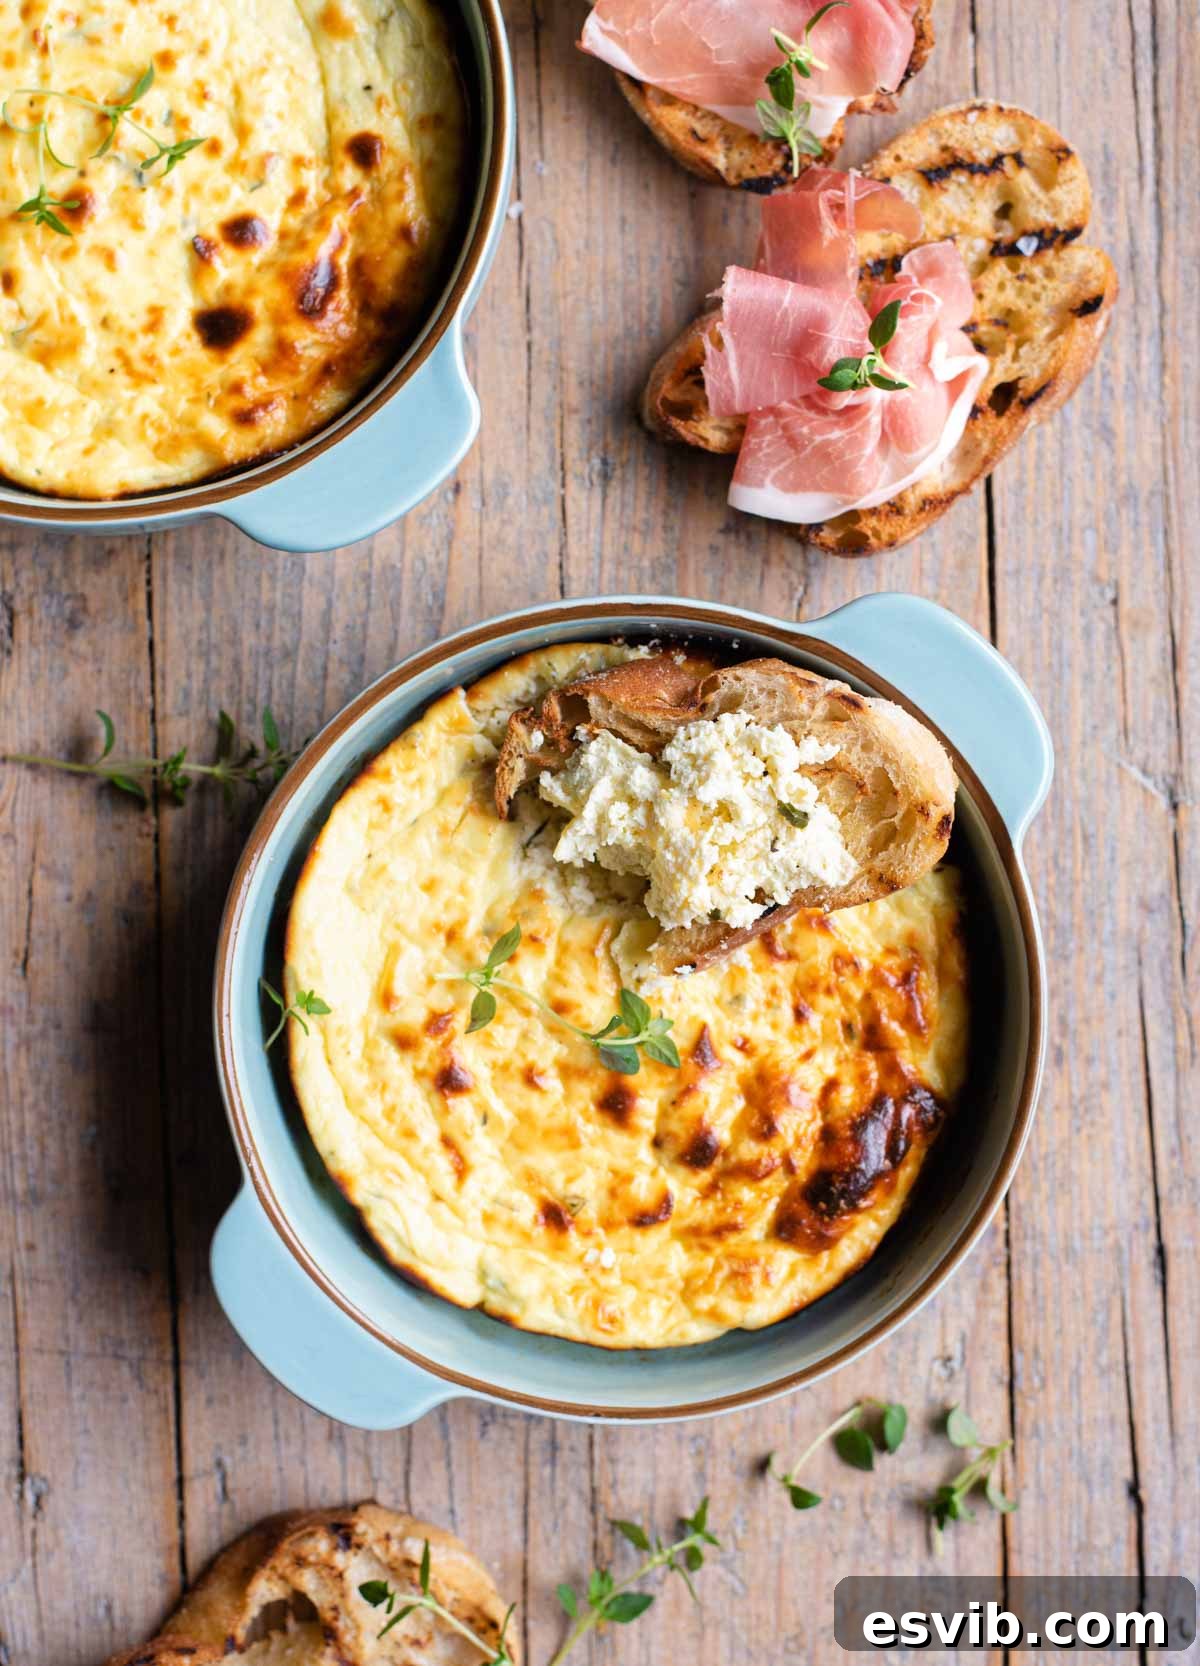
Creamy Baked Ricotta with Thyme & Parmesan: An Irresistible Italian Appetizer
Prepare to fall in love with this incredibly simple yet utterly delicious Baked Ricotta recipe! Infused with the aromatic freshness of thyme, the savory depth of Parmesan cheese, and a subtle whisper of nutmeg, this dish transforms humble ricotta into a light, creamy, and wonderfully cheesy appetizer. Baked to perfection in the oven until beautifully puffed and golden, it’s an elegant addition to any gathering, especially when spread generously over crispy, chargrilled ciabatta.
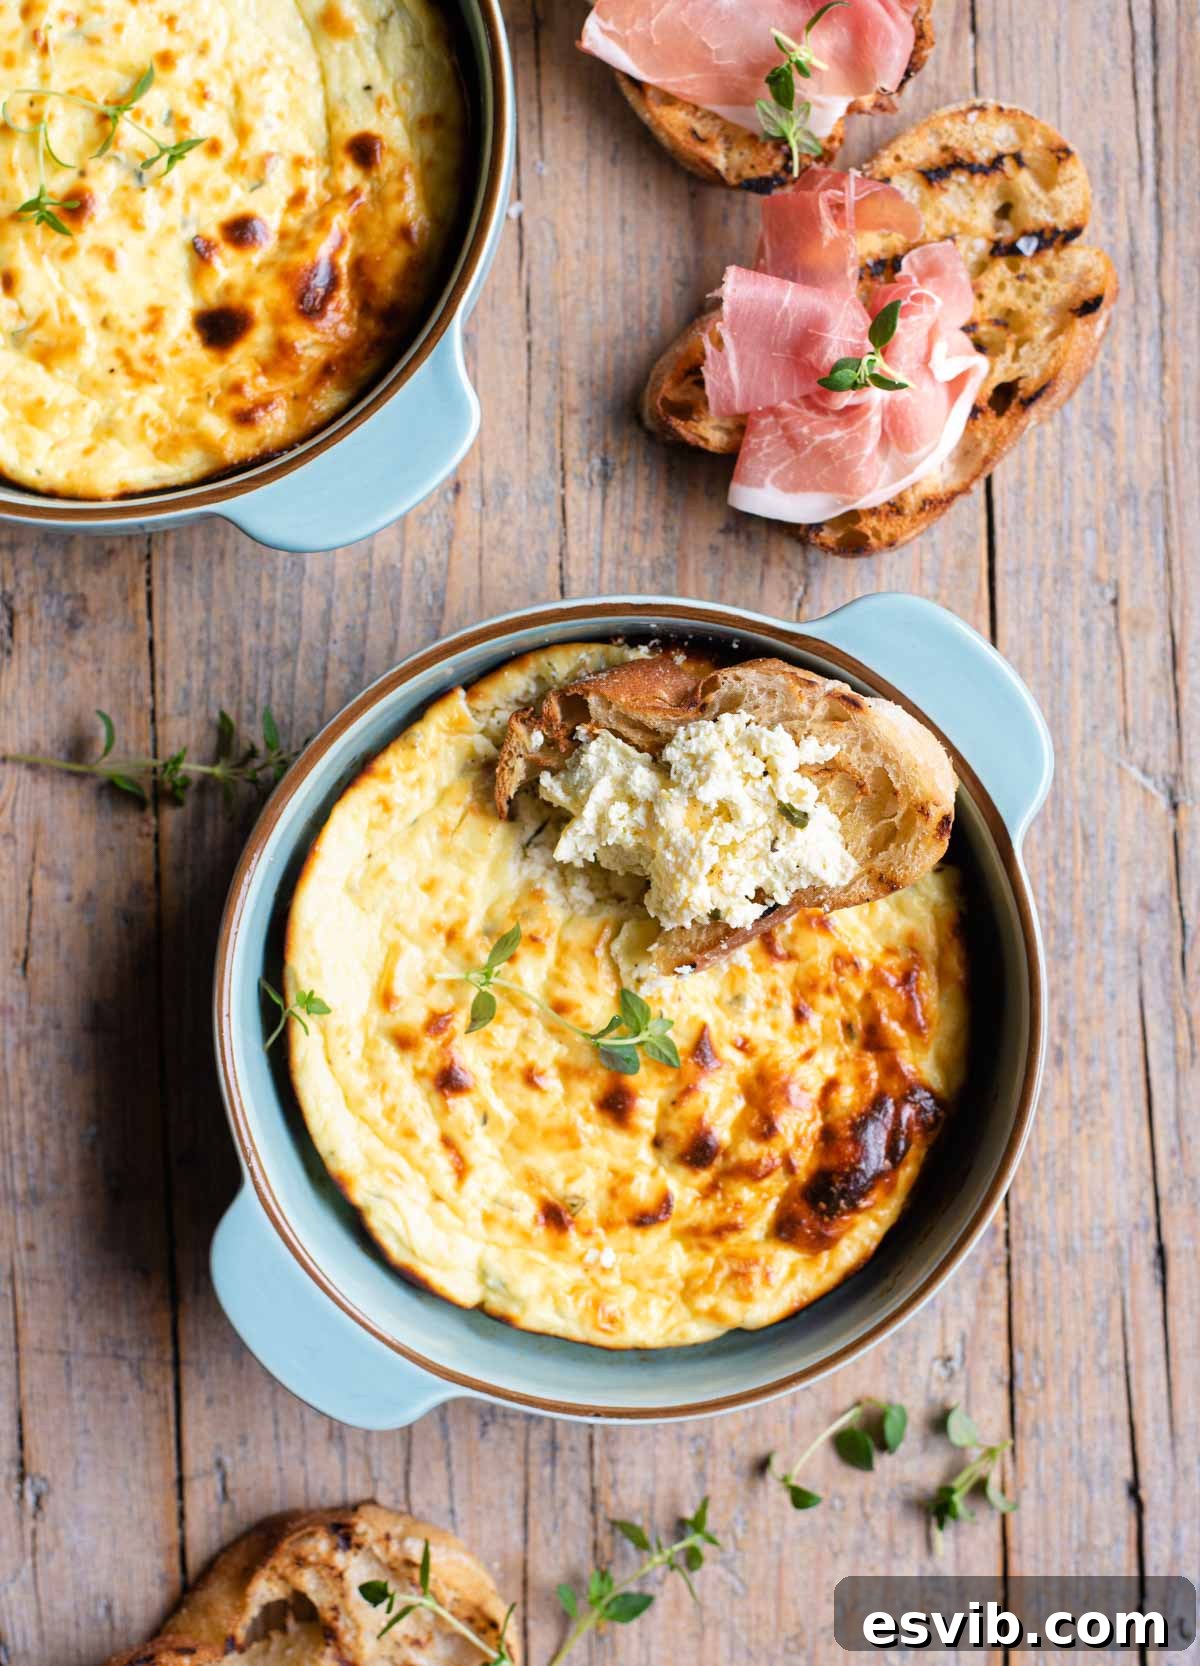
Why This Easy Baked Ricotta Will Become Your Go-To Appetizer
Baked Ricotta isn’t just an appetizer; it’s a celebration of simple, wholesome flavors that come together in a truly spectacular way. Whether you’re hosting an elaborate dinner party or simply seeking a delightful snack, this creamy Italian gem delivers every time. Its light, airy texture and rich, cheesy taste make it an ideal antipasto centerpiece, effortlessly complementing a spread of toasted bread, artisanal cured meats, fresh or pickled vegetables like a classic giardiniera, and, of course, a fine glass of vino.
The magic of this recipe lies in its transformation within the oven. The ricotta mixture, enriched with eggs, cheese, and fresh herbs, rises beautifully, achieving an almost soufflé-like consistency. The surface develops a stunning golden-brown crust, adding a delightful textural contrast to the soft, warm interior. Despite its impressive appearance and gourmet taste, this baked ricotta is remarkably easy to prepare. Just a few minutes of mixing, and then the oven does the rest, yielding a dish that looks and tastes like you spent hours in the kitchen.
Essential Ingredients for Your Perfect Baked Ricotta
Creating this delectable Baked Ricotta requires only a handful of readily available ingredients. The key is to select quality components, as their individual flavors truly shine through in the final dish. Below is a detailed look at what you’ll need, along with some crucial tips for each.
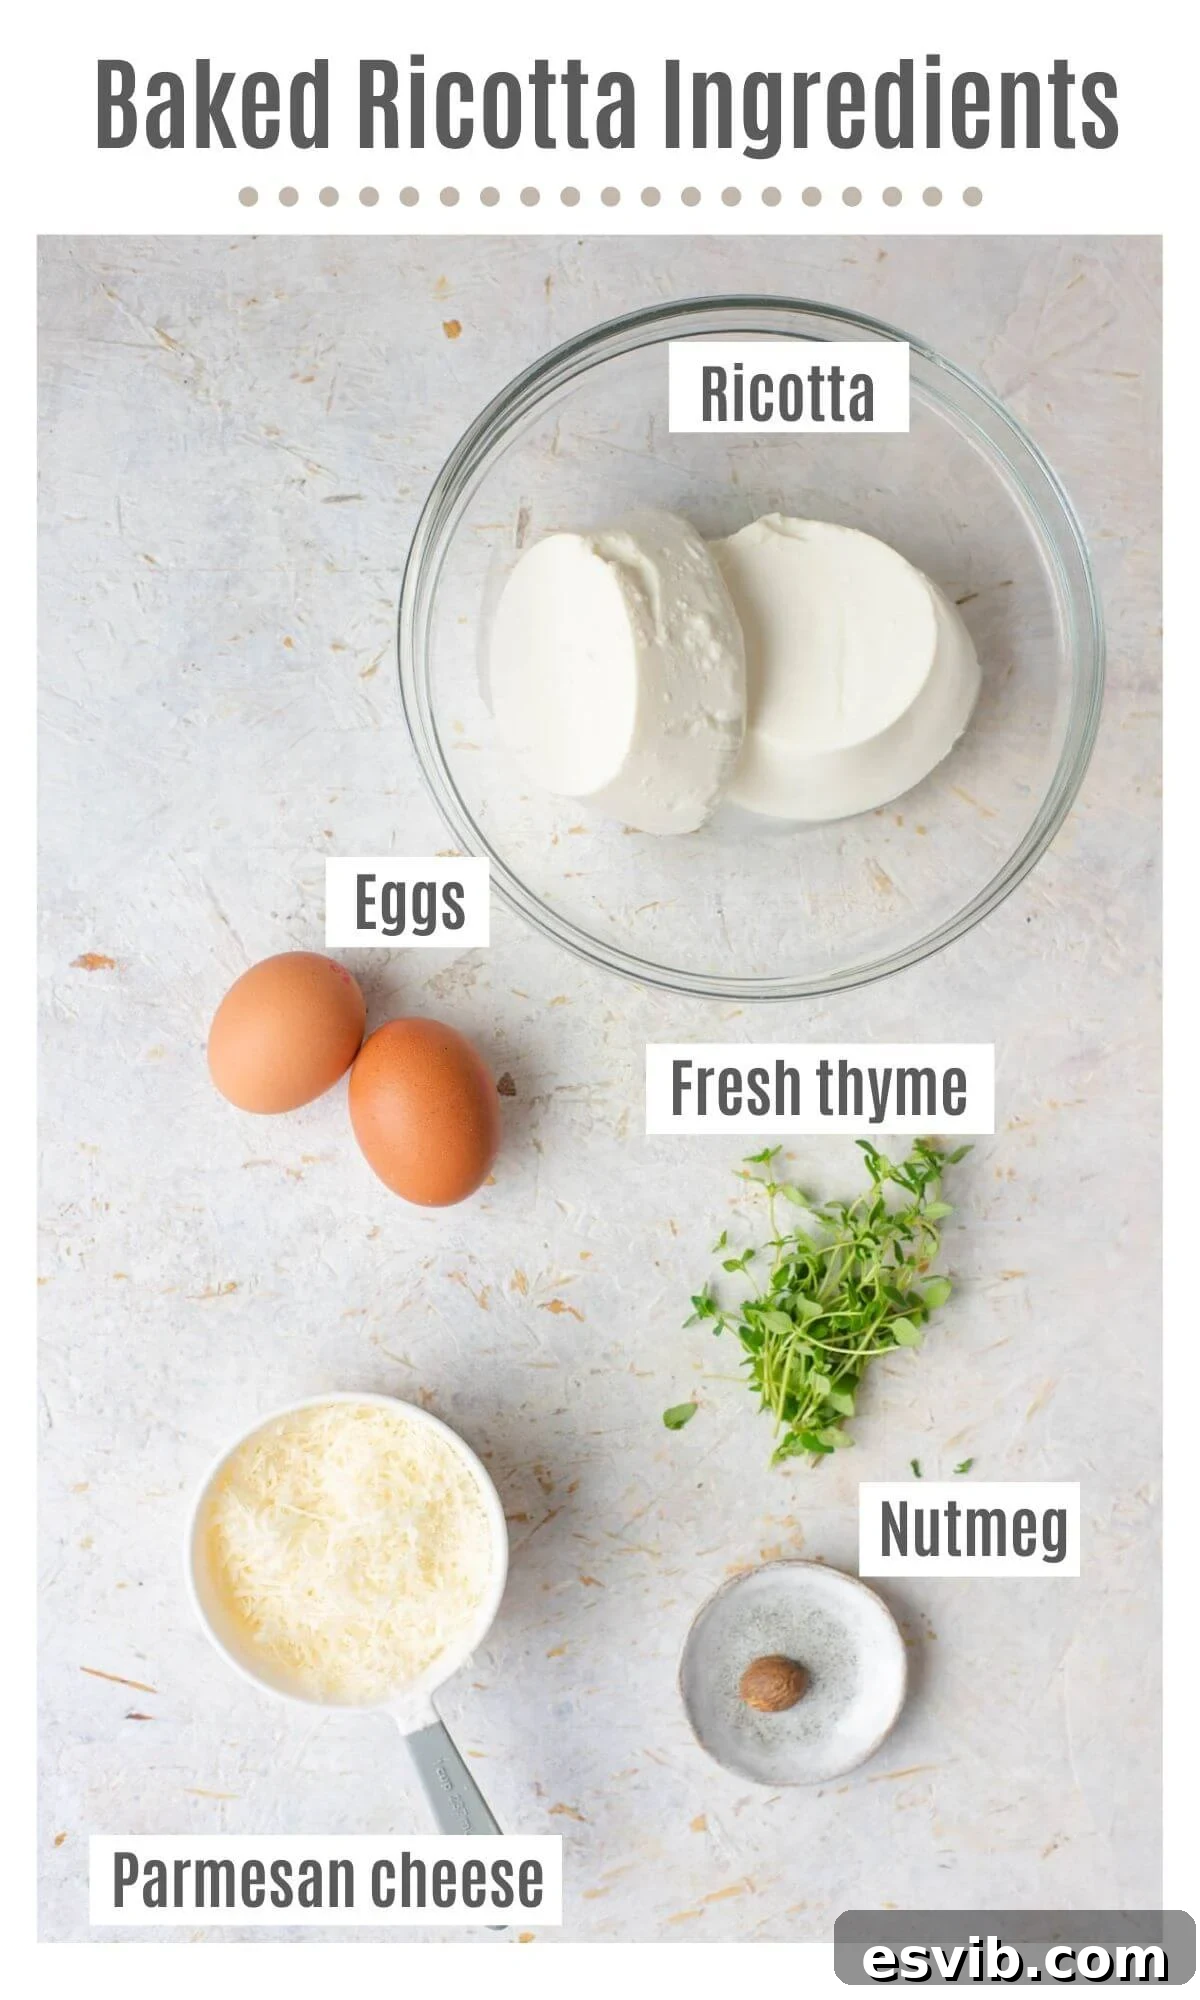
- Whole Milk Ricotta: This is the star of our dish, and using whole milk (full-fat) ricotta is paramount for achieving the best flavor and a luxuriously creamy texture. Its richness is essential for that melt-in-your-mouth experience. Before you begin, always remember to drain off any excess liquid from the ricotta tubs. This simple step prevents a watery final product and ensures your baked ricotta is firm yet tender.
- Eggs: Two medium to large-sized eggs act as a binder, helping the ricotta mixture puff up beautifully and set into that delightful soufflé-like consistency. They contribute to the structure and richness of the dish.
- Freshly Grated Parmesan: A crucial component for cheesy flavor. While pre-grated parmesan might be convenient, it simply cannot compare to the sharp, nutty, and complex taste of freshly grated Parmesan. Grating it yourself ensures maximum flavor and avoids the anti-caking agents often found in pre-packaged varieties.
- Fresh Thyme: We adore fresh thyme for its earthy, slightly peppery, and incredibly aromatic notes that perfectly complement the creamy ricotta. However, feel free to get creative with other fresh herbs. Fresh parsley offers a clean, bright flavor, basil adds a touch of sweetness, and rosemary brings a robust, piney aroma. Choose what suits your palate best!
- Nutmeg: Don’t underestimate the power of a tiny pinch of freshly grated nutmeg. It’s a secret ingredient that elevates the flavor profile of the ricotta, adding a warm, subtle sweetness and complexity that makes all the difference. While it’s just a whisper, try not to skip it.
- Salt & Pepper: Proper seasoning is vital to enhance and balance all the wonderful flavors in this dish. Use good quality sea salt and freshly cracked black pepper to taste. You’ll be surprised how much these simple additions brighten the overall profile.
- Butter: A small amount of butter is needed to generously grease your baking dish or ramekins. This not only prevents sticking but also contributes to a lovely golden crust on the edges of the baked ricotta.
- Bread for Serving: For an authentic Italian experience, we highly recommend serving this baked ricotta with chargrilled ciabatta bread. Slice the ciabatta, drizzle it lightly with good quality olive oil, and grill or toast it until it’s beautifully charred and crispy. The crunchy texture and smoky flavor provide a perfect counterpoint to the creamy ricotta. If ciabatta isn’t available, your favorite crusty bread or even sturdy crackers will work wonderfully.
Step-by-Step Guide to Making Perfect Baked Ricotta
Crafting this elegant baked ricotta is surprisingly straightforward. Follow these easy steps, and you’ll have a stunning appetizer ready in no time. The process is designed to be simple, ensuring even novice cooks can achieve fantastic results.
Preparing Your Ricotta Mixture
- Preheat Oven & Prepare Dish: Begin by preheating your oven to 400°F (200°C). While the oven heats, lightly and thoroughly grease your chosen baking dish or individual ramekins with butter. This ensures easy removal and a pleasant golden crust. Set the prepared dish aside.
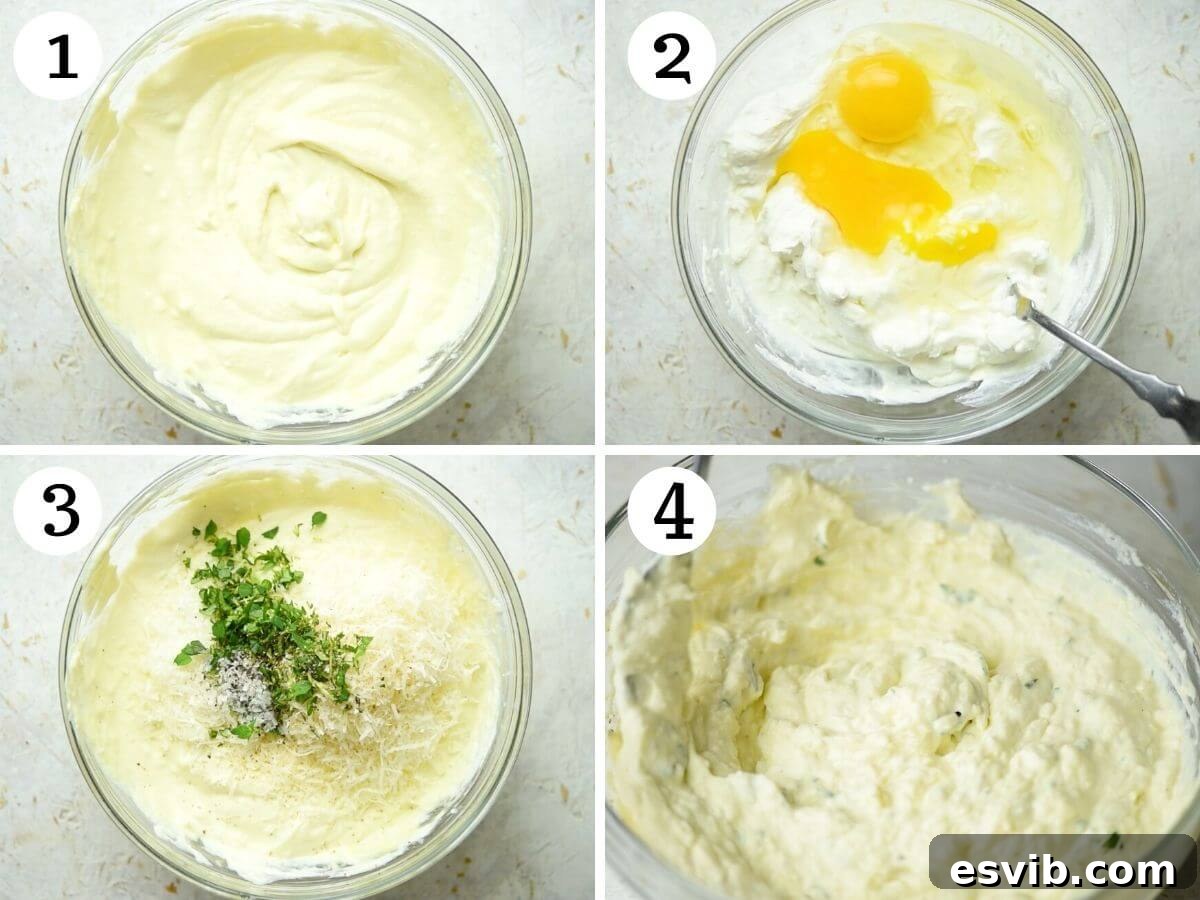
- Drain Ricotta: Carefully drain any excess liquid from the tubs of whole milk ricotta. This is important for achieving the desired creamy, firm texture. Once drained, transfer the ricotta to a large mixing bowl.
- Whisk Ricotta & Eggs: Using a fork or a whisk, mix the ricotta until it’s smooth and lump-free. Then, crack the two eggs into the bowl with the ricotta. Continue to mix vigorously until the eggs are fully incorporated and the mixture is uniformly combined, with no streaks of egg visible.
- Season and Flavor: Now it’s time to infuse our ricotta with flavor! Add the freshly grated Parmesan cheese, the chopped fresh thyme, a pinch of nutmeg, and a generous amount of salt and freshly cracked black pepper. Mix everything together thoroughly until all the ingredients are well distributed throughout the creamy ricotta mixture.
Baking to Golden Perfection
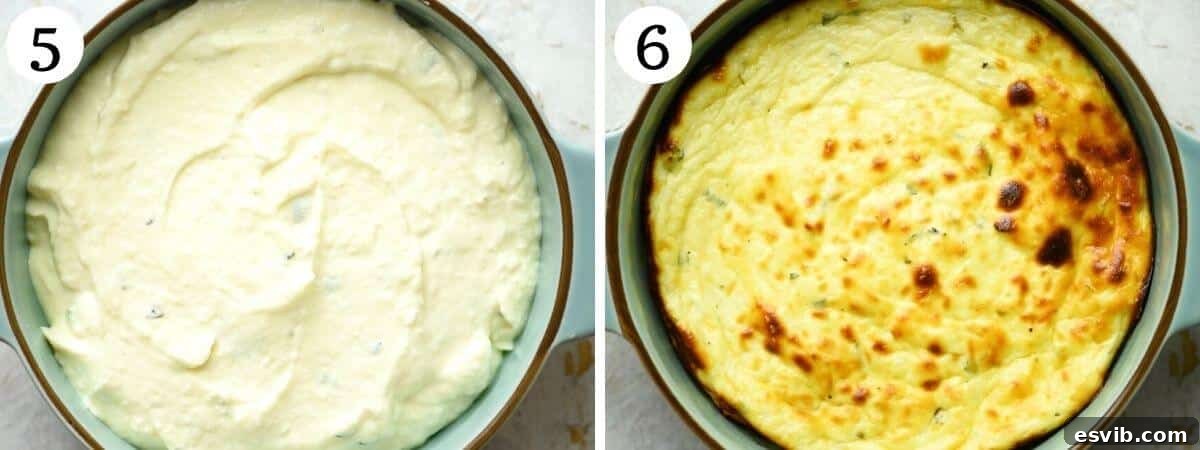
- Fill Baking Dish: Spoon the prepared ricotta mixture into your buttered baking dish or ramekins. Fill them to about three-quarters full. Use the back of a spoon to gently smooth the tops of the ricotta mixture, creating an even surface for baking.
- Bake Until Golden: Transfer the dish to the preheated oven. Bake for approximately 30-45 minutes. The exact time may vary slightly depending on your oven and the size of your baking dish. Look for the ricotta to puff up significantly and develop a beautiful golden-brown crust on top. Once baked, remove it from the oven.
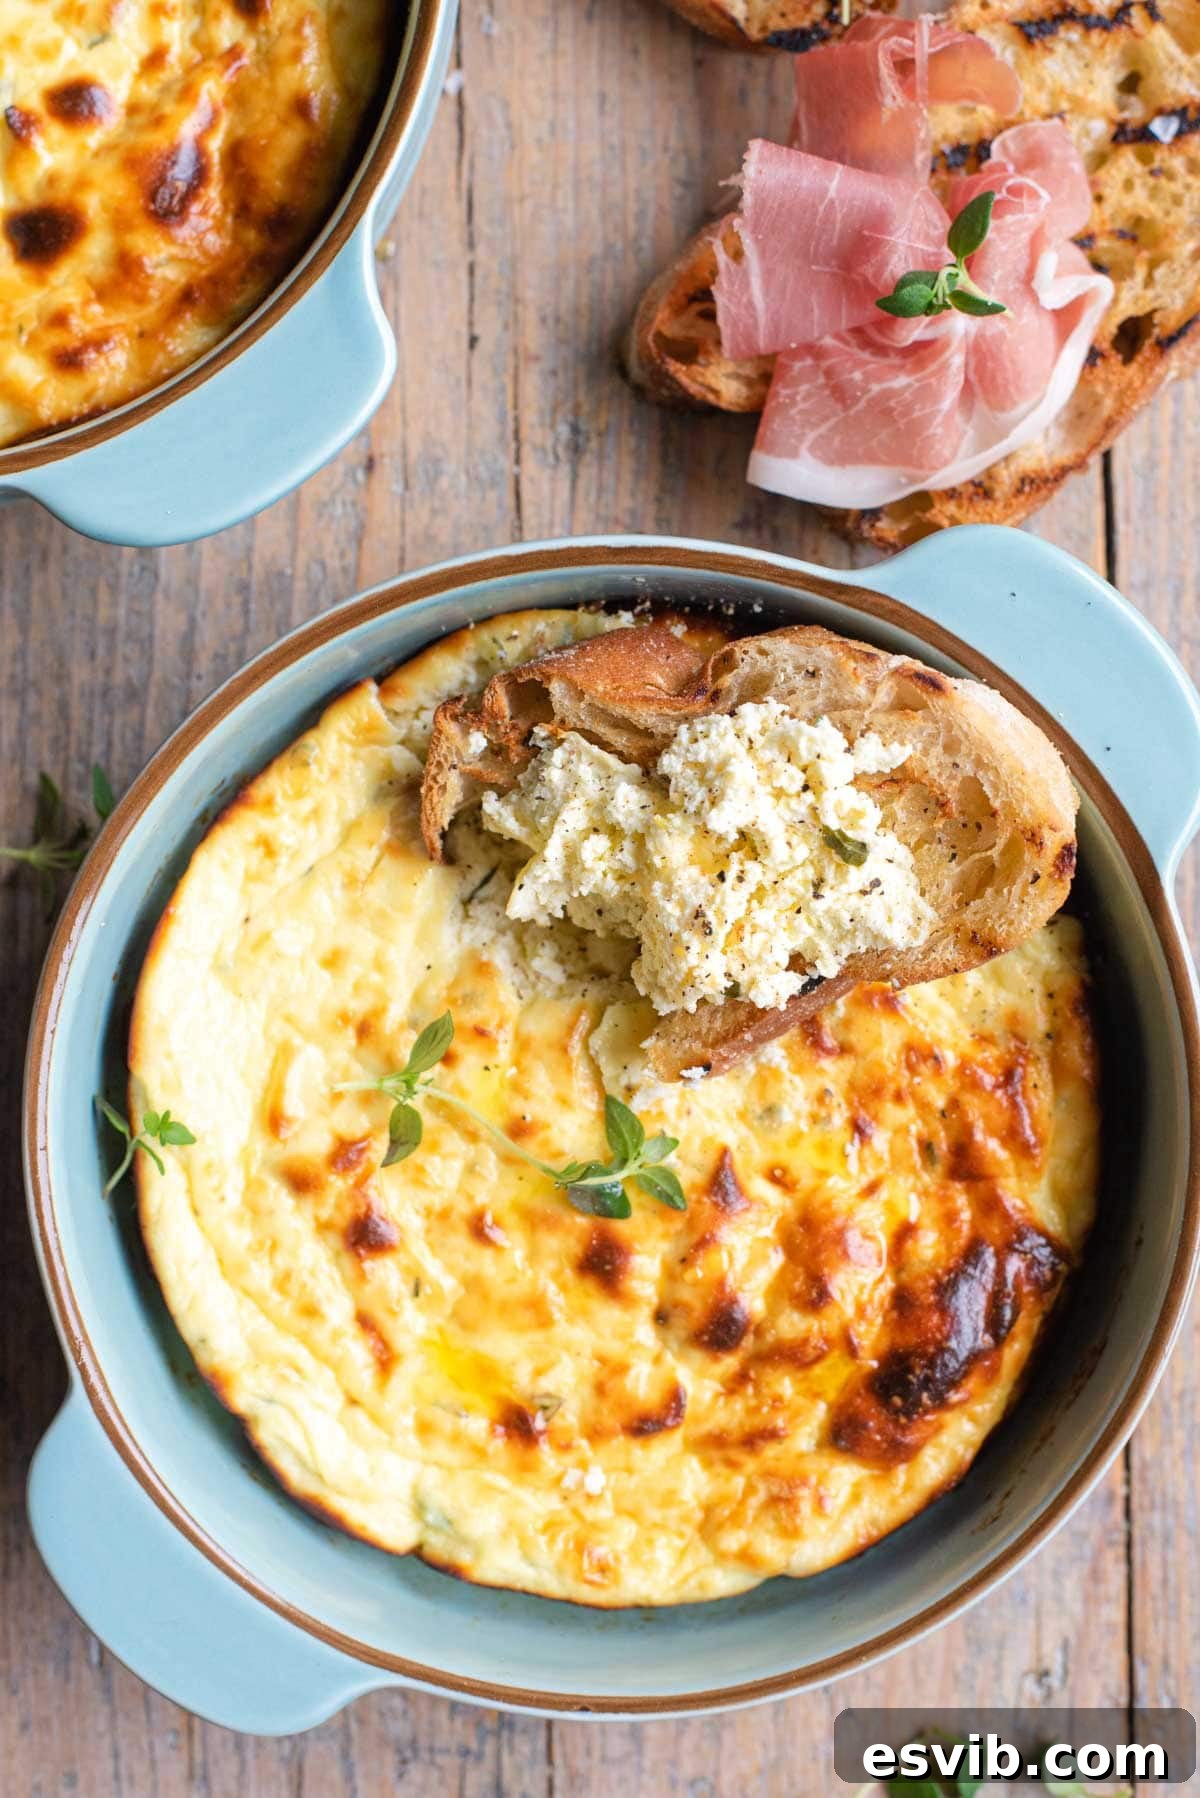
- Serve Warm: Allow the baked ricotta to cool slightly for a few minutes before serving. It’s truly at its best when served warm, allowing its creamy texture and fragrant flavors to shine. Serve alongside your favorite toasted ciabatta bread or crisp crackers.
Expert Tips & Frequently Asked Questions (FAQs)
To ensure your Baked Ricotta turns out perfectly every time, and to answer any lingering questions, we’ve compiled a list of our top tips and frequently asked questions.
Top Tips for Success
- Draining the Ricotta: While some recipes suggest elaborate draining methods, for this recipe, simply pouring off any excess liquid from the tubs before adding the ricotta to your mixing bowl is sufficient. There’s no need to leave it in a sieve for extended periods.
- Choosing Your Baking Dish: The versatility of this recipe extends to your choice of baking vessel. We typically use two 6-inch round baking dishes, which result in lovely individual portions or smaller sharing plates. However, one larger dish will work just as well. The main consideration is to ensure you fill the dish approximately ¾ full with the ricotta mixture to allow for proper rising and even baking.
- Exploring Flavor Variations: This recipe is a fantastic canvas for culinary creativity! While thyme, Parmesan, and nutmeg create a classic profile, don’t hesitate to experiment. Consider adding a pinch of red pepper flakes (chilli flakes) for a subtle kick, incorporating different cheeses like grated Pecorino Romano for a sharper taste or a mild provolone for extra creaminess, or experimenting with other fresh herbs like oregano or marjoram. A bit of lemon zest can add a wonderful brightness, and finely minced garlic or roasted garlic paste will introduce savory depth.
- Preparing in Advance: This dish is ideal for entertaining as much of the prep can be done ahead of time. You can whisk together the entire ricotta mixture in a bowl and keep it covered in the refrigerator for 1-2 days before you plan to bake it. This allows for quick and easy baking right before your guests arrive.
- Storage & Freezing: Once baked, any leftover ricotta will keep well when stored in an airtight container in the fridge for 2-3 days. While delicious, we do not recommend freezing the baked ricotta, as the freezing and thawing process tends to compromise its delicate, creamy texture, making it grainy.
Common Questions Answered
What’s the best way to serve Baked Ricotta?
Baked ricotta is incredibly versatile. It’s fantastic served warm or at room temperature with toasted ciabatta bread or your favorite crackers. For an impressive spread, incorporate it into an antipasti board alongside cured meats like prosciutto or salami, a variety of Italian cheeses, fresh fruit such as figs or grapes, olives, and pickled vegetables.
Does ricotta melt in the oven?
Unlike many other cheeses that become completely molten when heated, ricotta behaves differently. When baked, ricotta becomes wonderfully soft and creamy but retains its shape, puffing up beautifully rather than melting into a liquid form. This is due to its high moisture content and specific protein structure.
How long does Baked Ricotta last?
Once baked and properly cooled, the ricotta can be stored in an airtight container in the refrigerator for 2 to 3 days. It can be reheated gently or served cold.
Can Baked Ricotta be frozen?
We generally do not recommend freezing baked ricotta. The freezing and thawing process can alter the texture of the cheese, causing it to become watery or grainy, thus losing its delightful creamy consistency. It’s best enjoyed fresh or within a few days of baking.
Serving Suggestions for Your Baked Ricotta Masterpiece
Baked Ricotta is a dish that effortlessly elevates any meal, whether it’s a casual weeknight starter or a sophisticated appetizer for a special occasion. While it shines brightly on its own, here are some ideas to make your serving experience even more memorable:
- Classic Ciabatta Companion: The most traditional and perhaps most satisfying way to enjoy baked ricotta is with slices of chargrilled ciabatta. The crunchy, slightly smoky bread offers a perfect textural and flavor contrast to the smooth, creamy cheese.
- Elevated Antipasto Platter: Transform your baked ricotta into the star of an Italian-inspired antipasto platter. Arrange it alongside an assortment of high-quality cured meats such as prosciutto, coppa, or salami. Add a mix of marinated olives, roasted red peppers, artichoke hearts, sun-dried tomatoes, and perhaps some fresh figs or grapes for a touch of sweetness.
- Fresh Herb Garnish: Before serving, a final sprinkle of fresh thyme leaves or a drizzle of your best extra virgin olive oil can enhance both the visual appeal and the fresh aromas of the dish. A crack of black pepper also adds a nice touch.
- Wine Pairings: For a complete experience, pair your baked ricotta with a light-bodied, crisp white wine such as a Pinot Grigio, Vermentino, or a dry rosé. Their acidity will beautifully cut through the richness of the cheese.
- Beyond Appetizers: While primarily an appetizer, consider serving any leftover baked ricotta as a spread for sandwiches, a topping for bruschetta, or even stirred into warm pasta for a quick and luxurious meal.
More Irresistible Italian Appetizers to Explore
If you’ve enjoyed this Baked Ricotta, you’ll surely love exploring more of our delightful Italian appetizer recipes. Each one is designed to bring authentic flavors and simple joy to your kitchen.
- Burrata with Crispy ‘Nduja & Gremolata
- Whipped Ricotta Dip with Roasted Tomatoes
- Grissini – Italian Breadsticks
- Whipped Ricotta Toast with Balsamic Cherries
We love hearing from you! If you’ve tried this Baked Ricotta recipe or any other on our blog, please don’t hesitate to rate the recipe and share your experience in the comments section below. Your feedback means the world to us! You can also FOLLOW US on FACEBOOK, INSTAGRAM, and PINTEREST to discover more delicious Italian food and stay updated on our latest culinary adventures.
Baked Ricotta
By Emily
Prep Time: 5 mins
Cook Time: 30 mins
Total Time: 35 mins
Servings: 4 servings
Super easy and delicious Baked Ricotta made with fresh thyme, parmesan and nutmeg. Baked in the oven until light and creamy then spread over chargrilled ciabatta for a delicious appetizer!
Ingredients
- 2 cups whole milk ricotta (500g), excess liquid drained
- 1 cup freshly grated parmesan (40g)
- 2 medium-large eggs
- 1 tbsp fresh thyme, chopped
- 1 pinch nutmeg
- Salt and pepper, to season
- Butter, for greasing
Instructions
- Preheat the oven to 400°F (200°C). Lightly grease your ramekins or baking dish with butter and set aside.
- Drain any excess liquid from the ricotta and add to a mixing bowl. Mix with a fork or whisk until smooth.
- Add the eggs and mix well until thoroughly combined into the ricotta.
- Next, add the chopped thyme, grated parmesan, nutmeg, and a good pinch of salt and pepper. Mix until all ingredients are well combined.
- Spoon the ricotta mixture into your prepared baking dish until it is ¾ full. Smooth the tops with the back of a spoon. Bake in the oven for 30-45 minutes until puffed up and golden brown on top.
- Serve warm with toasted ciabatta bread or crackers.
Notes
- Draining the ricotta: Just ensure any excess liquid is drained from the tubs; no need to leave it in a sieve for extended periods.
- What dish to bake it in: We used two 6-inch round baking dishes, but one larger dish works perfectly. Fill it about ¾ full.
- Other flavor options: Feel free to customize with red pepper flakes, different cheeses, other herbs (like parsley or rosemary), lemon zest, or minced garlic.
- Preparing in advance: The mixture can be prepared and kept in the fridge for 1-2 days before baking.
- Storage & freezing: Baked ricotta stores well in the fridge for 2-3 days. Freezing is not recommended as it affects the creamy texture.
Nutrition
Calories: 347kcal | Carbohydrates: 5g | Protein: 26g | Fat: 25g | Saturated Fat: 15g | Trans Fat: 1g | Cholesterol: 162mg | Sodium: 535mg | Potassium: 194mg | Fiber: 1g | Sugar: 1g | Vitamin A: 945IU | Vitamin C: 3mg | Calcium: 570mg | Iron: 1mg
Nutrition information is automatically calculated, so it should only be used as an approximation.
Helpful Information for All Recipes
- We always use extra virgin olive oil in all of our recipes unless explicitly stated otherwise.
- When using canned or jarred tomatoes of any kind, we recommend Cirio or Mutti brands for the best results and flavor.
- All vegetables are assumed to be medium-sized unless specified differently.
- All recipes are carefully tested and developed using a fan (convection) oven.
- Find out more about how nutrition is calculated on our site.
- Check out our must-have Italian Pantry Staples to stock your kitchen.
- You can also find all our Essential Kitchen Tools for Italian Cooking to equip your culinary space.
Did you try this recipe? Leave a comment below!