
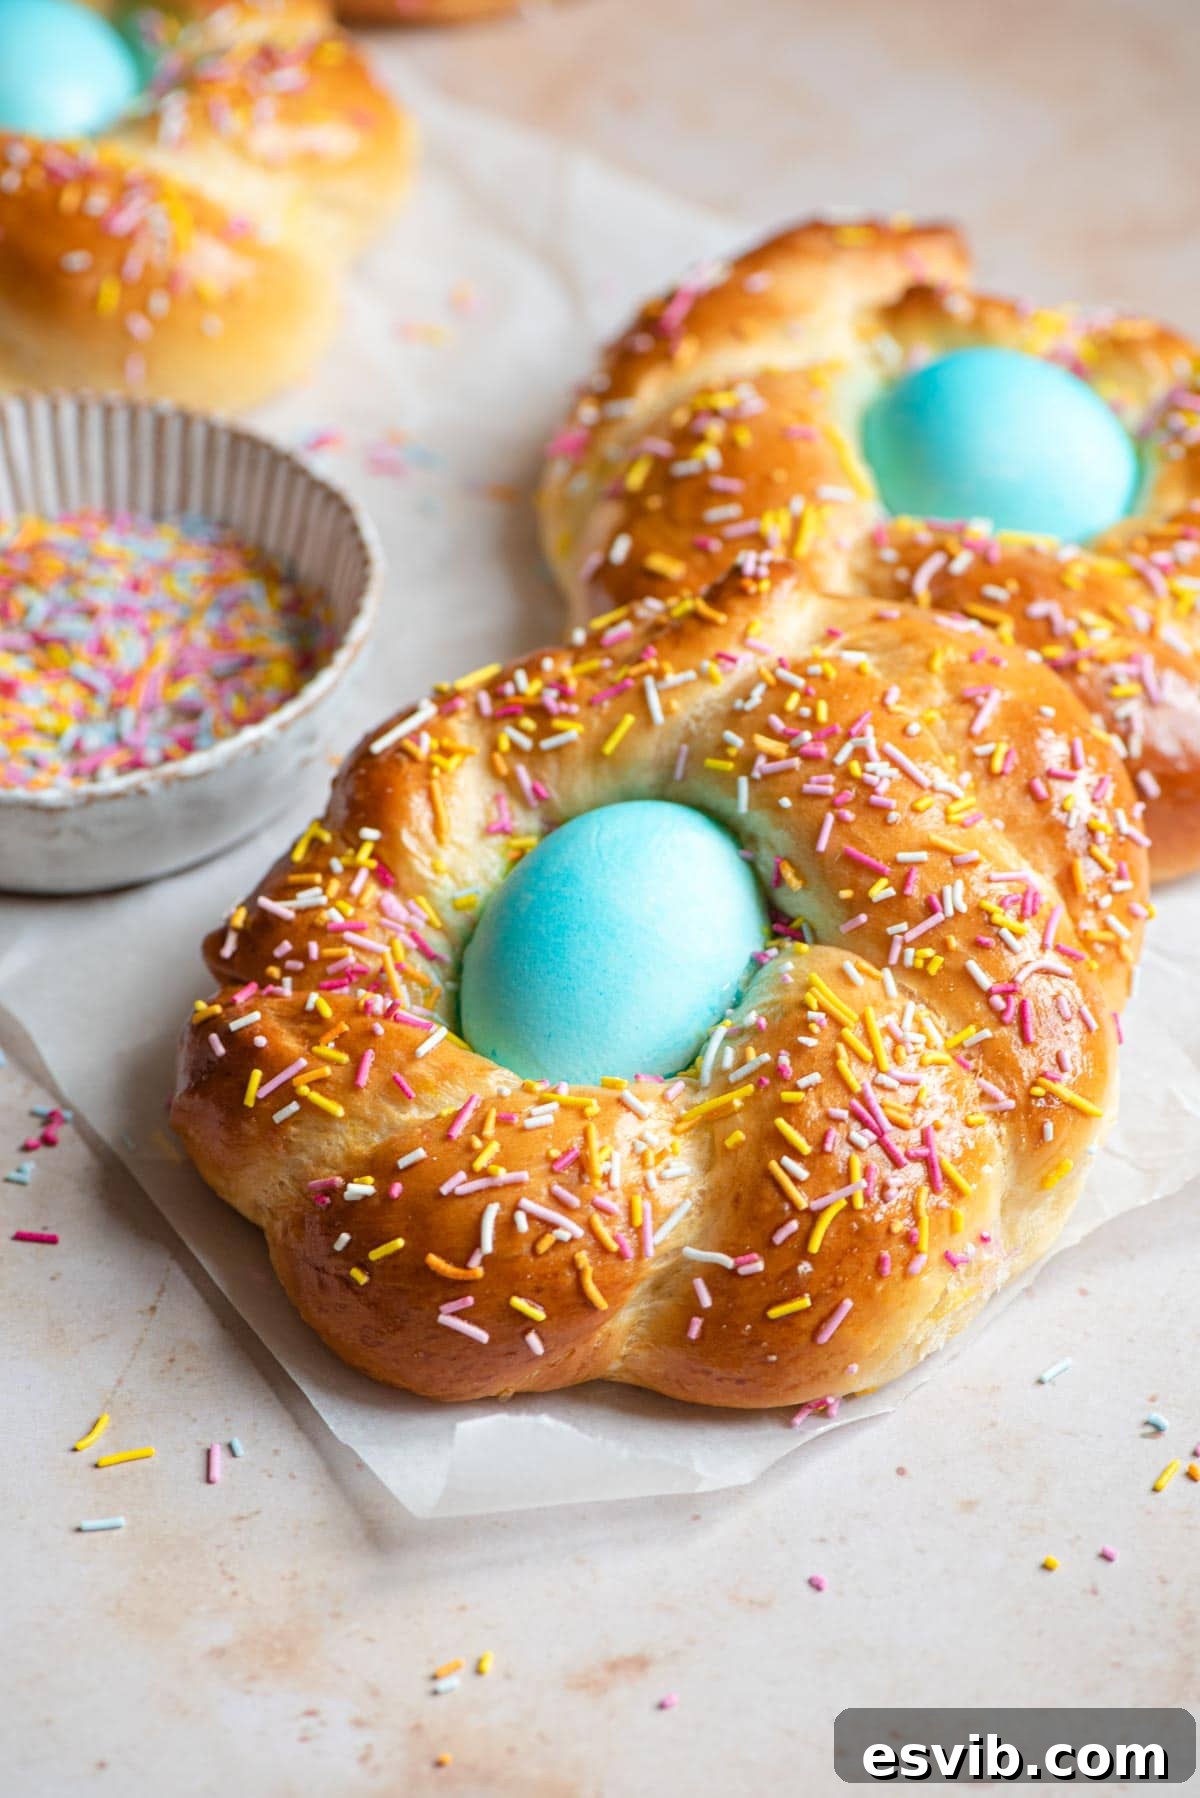
Traditional Italian Easter Bread (Pane di Pasqua): A Sweet Braided Delight
Welcome to the enchanting world of Italian Easter Bread, or “Pane di Pasqua”! This beloved traditional bread is much more than just a recipe; it’s a celebration of renewal, family, and the vibrant spirit of springtime. Imagine a beautifully braided, soft, sweet, and incredibly buttery brioche-style bread, lovingly baked with fun, colorful eggs nestled within its spirals and often adorned with bright sprinkles. It’s an irresistible centerpiece for your Easter breakfast or brunch table, and equally delightful as a snack with a smear of butter or your favorite jam.
The Heartwarming Tradition of Pane di Pasqua
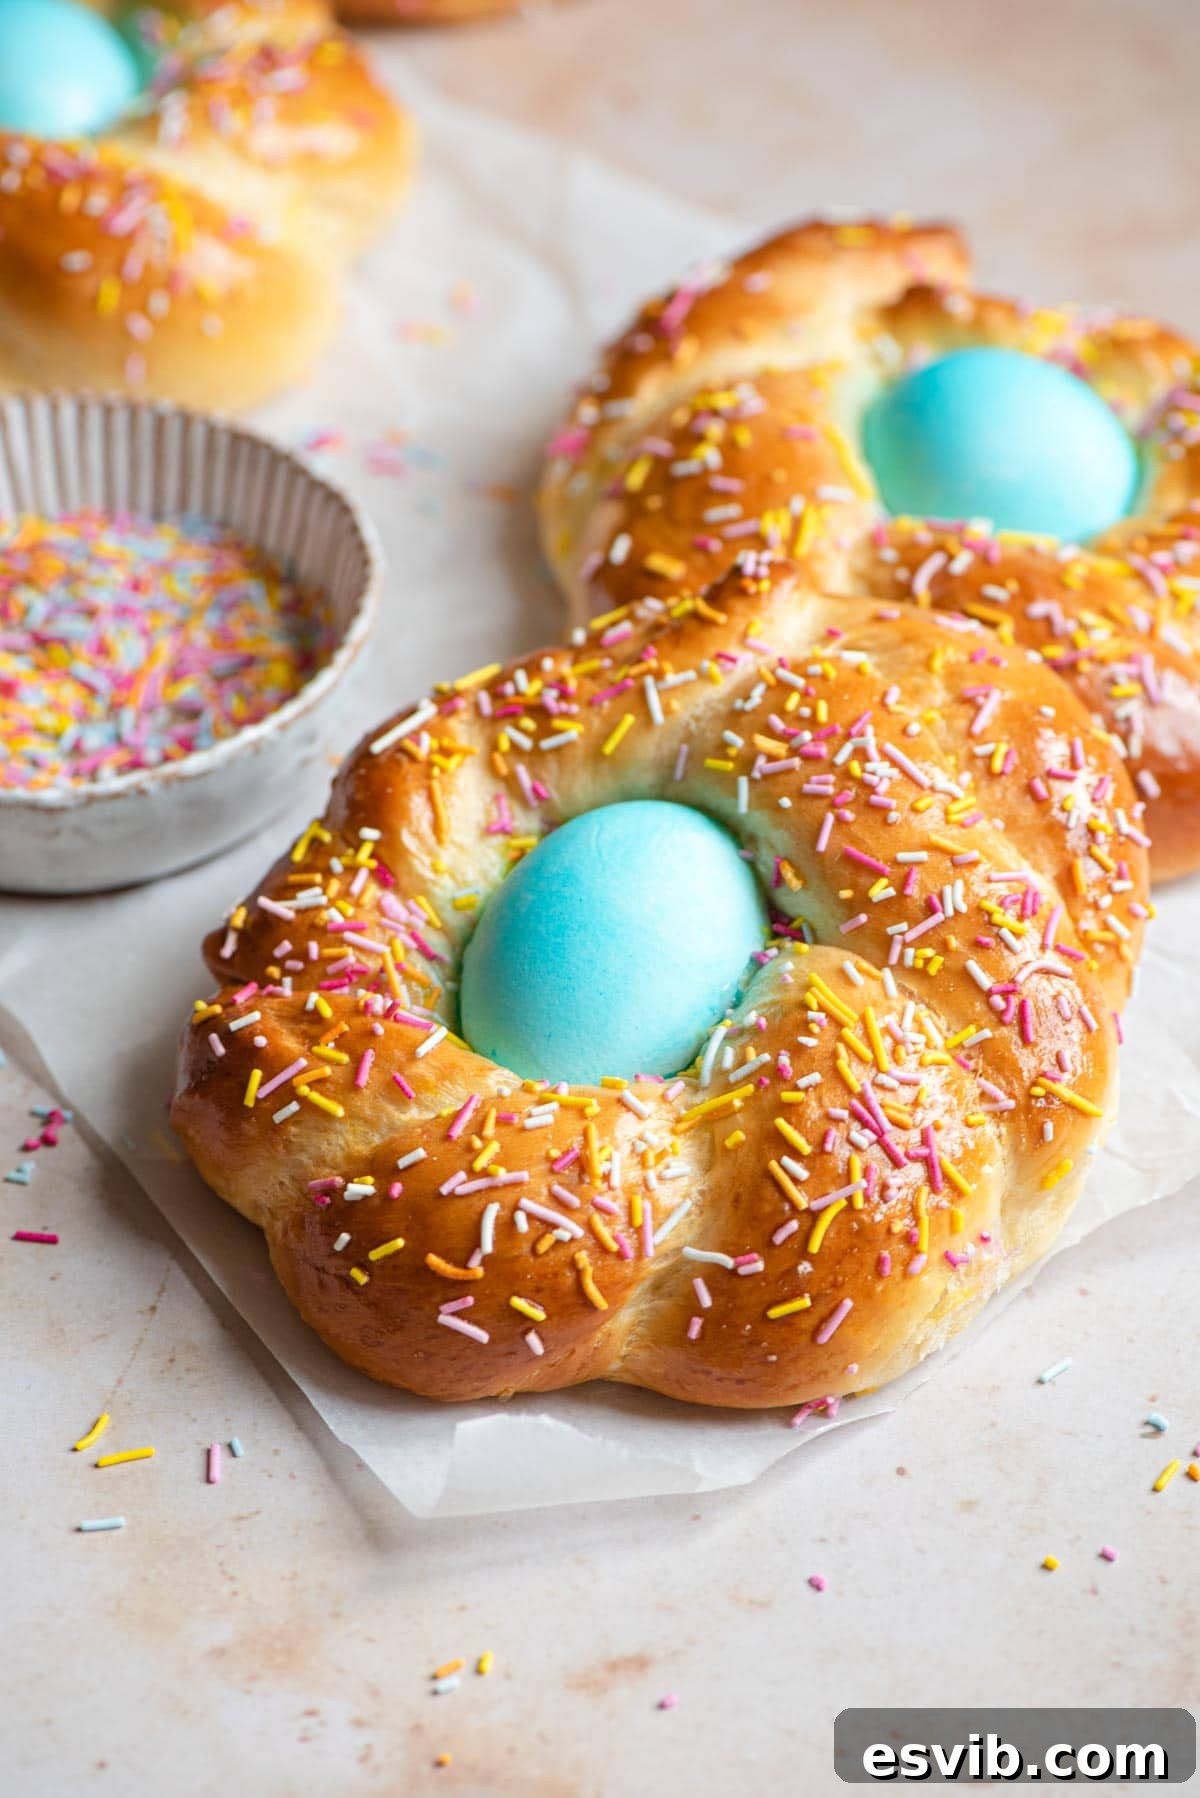
Pane di Pasqua is a truly special and delicious treat that encapsulates the joy of Easter. It’s crafted from a rich, sweet brioche-style dough that achieves an unparalleled softness and buttery flavor, often enhanced with delicate notes of lemon zest and fragrant vanilla. While the modern versions frequently incorporate vibrant food-colored eggs and festive sprinkles, the core of this bread remains deeply rooted in Italian traditions.
Traditionally, this bread is shaped into beautiful wreaths or nests, with raw, uncolored eggs placed in the center. These eggs are powerful symbols of new life, rebirth, and the resurrection central to the Easter holiday. The classic shape often features three braids, thoughtfully representing the Holy Trinity: The Father, The Son, and The Holy Spirit. Over time, families began adding playful colored eggs and cheerful sprinkles, transforming the bread into a joyous symbol perfect for celebrating the arrival of Spring. While these vibrant additions are optional, they certainly add a charming touch that children and adults alike adore.
Why You’ll Love This Homemade Italian Easter Bread
Making Pane di Pasqua at home is a rewarding experience that fills your kitchen with an incredible aroma and your heart with satisfaction. This recipe promises a bread that is:
- Incredibly Soft & Fluffy: Thanks to the brioche-style dough, enriched with butter and eggs, each bite is melt-in-your-mouth tender.
- Perfectly Sweet & Flavorful: Balanced sweetness from sugar, bright notes from lemon zest, and comforting warmth from vanilla make this bread utterly irresistible.
- Beautifully Braided: The act of braiding is therapeutic, and the resulting nests are truly stunning, making it a showstopper on any Easter table.
- Festive & Fun: The addition of colorful eggs and sprinkles brings a playful element that celebrates the joy of Easter and the vibrant arrival of spring.
- Versatile: Enjoy it plain, with butter and jam, or even transform leftovers into French toast.
Essential Ingredients for Your Pane di Pasqua
Crafting the perfect Italian Easter Bread begins with understanding the role of each ingredient. Below, you’ll find a detailed look at what you need, along with important tips to ensure your bread turns out wonderfully every time!
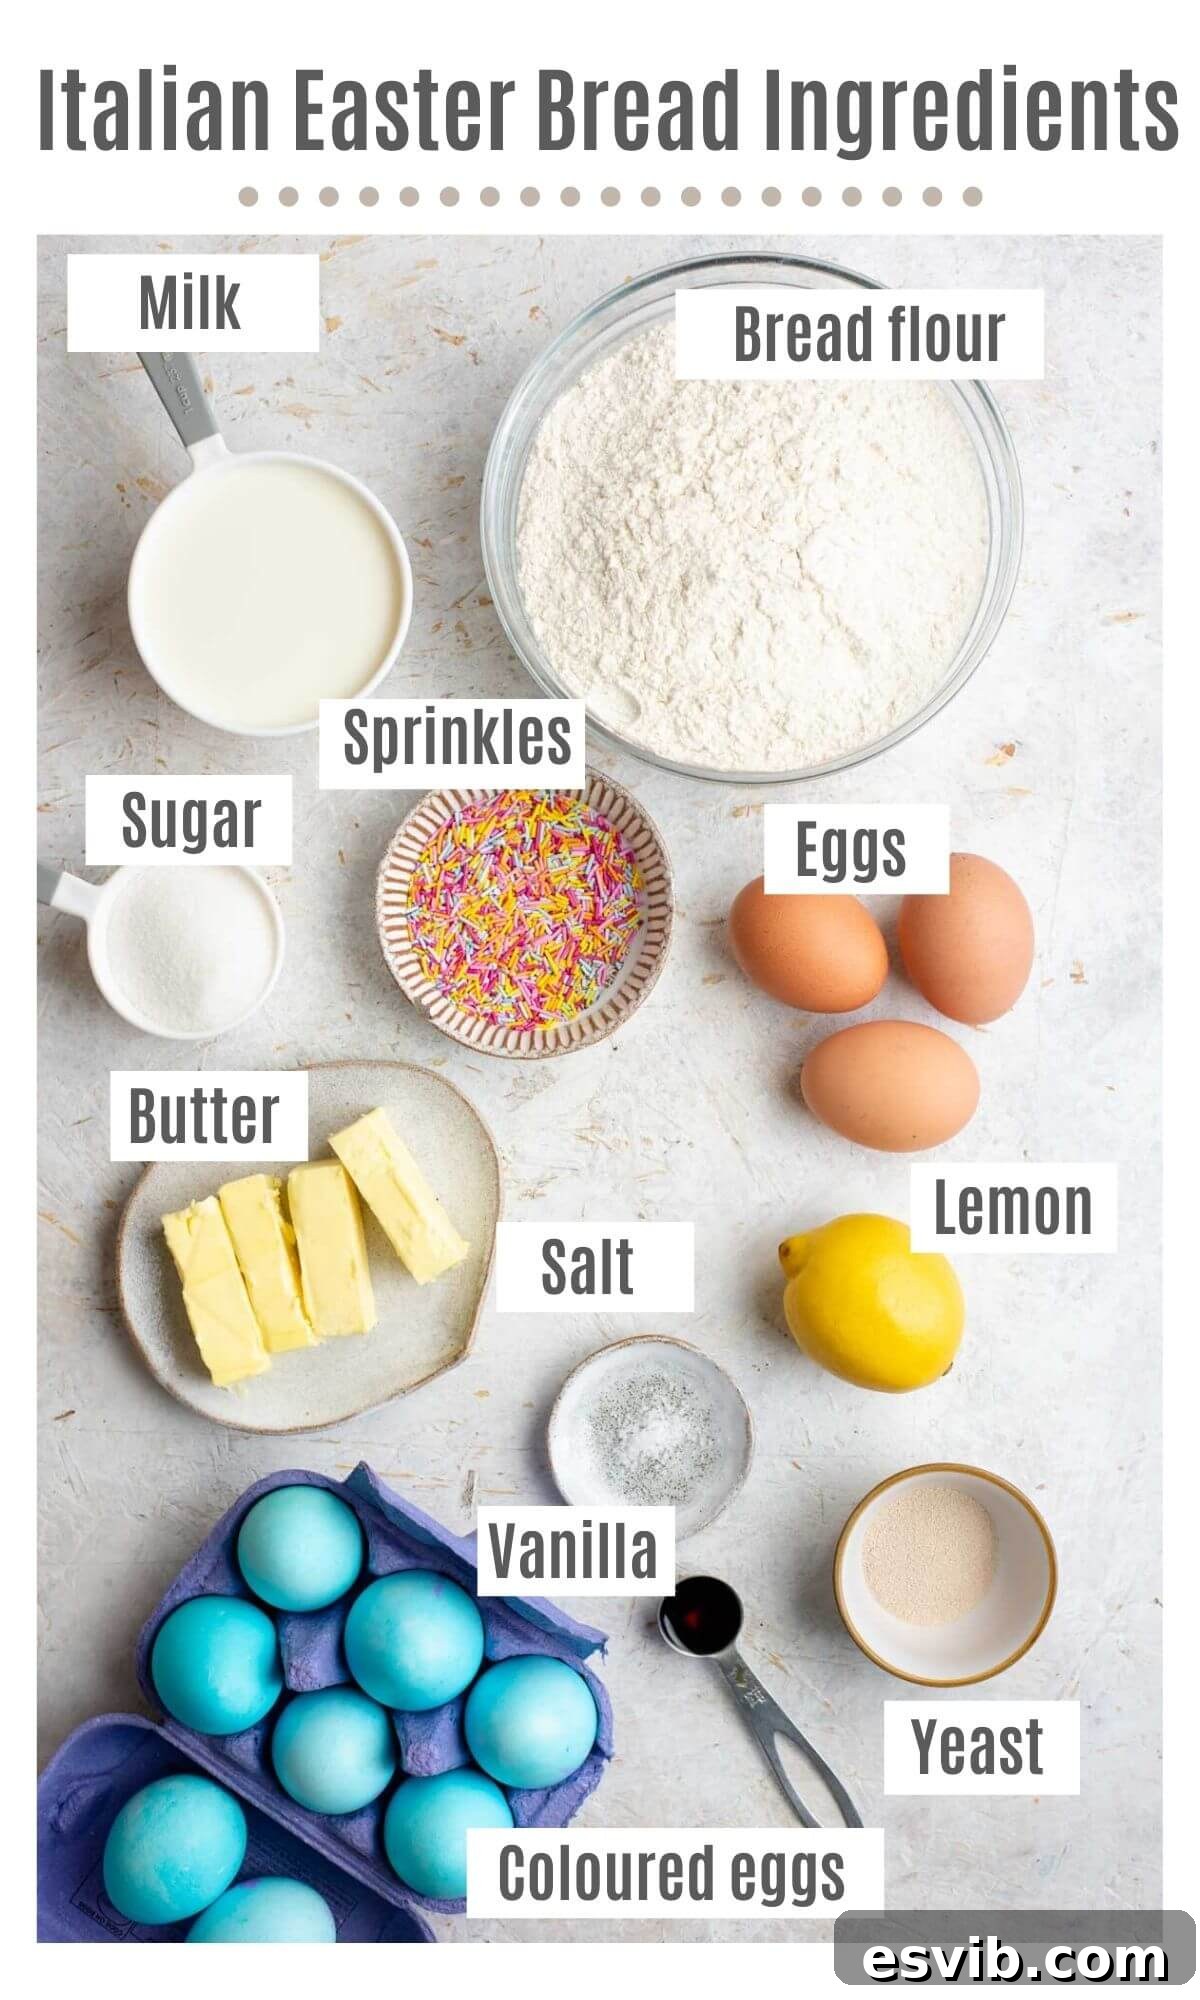
- Flour: For the best results and a wonderfully soft texture, bread flour is highly recommended. Its higher protein content develops gluten more effectively, leading to a chewier yet tender crumb. If you don’t have bread flour, all-purpose flour can be used, but be aware that the texture might be slightly different – perhaps a little less airy and tender.
- Granulated Sugar: This provides the perfect level of sweetness to our brioche dough and contributes to its beautiful golden-brown crust during baking.
- Whole Milk: Opt for whole (full-fat) milk. The higher fat content significantly enriches the dough, contributing to its luxurious flavor and incredibly soft, moist texture. While lower-fat milk works, it won’t yield the same richness.
- Vanilla Extract: Always use real vanilla extract or vanilla bean paste for an authentic, deep vanilla flavor. Avoid artificial vanilla essence, which can impart a less desirable taste.
- Instant Yeast: This recipe calls for dry instant yeast (sometimes labeled “fast action yeast”). Instant yeast doesn’t typically require prior activation in liquid, which saves time. However, if your specific brand of yeast suggests activation, simply dissolve it in a small portion of the warm milk called for in the recipe before adding it to the dry ingredients.
- Citrus Zest: The zest of one lemon or orange adds a bright, aromatic lift to the bread, cutting through the richness and enhancing the overall flavor. Lemon zest offers a classic, delicate flavor, while orange zest provides a slightly bolder, sweeter aroma. Both are delicious!
- Salt: Even in a sweet bread, salt is absolutely crucial. It balances the sweetness, enhances all the other flavors, and plays an important role in controlling yeast activity and strengthening the dough’s gluten structure. Do not skip it!
- Eggs: You’ll need large eggs for both the dough and for coloring. Importantly, use raw, uncooked eggs for coloring and placing in the braids. White-shelled eggs typically take on colors more vibrantly than brown ones.
- Food Coloring: For painting the raw eggs (optional). Gel food coloring is often preferred for its vibrant pigments and ease of use. You can choose any colors that spark joy for your Easter celebration.
- Sprinkles: Bright and colorful sprinkles are an optional but highly recommended addition, especially if you want to make your Easter bread extra festive and appealing, particularly for children.
Detailed Step-by-Step Instructions to Bake Perfect Pane di Pasqua
Follow these detailed steps carefully to create your beautiful Italian Easter Bread. Remember, baking is a journey, and taking your time will yield the best results!
Preparing the Dough
- Start by gently warming your whole milk until it’s lukewarm (not hot!) and melt your unsalted butter in a separate bowl. Set aside.
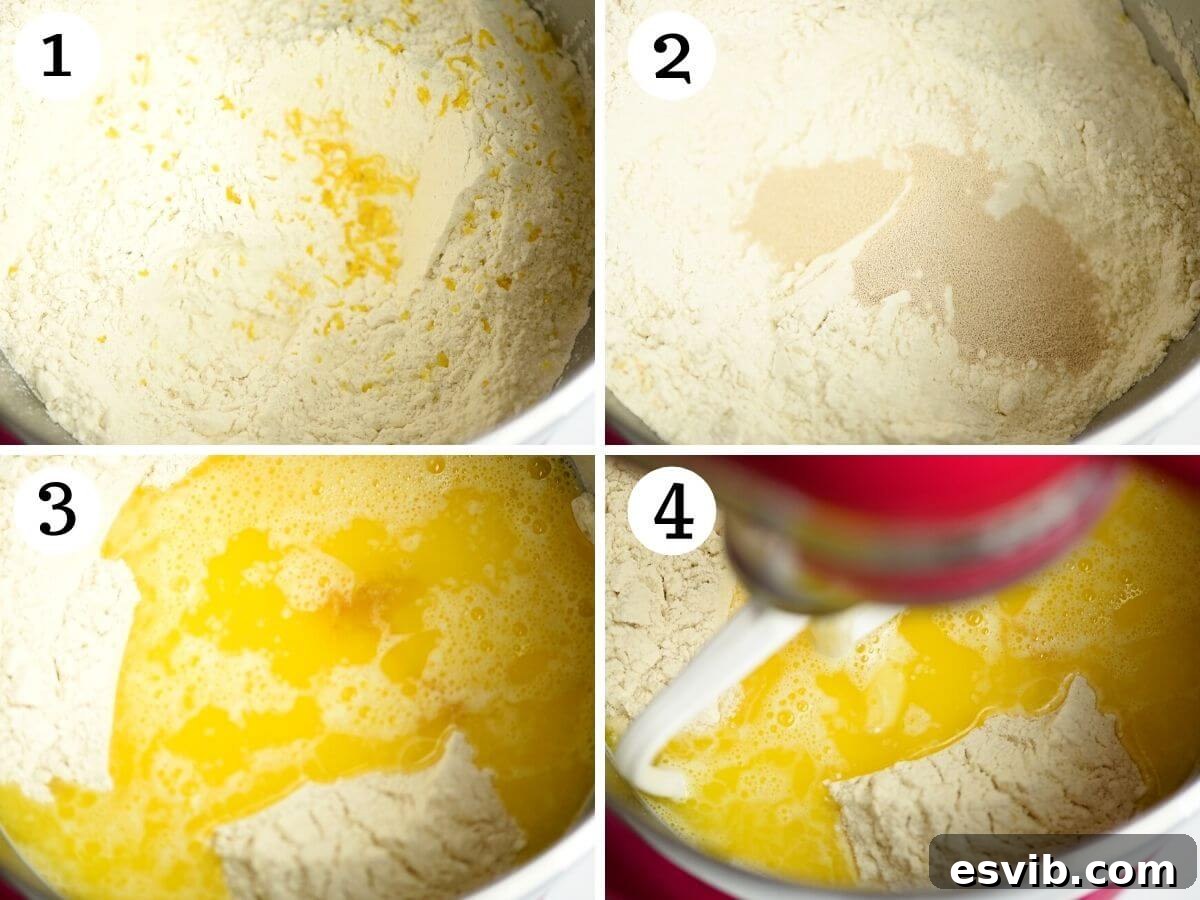
- In the large bowl of a stand mixer, combine the bread flour, granulated sugar, salt, and the bright lemon zest. Give these dry ingredients a quick mix with a spoon or whisk to ensure they are well distributed (as seen in photo 1).
- Next, add the instant yeast to the flour mixture and mix again. Create a well in the center of the dry ingredients. Pour in the two whisked large eggs, the warm milk, the melted butter, and the vanilla extract (refer to photos 2 & 3).
- Attach the paddle attachment to your stand mixer and mix all ingredients on low speed for a few seconds until a shaggy, rough dough begins to form.
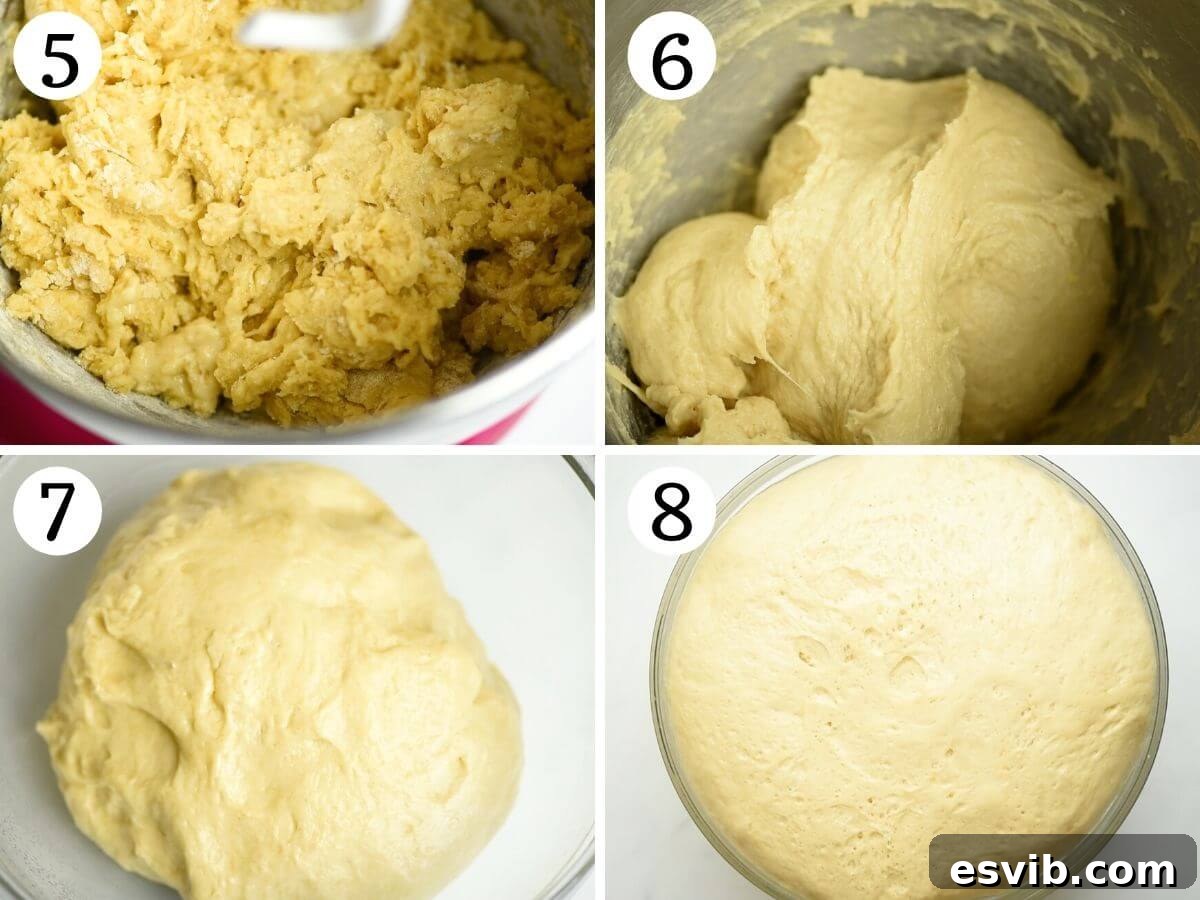
- Switch to the dough hook attachment. Knead the dough on a medium-low speed for a full 10 minutes. The dough will be quite sticky initially, but it should become smooth and elastic. It might stick to the sides of the bowl, but it shouldn’t stick excessively to your hands when gently touched (see photos 4-6 for texture progression).
- Once kneaded, transfer the soft, elastic dough to a clean bowl that has been lightly oiled. Turn the dough once to coat it with oil. Cover the bowl tightly with plastic wrap to prevent a skin from forming.
- Allow the dough to rise in a warm, draft-free place for about 2 hours, or until it has visibly doubled in size. This first rise (bulk fermentation) is crucial for flavor development and a light texture (photos 7 & 8).
How to Dye Raw Eggs for Easter Bread
Adding colorful eggs to your Easter bread is a wonderful way to make it pop! Remember to always use raw, uncooked eggs. White-shelled eggs are ideal as they allow the colors to appear brighter and truer.
- For vibrant colors, gel food coloring is highly recommended. It’s concentrated and produces rich hues. Choose any colors you like!
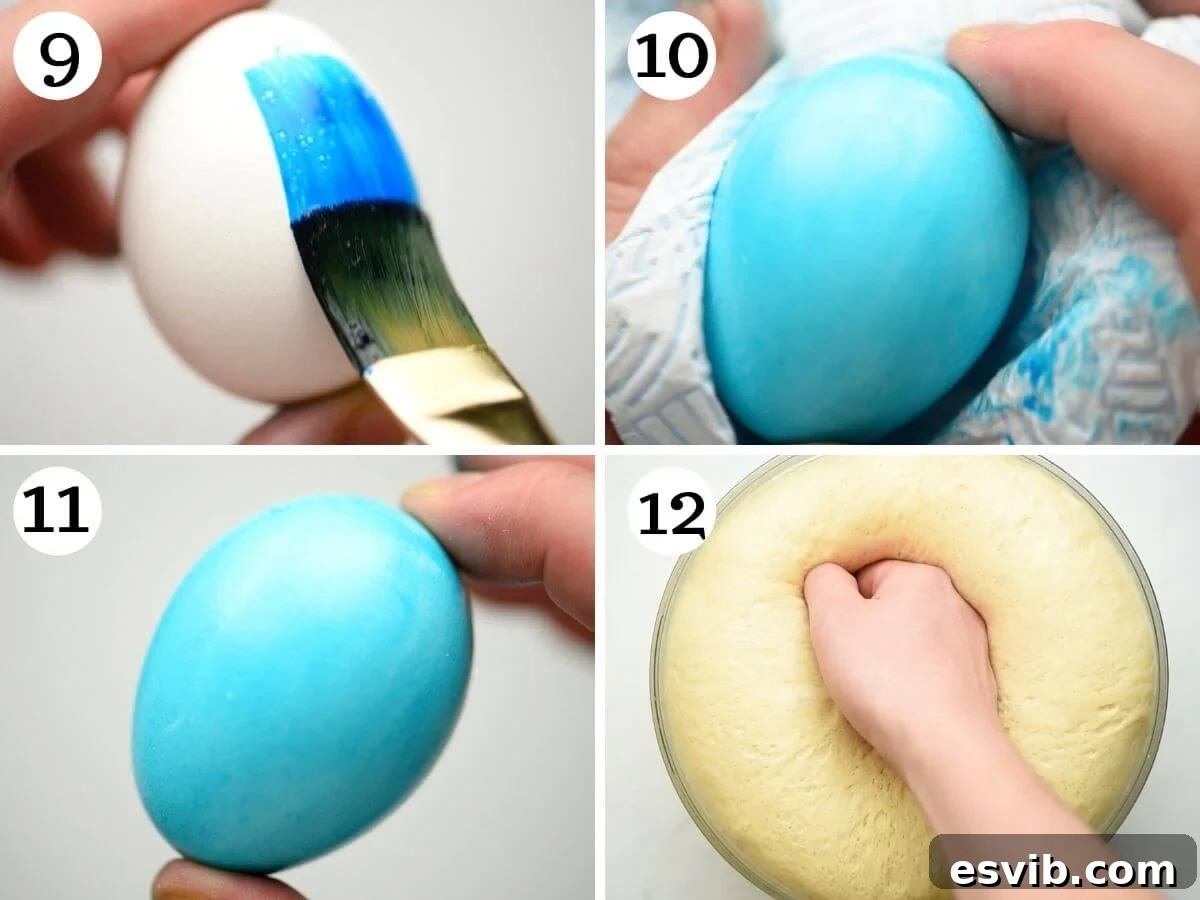
- Using a clean, damp paintbrush, dip it into your chosen gel food coloring. Carefully brush the color all over the raw eggshell.
- Immediately after brushing, gently rub a dry kitchen paper towel over the egg. This technique helps to smooth out any visible brush strokes, ensuring a more even and professional-looking finish (photos 9-11).
- Once the painted eggs have completely dried, gently rinse them under cold water. This crucial step helps remove any excess food coloring and prevents it from bleeding onto your bread dough during the second rise and baking.
- Pat the rinsed eggs completely dry with a fresh paper towel before placing them in the dough.
Shaping and Braiding Your Easter Bread
This is where the magic happens! Creating the signature braided wreaths is simpler than it looks.
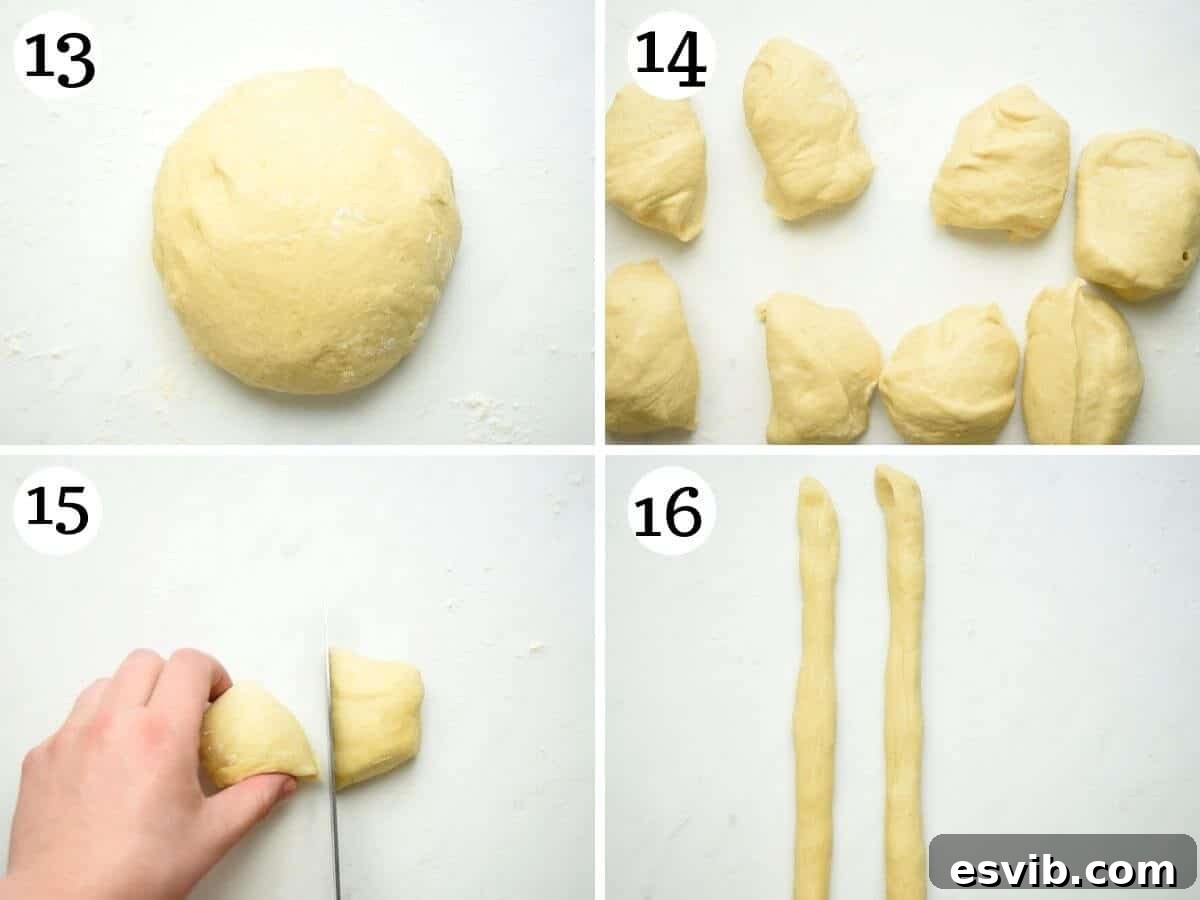
- Once your dough has completed its first rise and doubled in size, gently punch it down to release the air. Transfer the dough to a clean work surface that has been very lightly dusted with flour. Be careful not to add too much flour, as this can make the dough stiff and difficult to roll (photos 12 & 13).
- Divide the dough: First, cut the entire dough mass into 8 equal portions. Then, cut each of those 8 portions in half, so you end up with 16 smaller, roughly equal pieces of dough.
- Working with two pieces of dough at a time, roll each piece into a long, uniform strand, approximately 10 inches (25 cm) in length (photos 14 & 15). Try to keep the thickness consistent along the strand.
- Take two strands and pinch them firmly together at one end. This will be the top of your braid.
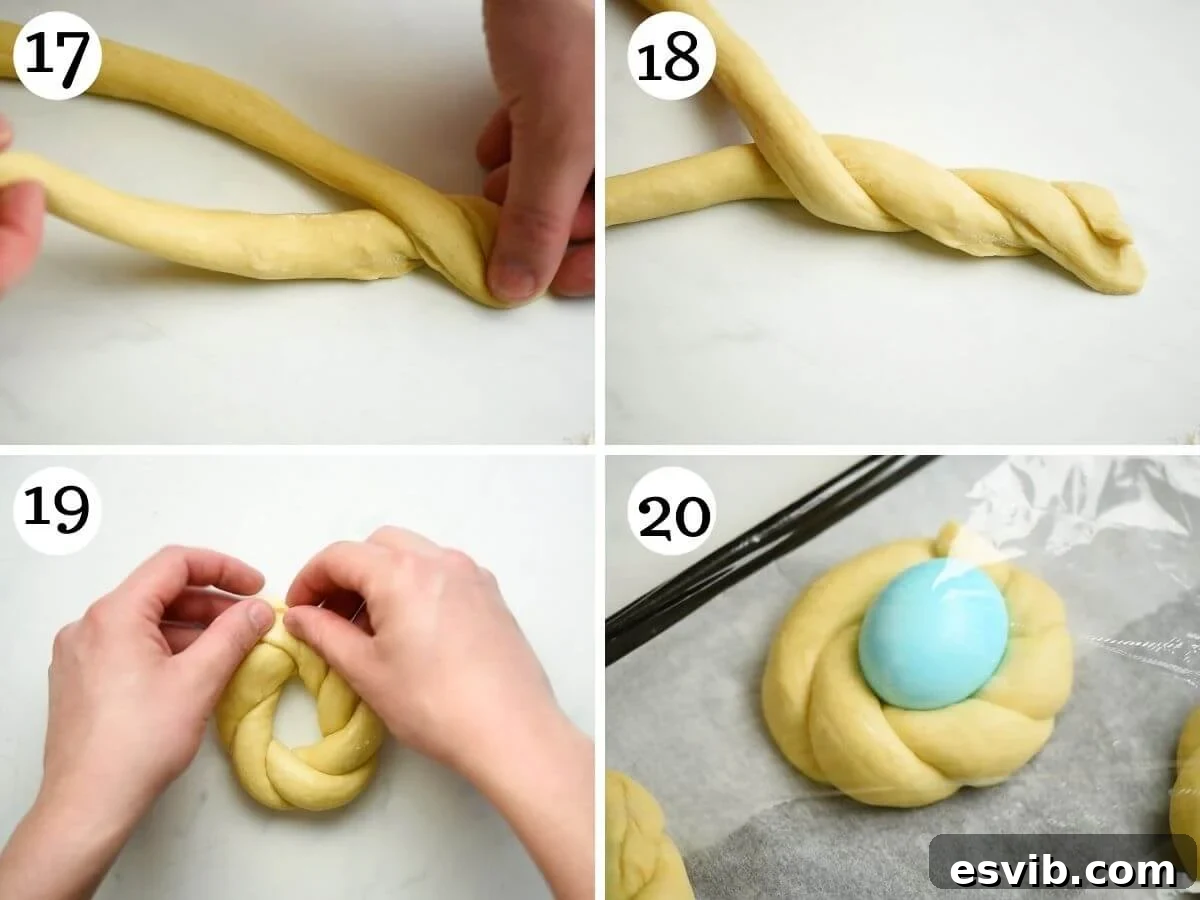
- Now, carefully weave the two strands together to create a simple two-strand braid. Some traditional recipes use three strands, but a two-strand twist creates a beautiful effect for individual nests.
- Once braided, bring the top and bottom ends of your braided strand together to form a wreath or a nest shape. Pinch the ends firmly to seal them.
- Carefully transfer the formed wreath onto a baking tray lined with baking parchment. Ensure you leave at least 2 inches (5 cm) of space between each wreath, as they will expand during the second rise and baking.
- Gently place one of your colorful, dried raw eggs into the center of each wreath.
- Repeat this process with the remaining dough pieces to create all 8 Easter bread nests (photos 19 & 20).
Second Rise and Baking
- Once all the breads are shaped and on the baking tray, cover the tray loosely with plastic wrap. Allow the bread to rise again for another 1 hour in a warm place. This is the second proofing, which gives the bread its final light and airy texture (photo 20).
- Towards the end of the second rise, pre-heat your oven to 350°F (180°C).
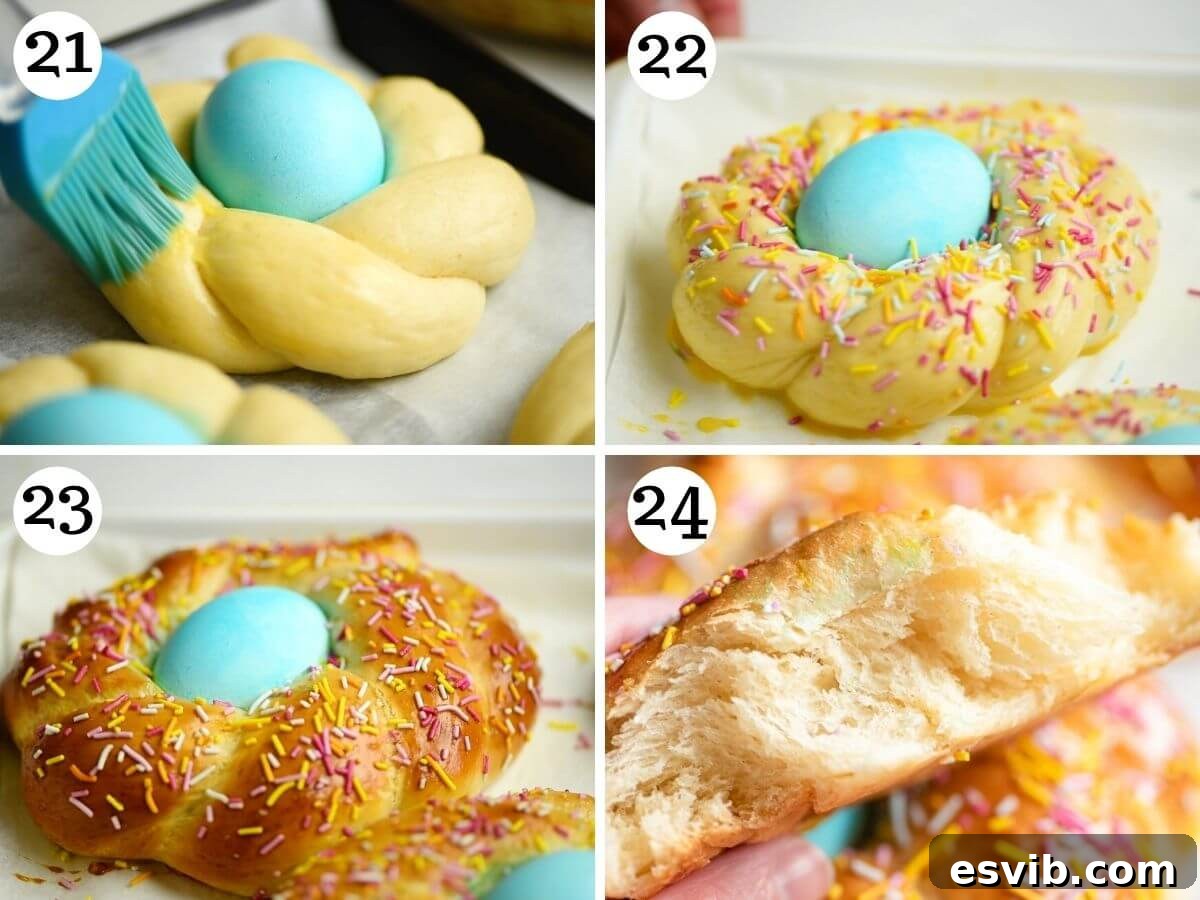
- Once risen, gently brush the tops of each Easter bread with a beaten egg (this is often called an egg wash). This will give them a beautiful golden-brown shine.
- If using, generously sprinkle your chosen colorful sprinkles over the top of each bread.
- Bake in the pre-heated oven for 20-25 minutes, or until the breads are beautifully golden brown on top and sound hollow when tapped on the bottom (photos 21-23).
- Remove the baked Easter breads from the oven and transfer them to a wire rack to cool slightly.
- Serve warm or at room temperature. For the best flavor and texture, Italian Easter Bread is truly best eaten the same day it’s baked (photo 24).
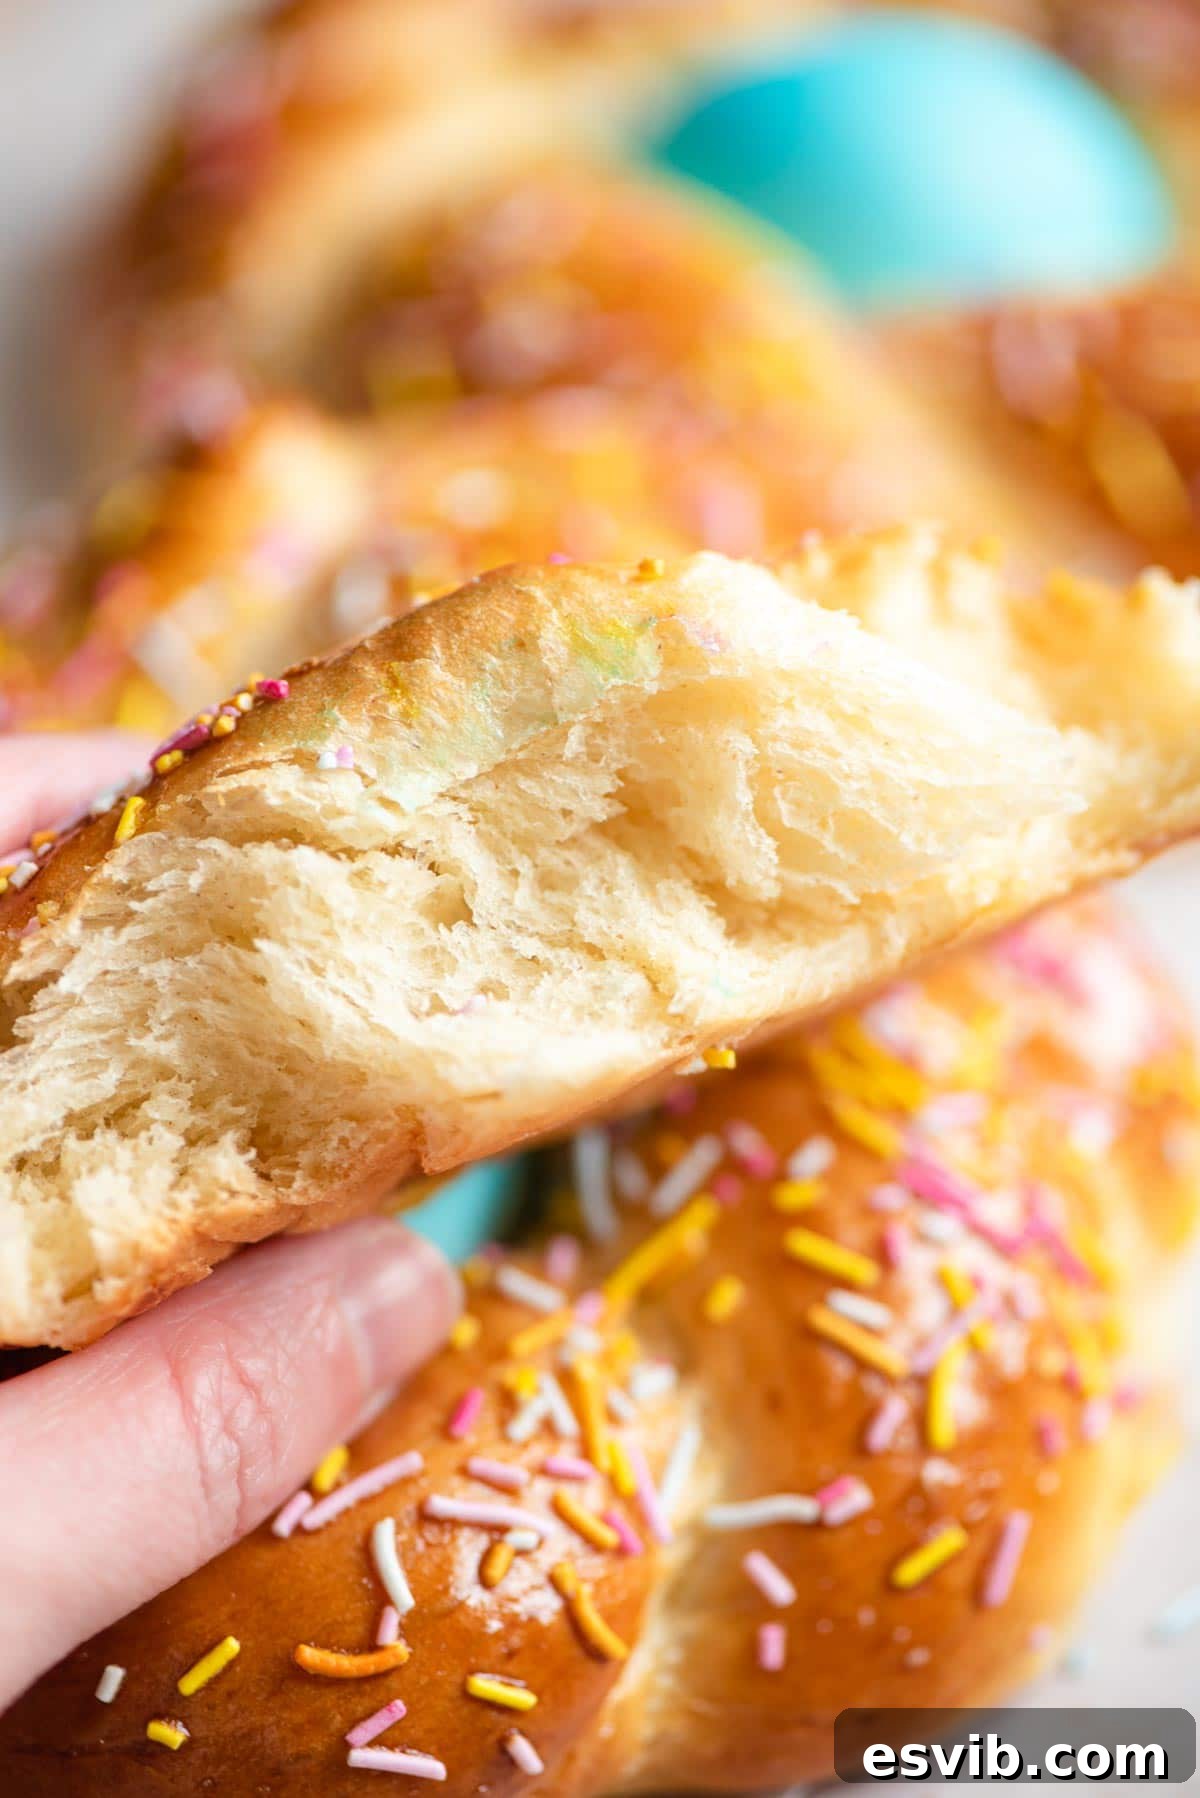
Just look at how soft and fluffy the inside of this bread is! Pure perfection for your Easter celebration.
Top Tips for Success & Common Questions
Mastering Italian Easter Bread is easy with these helpful tips and answers to frequently asked questions:
- Enjoy Freshness: This Italian Easter bread is absolutely at its peak when served the same day it’s baked, showcasing its incredible freshness and extra soft texture. Like most brioche-style breads, it can dry out quickly. If you have leftovers the next day, it’s wonderful toasted and spread with jam or butter, or even used for French toast.
- Accurate Flour Measurement: If you’re measuring flour using cups instead of a kitchen scale, make sure to use the “spoon and level” method. Gently spoon the flour into your measuring cup until it overflows, then level it off with a straight edge (like a knife) without packing it down. This prevents adding too much flour, which can result in a dense, dry bread.
- The Power of Whole Milk: While you can technically use lower-fat milk, opting for whole (full-fat) milk is highly recommended. The fat content contributes significantly to the richness, flavor, and tender crumb that makes this brioche dough so special.
- Vibrant Egg Colors: For the brightest and clearest colored eggs, gel food coloring is your best bet. It’s more concentrated than liquid food coloring. Remember, white-shelled eggs will always yield more vibrant hues than brown ones.
- Creative Flavor Variations: Feel free to customize your Pane di Pasqua! You can knead in candied orange peel, plump raisins, or even finely chopped dried cranberries into the dough. For aromatic twists, consider adding a few drops of anise extract or almond extract for a different flavor profile, traditionally found in some regional Italian versions.
- Delicious Leftovers: Should you find yourself with leftover Easter bread that has started to dry out, don’t despair! It makes the most heavenly French toast, soaking up the custard beautifully. Alternatively, slice it thick and dunk it into a frothy cappuccino or latte for a delightful breakfast treat.
Italian Easter bread is truly delicious simply eaten on its own, appreciating its sweet, buttery flavor. For breakfast or a delightful snack, it pairs wonderfully with a spread of your favorite jam, marmalade, or creamy butter. It’s also excellent alongside a cup of coffee or tea.
The most effective way to prevent food coloring from transferring to your beautiful bread is to ensure the colored eggs are completely dry after painting. After the coloring has dried, gently rinse the eggs under cold running water to wash off any loose pigment, then pat them completely dry with a kitchen paper towel before placing them in the dough.
Once your Italian Easter bread is baked and cooled, the eggs nested within it will be hard-boiled. You can easily peel them, chop them up, and use them in a variety of dishes. They’re perfect for adding to salads, making egg salad sandwiches, or simply enjoying as a protein-rich snack. Remember to store any peeled eggs in the fridge.
Absolutely! You can prepare the dough the day before. After the initial kneading, place the dough in a lightly oiled bowl, cover it tightly with plastic wrap, and refrigerate it overnight. The cold temperature will slow down the yeast activity, allowing it to rise slowly. The next day, simply take the dough out, let it come closer to room temperature for about 30-60 minutes, then proceed with shaping the wreaths and allowing them to complete their second rise. Keep in mind that the cold dough may take a little longer to rise during the second proofing.
Yes, this bread freezes beautifully! Once completely cooled after baking, wrap the bread tightly in plastic wrap, then in aluminum foil, or place it in an airtight freezer-safe bag. You can freeze the baked bread for up to 3 months. To enjoy, simply defrost it completely at room temperature, then warm it gently in a low oven (around 300°F/150°C) for a few minutes, or toast slices if preferred, to revive its fresh texture.
More Italian Easter & Celebration Recipes
If you’re looking for more delicious Italian recipes to complete your Easter feast or any celebratory occasion, explore these fantastic options:
- Pizza Rustica (Savory Easter Pie)
- Rich Italian Lamb Ragu
- Torta Pasqualina (Spinach and Ricotta Pie)
- Cenci di Carnevale (Chiacchiere, Crostoli, Bugie) – Italian Fried Pastries
If you’ve tried this delightful Italian Easter Bread or any other recipe from our collection, please don’t forget to rate the recipe and share your experience in the comments below. We love hearing from you! You can also FOLLOW US on FACEBOOK, INSTAGRAM, and PINTEREST to discover more delicious food and stay updated on our latest culinary adventures.
Step-by-step photos and helpful tips are provided above for a perfect first-time bake!
Italian Easter Bread
Rating: 5 out of 5 stars (5 votes)
By Emily
30 mins
20 mins
3 hrs
3 hrs 50 mins
8 breads

Print Recipe
Learn how to bake a traditional Italian Easter bread. This braided, soft, sweet, and buttery brioche-style bread is baked with fun colorful eggs and bright sprinkles, making it perfect for Easter breakfast, brunch, or a festive snack with butter or jam.
Ingredients
- 3.5 cups bread flour (470g), spooned and leveled
- 6 tbsp unsalted butter, melted (85g)
- 1 cup whole milk, warmed (240ml)
- 3 large eggs (2 for dough, 1 for egg wash)
- ⅓ cup granulated sugar (70g)
- ½ tsp salt
- 2 tsp instant yeast (fast action yeast)
- 1 tsp vanilla extract
- Zest of 1 lemon (or orange)
- 8 raw eggs in their shells (for placing in bread)
- Food coloring for painting the eggs (optional)
- Sprinkles (optional)
Instructions
- Gently warm the milk (it should be lukewarm, not hot) and melt the butter separately.
- Add the flour, sugar, salt, and lemon zest to a bowl of a stand mixer and mix to combine.
- Add the yeast, mix to combine, then make a well in the center of the bowl. Add 2 whisked large eggs, warm milk, melted butter, and 1 tsp of vanilla.
- Using a paddle attachment, mix everything for a few seconds until a rough dough forms. Switch to a dough hook attachment and knead the dough for 10 minutes on a medium/low speed. The dough will be very sticky but shouldn’t stick to your hands when touched.
- Transfer the dough to a clean, lightly oiled bowl, cover with plastic wrap, and let it rise for 2 hours or until doubled in size.
Colouring the Eggs
- Paint raw, uncooked eggs with any food coloring of your choice. Gel food coloring works best for vibrant colors. Let them dry completely, then give them a gentle rinse under cold water to stop the color from running onto the dough. Pat them dry with kitchen paper.
- Note: It’s best to use white shelled eggs rather than brown for brighter colors.
Assembling the Easter Bread
- Once risen, gently punch the air out of the dough and place it on a clean work surface very lightly dusted with flour (don’t add too much or it’ll be too difficult to roll).
- Cut the dough into 8 equal pieces, then cut each piece in half so you have 16 pieces. Roll two pieces of dough to roughly 10-inch long strands. Pinch the strands together at the top and weave them together to create a braid (or twist). Join the top and bottom ends together to create a wreath (nest) shape, then place on a baking tray lined with baking parchment, ensuring they are 2 inches apart. Place a colored raw egg in the middle of each wreath. Repeat with the remaining dough pieces.
- Cover the baking tray with plastic wrap and leave to rise again for 1 hour.
- Once risen, pre-heat the oven to 350°F (180°C).
- Gently brush the Easter bread with the remaining beaten egg (egg wash) and top with sprinkles if desired. Bake in the oven for 20-25 minutes until golden brown on top.
- Remove from the oven, let cool on a wire rack, and serve. Best eaten the same day for optimal freshness.
Video
Notes
- Preparing in advance: You can prepare the dough and place it into the fridge overnight until doubled in size. The next day you can shape them into wreaths and let them rise. They may take a little longer to rise since the dough is cold.
- Measure the flour correctly: If you don’t have a kitchen scale and are using cups, make sure to spoon the flour into the cups and level it off with a knife so you don’t overpack the flour.
- Serve the same day: This Italian Easter bread is best served the same day when it’s fresh and extra soft. Like most brioche breads, it dries out quickly, so it’s best spread with jam or butter or toasted the next day.
- Use whole milk: Although you can use lower-fat milk, you won’t get the rich flavor and texture that you get from using whole milk!
- Additional flavors: You can add in candied peel or raisins if you like, and can adapt the flavors with something like anise or almond extract.
- Leftovers: Leftover bread can be made into the most delicious French toast or dunked into a frothy cappuccino for breakfast if it has dried out too much.
- Freezing: You can freeze the baked bread for up to 3 months. Defrost completely, then warm up in the oven or toast if preferred.
Helpful Info for All Recipes
- We always use extra virgin olive oil in all of our recipes unless stated otherwise.
- When using canned or jarred tomatoes, we recommend Cirio or Mutti brands for the best results and flavor.
- All vegetables are medium-sized unless specified otherwise.
- All recipes are tested and developed using a fan (convection) oven.
- Find out more about how nutrition is calculated.
- Check out our must-have Italian Pantry Staples.
- You can also find all our Essential Kitchen Tools for Italian Cooking.
Nutrition
Calories: 378kcal | Carbohydrates: 54g | Protein: 12g | Fat: 13g | Saturated Fat: 7g | Trans Fat: 1g | Cholesterol: 96mg | Sodium: 189mg | Potassium: 156mg | Fiber: 2g | Sugar: 11g | Vitamin A: 417IU | Vitamin C: 1mg | Calcium: 57mg | Iron: 1mg
Nutrition information is automatically calculated, so should only be used as an approximation.
Leave a comment below!