
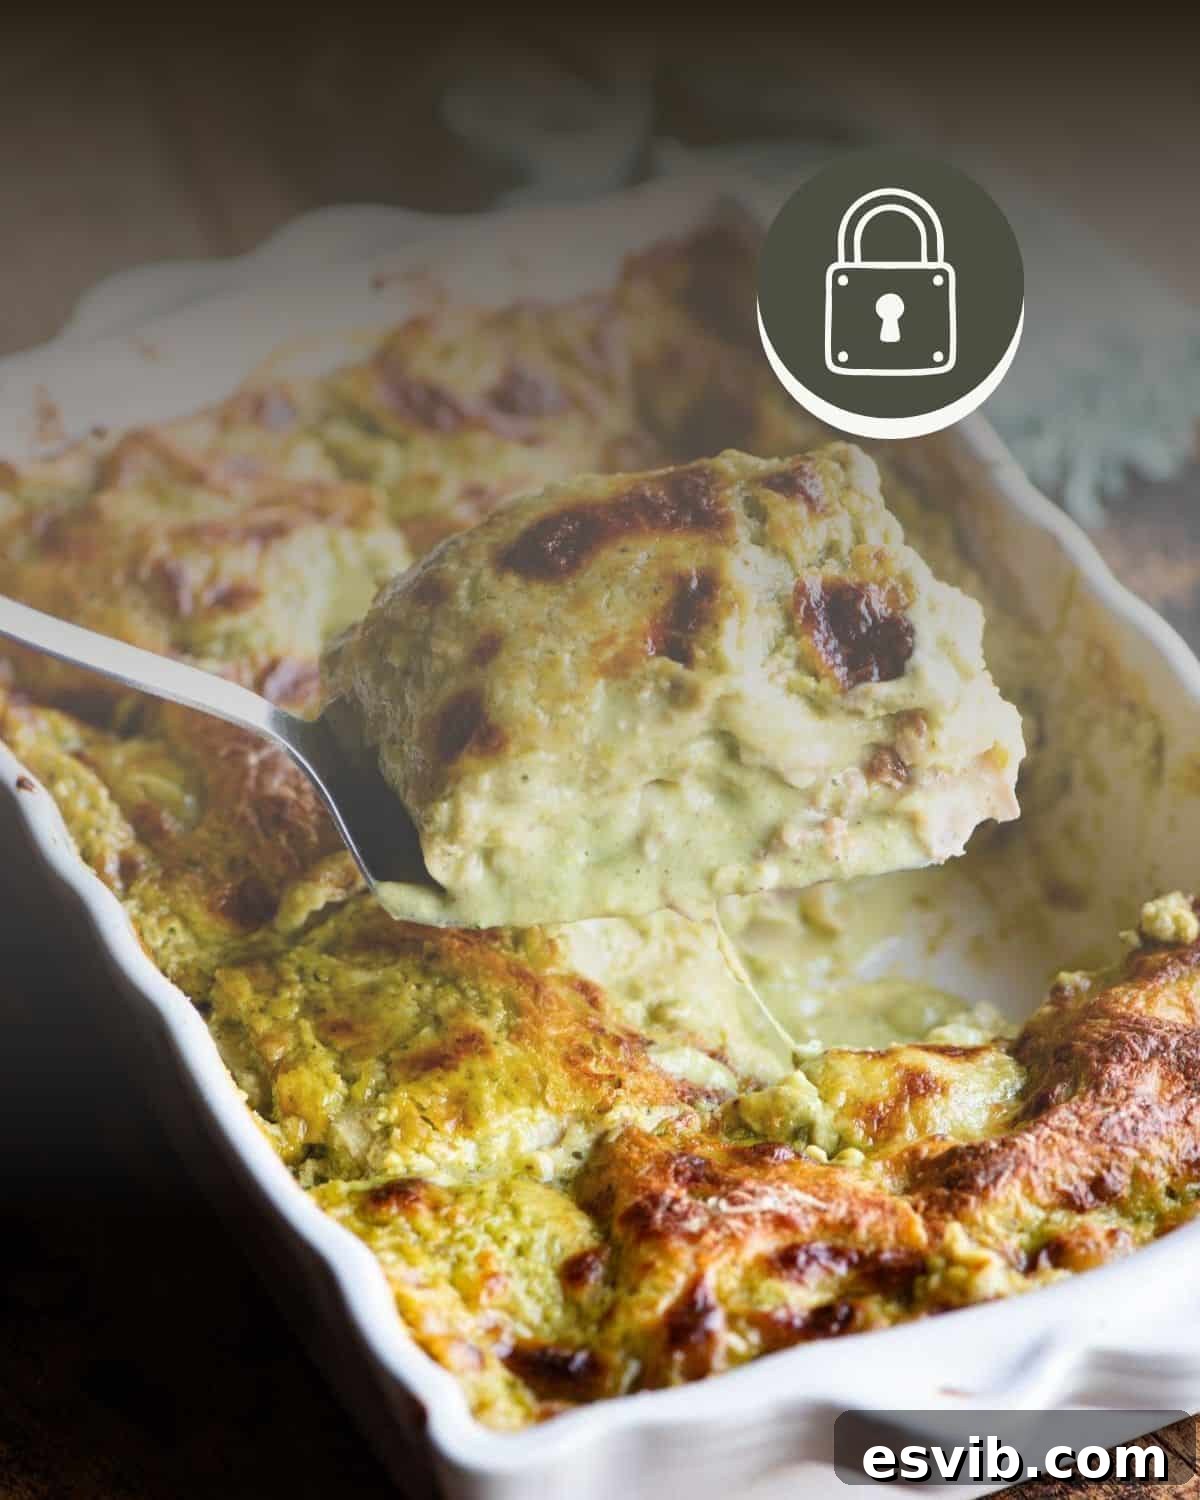
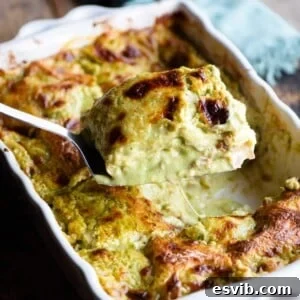
Prepare to embark on a culinary journey to the heart of Sicily with our exquisite Pistachio Lasagna. This isn’t just any lasagna; it’s a symphony of textures and flavors, boasting a lusciously creamy pistachio béchamel sauce, delicate layers of homemade pasta, savory Italian prosciutto cotto (ham), and a delightful blend of mozzarella and Pecorino cheese. Inspired by the rich culinary traditions of Sicily, where pistachios are revered for their vibrant color and intense flavor, this lasagna offers unparalleled comfort and an unforgettable taste experience. It’s the perfect dish to elevate your family meals or impress guests with a truly unique Italian creation that balances tradition with an exciting, modern twist.
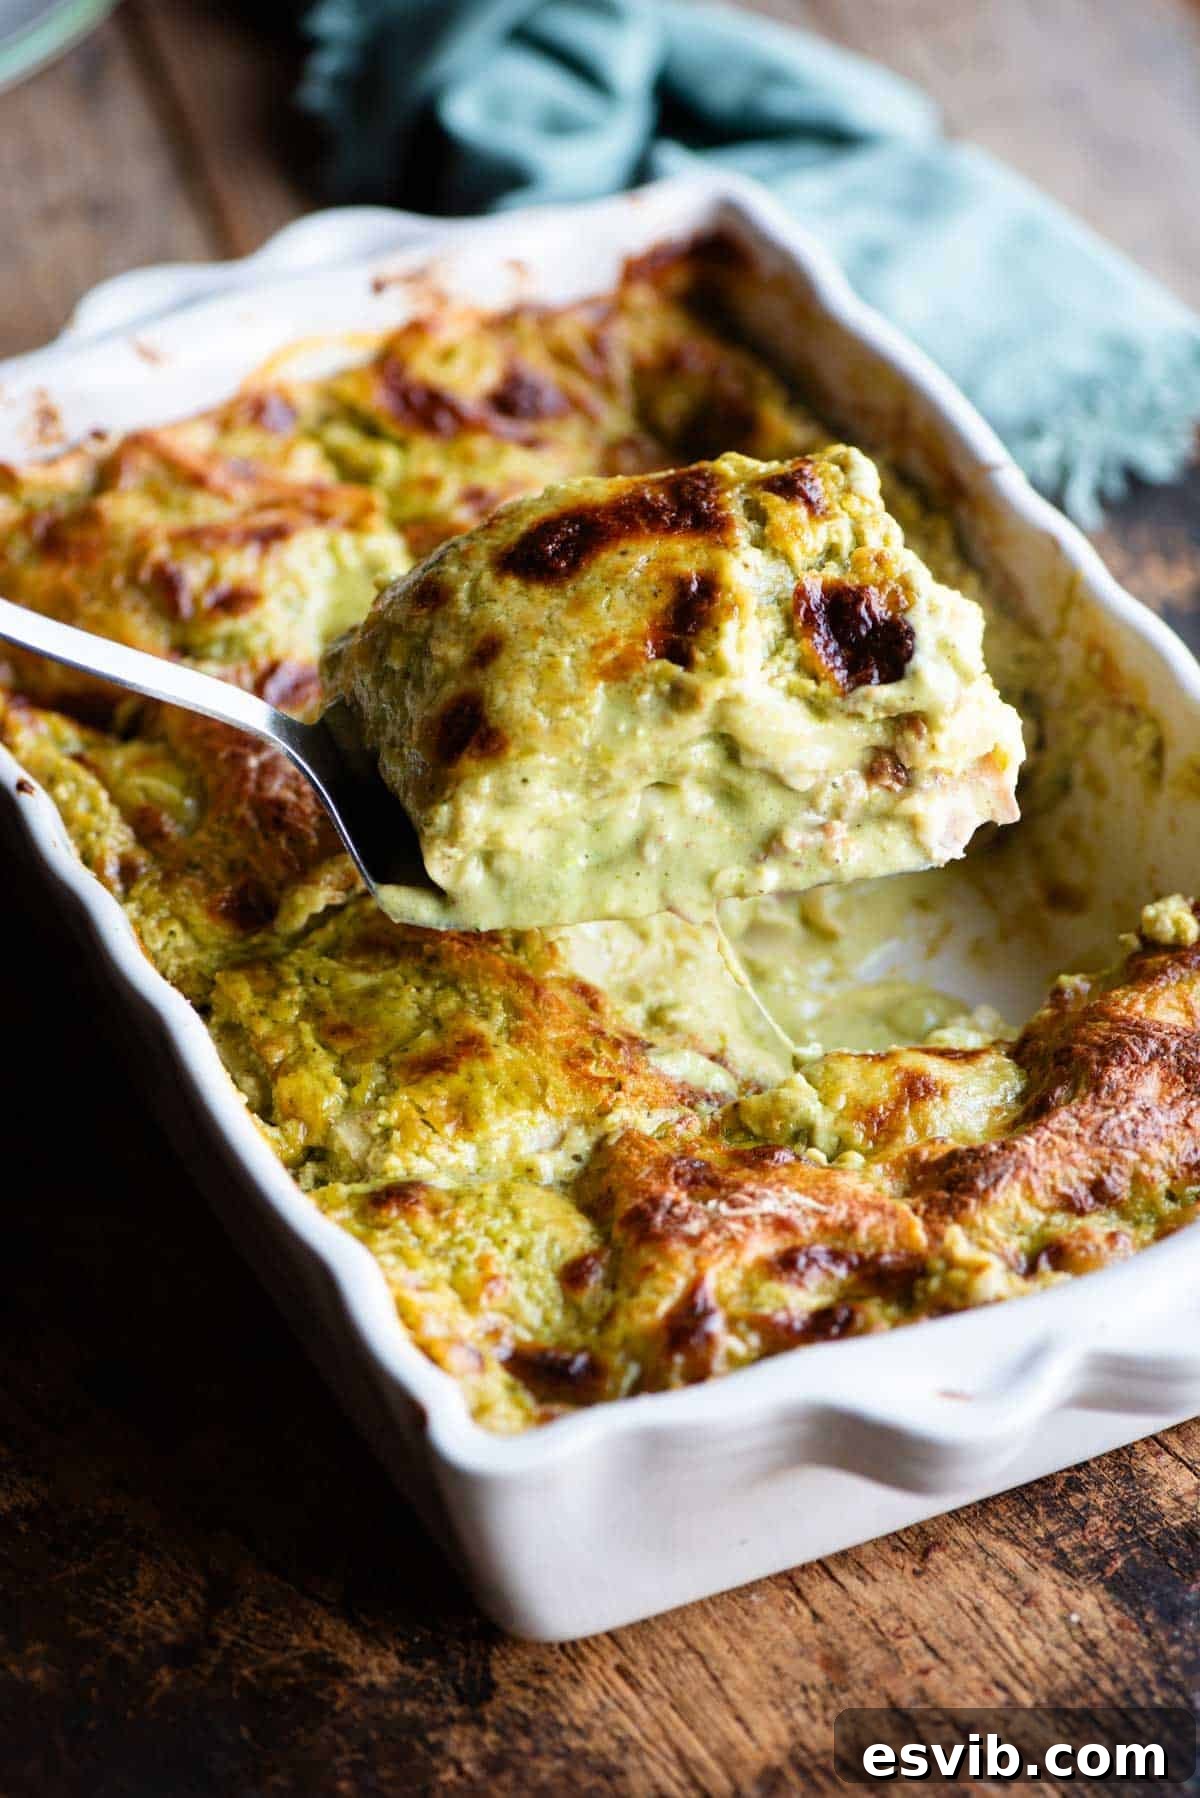
If you’re anything like us, a well-made lasagna holds a special place in your heart, evoking feelings of warmth and tradition. This pistachio rendition, however, transcends the ordinary, offering a truly special and innovative twist on a beloved classic. What makes this dish truly stand out is its signature sauce: a velvety smooth béchamel, generously infused with a vibrant batch of homemade pistachio pesto. This unique combination imbues every single layer of the lasagna with a rich, earthy, and distinctly nutty flavor that is simply irresistible and undeniably sophisticated.
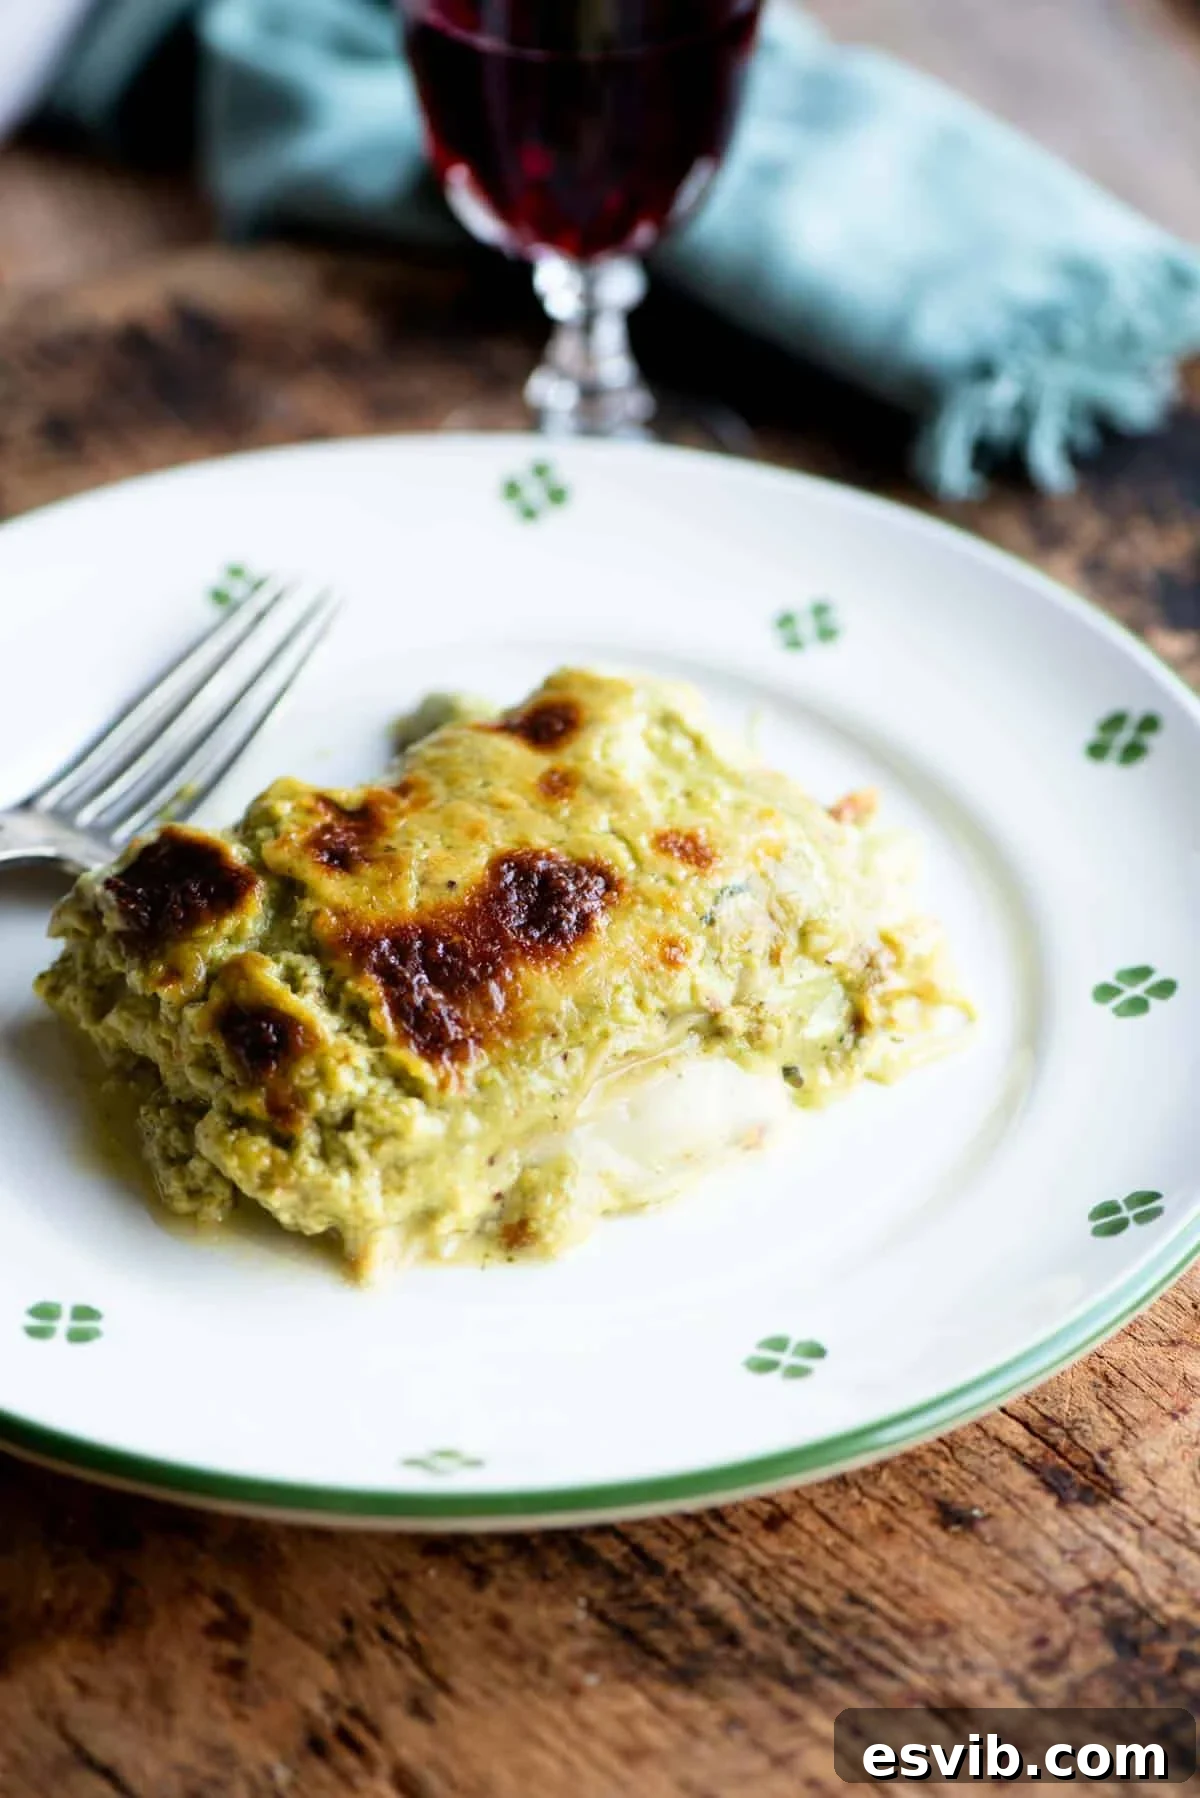
The filling, while seemingly simple, is meticulously balanced to allow the pistachio to shine, creating a harmony that delights the palate. Layers of tender Italian prosciutto cotto, creamy fresh mozzarella, and tangy Pecorino Romano cheese complement the pistachio béchamel beautifully, adding savory depth and a delightful textural contrast. This lasagna isn’t just a meal; it’s an experience designed to be shared. Serve it alongside some crusty artisanal bread, a fresh green salad, or our delightful homemade focaccia for a truly memorable Sunday family gathering, a festive holiday feast, or any special occasion that calls for something extraordinary.
Key Ingredients for the Perfect Pistachio Lasagna
Crafting this exceptional Pistachio Lasagna begins with selecting the right ingredients. Each component plays a vital role in achieving the dish’s signature flavor profile and luxurious texture. Paying attention to these details will ensure your lasagna is nothing short of spectacular. Here’s a closer look at what you’ll need and why specific choices make a significant difference:
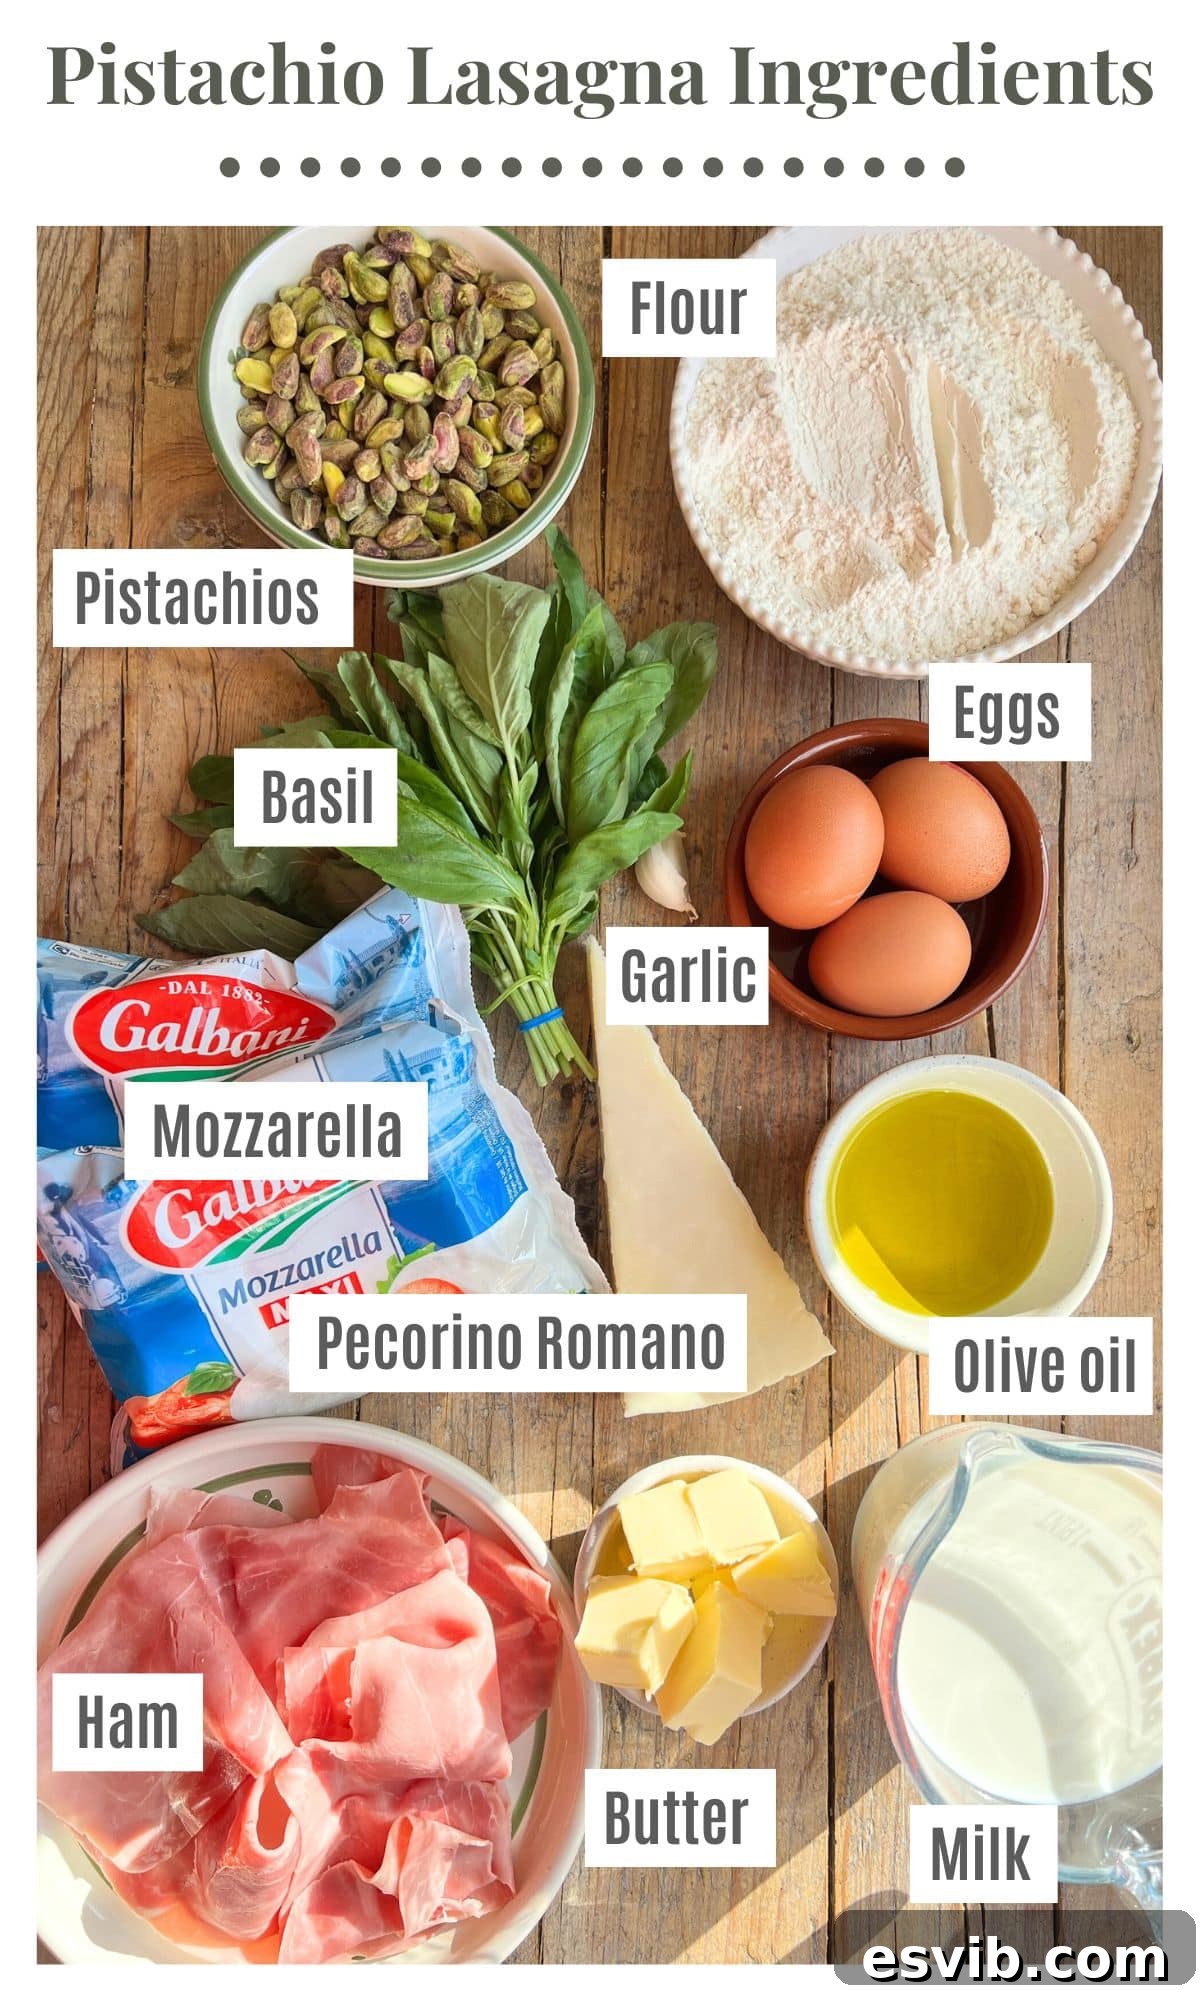
- Unsalted Pistachios: The undisputed star of our lasagna! It is absolutely crucial to use unsalted pistachios for this recipe to ensure the delicate, nuanced flavors of the nuts and béchamel are not overwhelmed by excessive saltiness. For the most authentic and intense pistachio flavor, seek out shelled pistachios, ideally from Bronte, Sicily, known globally for their superior quality, vibrant green hue, and rich taste. If you can only find salted pistachios, don’t fret! You can easily prepare them by soaking them in cold water for about 30 minutes, then draining thoroughly and patting them completely dry before use.
- Italian Prosciutto Cotto (Cooked Ham): We specifically recommend using an Italian prosciutto cotto, which is a tender, mild, and often slightly sweet cooked ham. Its delicate flavor profile complements the richness of the pistachio béchamel beautifully without dominating the dish. The thin slices melt wonderfully into the layers, contributing moisture and a savory note. If authentic prosciutto cotto is unavailable, look for another premium-quality, thinly sliced cooked ham. As an adventurous alternative, thinly sliced mortadella would also be a fantastic option, lending a subtle spice and rich texture that harmonizes surprisingly well with pistachio. Avoid hams that are heavily smoked or intensely seasoned.
- Pecorino Romano Cheese: This hard, salty Italian cheese, traditionally made from sheep’s milk, is a flavor powerhouse. Its sharp, tangy, and robust character adds an incredible depth of umami and a delightful zest that truly elevates the entire lasagna. While Parmigiano Reggiano is a more common choice for lasagnas and would certainly work, we strongly encourage using Pecorino Romano if at all possible. Its distinctive, pungent notes truly shine through and provide a perfect counterpoint to the creamy pistachio sauce.
- Italian 00 Flour and Fresh Eggs (for Homemade Pasta): While opting for store-bought fresh or dried pasta sheets offers convenience, there’s an undeniable magic and superior texture to homemade pasta. The fresh, tender sheets absorb the rich sauces more effectively, creating a melt-in-your-mouth experience that is truly unparalleled. Italian 00 flour is specifically milled to a fine consistency, resulting in a silky-smooth and pliable dough. We will guide you through the process of making your own, but if time constraints are an issue, be sure to select high-quality dried or fresh lasagna sheets for the best results.
- Fresh Mozzarella: For the ultimate creamy and gooey layers, fresh mozzarella is indispensable. However, fresh mozzarella contains a significant amount of moisture, which, if not addressed, can lead to a watery lasagna. The crucial trick here is to drain it properly. Once you’ve torn or sliced your mozzarella, place the pieces on several layers of clean kitchen paper towels for at least 30 minutes. Before incorporating it into your lasagna, gently blot it again to remove any remaining excess liquid. This simple step ensures a perfectly structured, intensely flavorful, and deliciously creamy lasagna without unwanted sogginess.
Expert Recipe Tips for Success
Crafting a truly perfect Pistachio Lasagna involves more than just following steps; it’s about understanding the techniques that enhance flavor and texture. Follow these expert tips to ensure your lasagna turns out beautifully structured, bursting with flavor, and utterly delicious every single time you make it:
- Always Blanch Your Homemade Pasta Sheets: This step is not optional when working with fresh homemade pasta for lasagna. Blanching the pasta sheets in generously salted boiling water for approximately 30 seconds before assembling serves multiple critical purposes. Firstly, it gives the delicate pasta sheets a firmer structure, preventing them from becoming mushy during the long bake. Secondly, it ensures a desirable al dente bite in the final dish. If you were to assemble the lasagna with raw homemade pasta, the end result would likely be overly soft and lack the satisfying texture characteristic of a great lasagna. For efficiency, consider blanching pasta in batches, then immediately assembling a section of the lasagna to manage your workspace, especially in smaller kitchens.
- Utilize Our Homemade Pasta Visual Tutorial: If you’re a novice in the art of making fresh pasta, or simply need a refresher, we’ve got you covered! We offer a comprehensive, step-by-step photo tutorial that illustrates the entire process. You can access the full guide with detailed instructions and visual aids in our dedicated homemade pasta post here. This resource will walk you through every stage, from preparing the flour well to expertly kneading and rolling out the dough.
- Embrace the Precision of a Kitchen Scale: When embarking on homemade pasta, precision in ingredient measurement is paramount. We highly recommend using a digital kitchen scale to accurately weigh your flour and eggs. Measuring by volume (e.g., using cups) can be highly inconsistent due to variations in how ingredients are packed, which can lead to significant differences in dough consistency. A scale ensures you achieve the exact flour-to-egg ratio, which is absolutely critical for producing a perfectly pliable, smooth, and workable pasta dough that’s a joy to roll out.
- Mastering the Béchamel Consistency: The béchamel sauce is the creamy foundation of this lasagna, so achieving the right consistency is key. To ensure it’s silky smooth and completely lump-free, vigorously whisk constantly as you gradually pour the milk into the roux. Continue to cook and stir until the sauce visibly thickens to a consistency that generously coats the back of a wooden spoon. If your béchamel becomes too thick, you can gently thin it out with a little warm milk. Conversely, if it seems too thin, simmer it gently while continuously stirring until it reaches the desired richness and thickness.
- Properly Drain the Mozzarella: As emphasized in our ingredient notes, never skip the crucial step of draining the fresh mozzarella. Any excess moisture trapped within the cheese will be released during the baking process, potentially making your beautiful lasagna watery and diluting the rich, intricate flavors you’ve worked so hard to build. Dedicate at least 30 minutes to allowing the torn or sliced mozzarella to sit on paper towels, and don’t forget to gently blot it dry just before layering.
- The Importance of Resting Time After Baking: After meticulously preparing and baking your delicious lasagna, it’s incredibly tempting to cut into it immediately. However, allowing the lasagna to rest for a crucial 5-10 minutes after removing it from the oven is absolutely essential. This short resting period allows the piping hot layers to settle, the cheese to firm up slightly, and all the incredible flavors to meld together perfectly. The result will be cleaner, more defined slices that hold their shape beautifully, and a much more enjoyable texture with every forkful. Patience truly pays off here.
Explore More Delicious Lasagna Recipes
If you’ve fallen in love with the comforting, layered delights of lasagna, then you’ll be delighted to explore our other fantastic recipes. From timeless Italian classics featuring rich meat sauces to innovative vegetarian options and regional specialties, there’s a lasagna for every taste, occasion, and season. Expand your Italian cooking repertoire and discover your next favorite dish with these beloved recipes:
Pasta
Lasagne al Forno (Italian Beef Lasagna)
Fresh Pasta
Butternut Squash Lasagna with Sausage and Taleggio
Pasta
Authentic Lasagna Bolognese (Lasagne alla Bolognese)
Pasta
Italian Lamb Lasagna with Pecorino Bechamel
We genuinely hope you enjoy creating and savoring this incredible Pistachio Lasagna recipe. It’s a dish that truly brings a touch of Sicilian elegance and comfort to any table. If you try this, or any other recipe from our blog, please don’t hesitate to rate it and share your experiences, tips, and personal twists in the comments section below – we absolutely love hearing from you and learning about your culinary adventures! Your feedback helps our community grow and inspires us to create even more delicious content. You can also stay connected with us and discover a continuous stream of delicious food inspiration by following us on Facebook, Instagram, and Pinterest. For exclusive weekly recipe inspiration, cooking tips, and updates delivered straight to your inbox, don’t forget to sign up for our Newsletter!
Step By Step Photos Provided Throughout
Most of our recipes include detailed step-by-step photos, along with helpful tips and tricks to ensure perfect results on your very first attempt, and sometimes even a video tutorial!
Pistachio Lasagna
By Emily
1 hour
20 minutes
50 minutes
30 minutes
2 hours
40 minutes
8 servings
Pin Recipe
Print Recipe
Equipment You’ll Need
-
9×13-inch Baking Dish: A standard-sized oven-safe dish (ceramic, glass, or metal) is essential for assembling and baking your lasagna evenly.
-
Food Processor or Immersion Blender: Crucial for transforming the pistachios and other ingredients into a wonderfully smooth and creamy pesto. A high-speed blender can also work effectively.
-
Pasta Machine: Highly recommended for rolling out homemade pasta sheets to the perfect, consistent thickness, which is key for the delicate texture of this lasagna. Both manual and electric models are suitable.
-
1-2 Clean Kitchen Towels: These are indispensable for laying out and air-drying your blanched pasta sheets, preventing them from sticking and removing excess moisture.
-
Hand Whisk: An absolute necessity for creating a perfectly smooth, lump-free béchamel sauce, ensuring a luxurious creamy texture.
-
Kitchen Paper Towels: Used extensively for draining excess moisture from the fresh mozzarella, a critical step to ensure your lasagna remains creamy and not watery.
-
Kitchen Tongs: Extremely useful for carefully handling hot, blanched pasta sheets, allowing you to transfer them without tearing.
-
Large Pot: For boiling a sufficient amount of water to properly blanch the pasta sheets.
-
Medium Saucepan: For preparing the foundational béchamel sauce with ease.
Ingredients
For the Homemade Pasta
- 300 g Italian 00 flour, (this is approximately 2 cups plus 2 tablespoons; always weigh for accuracy), plus extra for dusting your work surface and pasta machine.
- 3 large eggs, (weighing roughly 167g in total, vital for the perfect dough consistency).
Pistachio Pesto
- 140 g (1 cup) unsalted pistachio nuts without shells, (absolute must for balanced flavor; refer to notes for salted pistachio prep).
- 20 g (2 cups) fresh basil, (packed, bright green leaves for vibrant aroma and color).
- 1 garlic clove, (peeled and roughly chopped for easier blending).
- 60 g (1 cup) Pecorino Romano, (finely grated for its distinct salty and sharp Italian character).
- 70 ml (1/3 cup) extra virgin olive oil, (use a good quality olive oil to enhance the pesto’s overall richness and flavor).
Béchamel Sauce
- 700 ml (3 cups) milk, (whole milk is strongly recommended for the creamiest, most luxurious béchamel).
- 70 g (5 tablespoons) unsalted Butter, (to form the essential roux base for the sauce).
- 70 g (5 tablespoons) all-purpose flour, (the thickening agent for your velvety béchamel).
- Salt and freshly ground black pepper, (season generously to taste, enhancing all the flavors).
Filling and Assembly
- 10 large slices of Italian ham, (approximately 300g/10.5oz, such as thinly sliced prosciutto cotto).
- 250 g (9oz) fresh mozzarella, (crucially, ensure it’s well-drained and blotted dry to avoid a watery lasagna).
- Pecorino Romano, fine grating on each layer (for an extra, intense burst of savory, salty flavor that truly elevates the dish).
Stay Connected for More Recipes!
Detailed Instructions
Step 1: Prepare the Homemade Pasta Dough
-
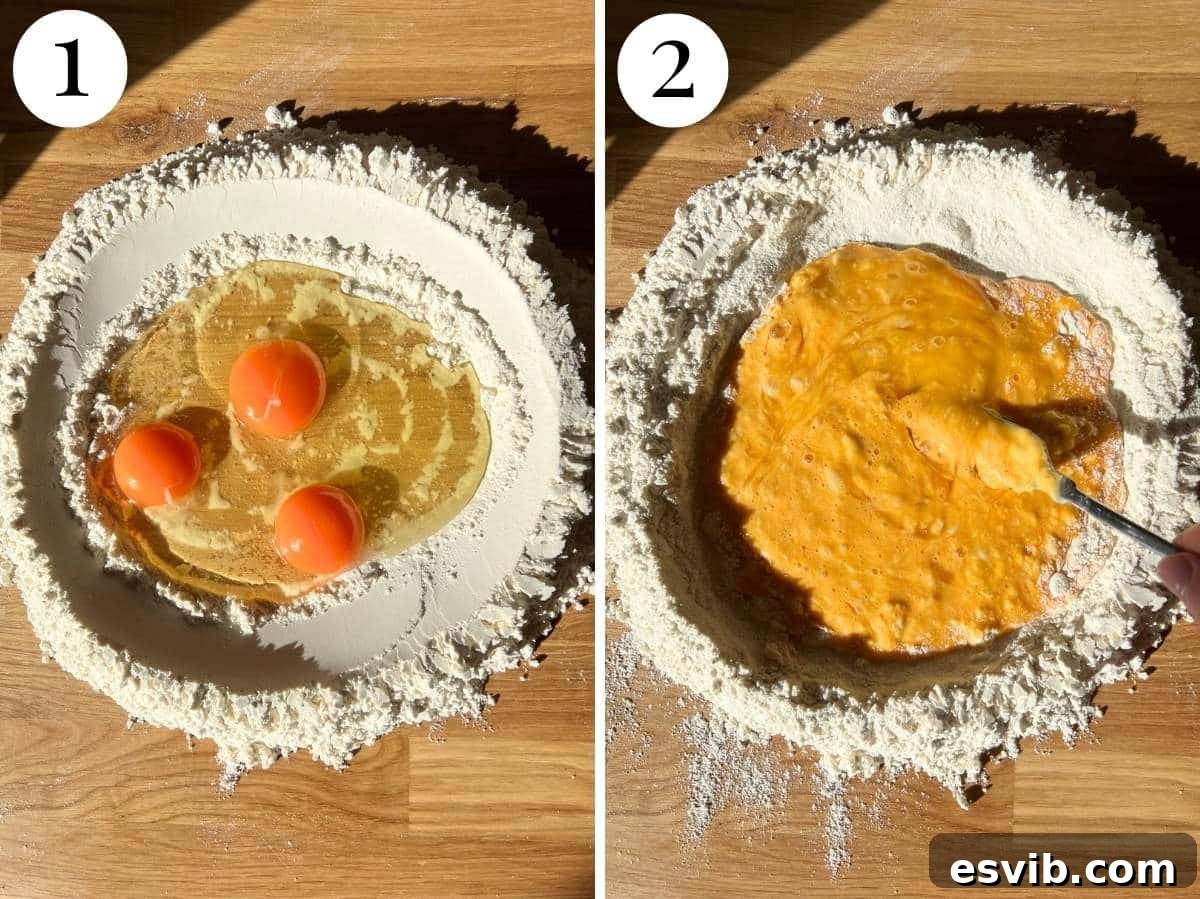
Begin by creating a clean, spacious work surface, ideally a wooden board or a clean countertop. Pour the precisely weighed 300g of Italian 00 flour onto it, forming a neat, symmetrical mound. In the center of this flour mound, create a wide, deep well, ensuring the walls are sturdy enough to contain the liquid. Carefully crack the three large eggs into this well. Using a fork, gently whisk the eggs together from the center, slowly incorporating small amounts of flour from the inner edges of the well. Continue this motion, gradually widening your whisking area to bring in more flour.

-
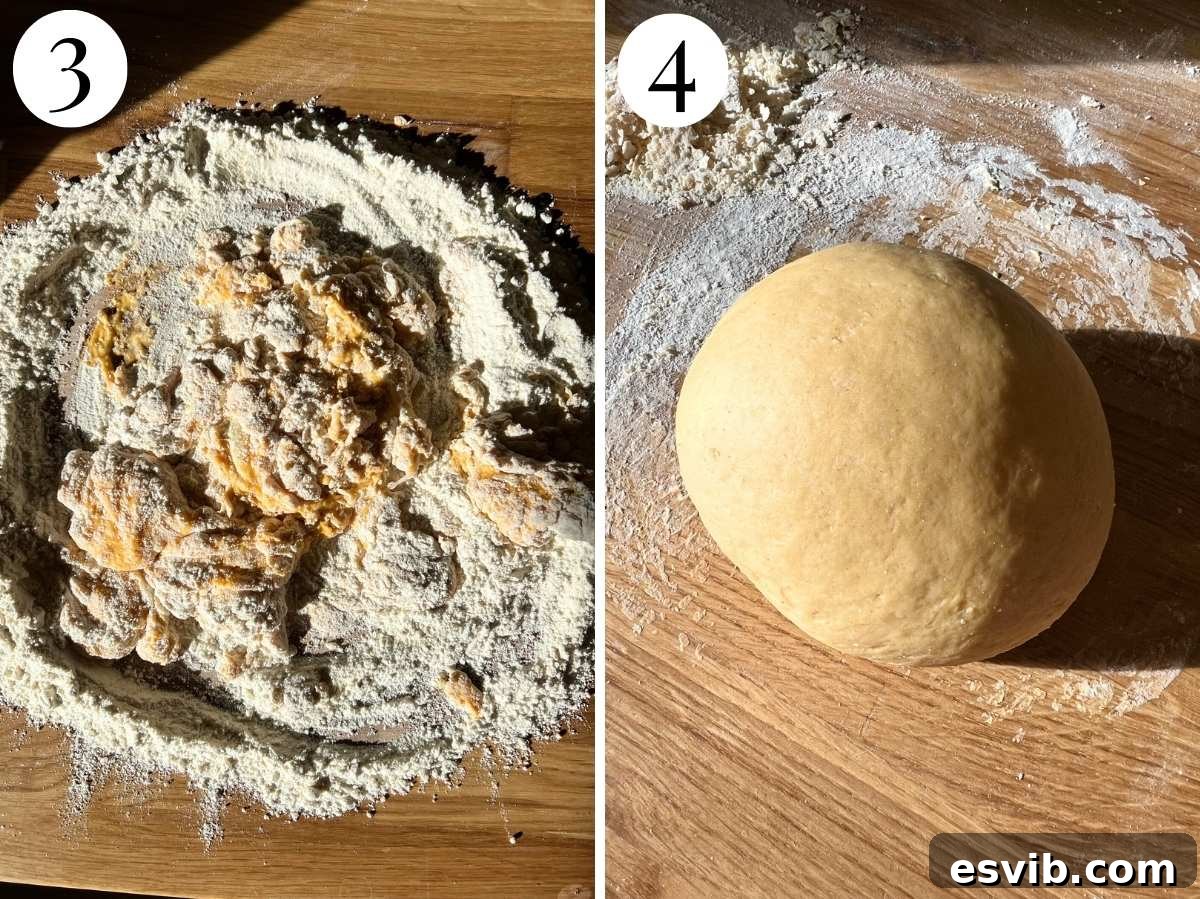
As the mixture in the well thickens into a thick, sticky paste, set aside the fork and use your hands to gradually gather the remaining flour into the center, forming a cohesive, shaggy dough. Now comes the essential part: knead the dough vigorously for approximately 10 minutes. Use the heel of your hand to push the dough away from you, then fold it back towards you, rotating it slightly with each push and fold. The dough will initially be quite stiff and resistant, but with continuous kneading, it will gradually transform, becoming incredibly smooth, elastic, and springy. A perfectly kneaded dough should feel like a firm, smooth rubber ball when gently pressed.
-
Once adequately kneaded and exhibiting the desired smooth, elastic texture, shape the dough into a compact ball. Wrap it tightly with plastic wrap, ensuring no air can reach the dough, as this will prevent it from drying out and forming a crust. Allow the dough to rest at room temperature for a minimum of 30 minutes, or up to an hour if time permits. This resting period is crucial; it allows the gluten strands within the dough to relax, making the dough much more pliable and significantly easier to roll out, preventing it from snapping back during shaping.
Step 2: Craft the Creamy Béchamel Sauce
-
In a medium-sized, heavy-bottomed saucepan, add the 70g of unsalted butter. Place the saucepan over medium heat and allow the butter to melt completely. Continue to cook gently until it is fully liquefied and begins to bubble lightly, indicating it’s ready for the next step. Be careful not to let the butter brown, as this will alter the flavor of your béchamel.
-
Once the butter is melted and bubbling, add the 70g of all-purpose flour to the saucepan. Immediately, using a hand whisk, stir continuously and vigorously to incorporate the flour into the butter, forming a smooth, golden paste known as a roux. Continue to cook this roux for about 1 minute, stirring constantly. This crucial step is to cook out the raw flour taste, ensuring your béchamel has a clean, pleasant flavor, without allowing the roux to take on too much color.
-
Now, slowly begin to whisk in about half of the milk (approximately 350ml) into the cooked roux. Pour it in a very slow, steady stream while continuously whisking vigorously to prevent any lumps from forming. The mixture will quickly thicken. Once this initial portion of milk is fully absorbed and the sauce has started to thicken into a smooth consistency, gradually pour in the remaining milk, continuing to whisk until it is completely incorporated and the sauce is smooth.
-
Continue to heat the béchamel sauce over medium heat, stirring frequently with your whisk or a wooden spoon, until it comes to a gentle simmer and visibly thickens to the desired consistency. The sauce should be thick enough to generously coat the back of a wooden spoon without running off too quickly. Season the béchamel generously with salt and freshly ground black pepper to taste. Once seasoned and thickened, remove the saucepan from the heat and set the béchamel aside. It will continue to thicken slightly as it cools.
Step 3: Prepare the Pistachio Pesto and Combine with Béchamel
-
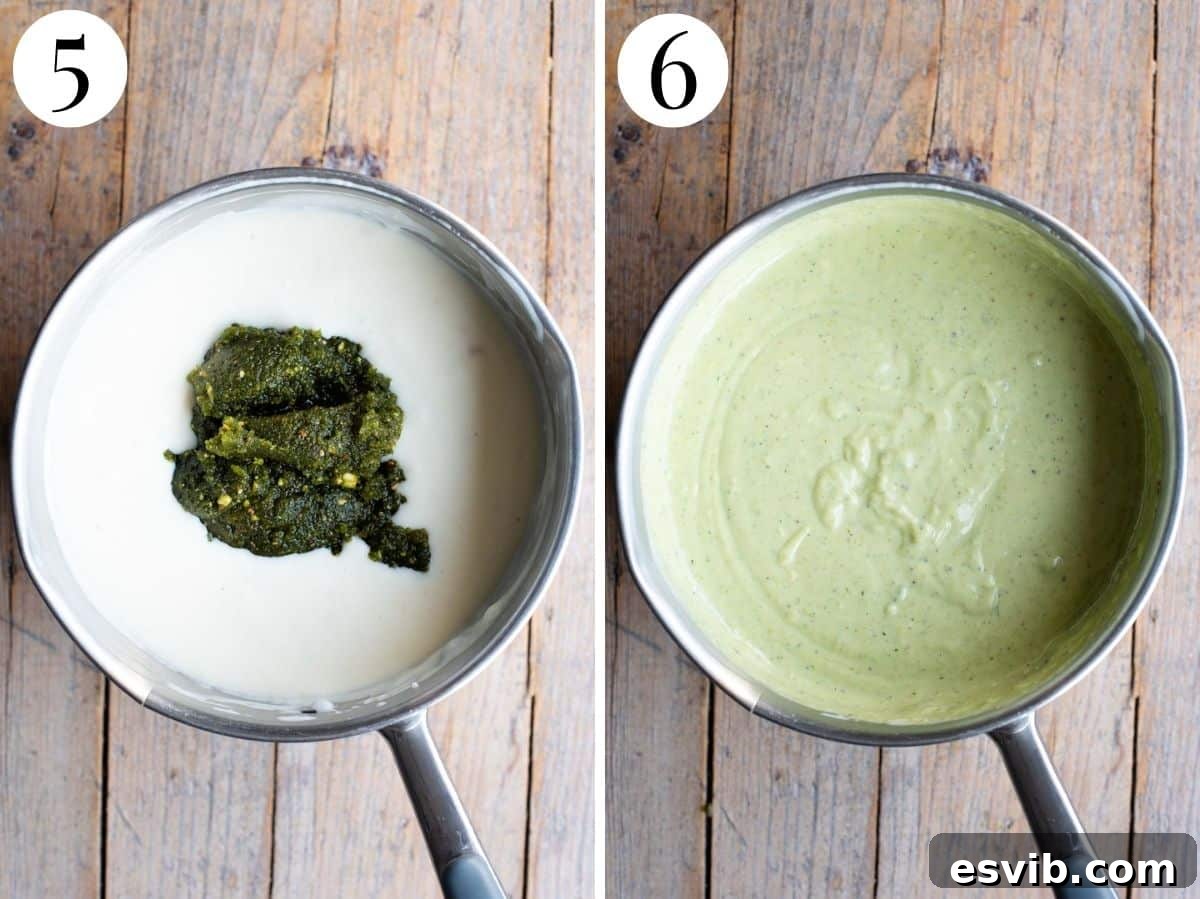
In the bowl of a food processor (or using an immersion blender if preferred), combine the 140g of unsalted pistachio nuts, 20g of fresh basil leaves, the peeled garlic clove, 60g of finely grated Pecorino Romano cheese, and 70ml of extra virgin olive oil. Pulse and blend the mixture until a thick, coarse, and fragrant paste begins to form. To achieve an exceptionally smooth and creamy consistency, add a few generous spoonfuls of your prepared béchamel sauce to the pesto mixture. Continue to blitz until the pesto is completely smooth, luscious, and a vibrant green color.
-
Once your pistachio pesto has reached its desired smooth texture, carefully transfer it into the saucepan containing the prepared béchamel sauce. Using a whisk or a spatula, mix the pesto and béchamel thoroughly until they are completely combined, forming a uniformly vibrant green, smooth, and intensely aromatic pistachio béchamel sauce. Taste the sauce and adjust the seasoning with additional salt and pepper if necessary, ensuring the flavors are perfectly balanced.
Step 4: Roll Out Your Homemade Pasta Sheets
-
Set up your pasta machine securely on your work surface, ensuring it is clamped tightly and stable. Adjust the rollers to the widest setting available (this is typically designated as number 0 on most home pasta machines). Take your well-rested pasta dough and cut it precisely in half. Immediately re-wrap one half of the dough in plastic wrap to prevent it from drying out while you work with the first portion.
-
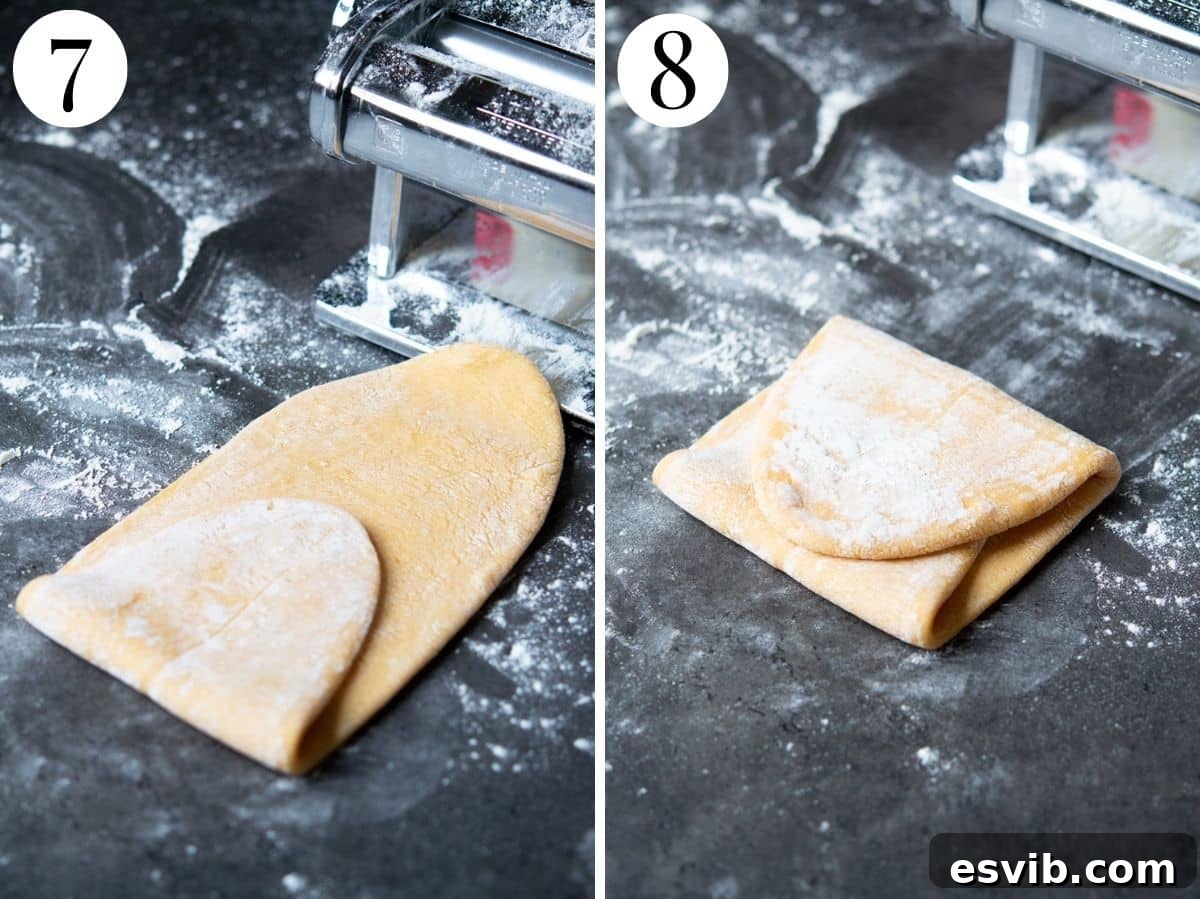
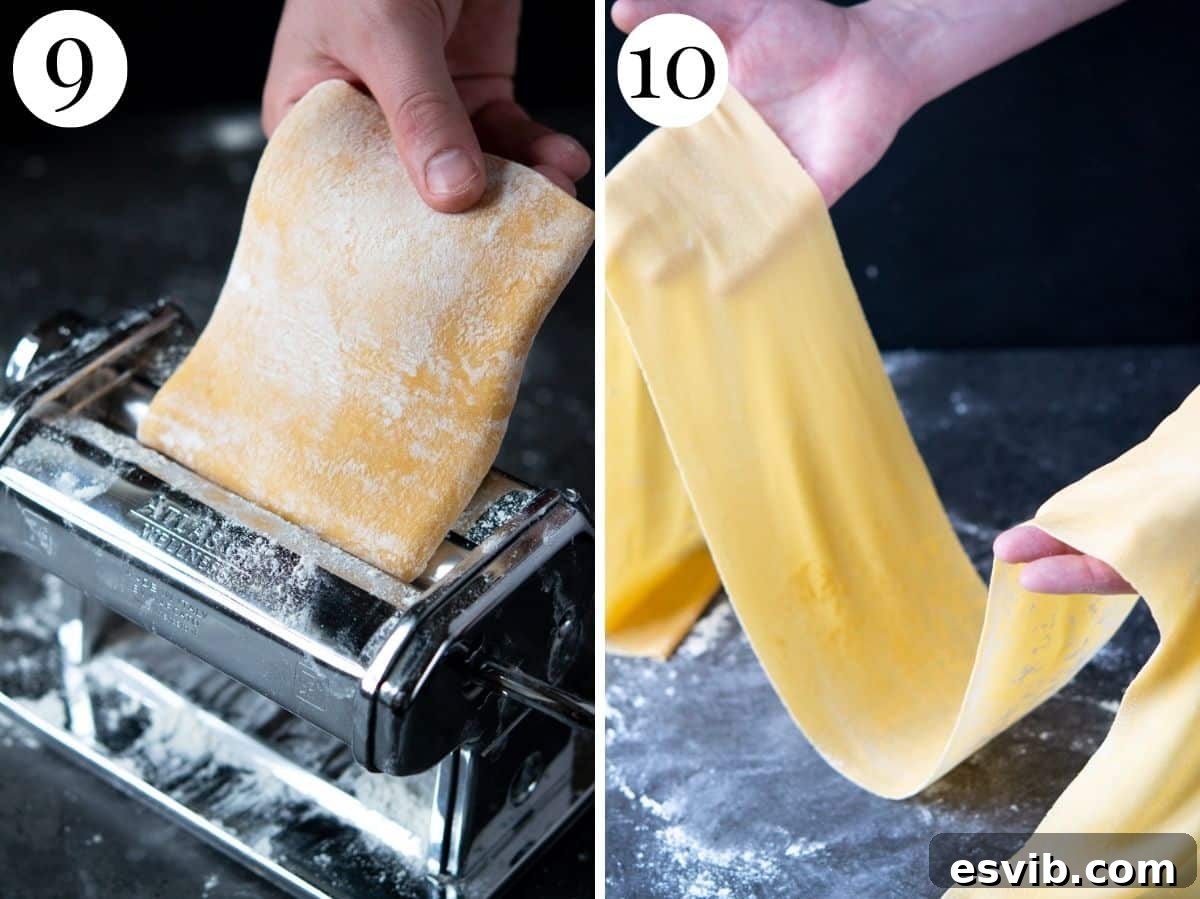
Lightly flatten the unwrapped half of the dough with your hands, shaping it into a rough rectangle that will easily fit through the pasta machine. Pass this flattened dough through the widest setting. Once it emerges, carefully fold one end of the dough towards the middle, and then fold the other end right over that, effectively creating a ‘leaflet’ or ‘envelope’ shape. Gently flatten this folded dough again and pass it through the widest setting once more. Repeat this precise folding and rolling process one more time. This technique helps to strengthen the gluten within the dough and creates a perfectly smooth, uniform pasta sheet.
-
Now, without any further folding, progressively roll the dough through each subsequent setting on your pasta machine, moving from the widest setting towards increasingly narrower ones. Continue this process until you reach the third-to-last setting (which is typically number 7 on a machine with 9 settings). This specific thickness is ideal for lasagna sheets, as it provides enough structure to hold the layers while still being delicate and tender. Throughout this rolling process, ensure you lightly dust the pasta dough, your work surface, and the pasta machine rollers with extra 00 flour as needed to prevent any sticking. Repeat the entire rolling process with the second half of your pasta dough until all sheets are prepared.
Step 5: Blanch the Pasta Sheets
-
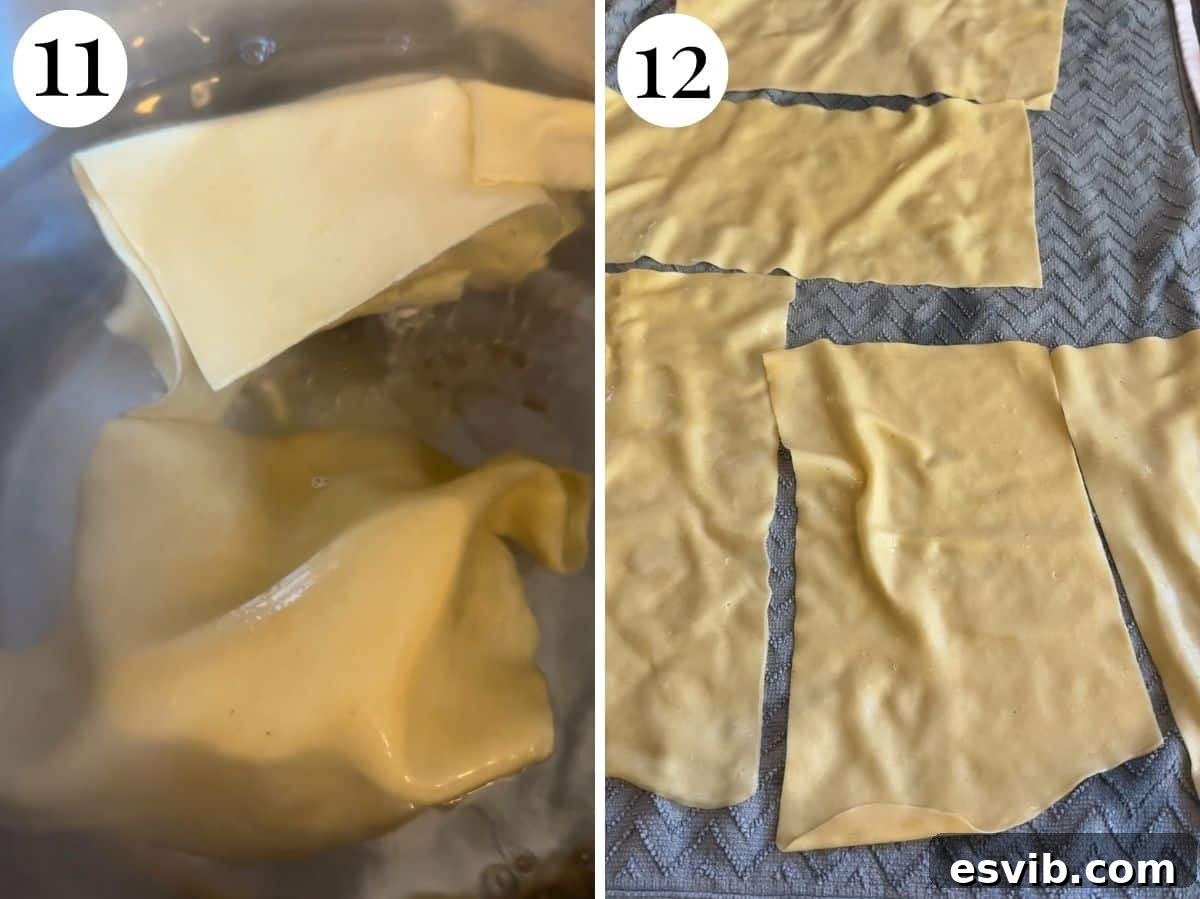
Bring a large pot of water to a vigorous, rolling boil. It’s crucial to season the water generously with salt – it should taste like the sea. This is your primary opportunity to season the pasta itself, which will greatly impact the final flavor of your lasagna. While the water comes to a boil, lay out 1-2 clean, dry dish towels on a clean surface near your stove; these will serve as a resting place for your blanched pasta sheets.
-
Carefully cut your rolled-out pasta sheets into rectangles that are roughly the same size as your 9×13-inch baking dish. Gently immerse 2-3 pasta sheets at a time into the boiling salted water. Blanch them for approximately 30 seconds. The pasta should become pliable and slightly tender but still retain a firm bite (al dente) – it will continue cooking in the oven. Using kitchen tongs, very carefully remove the blanched pasta sheets from the hot water and lay them flat on the clean kitchen towels to air dry for a few minutes. This crucial step prevents them from sticking together and removes any excess surface moisture. Continue blanching the rest of the pasta in small batches until all sheets are ready for assembly.
-
Pro-Tip for Efficiency: To optimize your workspace and streamline the assembly process, especially if your kitchen counter space is limited, consider a batch-by-batch approach. Blanch a portion of your pasta sheets, then immediately assemble one or two layers of the lasagna before proceeding to blanch the next batch. This method keeps your preparation area manageable and ensures your pasta sheets are fresh and perfectly pliable for layering.
Step 6: Assemble Your Pistachio Lasagna
-
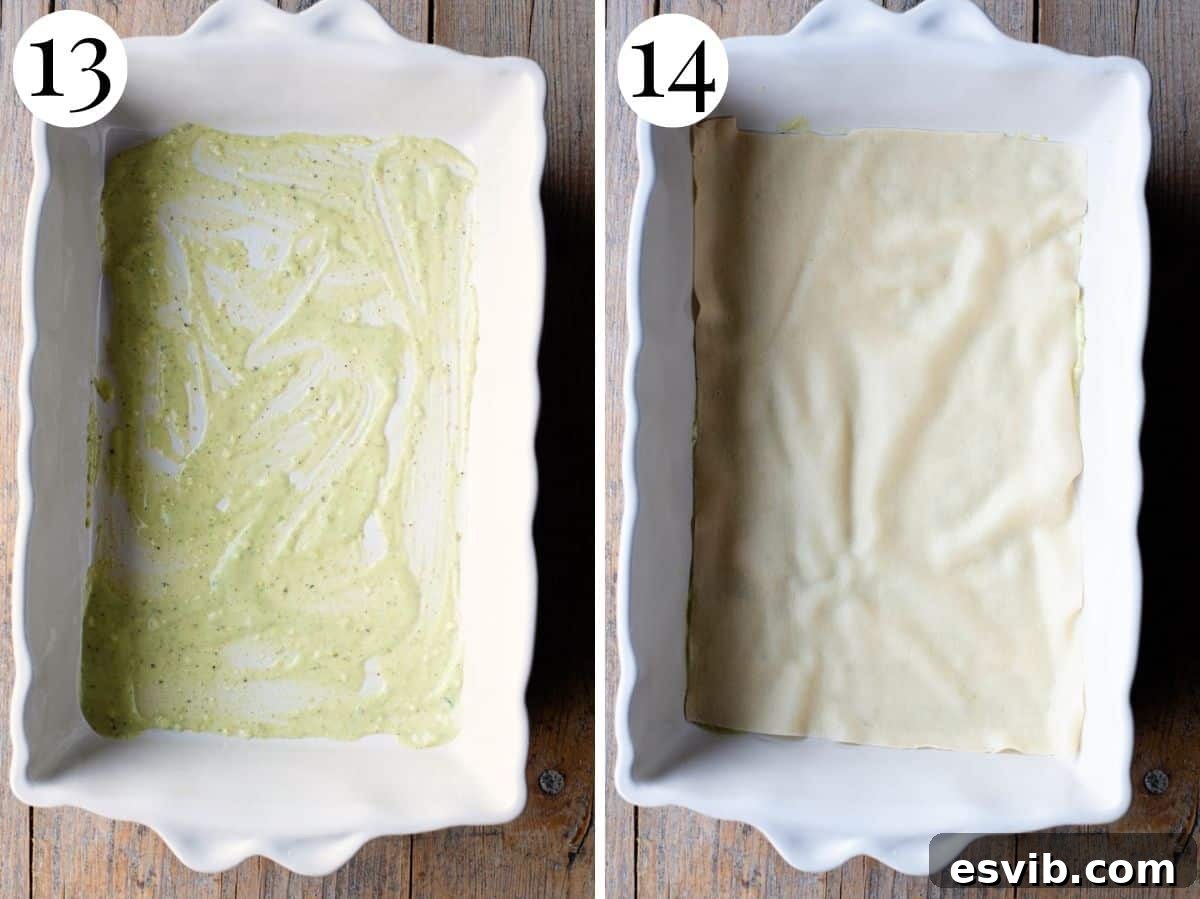
Lightly grease your 9×13-inch baking dish to prevent sticking. Spread a generous spoonful (approximately 2-3 tablespoons) of the prepared pistachio béchamel sauce evenly across the bottom of the dish. This initial layer of sauce is crucial not only to prevent the first layer of pasta from sticking but also to infuse the very bottom of the lasagna with moisture and flavor, creating a delicious foundation.
-
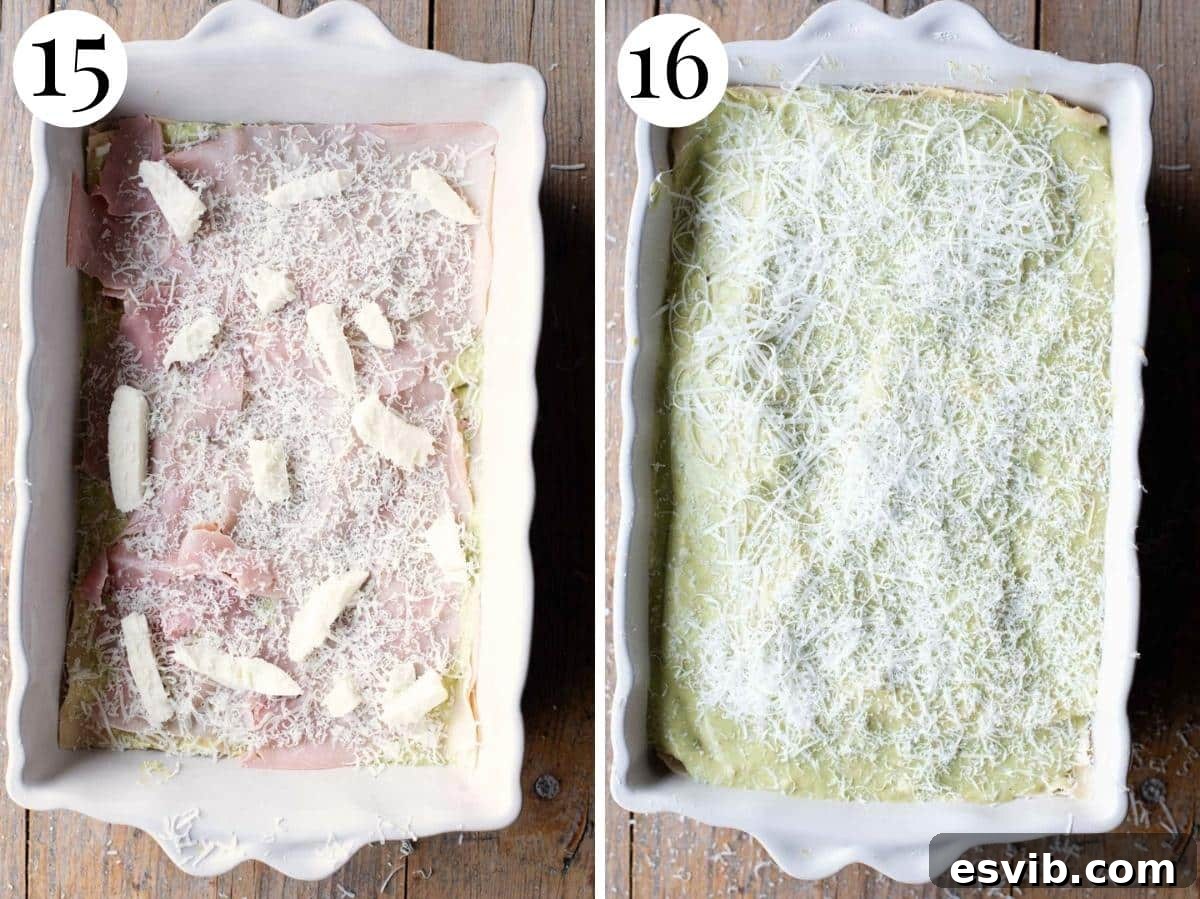
Now, begin the art of layering your lasagna. Place a single layer of your blanched pasta sheets directly over the béchamel base, ensuring they cover the entire bottom of the dish. You may need to slightly overlap sheets or gently trim them to fit perfectly. Follow this pasta layer with another generous spread of the luscious pistachio béchamel sauce. Next, evenly arrange slices of the Italian ham, followed by pieces of the well-drained fresh mozzarella. Conclude this layer with a fine grating of Pecorino Romano cheese for its distinctive salty kick. Continue this meticulous layering process – pasta, pistachio béchamel, ham, mozzarella, Pecorino – until you have used all your ingredients. For a standard 9×13-inch dish, you should typically achieve around 5 distinct, flavorful layers. Ensure the very top layer is just sauce and a final, generous sprinkle of Pecorino Romano, which will create a beautifully golden and crusted top when baked.
Step 7: Bake to Golden Perfection
-
Preheat your oven to 200 °C (400 °F) if you are using a conventional (static) oven, or set it to 180 °C (350 °F) if you have a fan-assisted (convection) oven. Ensuring your oven is fully preheated is important for even baking and a beautiful golden crust.
-
Carefully place the assembled lasagna into the preheated oven, leaving it uncovered. Bake for approximately 30-35 minutes, or until the top layer is bubbling vigorously, has developed a beautiful golden-brown crust, and the edges are slightly caramelized. The internal temperature should be piping hot throughout. Once baked to perfection, remove the lasagna from the oven. Crucially, allow it to rest for 5-10 minutes before attempting to cut into individual slices and serving. This resting period allows the layers to set properly, ensuring that each slice holds its shape beautifully and prevents the lasagna from falling apart upon serving.
Helpful Notes and Storage Tips
- Prepping Ahead: This Pistachio Lasagna is an excellent dish for meal prepping or preparing in advance for entertaining. You can assemble the entire lasagna up to 1 day before you plan to bake it. Simply cover the baking dish tightly with several layers of plastic wrap and store it in the refrigerator. When you’re ready to bake, remove it from the fridge about 30 minutes prior to baking to allow it to come closer to room temperature, then proceed to bake as instructed in the recipe.
- Storage of Leftovers: Once cooked, any leftover Pistachio Lasagna will keep wonderfully in an airtight container in the refrigerator for up to 3 days. Many find that the flavors meld and deepen overnight, making it even more delicious the next day!
- Reheating Instructions: To reheat individual slices or the entire dish, you can place it (covered with aluminum foil to prevent drying out and preserve moisture) in a preheated oven at 180 °C (350 °F) until it’s heated through to the center. For smaller portions, a microwave can be used, although the oven method will help maintain a crispier top crust. This lasagna is also quite delightful enjoyed at room temperature, especially during warmer seasons, making it a perfect candidate for picnics or potlucks.
- Freezing for Future Enjoyment: For longer-term storage, this lasagna freezes beautifully, offering a convenient make-ahead meal option. You can freeze it either before or after baking:
- To Freeze Unbaked: Assemble the lasagna completely in a freezer-safe baking dish (an aluminum foil pan works exceptionally well for easy transfer and cleanup). Once assembled, cover the dish tightly with several layers of plastic wrap, followed by a layer of heavy-duty aluminum foil to prevent freezer burn. Freeze for up to 3 months. When you’re ready to cook, thaw the lasagna overnight in the refrigerator. Then, bake as directed in the recipe, potentially adding an extra 10-15 minutes to the baking time to ensure it’s heated through.
- To Freeze Baked: Allow the baked lasagna to cool down completely to room temperature. You can then cut it into individual portions or leave it whole. Wrap each portion (or the whole lasagna) tightly in plastic wrap, then an additional layer of aluminum foil. Freeze for up to 3 months. To reheat, thaw desired portions in the refrigerator, then warm in the oven (covered) until hot, or reheat directly from frozen at a slightly lower temperature (e.g., 160°C/325°F) for a longer duration until thoroughly heated.
Helpful Information for All Our Recipes
- Unless otherwise explicitly stated within a specific recipe, I consistently use high-quality extra virgin olive oil in all my culinary creations.
- For superior flavor, texture, and consistent results in any recipe calling for canned or jarred tomatoes (be it crushed, diced, whole peeled, or pureed), I exclusively recommend utilizing trusted Italian brands such as Cirio or Mutti. Their premium quality makes a noticeable difference in the final outcome of your dish.
- Unless a specific size is mentioned in the ingredient list, please assume that all vegetables referenced in our recipes are of medium size.
- All our recipes are meticulously tested and developed using a fan-assisted (convection) oven to ensure reliable cooking times and precise temperature recommendations for consistent success in your own kitchen.
- Curious about the nutritional breakdown of our dishes? You can find out more about how our nutrition information is calculated on our website, offering transparency and insights into your meal planning.
- Elevate your home cooking with authentic Italian flavors! Check out our comprehensive list of must-have Italian Pantry Staples to stock your kitchen like a seasoned Italian nonna.
- Equip your kitchen for success and efficiency with our recommendations for the Essential Kitchen Tools for Italian Cooking, designed to make your culinary journey smoother and more enjoyable.
Nutrition Information
Calories: 654kcal
|
Carbohydrates: 37g
|
Protein: 30g
|
Fat: 43g
|
Saturated Fat: 16g
|
Polyunsaturated Fat: 5g
|
Monounsaturated Fat: 19g
|
Trans Fat: 0.3g
|
Cholesterol: 170mg
|
Sodium: 773mg
|
Potassium: 537mg
|
Fiber: 2g
|
Sugar: 6g
|
Vitamin A: 917IU
|
Vitamin C: 2mg
|
Calcium: 396mg
|
Iron: 3mg
Nutrition information provided is automatically calculated and should be considered as an approximation. Actual nutritional values may vary based on specific brands of ingredients used, preparation methods, and portion sizes.
Did you try this recipe?
We’d love to hear your feedback! Share your experience in the comments below!