
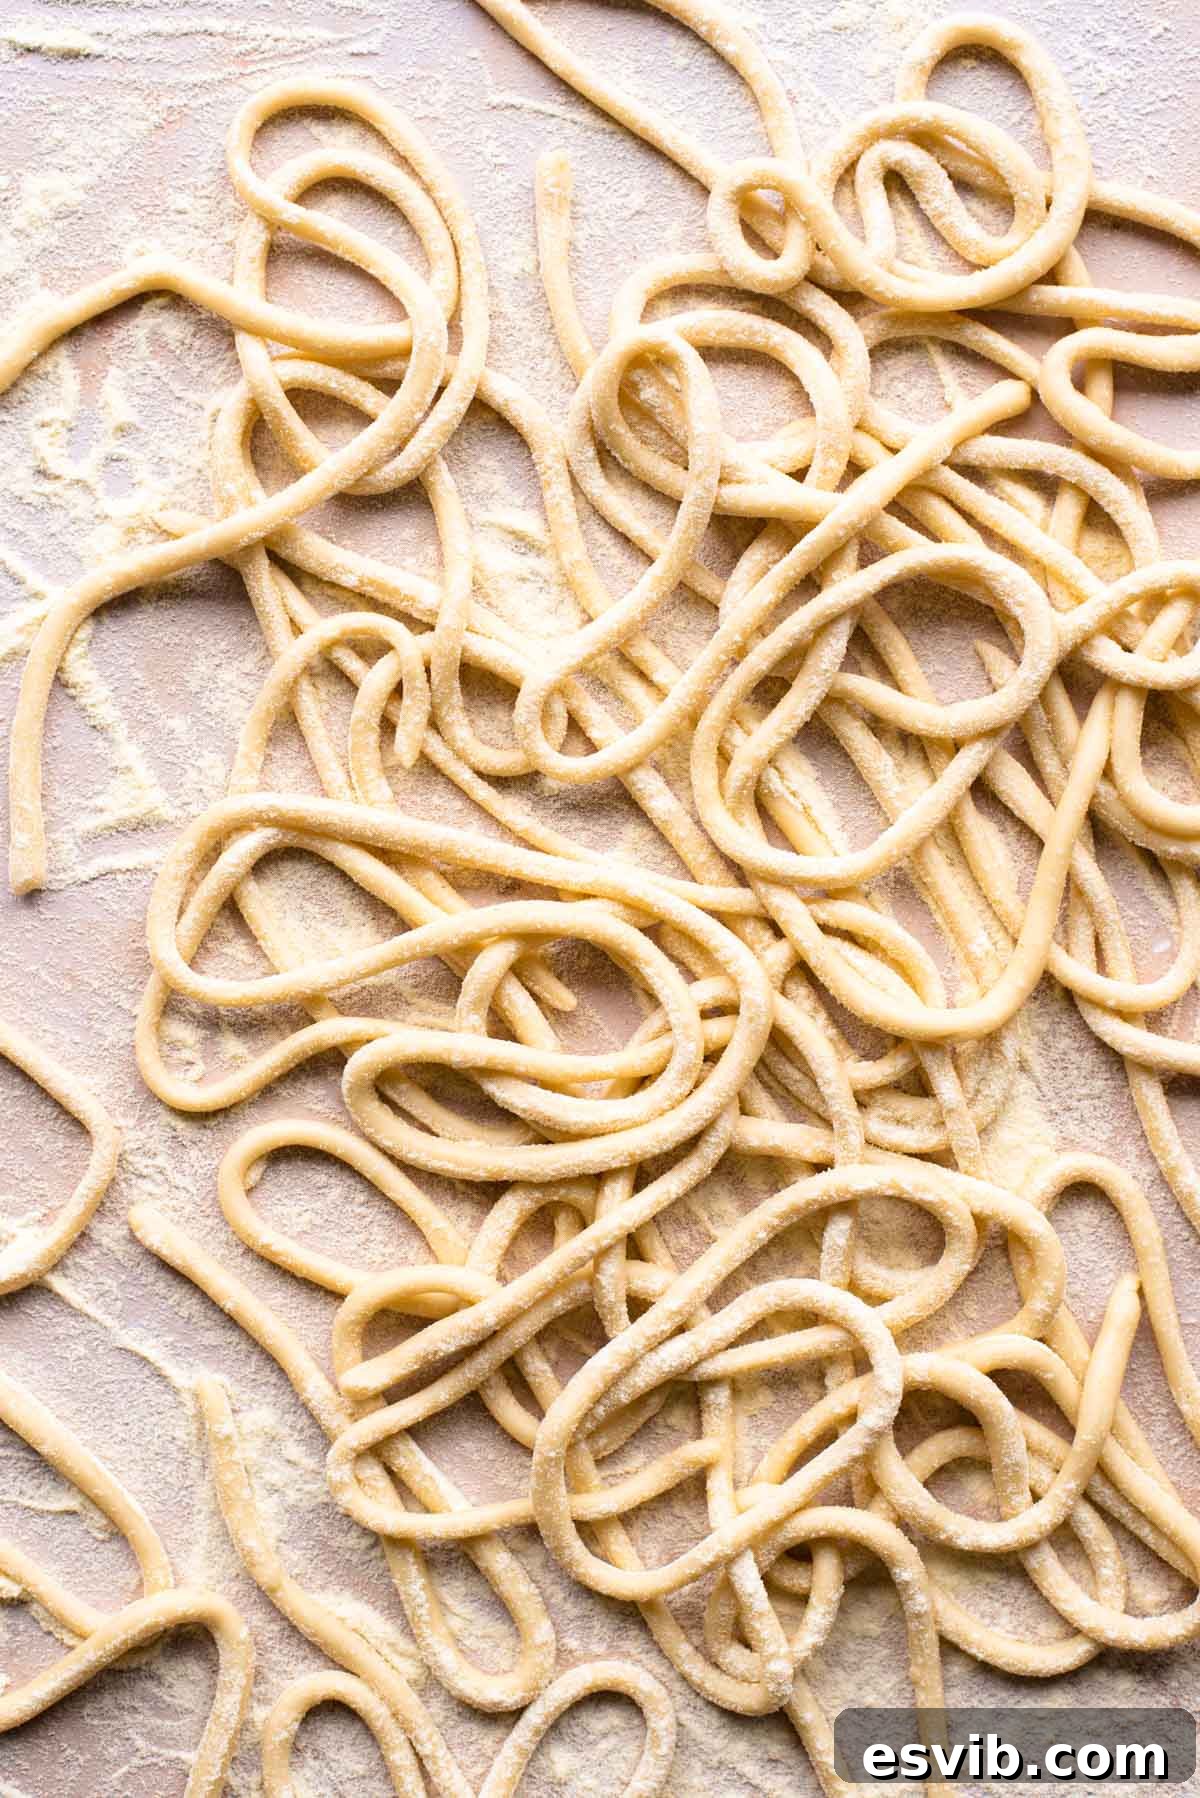
Embark on a culinary journey to Tuscany with this guide on how to make homemade Pici Pasta from scratch. This rustic, hand-rolled pasta shape, a beloved specialty from Siena, is remarkably simple to create with a humble, egg-free dough. Requiring just three core ingredients and a little love, Pici pasta comes together quicker than you might imagine. Its wonderfully chewy texture and impressive ability to absorb rich sauces make it an absolute delight. Prepare to serve your freshly made Pici with a classic Cacio e Pepe, Tuscan style, or pair it with any of your favorite hearty pasta sauces for an unforgettable meal.
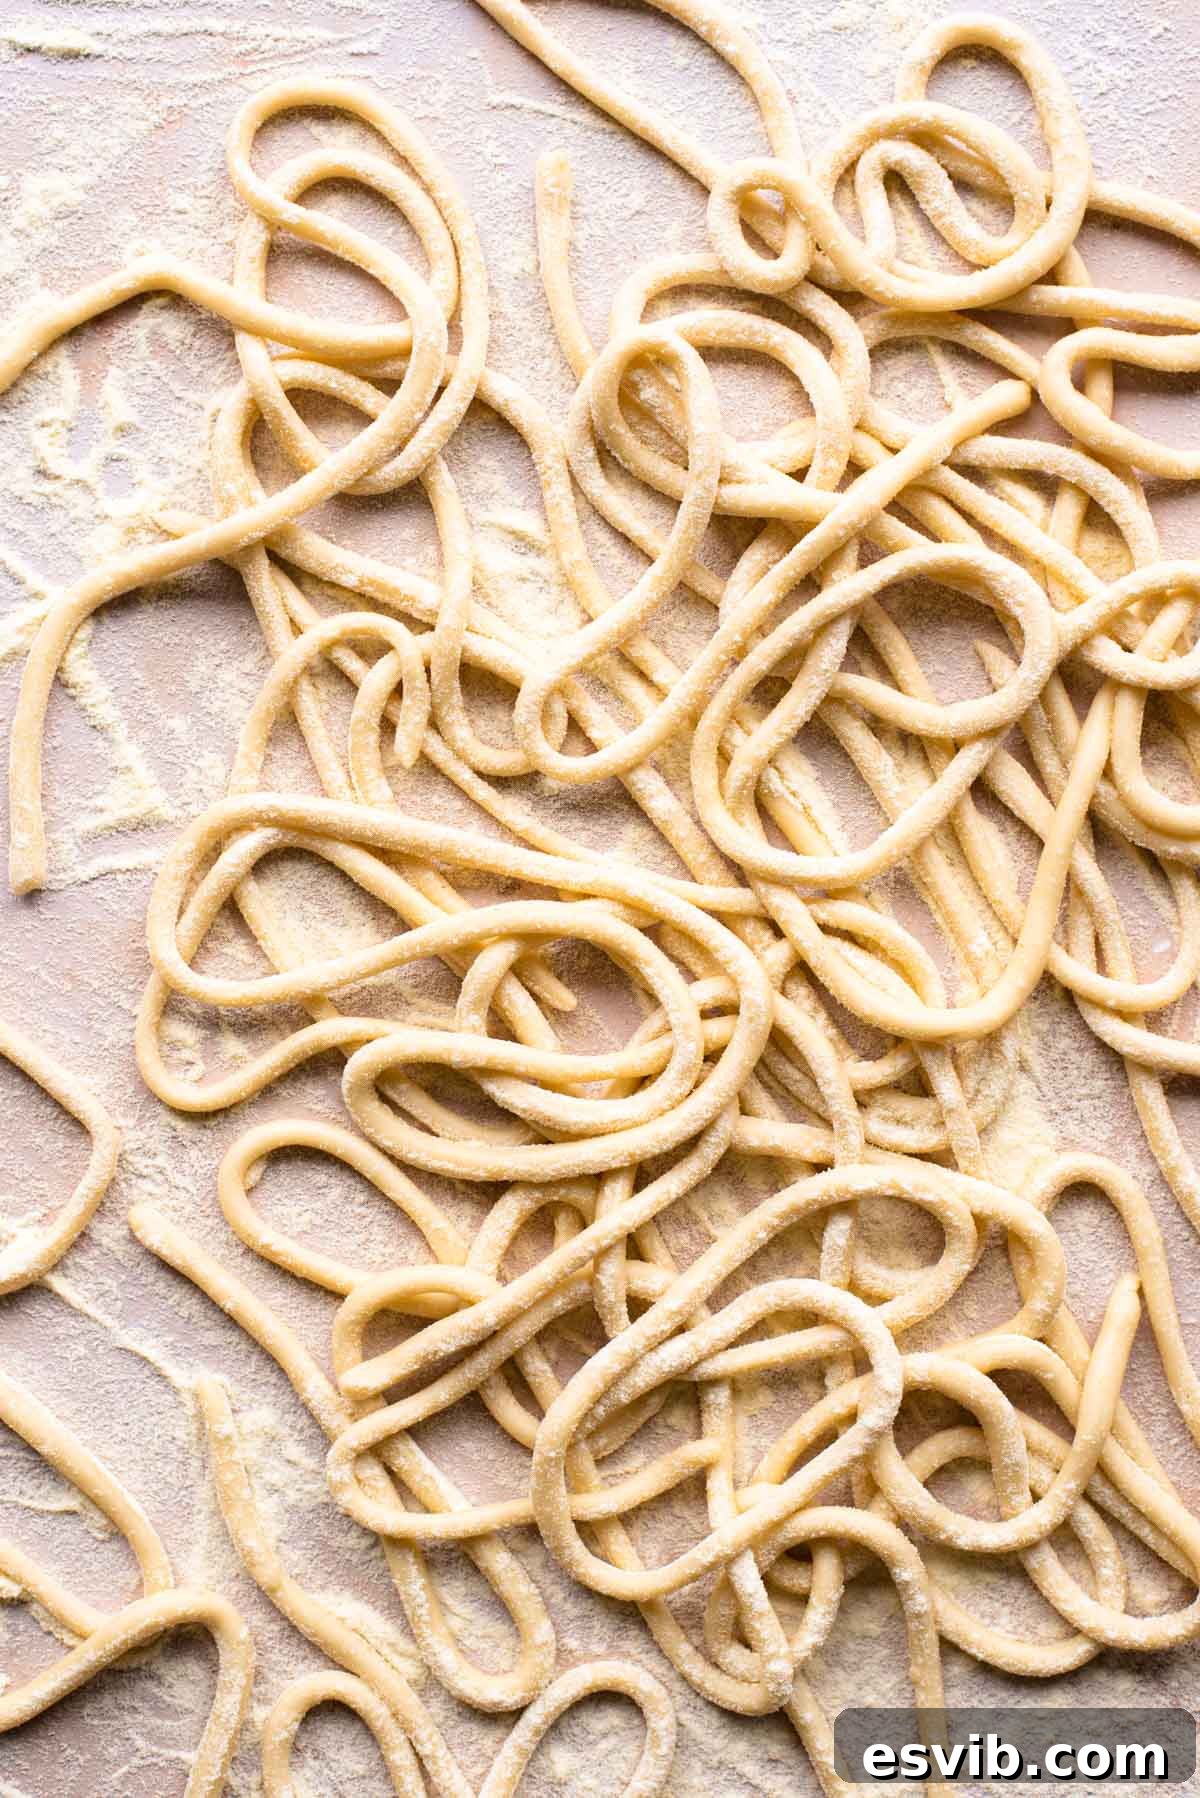
Discovering Pici Pasta: Tuscany’s Rustic Treasure
Pici pasta, affectionately known as ‘Pici Senesi’, hails from the picturesque city of Siena in Tuscany, Italy. This thick, satisfying, hand-rolled pasta is a testament to the region’s rich culinary heritage, where simple ingredients are transformed into extraordinary dishes. What makes Pici truly special is its minimalist composition: it’s crafted from just flour, water, and a touch of olive oil. This straightforward recipe not only makes it incredibly quick and easy to prepare, but also naturally egg-free, appealing to those with dietary preferences or allergies.
The beauty of Pici lies in its forgiving nature and ease of handling, making it an ideal project for beginner pasta makers. Unlike some delicate pasta types, Pici doesn’t demand intricate machinery or years of experience. Its robust structure and rustic charm mean that every strand, no matter how imperfect, contributes to its authentic character. This versatility extends to its serving options, as Pici pairs beautifully with a vast array of sauces, from rich meat ragus to lighter vegetable-based concoctions.
In its native Tuscany, Pici is most famously served with Cacio e Pepe, a sublime combination of Pecorino cheese and black pepper that clings perfectly to the pasta’s rough surface, creating a truly heavenly comfort food experience. Beyond this iconic pairing, traditional Tuscan ways to enjoy Pici include Pici con La Nana, a succulent duck ragu deeply rooted in Sienese tradition, or alle Bricole, a delightful preparation featuring toasted breadcrumbs, fresh chilli, and local Tuscan Pecorino cheese. These pairings highlight Pici’s ability to stand up to bold flavors while complementing them with its unique texture.
Join us as we guide you through the process of making Pici pasta from scratch. Below, you’ll find our detailed step-by-step recipe, complete with illustrative photos, essential tips, and a curated list of delicious sauces to complete your meal. Get ready to impress your taste buds and loved ones with this authentic Italian delight. Buon Appetito!
Essential Ingredients for Perfect Pici Pasta
Creating authentic Pici pasta requires only a handful of pantry staples, yet the quality of each ingredient plays a significant role in the final texture and flavor of your pasta. Below, we outline the simple components you’ll need and offer important tips for selecting them. Achieving culinary perfection often starts with understanding your ingredients.
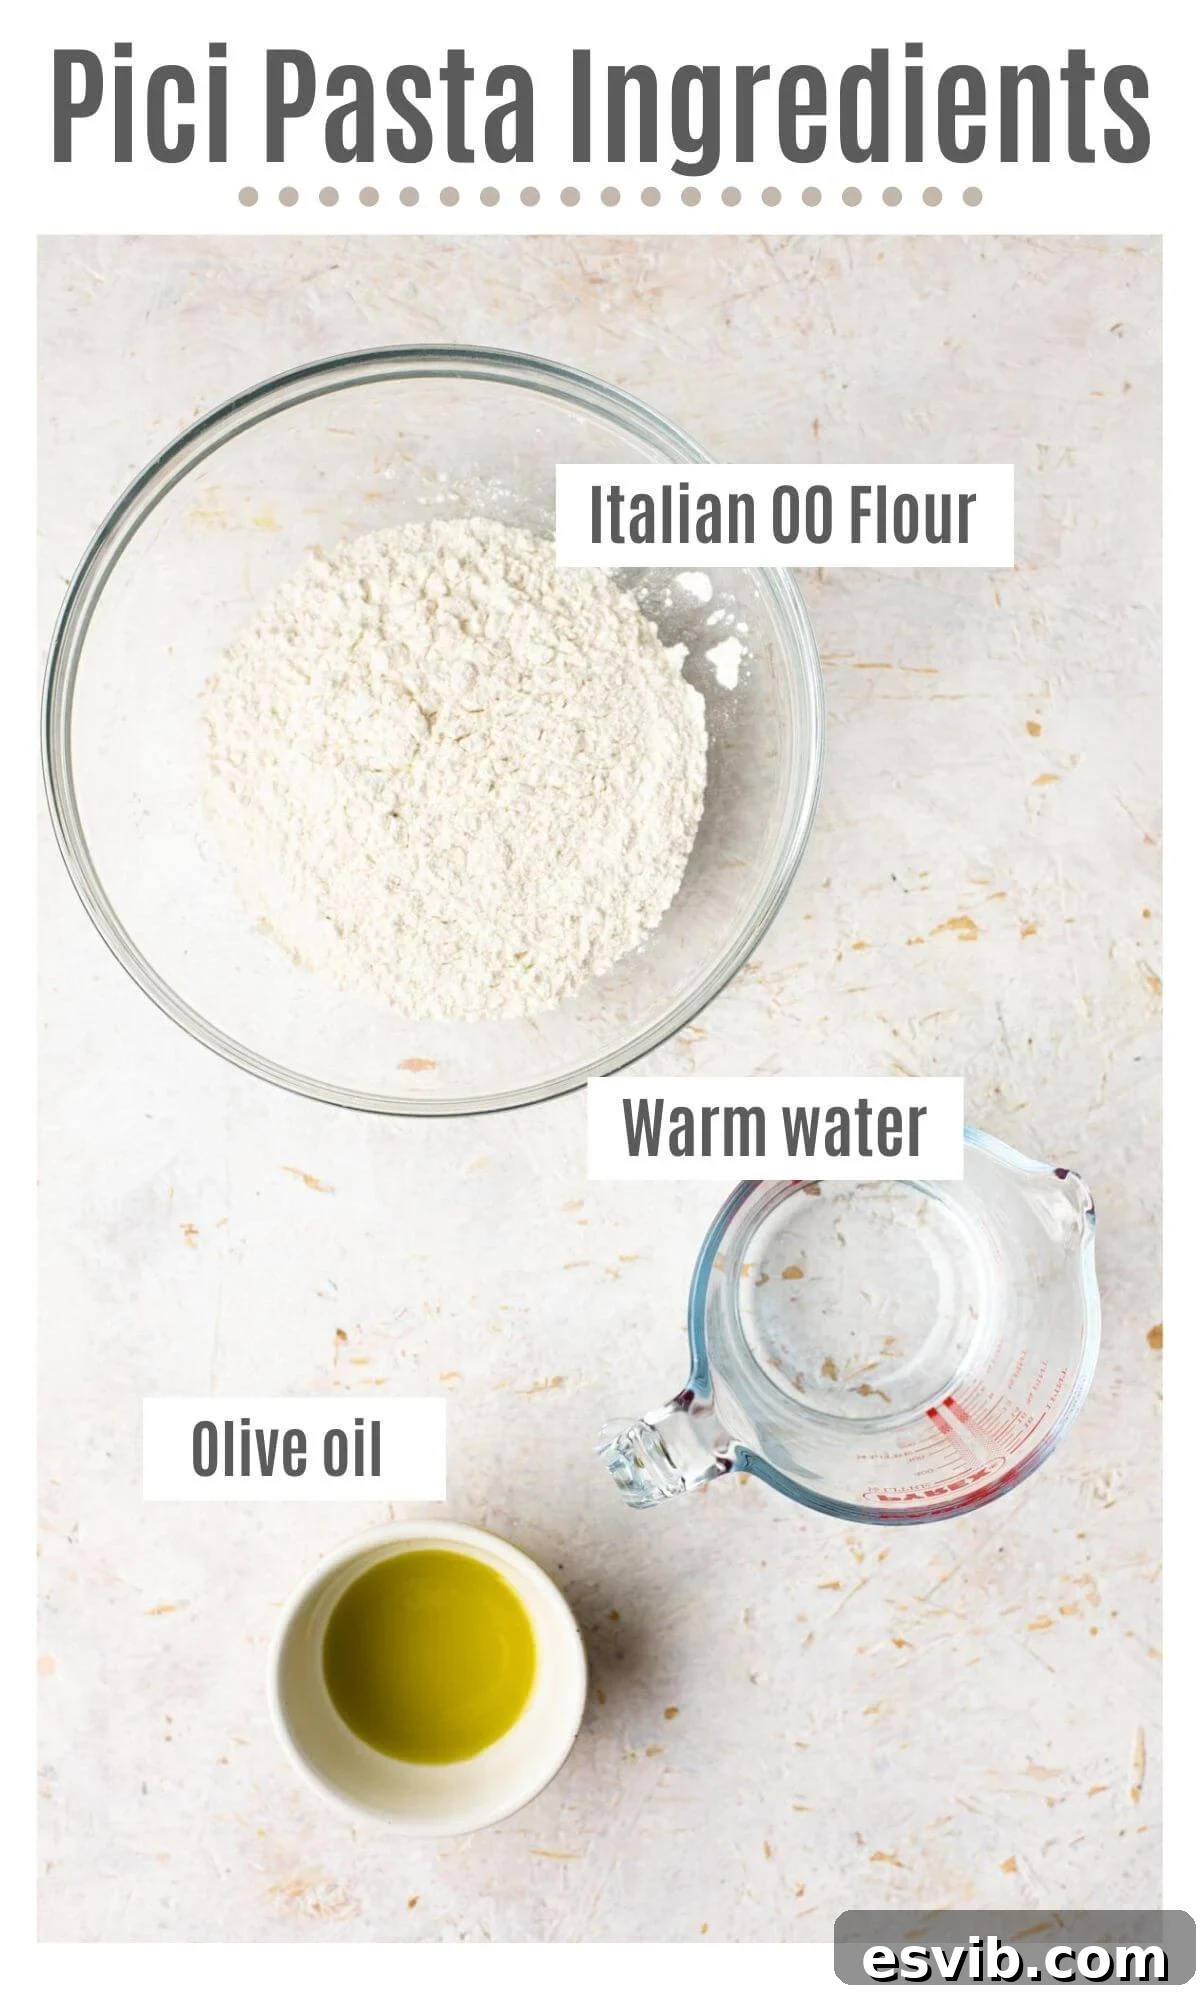
- Italian 00 Flour: Without a doubt, Italian double zero (00) flour is the gold standard for pasta making. Its incredibly fine grind and lower protein content create a silky, tender dough that is easy to work with and results in pasta with a superior texture. While 00 flour is highly recommended for the best results, don’t despair if you can’t find it. All-purpose flour can be used as a substitute, though your Pici might be slightly chewier and less delicate. If using all-purpose, you might need to adjust the water slightly to achieve the correct dough consistency.
- Warm Water: The temperature of your water is crucial for dough development. Use warm water, but ensure it’s not hot. Warm water helps activate the gluten in the flour more efficiently, making the dough softer, more pliable, and easier to knead and roll. It also allows the dough to come together more smoothly, reducing the need for excessive kneading.
- Olive Oil: A good quality extra virgin olive oil is not just for dressing salads; it’s an essential component in Pici dough. Olive oil adds a subtle depth of flavor characteristic of Mediterranean cuisine and contributes to the dough’s elasticity and workability. It also helps prevent the dough from drying out too quickly during the resting period and provides a smooth texture to the finished pasta.
- Salt (for cooking): While traditional Pici dough doesn’t typically include salt, properly salting your cooking water is paramount. Just like baking, pasta cooking requires seasoning, and the salt infuses flavor into the pasta itself. Aim for water that tastes like the sea – it makes a huge difference to the final dish.
Crafting Pici: A Step-by-Step Visual Guide
Making Pici pasta by hand is a wonderfully meditative process, and it’s much simpler than it looks. Follow these detailed steps, accompanied by our visual aids, to create your own rustic Tuscan pasta masterpiece. Remember, perfection isn’t the goal; embracing the handmade, slightly imperfect nature of Pici is part of its charm!
Recipe Preparation:
- Step 1: Prepare Your Work Surface and Flour. Begin by pouring your Italian 00 flour onto a large, clean work surface. A wooden board or a clean countertop works best. Using your fingers or the bottom of a bowl, create a generous well (a hollow space) in the center of the flour mound. This well will hold your liquid ingredients and prevent them from spilling as you begin to mix.
- Step 2: Combine Wet and Dry Ingredients. Pour the warm water and olive oil directly into the well you’ve created in the flour. Starting from the inner edges of the well, gradually use a fork to draw small amounts of flour into the liquid. Continue mixing gently, incorporating more flour until a shaggy, rough dough begins to form. It will look crumbly and somewhat uneven at this stage, but don’t worry, this is exactly what you want. Avoid adding all the flour at once; control is key.
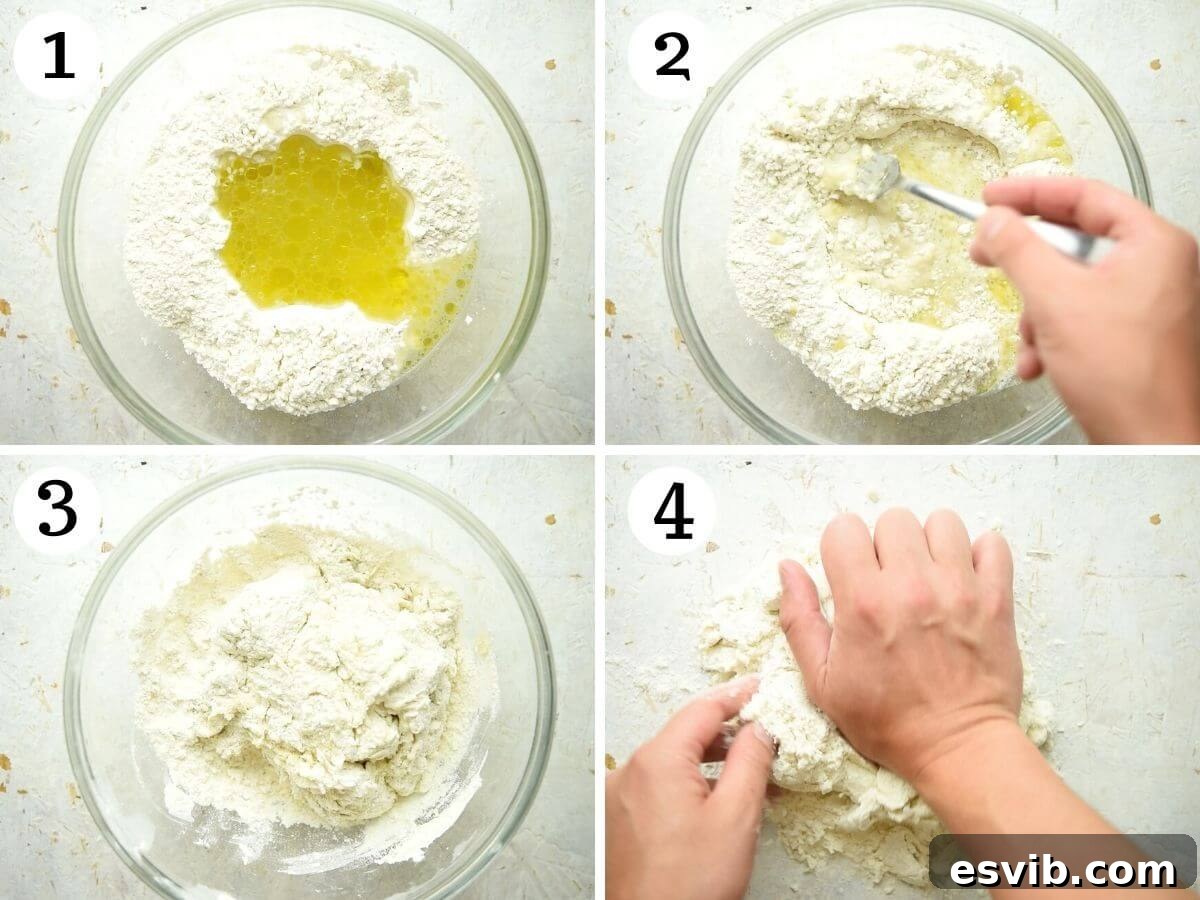
- Step 3: Knead the Dough to Perfection. Once a rough dough has formed, scrape any remaining flour and dough bits from your work surface and bring everything together. Now, it’s time to knead! Using the heels of your hands, push the dough away from you, fold it back, rotate, and repeat. Knead the dough vigorously for a full 10 minutes. This process is crucial for developing the gluten, which will make your pasta tender and elastic. You’ll notice a remarkable transformation as the dough becomes smooth, supple, and elastic to the touch. It should feel firm but not stiff, and should spring back when gently poked.
- Step 4: Rest the Dough. After kneading, form the dough into a smooth ball. Wrap it tightly in plastic wrap to prevent it from drying out. Let the dough rest at room temperature for at least 30 minutes. This resting period is not optional; it allows the gluten to relax, making the dough much softer, easier to roll, and more pliable. Skipping this step will result in a tough dough that resists shaping.
- Step 5: Roll Out and Cut the Dough. After resting, unwrap the dough and place it back on your clean work surface. Crucially, do NOT add any extra flour to the surface at this stage – this is important for the next step. Using a rolling pin, roll the dough out evenly into a round shape, approximately 1cm (about ⅓ to ½ inch) thick. Next, using a sharp knife or a pizza cutter, cut the dough into ¼ inch (approx. 0.6 cm) thick strips. These strips will be the starting point for your individual Pici strands.
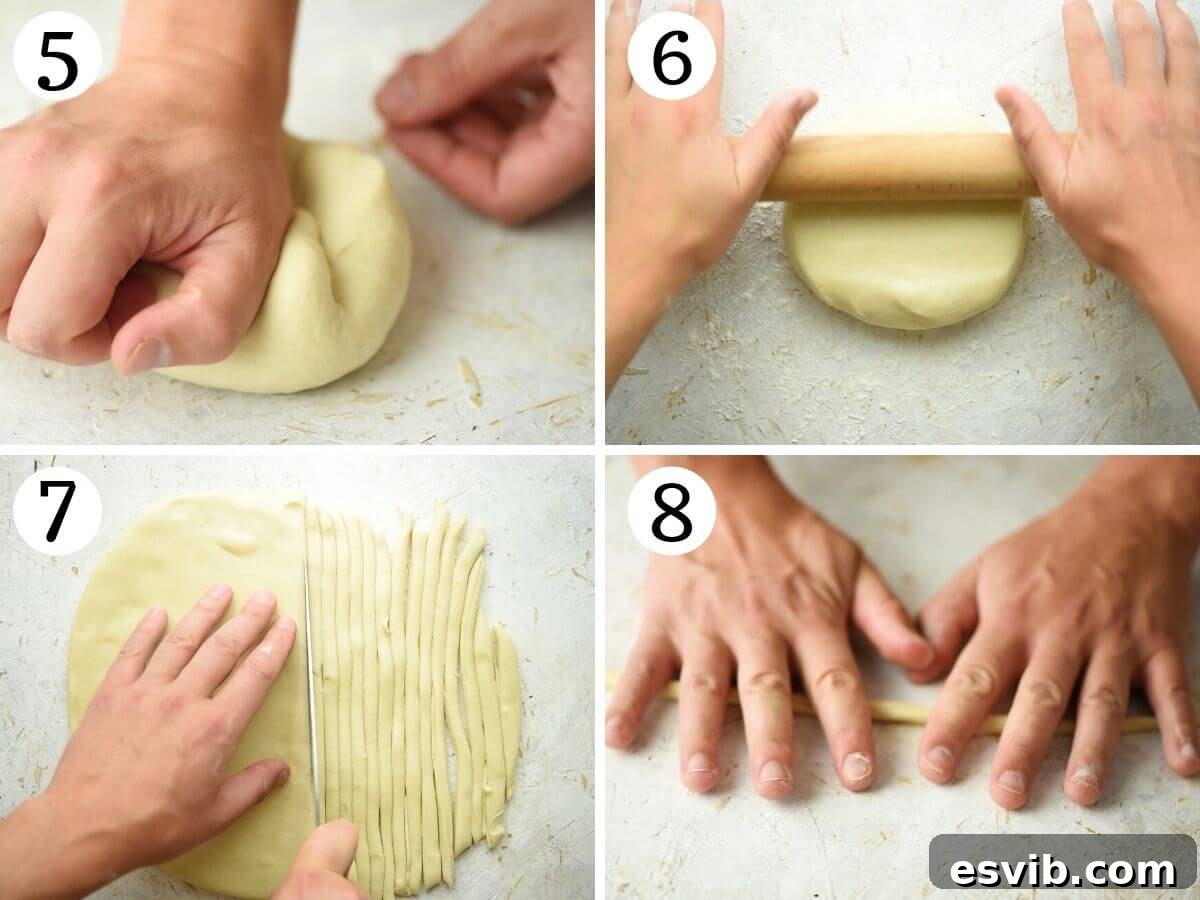
- Step 6: Hand-Roll the Pici. This is where the magic happens and Pici gets its distinctive shape. Take one strip of dough at a time. Place it on your clean, unfloured work surface. Using the palms of your hands and your fingertips, gently roll the strip back and forth, applying light pressure from the center outwards. The goal is to stretch and thin the dough until it resembles thick, rustic spaghetti or a long, slender worm. The pasta needs enough “grip” on the work surface to roll and elongate, so it’s essential not to add any flour to your rolling area. If you use flour, the strips will just slide around, making it impossible to shape them. Aim for a length of about 10-12 inches (25-30 cm), or as long as you can manage without breaking them. As you finish each piece of Pici, place it on a tray or a separate area that has been lightly dusted with flour or semolina. This dusting is crucial here to prevent the finished Pici strands from sticking together while you continue rolling the rest of the dough.
- Step 7: Cook the Pici Pasta. Bring a large pot of generously salted water to a rolling boil. Ensure you use a spacious pot with plenty of water to prevent the pasta from clumping. Once the water is vigorously boiling, carefully add the Pici pasta. Stir gently to separate any strands that might be clinging together. Pici cooks relatively quickly due to its fresh nature, typically taking only 2-3 minutes. You want it to be al dente – tender with a slight bite. Once cooked, use tongs or a slotted spoon to transfer the Pici directly into your waiting pasta sauce. This helps carry over some of the starchy pasta water into the sauce, which aids in creating a silky, emulsified coating. Toss the pasta gently with the sauce until every strand is beautifully coated. Serve immediately and enjoy your homemade masterpiece!
Expert Tips & Frequently Asked Questions for Pici Pasta
Mastering Pici pasta is all about understanding a few key techniques and troubleshooting common issues. Here are our top tips and answers to frequently asked questions to ensure your homemade Pici is a resounding success every time.
Key Tips for Pici Perfection:
- Allow the Dough to Rest: This cannot be stressed enough. The 30-minute resting period is vital. It allows the gluten, which you activated during kneading, to relax. A relaxed dough is a soft, pliable, and easy-to-work-with dough. If you try to roll it out immediately after kneading, it will be springy and resistant, making shaping much more difficult.
- Avoid Flour When Rolling Individual Pici: This is a critical distinction from many other pasta types. When you are forming the individual Pici strands, your work surface should be clean and completely unfloured. The dough needs friction to elongate and create its characteristic thick, rustic shape. If your surface is floured, the dough strips will simply slide around, making it impossible to roll them effectively. Only dust flour or semolina on the tray where you place the finished Pici to prevent sticking.
- Measure Flour Accurately: For consistent and perfect dough every time, a kitchen scale is your best friend. Weighing flour is far more precise than using measuring cups, as cup measurements can vary significantly depending on how the flour is scooped and packed. If you must use cups, gently spoon the flour into the measuring cup until it overflows, then level it off with a straight edge like a knife, without packing or scooping directly from the bag.
- Don’t Overcook the Pici: Fresh pasta cooks very quickly. Pici, being thick, still needs only 2-3 minutes in boiling water. Keep a close eye on it and taste test after 2 minutes to ensure it’s al dente – tender but with a satisfying chew. Overcooked pasta loses its texture and appeal.
- Be Patient and Enjoy the Process: Hand-rolling Pici is a simple but repetitive task. Put on some music, pour yourself a glass of wine, and enjoy the meditative rhythm of transforming dough into delicious pasta. The rustic look is part of its charm, so don’t strive for machine-like uniformity.
- Using Semolina for Storage: When placing rolled Pici on a tray to await cooking, a generous dusting of fine semolina flour (or regular flour if semolina isn’t available) is best. Semolina helps keep the strands separate and prevents them from drying out too quickly, thanks to its coarser texture.
Frequently Asked Questions (FAQs):
Absolutely! Pici is a great pasta to prepare ahead of time. You have a couple of options:
- Dough: You can make the Pici dough up to 24 hours in advance. After kneading, wrap it tightly in plastic wrap and store it in the refrigerator. Before using, let it come to room temperature for about 30-60 minutes to make it pliable again.
- Rolled Pici: You can roll out the individual Pici strands and store them on a baking tray heavily dusted with semolina flour (or regular flour). Ensure they are not touching each other too much. Cover them loosely with a clean, damp kitchen towel or plastic wrap to prevent them from drying out. They can be stored this way at room temperature for a few hours, or in the refrigerator for up to 24 hours.
Yes, you can freeze Pici dough. After kneading and forming it into a ball, wrap the dough tightly in plastic wrap, then an additional layer of aluminum foil. This double wrapping helps prevent freezer burn. Store it in the freezer for up to 1 month. When you’re ready to use it, transfer the frozen dough to the refrigerator to thaw overnight, then let it come to room temperature before rolling. You can also freeze individual rolled Pici strands by first flash-freezing them on a floured tray until solid (about 30-60 minutes), then transferring them to a freezer-safe bag or container. Cook from frozen, adding an extra minute or two to the cooking time.
Yes, traditional Pici pasta, made with just flour, water, and olive oil, is naturally vegan. This makes it an excellent choice for those following a plant-based diet, offering a delicious homemade pasta option without eggs or other animal products.
While a pasta machine can roll out the dough into flat sheets, it cannot replicate the unique hand-rolled texture and thickness of authentic Pici. The charm of Pici lies in its irregular, rustic shape achieved by hand-rolling. If you use a machine, you’d effectively be making a different shape, like a thick spaghetti or tagliatelle, which might not hold sauces in the same way. We highly recommend sticking to the traditional hand-rolling method for the true Pici experience.
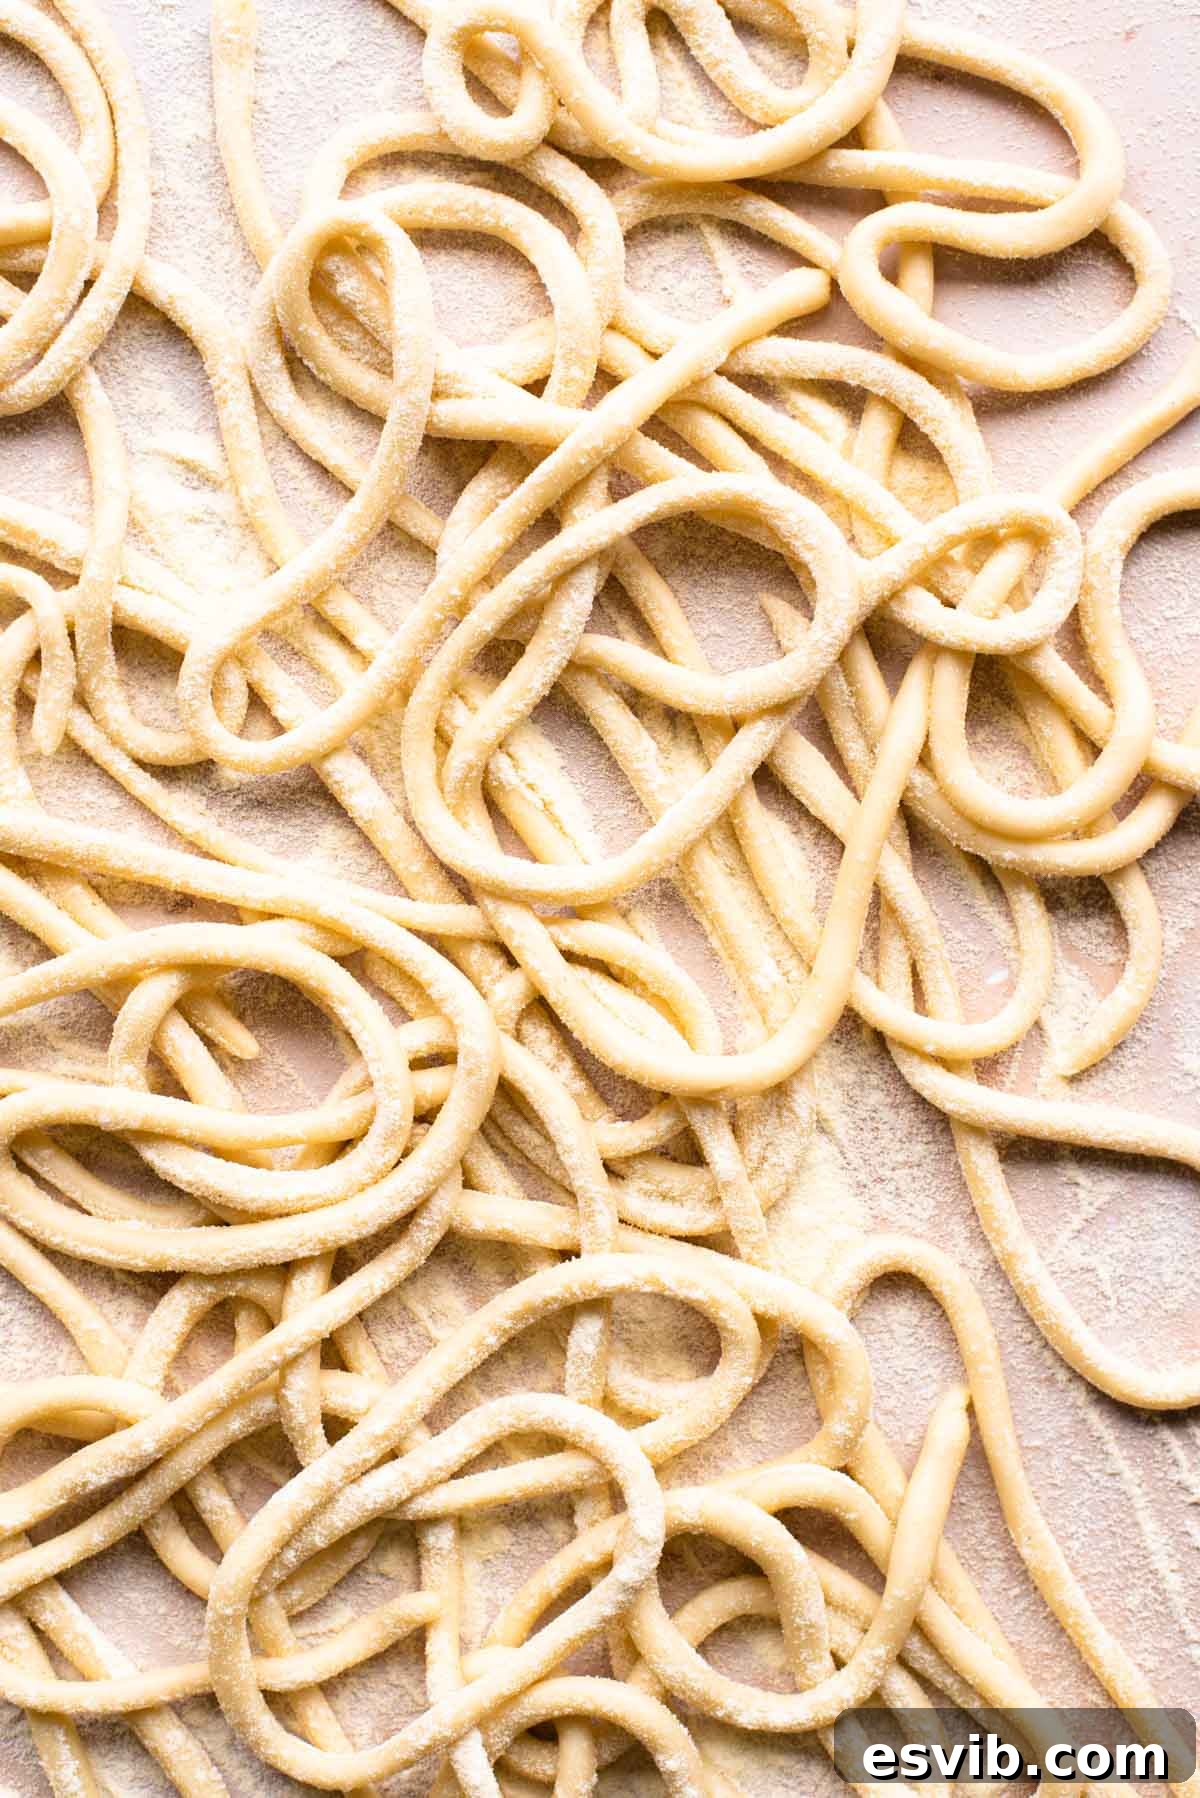
Delicious Sauces to Pair with Homemade Pici Pasta
Pici pasta’s robust, chewy texture and rustic charm make it an exceptional vehicle for a wide variety of sauces. Its thick strands are perfect for clinging to hearty ragus and absorbing rich, flavorful dressings. In Tuscany, some classic and cherished ways to serve Pici include Cacio e Pepe (a simple yet profound combination of Pecorino cheese and black pepper), con La Nana (a rich and savory duck ragu), and con Le Bricole (a delightful mix of toasted breadcrumbs, fresh chili, garlic, and Pecorino). These traditional pairings perfectly showcase Pici’s versatility, but don’t limit yourself!
Here are some other delicious and highly recommended sauces that pair beautifully with homemade Pici, transforming your meal into an authentic Italian feast:
- Pici and Tuscan Sausage Ragu: The hearty, flavorful notes of a slowly simmered Tuscan sausage ragu find their ideal match in Pici. The thick strands provide the perfect surface for the rich, meaty sauce to cling to, ensuring every bite is bursting with flavor.
- Walnut Sauce – Salsa di Noci: For a lighter yet incredibly rich option, a creamy walnut sauce offers a delightful contrast to Pici’s chewiness. The subtle nuttiness and smooth texture coat the pasta beautifully, creating an elegant and satisfying dish.
- Vodka Pasta Sauce: The creamy, tangy, and slightly spicy notes of a classic vodka sauce are surprisingly wonderful with Pici. The thickness of the pasta ensures it holds up well to the robust creaminess, making for a truly indulgent meal.
- Creamy Gorgonzola Sauce: If you’re a fan of bold cheese flavors, a luscious Gorgonzola sauce is a must-try. Its intense, salty creaminess coats the Pici strands generously, creating a dish that’s rich, decadent, and full of character.
- Authentic Italian Tomato Sauce – Quick, Easy & Delicious: Sometimes, simplicity is best. A vibrant, fresh, and slow-simmered authentic Italian tomato sauce allows the natural flavor and texture of your homemade Pici to shine. It’s a comforting classic that never disappoints.
- Wild Boar Ragu (Cinghiale): A staple in Tuscan cuisine, a rich wild boar ragu is perhaps one of the most quintessential pairings for Pici. The deep, gamey flavors and tender meat pieces are perfectly complemented by the pasta’s rustic nature.
- Mushroom and Truffle Cream Sauce: For an earthy and luxurious experience, a sauce featuring sautéed wild mushrooms and a hint of truffle oil or paste elevates Pici to a gourmet level. The pasta’s texture helps ground the delicate yet potent flavors of the fungi.
We hope you’ve enjoyed this journey into making Homemade Pici Pasta. If you’ve tried this recipe or any other on our blog, don’t forget to rate it and let us know how you got on in the comments below – we love hearing from you! You can also FOLLOW US on FACEBOOK, INSTAGRAM, and PINTEREST, or sign up for our NEWSLETTER to discover more of our delicious recipes and culinary adventures.
Step By Step Photos Above
Most of our recipes come with step by step photos, helpful tips and tricks to make it perfectly first time and even video!
Homemade Pici Pasta
By Emily
20
2
30
52
4 servings
Ingredients
- 300 g Italian 00 Flour, (2 cups + 2 tbsp)
- 150 ml warm water, (2/3 cup)
- 3 tbsp olive oil
Instructions
-
1. Put the flour in a large mixing bowl or clean work surface and make a well in the middle.
-
2. Add the olive oil and warm water to the well and incorporate it into the flour using a fork until a rough dough forms.
-
3. Once a rough dough has formed, knead the dough for 10 minutes until it’s smooth and elastic. Wrap the dough in plastic wrap and let it rest at room temperature for 30 minutes.
-
4. Without adding any extra flour, roll the dough out into a 1cm thick round. Next, cut the dough into ¼ inch thick strips.
-
5. One at a time, roll each strip out on a clean work surface to resemble thick spaghetti. The pasta needs enough grip to roll so don’t add any flour or you won’t be able to roll it out. Place each piece of rolled out pici on a tray or separate area dusted with flour or semolina to stop them sticking.
-
6. Bring a large pot of salted water to a boil. Once boiling, add the pici pasta and boil for 2-3 minutes then transfer it to your pasta sauce and toss together.
Video
Watch our video tutorial for a visual guide on making Pici Pasta:
Notes
- Let the dough rest – it’s important to let the dough rest for at least 30 minutes so it’ll be softer and easier to work with. This step is crucial for developing a pliable dough.
- Don’t use flour to roll out the Pici – it’s really important to not use any flour for rolling the Pici or they’ll just slide across the surface of your countertop instead of rolling, making it impossible to shape them. They need grip!
- Measuring flour – for best results use a kitchen scale to weigh the flour; it’ll give you perfect dough every time. If you are using cups, make sure to spoon the flour into the cups and level it off with a knife, don’t pack or scoop the flour.
- Make in advance – you can make the dough up to 24 hours in advance and store it wrapped tightly in plastic wrap in the fridge. Allow it to come to room temperature before rolling.
- Freezing – you can freeze the dough wrapped tightly in plastic wrap and foil. Use within one month. Cook fresh or frozen Pici directly from the freezer, adding an extra minute or two to the cooking time.
Helpful Info for All Recipes
- I always use extra virgin olive oil in all of my recipes unless stated otherwise. Its quality significantly impacts the flavor.
- When I use canned or jarred tomatoes of any kind, I always recommend Cirio or Mutti brands for the best results and flavor, reflecting authentic Italian taste.
- All vegetables are medium sized unless stated otherwise, to ensure consistency in measurements and cooking times.
- All recipes are tested and developed using a fan (convection) oven. Adjustments may be needed for conventional ovens.
- Find out more about how nutrition is calculated. Note that nutrition information is an approximation.
- Check out our must-have Italian Pantry Staples to stock your kitchen with essential ingredients for authentic Italian cooking.
- You can also find all our Essential Kitchen Tools for Italian Cooking, from pasta makers to proper pots, to enhance your culinary experience.
Nutrition
Calories: 364kcal
|
Carbohydrates: 54g
|
Protein: 9g
|
Fat: 12g
|
Saturated Fat: 2g
|
Polyunsaturated Fat: 2g
|
Monounsaturated Fat: 8g
|
Sodium: 4mg
|
Potassium: 75mg
|
Fiber: 2g
|
Sugar: 1g
|
Vitamin A: 2IU
|
Calcium: 12mg
|
Iron: 1mg
Nutrition information is automatically calculated, so should only be used as an approximation.
Did you try this recipe?
Leave a comment below!