
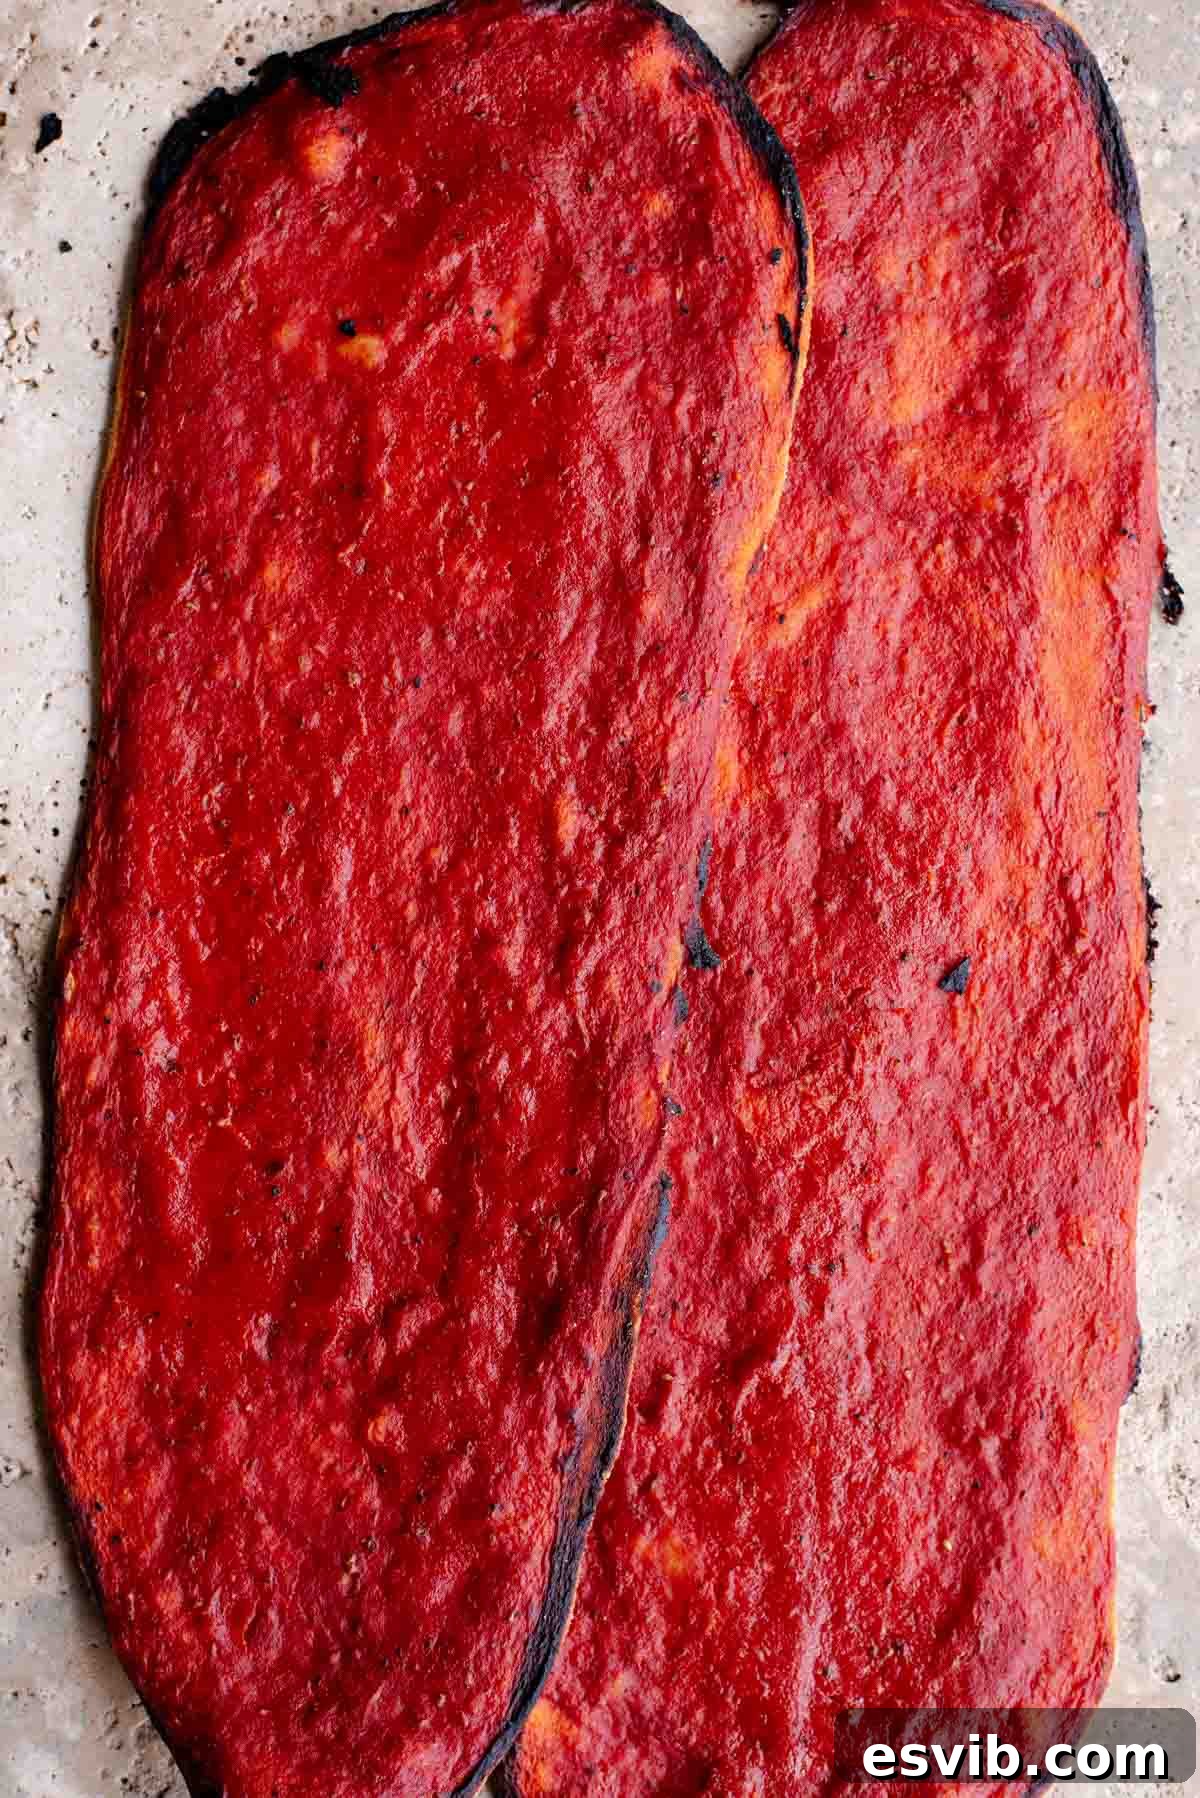
Discover Lingue di Pizza, a truly delightful Italian street food that brings the vibrant flavors of Rome and Naples straight to your kitchen. These long, thin, and wonderfully crispy pizzas are an absolute game-changer for anyone craving a quick and authentic Italian snack. Best of all, this recipe is entirely yeast-free, meaning no lengthy proofing times! With just a short one-hour resting period, you can whip up these delectable “pizza tongues” in no time. Our comprehensive guide will walk you through each step, ensuring perfect results, and introduces two irresistibly delicious topping variations to spark your culinary creativity.
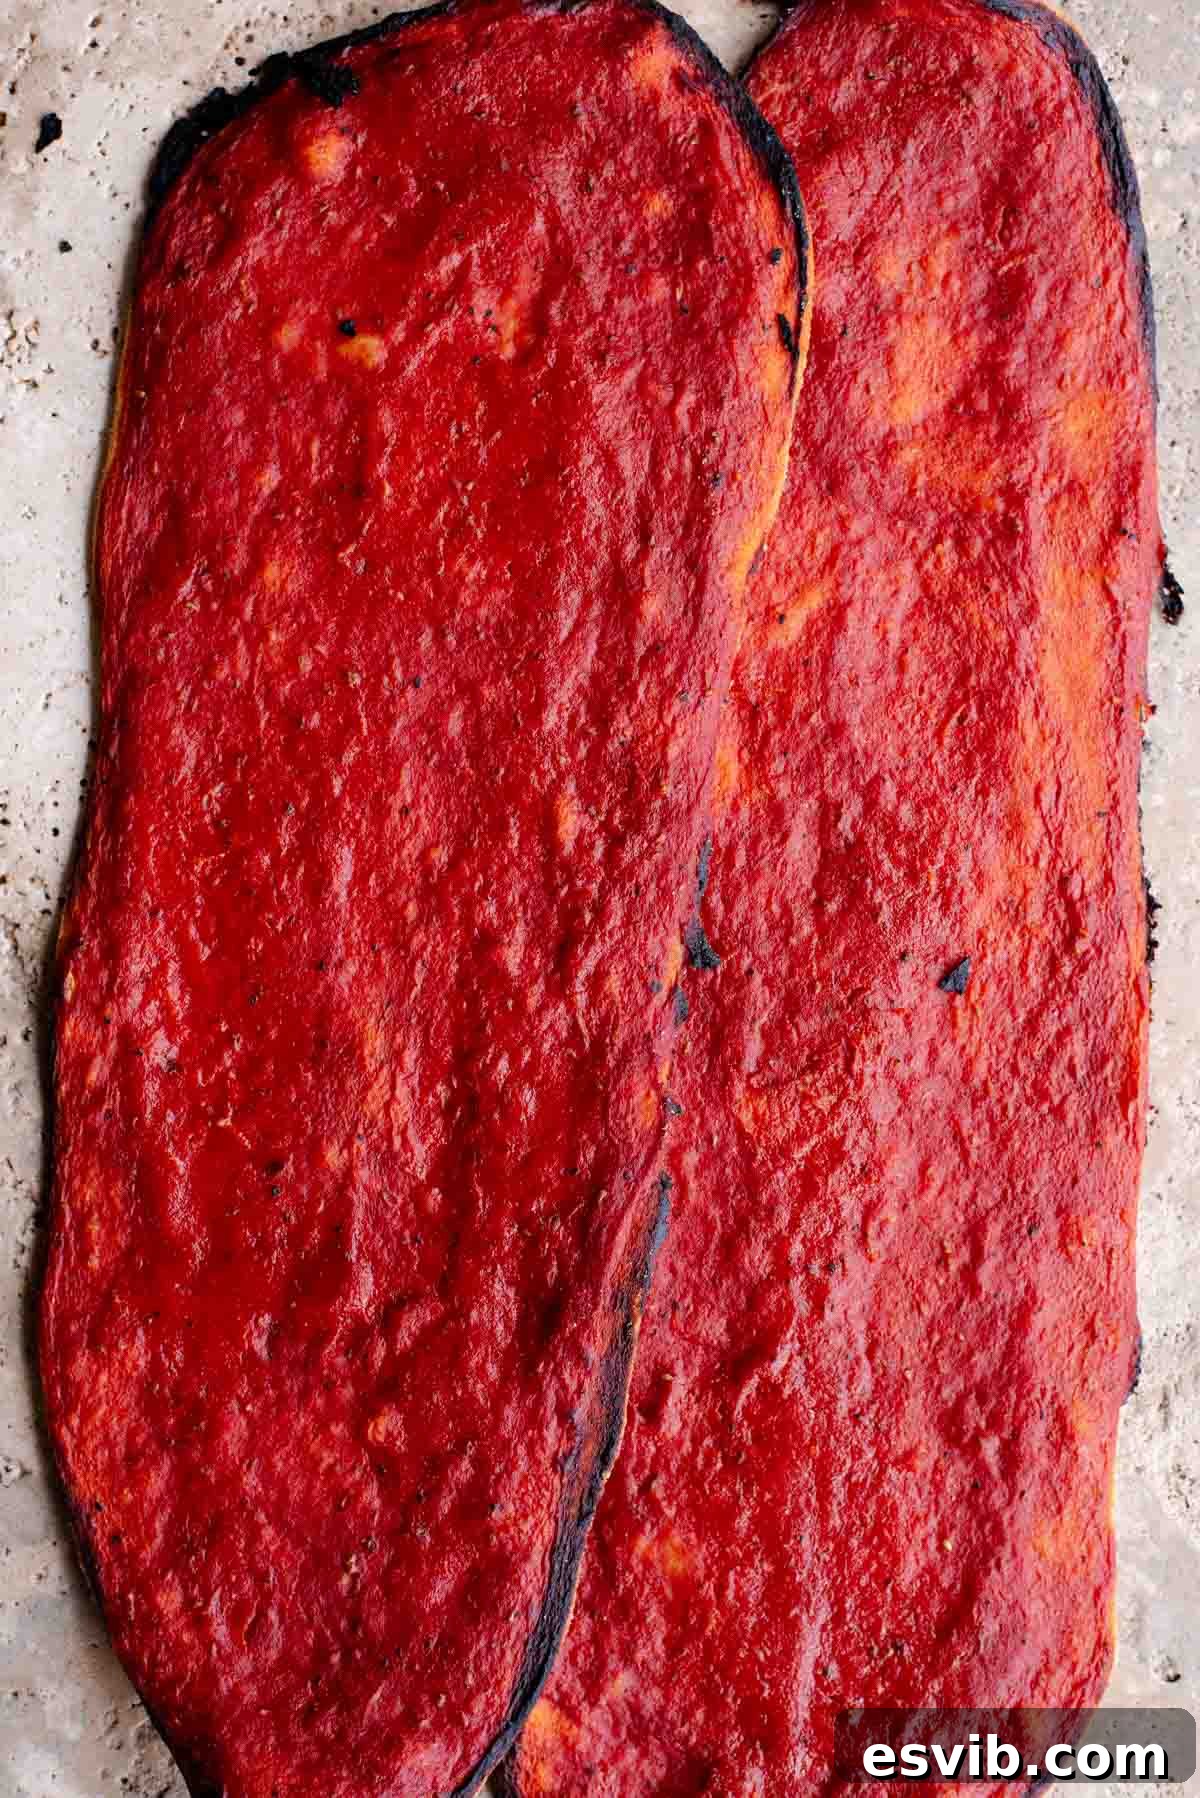
What Are Lingue di Pizza? Your New Favorite Crispy Italian Street Food
Lingue di Pizza, affectionately translating to ‘pizza tongues’ due to their distinctive long and slender shape, are a cherished street food sensation originating from the bustling streets of Rome and Naples. Far from your traditional thick-crust pizza, these are characterized by their incredibly thin and irresistibly crispy texture. Unlike many pizza recipes that rely on yeast and extensive proofing, Lingue di Pizza offer a remarkably quick and easy solution for when a pizza craving strikes but time is of the essence. Their simplicity in preparation does not compromise on flavor or satisfaction, making them an ideal choice for a variety of occasions.
These savory delights are not just a quick meal; they’re perfect for a light lunch, a sophisticated aperitivo snack paired with your favorite spritz and other Italian nibbles, or simply a delicious treat to enjoy any time of day. Their unique yeast-free dough requires minimal resting, allowing you to go from ingredients to oven in record time. The resulting texture is a delightful crunch that is utterly addictive, setting them apart from other pizza styles. If you’re looking for an authentic taste of Italy that’s both fast and flavorful, Lingue di Pizza are your answer.
Classic & Creative Topping Ideas for Lingue di Pizza
Traditionally, Lingue di Pizza are celebrated for their understated elegance, often served with a simple yet profoundly flavorful combination of tomato sauce and fragrant oregano. This classic pairing truly allows the crispy base to shine. For those who enjoy a little extra zest, a touch of freshly crushed garlic can be a wonderful addition, though it’s entirely optional and can be adjusted to your taste. This minimalist approach highlights the quality of each ingredient and the exquisite texture of the pizza itself.
Beyond the classic, another immensely popular and insanely delicious topping variation features thinly sliced potato and aromatic rosemary. The thinly sliced potatoes become tender and slightly caramelized, while the rosemary infuses the pizza with its earthy, piney notes, creating a comforting and savory experience. This recipe provides detailed instructions for both of these beloved variations, offering you a choice between tradition and a slightly more rustic indulgence. However, don’t feel limited! Lingue di Pizza are wonderfully versatile, inviting you to experiment with your own favorite flavors and create endless delicious combinations. Whether you stick to the classics or venture into new culinary territory, these crispy pizzas are sure to impress. Enjoy the journey of discovery!
Table of Contents
- Essential Ingredient Notes for Perfect Pizza Tongues
- Step-by-Step Visual Guide to Making Lingue di Pizza
- Expert Tips for Crafting the Best Lingue di Pizza
- Inspiring Lingue di Pizza Topping Combinations
- More Irresistible Italian Snacks to Explore
- Full Lingue di Pizza Recipe
Essential Ingredient Notes for Perfect Pizza Tongues
Crafting the perfect Lingue di Pizza starts with understanding the role of each ingredient. While the recipe is simple, selecting the right components makes all the difference in achieving that desired crispy texture and authentic flavor. Here’s a closer look at the key ingredients and why they are important:
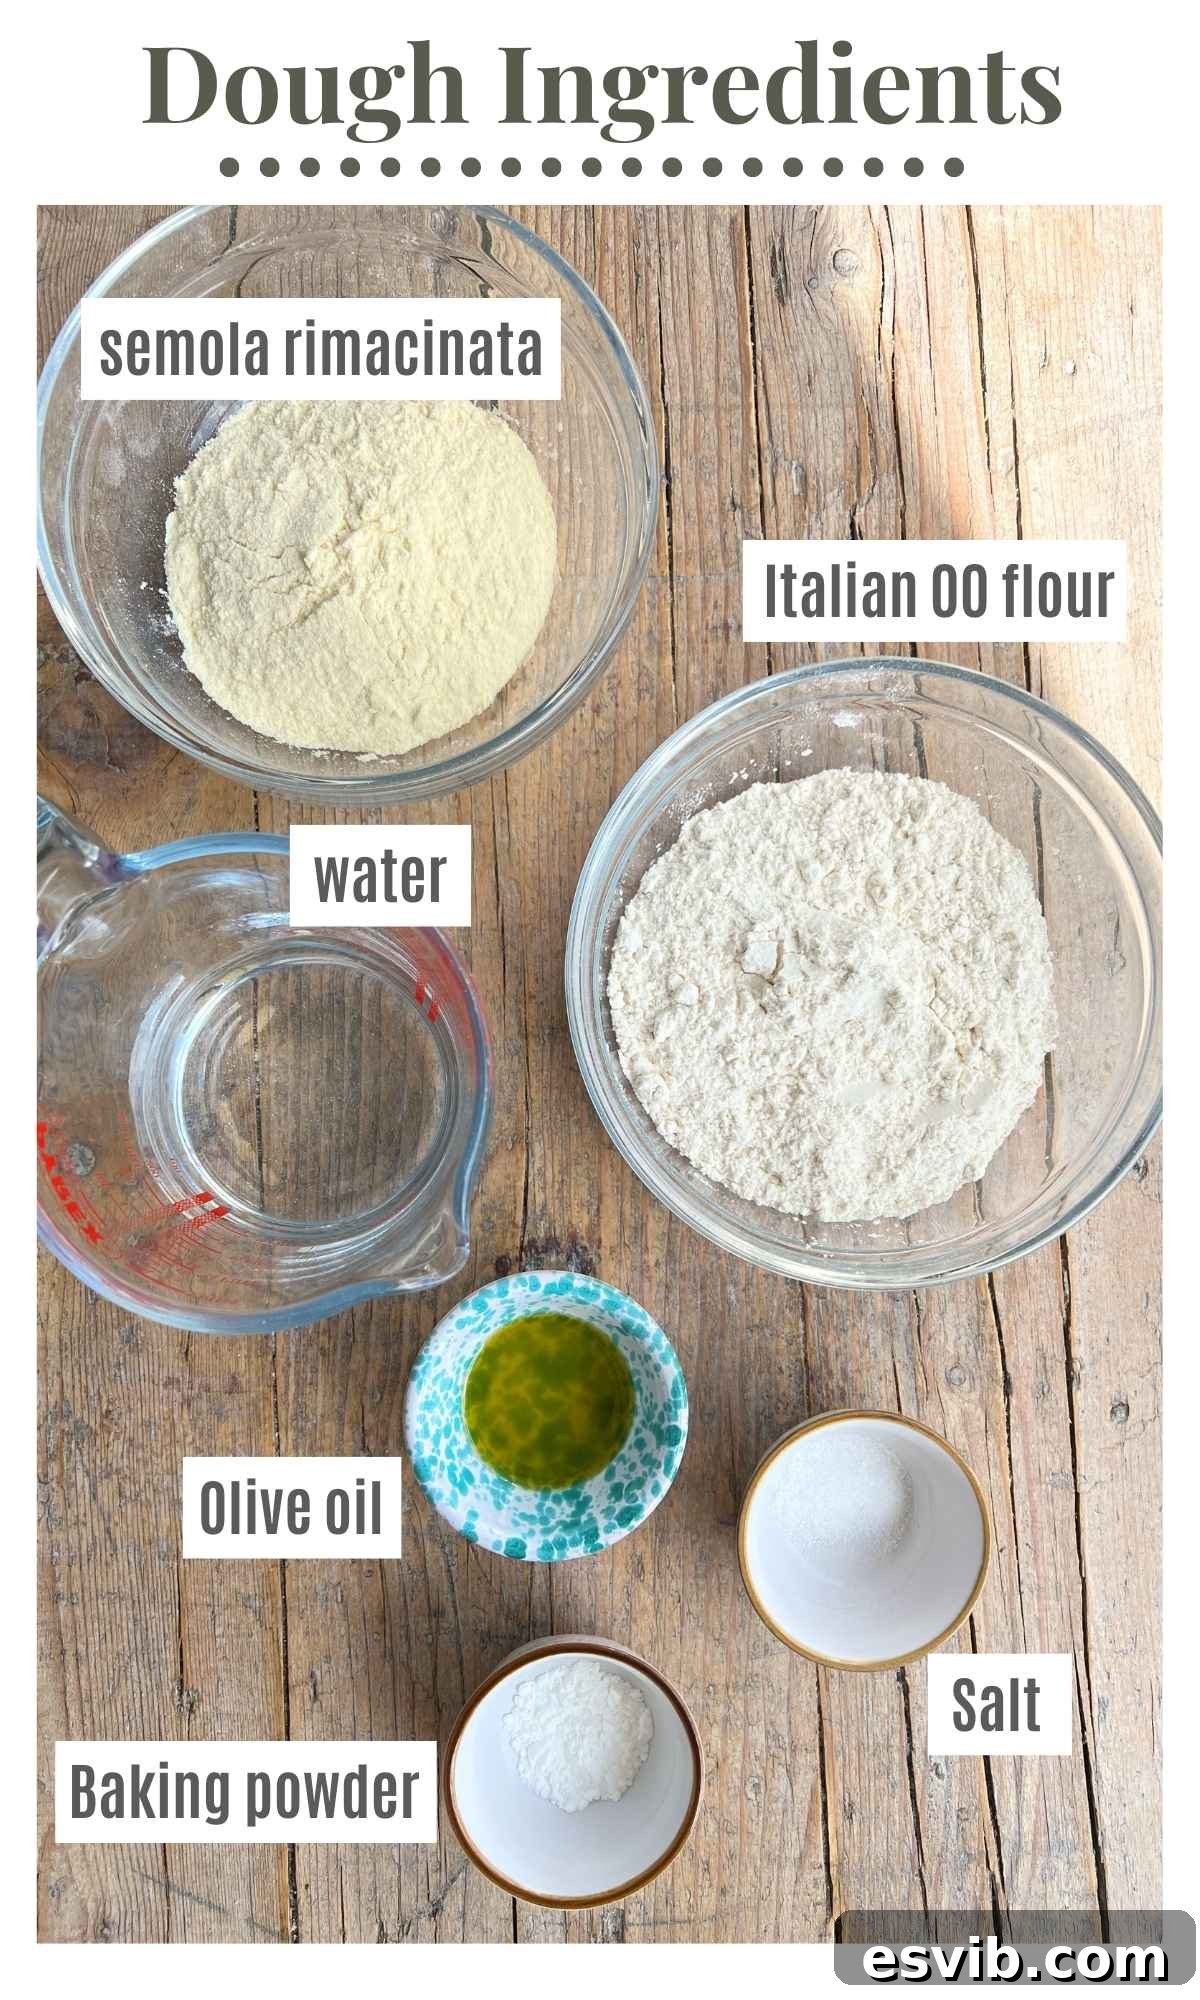
- Italian 00 Flour: This type of flour is a staple in Italian baking, particularly for pizzas and pasta. The ’00’ designation indicates that it is very finely milled, resulting in a soft, smooth texture and low protein content, which is ideal for achieving a tender yet crispy pizza crust. While Italian 00 flour is highly recommended for the most authentic results, you can certainly use good quality all-purpose flour as a readily available substitute. The texture might vary slightly, but your Lingue di Pizza will still be delicious.
- Semola Rimacinata: This ingredient is crucial for developing the characteristic structure and delightful crunch of Lingue di Pizza. Semola rimacinata is a finely milled durum wheat semolina, so fine that its texture is comparable to flour. Unlike coarser semolina, its fine grind integrates seamlessly into the dough, providing a wonderful chewiness and contributing significantly to the desired crispy exterior. It adds a unique depth of flavor and a beautiful golden hue to the crust. You should be able to find it in most Italian specialty food stores, larger supermarkets with international sections, or conveniently online (a link is often provided in the full recipe card for easy sourcing). Do not substitute with regular, coarse semolina, as this will result in a gritty texture.
- Baking Powder: As a yeast-free recipe, baking powder serves as the primary leavening agent for Lingue di Pizza. Its role is to create a small amount of lift and lightness in the dough, preventing it from becoming too dense or tough. It reacts when combined with liquid and heat, producing carbon dioxide bubbles that give the pizza a slight airy quality without the need for fermentation. This rapid leavening is what makes this recipe so incredibly quick and accessible, allowing you to enjoy homemade pizza without the wait.
- Fine Salt: Salt is more than just a seasoning; it plays a vital role in enhancing the flavor of the entire pizza, from the dough to the toppings. It also helps to strengthen the gluten structure in the flour, which contributes to the dough’s workability and the final texture of the crust. Ensure you use fine salt to distribute evenly throughout the dough.
- Water: The hydration of the dough is critical. Water binds the ingredients together, activating the gluten and allowing the dough to form. The amount of water might need slight adjustments based on the humidity and the specific brand of flour you use, so always observe the dough’s consistency and adjust as needed to achieve a soft, pliable, and slightly tacky texture.
- Olive Oil: A good quality extra virgin olive oil is indispensable in Italian cooking, and Lingue di Pizza is no exception. In the dough, it adds richness, helps with elasticity, and contributes to the golden color and crispness of the crust. Generous olive oil for greasing the baking tray is also essential, as it prevents sticking and helps create an extra-crispy base directly in contact with the hot surface. Choose a flavorful olive oil for the best overall taste experience.
By understanding and using these ingredients, you’ll be well on your way to making delicious and authentic Lingue di Pizza every time. Remember, fresh and quality ingredients are the foundation of great Italian food.
Step-by-Step Visual Guide to Making Lingue di Pizza
Follow these easy steps to prepare your yeast-free Lingue di Pizza dough and toppings. The process is straightforward, ensuring you get perfect crispy results every time.
Step 1: Mix the Dough – In a spacious mixing bowl, combine all the dry ingredients: Italian 00 flour (or all-purpose flour), Semola Rimacinata, baking powder, and fine salt. Whisk them together thoroughly to ensure even distribution of the leavening agent. Next, pour in the olive oil and water. Begin mixing with a spoon or your hands, bringing the ingredients together until a rough, shaggy dough forms. Don’t worry if it looks a bit uneven at this stage; it will come together with a little kneading (photos 1-3).
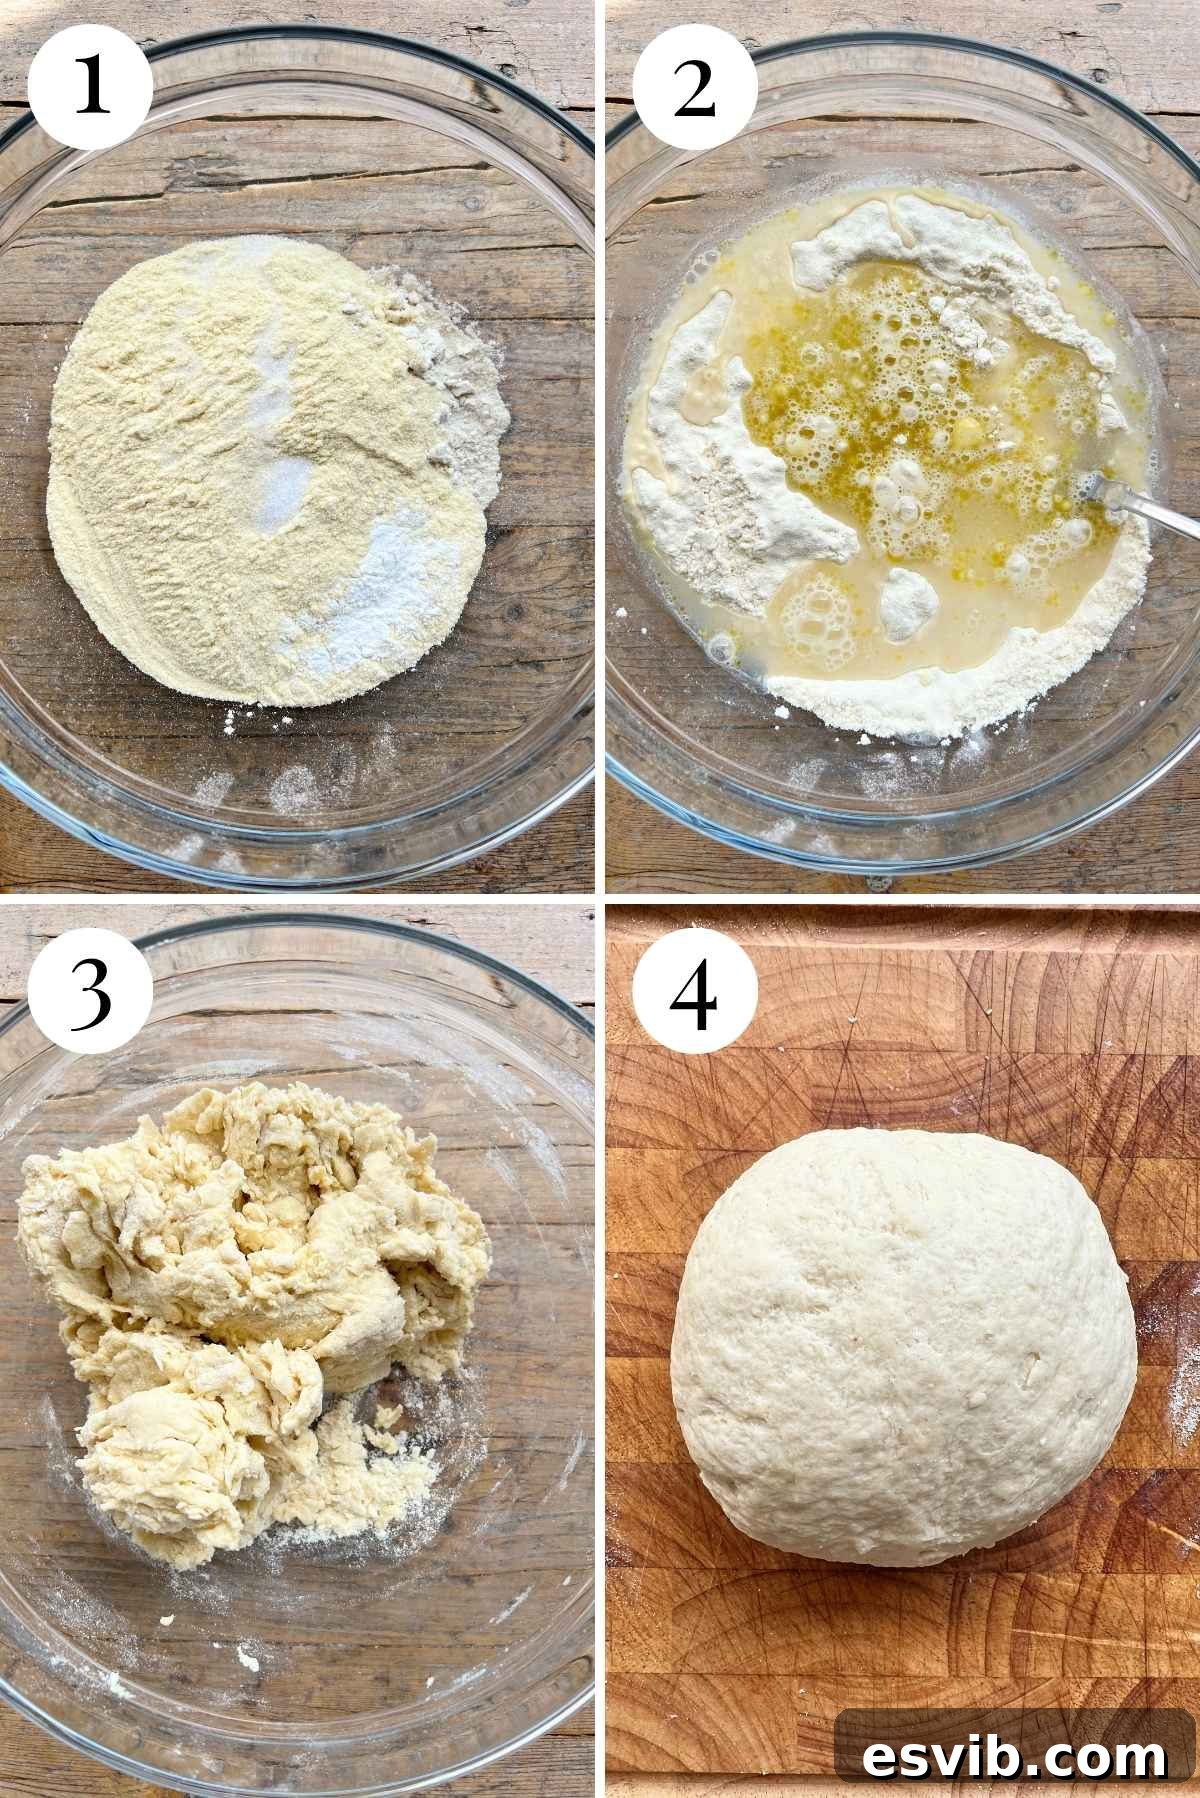
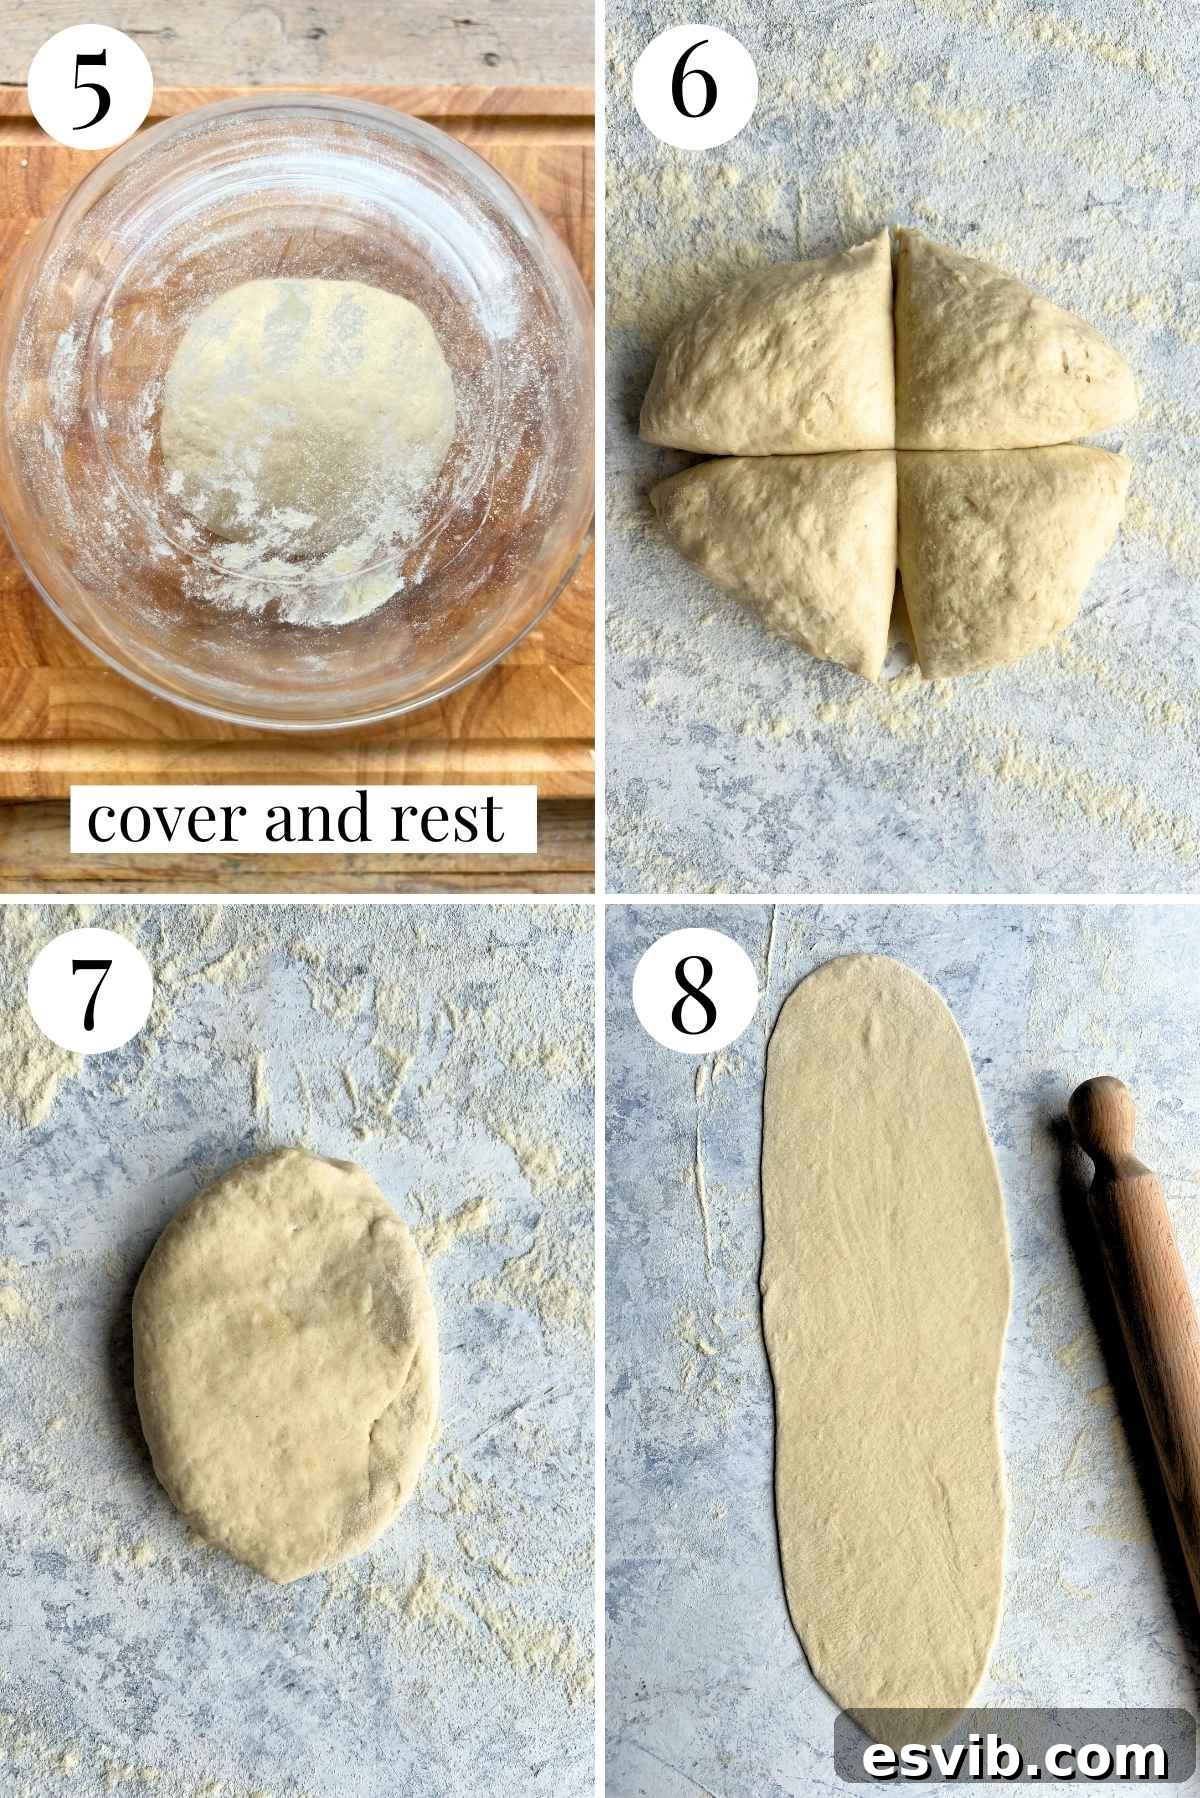
Step 2: Knead and Rest – Transfer the rough dough onto a clean, lightly floured work surface. Knead it gently for just a few seconds, enough to bring it into a smooth ball. Over-kneading is not necessary for this yeast-free dough. Once shaped, cover the dough to prevent it from drying out. A simple inverted mixing bowl works perfectly, or you can use plastic wrap. Allow the dough to rest at room temperature for at least 1 hour. This resting period is crucial, allowing the flour to fully hydrate and the gluten to relax, which will make the dough much easier to roll out and contribute to its crispiness (photos 4 and 5).
Step 3: Roll it Out – After the dough has rested, divide it into four equal quarters. Take one quarter and place it on a lightly semolina-dusted work surface. Using a rolling pin, roll the dough out into a long, thin, and even pizza shape. The key is to get it as thin as possible without tearing, as this is what gives Lingue di Pizza its signature crispness. Ensure you roll it long enough to fit the length of your baking tray (photos 6, 7 and 8). Repeat with the remaining dough quarters.
Step 4: Assemble – Before placing your rolled-out dough, prepare your baking tray. Generously grease the entire surface of the tray with olive oil. This is a vital step as the olive oil creates a protective layer and helps to achieve an incredibly crispy, golden-brown base on your Lingue di Pizza. Carefully lay your rolled-out dough onto the well-oiled tray, stretching gently if needed to ensure it fits perfectly without overlapping.
Step 5: Potato Lingue di Pizza – For this rustic and flavorful variation, once your dough is on the greased baking tray, drizzle it lightly with olive oil. Arrange the thinly sliced potatoes evenly over the dough. Sprinkle generously with fresh rosemary and a pinch of sea salt. Finish with another light drizzle of olive oil, which helps the potatoes crisp up and infuse with flavor. Bake in a preheated oven for 15-20 minutes, or until the edges are golden brown and the potatoes are tender and slightly crisp (always check at 15 minutes to prevent overcooking) (photos 9 and 10).
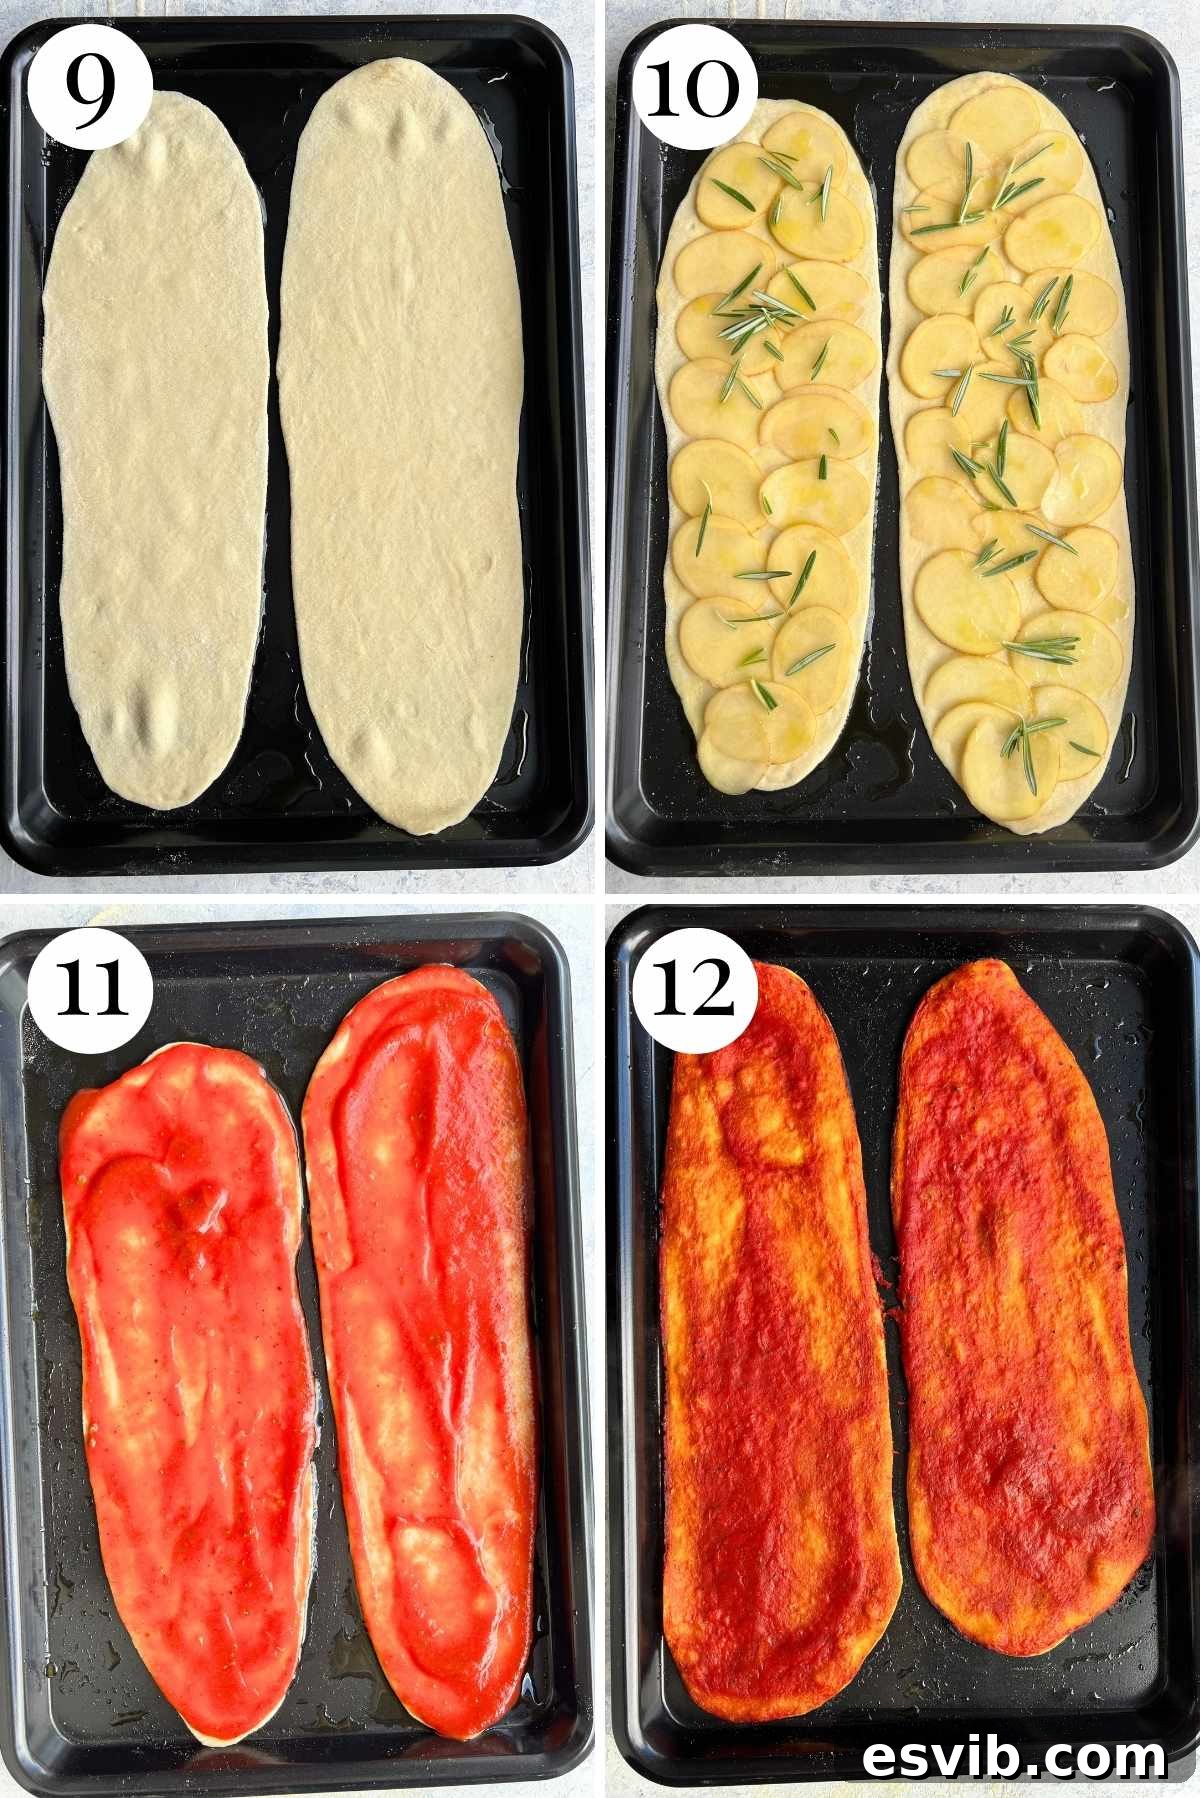
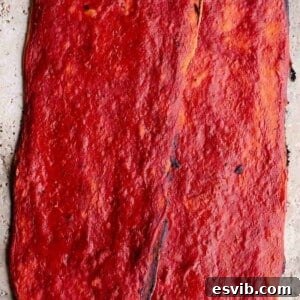
Step 6: Tomato Lingue di Pizza – Spread a generous layer of the prepared tomato sauce evenly over the dough, ensuring it reaches right to the edges of the pizza, leaving no crust border. This allows for maximum flavor in every bite and contributes to a beautiful, uniform bake. Bake the pizza in the preheated oven for an initial 10 minutes. After this first bake, remove them from the oven and spread another thin layer of passata (tomato puree) over the pizzas. This second application of sauce adds depth of flavor and keeps the pizza moist without making it soggy. Return them to the oven and bake for an additional 10 minutes, or until the edges are golden and the tomato sauce is slightly caramelized. Serve immediately for the best crispy experience (photos 11 and 12).
Expert Tips for Crafting the Best Lingue di Pizza
Achieving perfectly crispy and flavorful Lingue di Pizza is simple with a few insider tips. Pay attention to these details, and you’ll master this Italian street food in no time:
- Embrace Your Kitchen Scale for Accuracy: For consistently excellent results, I cannot emphasize enough the importance of using a kitchen scale to measure your ingredients, especially the flours. I meticulously test all my recipes by weight because it provides unparalleled accuracy every single time, eliminating variables that can arise with volume measurements. While cup measurements are provided as a convenience (and I measure them myself), factors like how tightly flour is packed can lead to significant variations. For the crispiest, most reliable outcome, invest in and use a digital kitchen scale. When using cups, always spoon the flour lightly into the measuring cup and level it off with a straight edge, rather than scooping directly from the bag.
- Resist the Urge to Overload: The beauty of Lingue di Pizza lies in its delicate, ultra-thin base. This means “less is more” when it comes to toppings. A heavy hand with ingredients will weigh down the thin crust, preventing it from crisping properly and potentially making it soggy. Stick to simple, light toppings, and distribute them evenly. The goal is to enhance the crispy texture, not overpower it.
- Strategic Advance Preparation: The dough for Lingue di Pizza is incredibly forgiving and flexible. If you’re making the dough the same day you plan to bake, ensure it gets at least the recommended one-hour rest at room temperature. This allows the flour to hydrate fully and makes the dough much easier to roll out. For even greater convenience, the dough can be made a day in advance. If prepping ahead, store the dough tightly covered in the refrigerator. Remember to bring it back to room temperature for about 30-60 minutes before you plan to roll and bake it. This will relax the gluten, making it pliable and easy to work with.
- Enjoy Fresh for Optimal Crispness: Lingue di Pizza are at their absolute best when served immediately and eaten on the same day they are baked. Their thin, unleavened crust means they can dry out much faster than a thicker, yeast-leavened pizza. While still tasty the next day, they might lose some of their signature crispiness. If you do have leftovers, a quick reheat in a hot oven (not microwave) can help restore some of their crunch, but nothing beats them fresh out of the oven.
- High Heat for Ultimate Crispiness: To achieve that desirable crisp exterior, ensure your oven is preheated to the specified high temperature (250C/480F). A hot oven creates a shock to the dough, rapidly cooking it and preventing it from becoming chewy. Placing the baking tray on the lowest rack or directly on a preheated pizza stone (if you have one) can also help maximize direct heat to the base, promoting an even crispier crust.
- Don’t Forget to Grease the Tray: As mentioned in the steps, generously greasing your baking tray with olive oil is a small but critical detail. This oil directly contributes to the golden, crispy underside of your pizza, ensuring it doesn’t stick and releases easily.
By keeping these tips in mind, you’ll be well on your way to mastering the art of Lingue di Pizza, creating a delightful and authentic Italian treat for yourself and your loved ones.
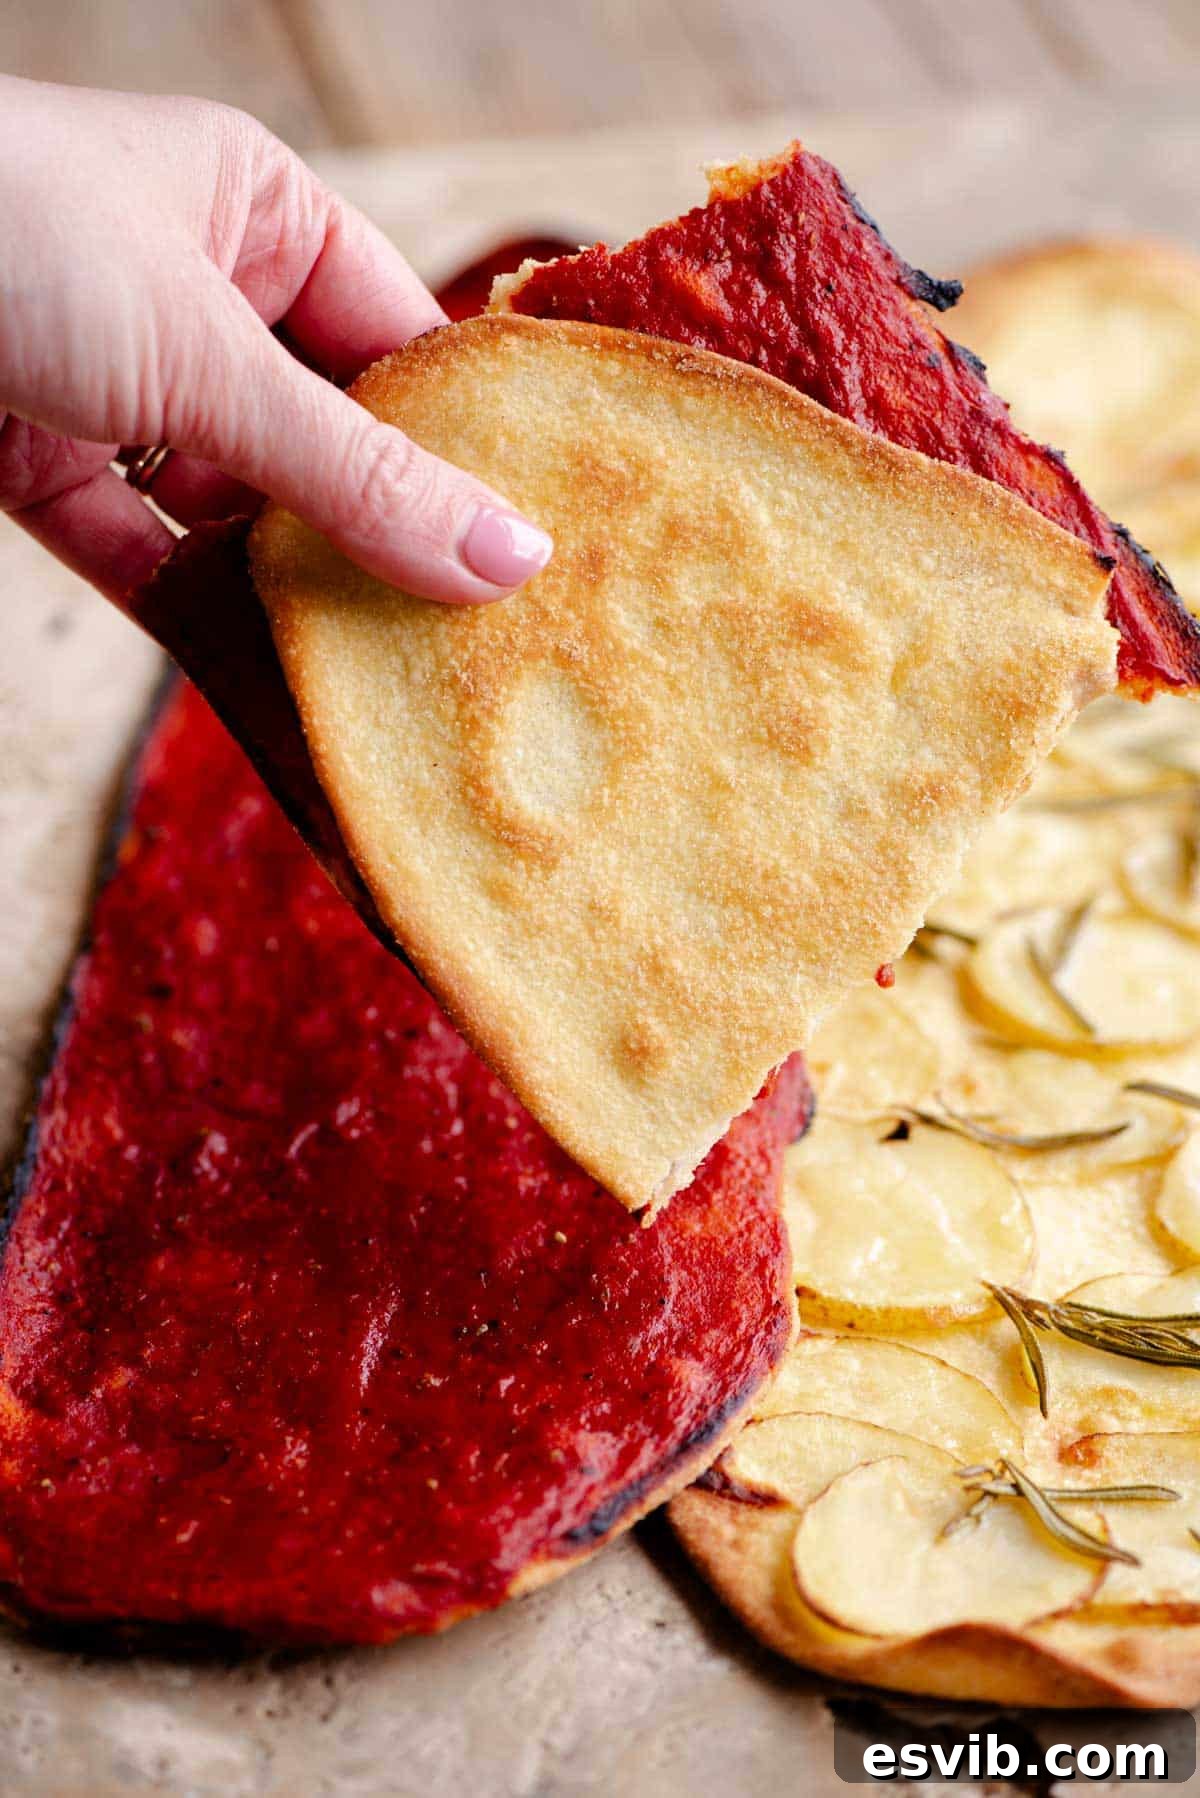
Inspiring Lingue di Pizza Topping Combinations
Lingue di Pizza’s thin and crispy base is the perfect canvas for a variety of toppings. While simple is often best, these ideas will help you explore different flavor profiles:
- The Timeless Original: Keep it classic and incredibly satisfying with a vibrant passata (tomato puree) base and a generous sprinkle of dried oregano. For an extra layer of authentic Italian flavor, you can crush a fresh garlic clove into your tomato sauce mixture before spreading. This combination allows the quality of your ingredients and the crispy crust to truly shine.
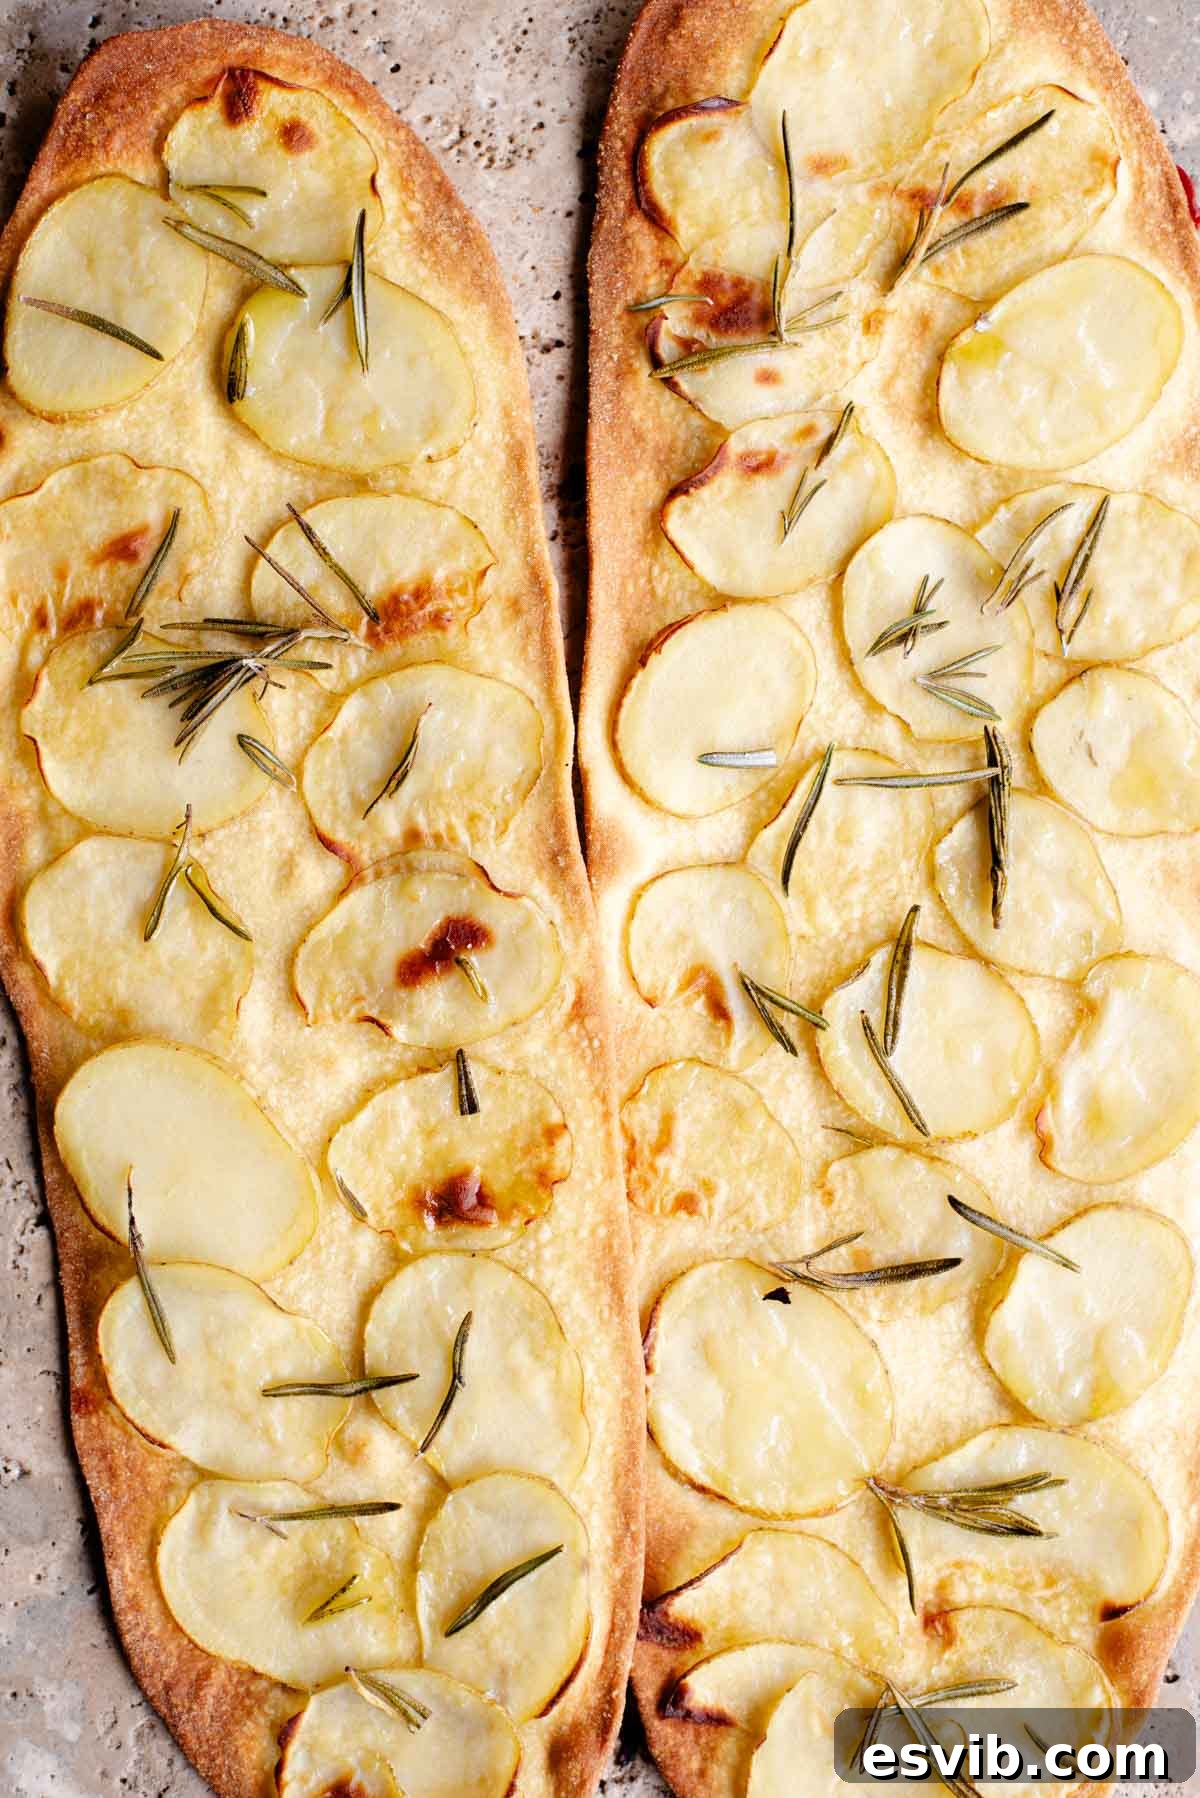
- Rustic Potato & Rosemary: This vegetarian option is a fan favorite for good reason. Slice waxy potatoes as thinly as possible – a mandoline is perfect for this – to ensure they cook through and crisp up beautifully. Top with fresh rosemary, a good pinch of sea salt, and a generous drizzle of olive oil. The potatoes become tender and slightly caramelized, offering a wonderfully savory and comforting bite.
- Savory Prosciutto Perfection: Elevate your tomato-based Lingue di Pizza with delicate slices of cured prosciutto or high-quality ham. To prevent the prosciutto from becoming too dry and brittle, add it during the *second* bake, after you’ve spread the additional layer of tomato sauce. The heat will warm it through just enough, intensifying its savory notes without overcooking.
- Mediterranean Anchovies, Capers, and Olives: For those who appreciate bold, briny flavors, this combination is a must-try. Scatter anchovies, capers, and your favorite olives (such as Kalamata or Gaeta) over the tomato sauce. You can choose one, two, or all three to create a symphony of salty, tangy tastes. Again, these toppings are best added during the second bake to warm through and meld with the tomato.
- Fresh Pesto and Creamy Burrata: For a fresh and indulgent twist, add your toppings *after* the pizza has finished baking. Spread a generous layer of homemade basil pesto (our homemade basil pesto recipe is highly recommended!) over the hot, crispy base. Then, tear fresh burrata cheese over the pesto. The heat from the pizza will gently melt the burrata, creating a creamy, luscious contrast to the crisp crust and fragrant pesto.
- Spicy Chili Flakes and Pecorino Romano: For a simple kick, add a sprinkle of red chili flakes to your tomato sauce, or directly over the potato and rosemary. Once baked, grate some salty Pecorino Romano cheese over the hot pizza. The heat will slightly soften the cheese, and its sharp, piquant flavor will beautifully complement the spice.
With these diverse options, you can tailor your Lingue di Pizza to any preference, making them a versatile and exciting addition to your culinary repertoire. Don’t hesitate to mix and match to find your ultimate combination!
More Irresistible Italian Snacks to Explore
Bread & Savory Bakes
Easy Overnight No Knead Focaccia
Antipasti
Taralli Pugliesi (Italian Snack)
Antipasti
Rustici Leccesi (Tomato and Mozzarella Pastries)
Antipasti
Pizza Scima (Abruzzese Flatbread)
We hope you thoroughly enjoy creating and savoring this delightful Lingue di Pizza recipe! If you’ve tried this or any other recipe from our blog, please don’t hesitate to rate it and share your experiences in the comments section below. Your feedback is invaluable and always a joy to hear! Stay connected with us for more delicious culinary inspiration by following our updates on Facebook, Instagram, and Pinterest. For a weekly dose of fresh recipes delivered straight to your inbox, consider signing up for our Newsletter. Happy cooking!
Step By Step Photos Above
Most of our recipes come with step by step photos, helpful tips and tricks to make it perfectly first time and even video!
Lingue di Pizza (Quick and Crispy Pizza)
By Emily
20 minutes
20 minutes
1 hour
1 hour 40 minutes
4 pizzas (serves 8)
Saved
Pin
Equipment
-
17×11.5 inch Baking tray
-
Rolling pin
Ingredients
- 200 g Italian 00 flour, or all-purpose flour (1.5 cups spooned and levelled)
- 130 g Semola Rimacinata, plus more for dusting (3/4 cup plus 1 tablespoon)
- ½ teaspoon baking powder
- ½ teaspoon fine salt
- 200 ml water, (3/4 cup plus 1 tablespoon)
- 1 tablespoon olive oil, plus extra for greasing
Topping 1 (for 4 pizzas)
- 560 g (2 cups) Passata (tomato puree US)
- 1/2 teaspoon dried oregano
- 1 garlic clove
- Olive oil
- Salt and pepper
Topping 2 (for 4 pizzas)
- 2 large waxy potatoes
- Fresh rosemary
- Olive oil
- Salt and pepper
Instructions
Make the dough
-
Put the flour, semola, baking powder and salt in a large mixing bowl and mix them together. Add the olive oil and water and mix to form a rough dough.
-
Place the dough on a clean work surface and knead for a few seconds into a ball. Cover the dough with the mixing bowl (or use plastic wrap) and leave it to rest for 1 hour.
Prep the toppings
-
For the tomato topping, put the passata in a bowl with the oregano, crushed garlic clove, a pinch of salt and pepper and a drizzle of olive oil. Mix until combined, then set aside.
-
For the potato topping, thinly slice the potatoes as thin as possible (I keep the skin on but you can peel it if you prefer) then set them aside.
Assemble and bake
-
Pre-heat the oven to 250C (480F). Grease a baking tray generously with olive oil.
-
When the dough has rested, cut it into 4 quarters. Lightly dust your work surface with semola and roll one quarter of the dough out into a long thin pizza using a rolling pin. Make sure you roll it out long enough to fit your tray (our tray is 17×11.5 inches).
For the tomato topping
-
Lay the dough on the baking tray and cover it with tomato sauce all the way to the edges. Repeat with the rest of the dough (I usually do this in 2 batches as I can only fit 2 on a tray at a time).
-
Bake in the oven for 10 minutes, then remove them from the oven and spread on another layer of tomato sauce. Bake for a further 10 minutes, then remove from the oven and serve.
For the potato topping
-
For the potato topping, drizzle your rolled out dough with olive oil then lay thin slices of potato over the dough, sprinkle with sea salt, fresh rosemary and then a drizzle of more olive oil.
-
Bake in the oven for 15-20 minutes until golden around the edges.
Notes
- Topping amounts – Each topping option in the ingredients list makes enough for the whole batch of dough (4 pizzas). You can cut this in half to make 2 pizzas instead.
- Storage – best served immediately and eaten the same day.
- Use a scale for best results – I highly recommend using a kitchen scale to weigh both flours for best results. I always measure the ingredients in cups myself for each recipe, but I find this can vary greatly with flour in particular. When using cups, I always measure the flour by spooning it into the cup and levelling it off with a knife.
Helpful Info for All Recipes
- I always use extra virgin olive oil in all of my recipes unless stated otherwise.
- When I use canned or jarred tomatoes of any kind, I always recommend Cirio or Mutti brands for the best results and flavor.
- All vegetables are medium sized unless stated otherwise.
- All recipes are tested and developed using a fan (convection) oven.
- Find out more about how nutrition is calculated.
- Check out our must-have Italian Pantry Staples.
- You can also find all our Essential Kitchen Tools for Italian Cooking.
Nutrition
Carbohydrates: 75g |
Protein: 12g |
Fat: 5g |
Saturated Fat: 1g |
Polyunsaturated Fat: 1g |
Monounsaturated Fat: 3g |
Sodium: 387mg |
Potassium: 735mg |
Fiber: 5g |
Sugar: 7g |
Vitamin A: 718IU |
Vitamin C: 15mg |
Calcium: 75mg |
Iron: 6mg
Nutrition information is automatically calculated, so should only be used as an approximation.