
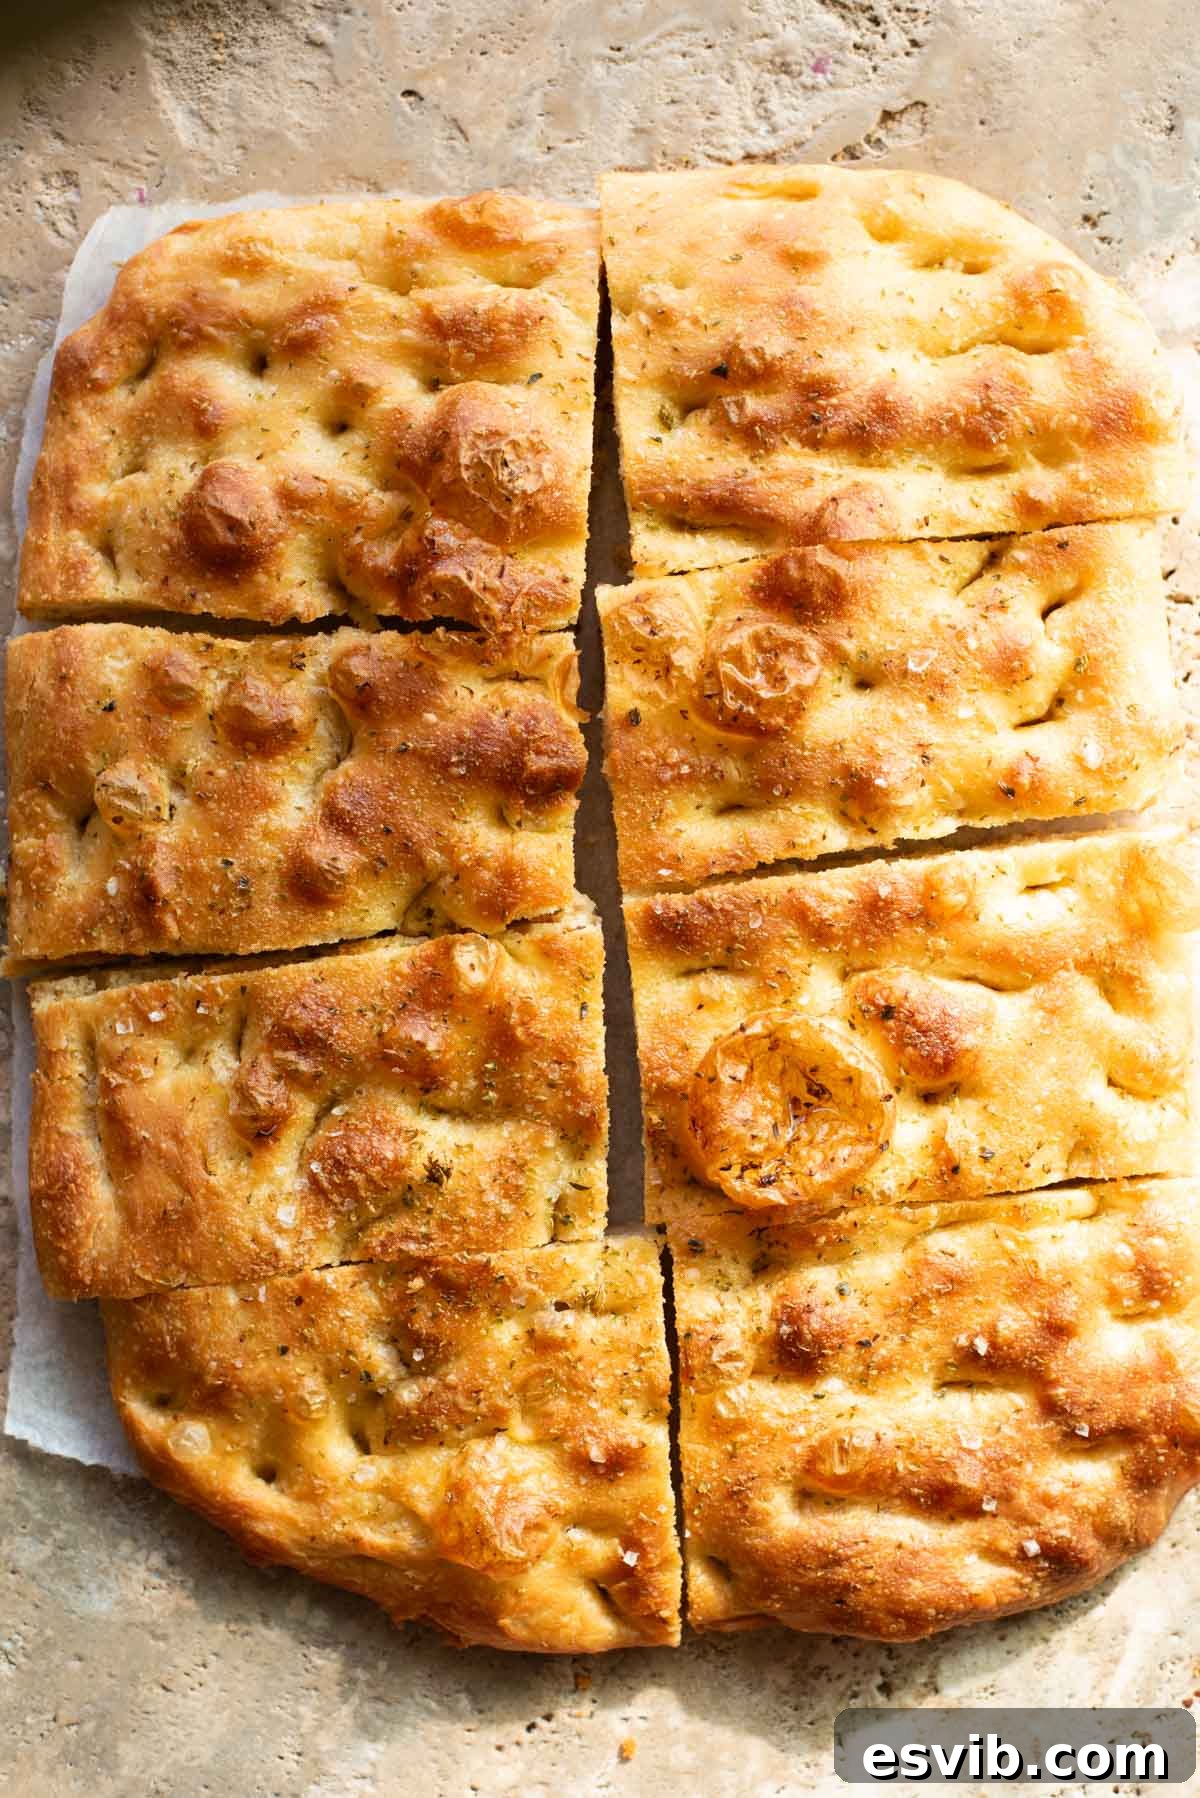
Welcome to your new favorite bread obsession: the **Easy Overnight No-Knead Focaccia recipe**. Imagine a bread so effortlessly made, yet so exquisitely bubbly, light, and airy, boasting an incredible flavor profile and a perfectly golden, crisp crust. This isn’t just a recipe; it’s a revelation, designed for simplicity without compromising on taste or texture. What makes it truly stand out is its forgiving nature – you can prepare the dough up to 48 hours in advance, fitting seamlessly into even the busiest schedules. Whether you enjoy it plain, adorned with your favorite toppings, or transformed into gourmet focaccia sandwiches, this bread promises a delightful culinary experience every single time.
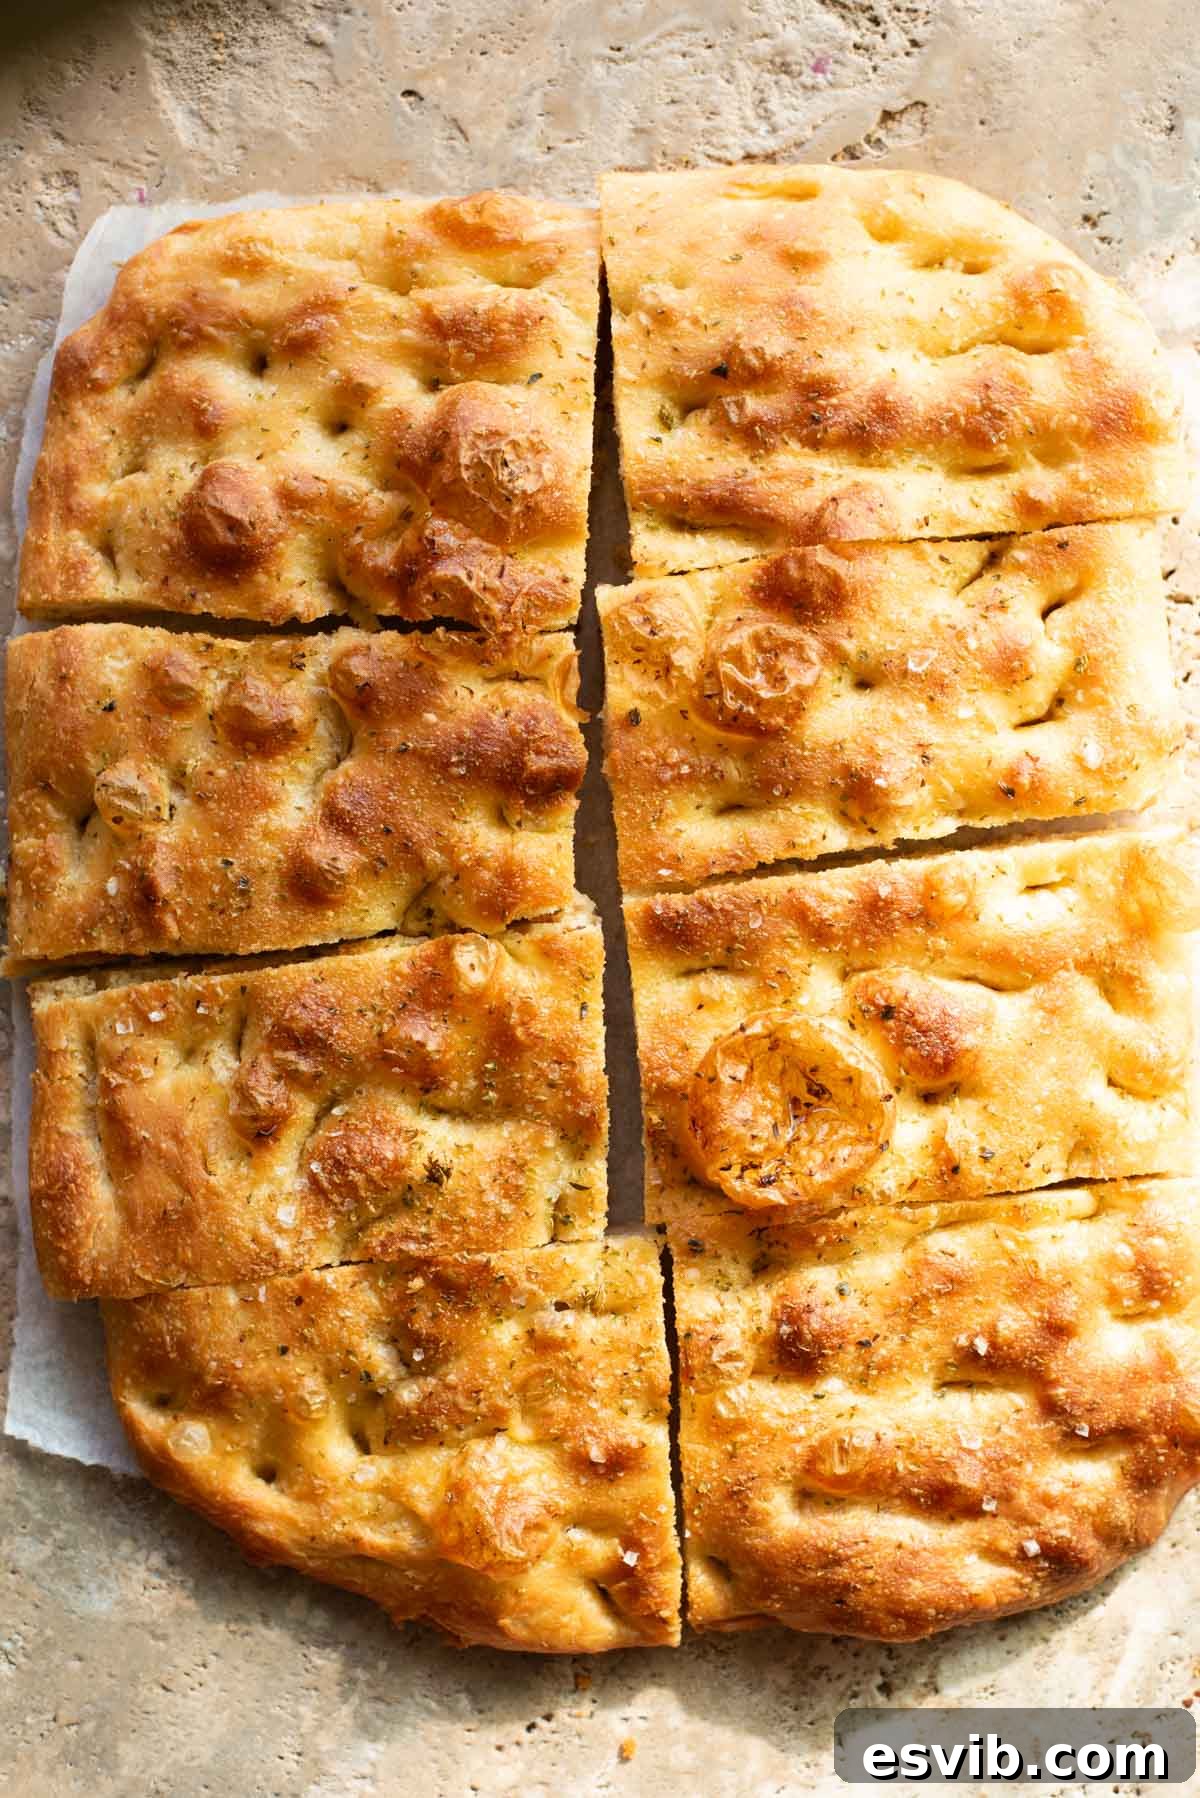
Table of Contents
- Why This is My Favorite Focaccia Recipe
- The Magic Behind Our Top Tips
- Essential Ingredient Notes
- Visual Walk-Through of the Recipe Steps
- Example Baking Timeline for Perfect Focaccia
- Focaccia Flavor Variations and Toppings
- Frequently Asked Questions (FAQs)
- More Delicious Italian Breads to Try
- Full Recipe Card
Why This is My Favorite Focaccia Recipe
After years of baking focaccia, I’ve refined my technique to create what I believe is the absolute best version. This recipe stands apart from others due to several key factors that contribute to its superior taste, texture, and ease of preparation:
- **Achieves Incredible Texture with High Hydration (80%):** The high water-to-flour ratio is the secret to this focaccia’s characteristic lightness, airiness, and abundant bubbles. It results in a moist, tender crumb encased in a wonderfully crisp and golden crust, offering a delightful contrast in every bite.
- **Utilizes Minimal Yeast for Better Digestion and Flavor:** Unlike many quick bread recipes that rely on larger amounts of yeast, this focaccia uses a tiny quantity. This not only makes the bread easier to digest, reducing any “heavy” feeling, but also allows for a longer, slower fermentation process.
- **No Kneading Required – A Simple Folding Technique Does the Work:** Forget the strenuous effort of traditional kneading. This recipe employs an easy stretch-and-fold method, making it approachable for bakers of all skill levels. The gentle folds develop the gluten structure over time, giving you professional results with minimal physical effort.
- **Perfect for Preparing Ahead (Up to 48 Hours in Advance):** This make-ahead capability is a game-changer. By allowing the dough to proof slowly in the refrigerator for up to two days, you not only build deeper, more complex flavors but also gain incredible flexibility in your baking schedule. Freshly baked focaccia on demand has never been easier!
While our site features another excellent focaccia recipe with a lower hydration (60%) and more yeast for same-day baking, this overnight version with higher hydration and minimal yeast has become my new staple. The extended proofing time truly unlocks an unparalleled depth of flavor that is simply unbelievably delicious!
I find myself reaching for this versatile bread constantly – as a standalone snack, perfect for dipping into rich sauces or sopping up soup (known as ‘scarpetta’ in Italian), crafting magnificent sandwiches, or serving as a canvas for various toppings. Its adaptability makes it an ideal companion for any meal.
Given the technical nuances of this recipe, I’ve made sure to provide thorough explanations, complete with visual aids and a short video demonstrating the crucial folding techniques. This detailed guide ensures you have all the necessary tips to achieve focaccia perfection. Feel free to use the table of contents above to navigate directly to the section you need, or simply jump straight to the full recipe card here.
The Magic Behind Our Top Tips
Embarking on the journey of making focaccia can be incredibly rewarding, especially with these insights I’ve gathered through extensive experimentation. The complete written recipe is available in the recipe card below, and for clarity on the folding techniques, I’ve included a helpful short video – it’s genuinely super easy!
- **Minimal Yeast is a Flavor and Digestion Game-Changer:** When it comes to focaccia, less yeast often means more. Especially with instant or fast-action yeast, a small quantity is all you need. Larger amounts are typically used for same-day doughs, but they can result in a bread that feels heavy and difficult to digest. By using minimal yeast and allowing for a longer, slower proof, you’ll produce a bread that’s not only lighter and airier but also much kinder to your stomach, preventing that sluggish feeling.
- **Time Truly Equals Flavor in Bread Making:** This principle is fundamental to exceptional baking. A longer proofing period is essential when working with a small amount of yeast, as it gives the dough ample time to ferment and develop a complex, nuanced flavor profile that simply can’t be achieved in a hurried process. This extended fermentation is what elevates a good focaccia to a truly great one.
- **Set a Timer – Your Best Friend in the Kitchen:** The stretch and fold technique in this recipe involves precise 30-minute intervals. It’s incredibly easy to get sidetracked, so setting a reliable timer is crucial. This simple habit ensures you don’t miss a fold, maintaining the rhythm of gluten development and proofing that’s vital for the perfect bubbly texture. Trust me, even experienced bakers rely on timers!
- **Embrace the Wet Dough – Don’t Be Afraid!** High hydration, meaning a high ratio of water to flour, is key to the light and airy texture of this focaccia. This results in a dough that is quite wet and sticky, making traditional kneading impractical. This is precisely why we employ the stretch-and-fold method. It’s a gentle technique that builds strength in the dough without the mess or effort of kneading. The photos and video tutorial will clearly demonstrate how straightforward this process is, turning what might seem daunting into an easy, enjoyable task.
Essential Ingredient Notes
Crafting the perfect focaccia starts with understanding your ingredients. Here are some key details for the components of this recipe:
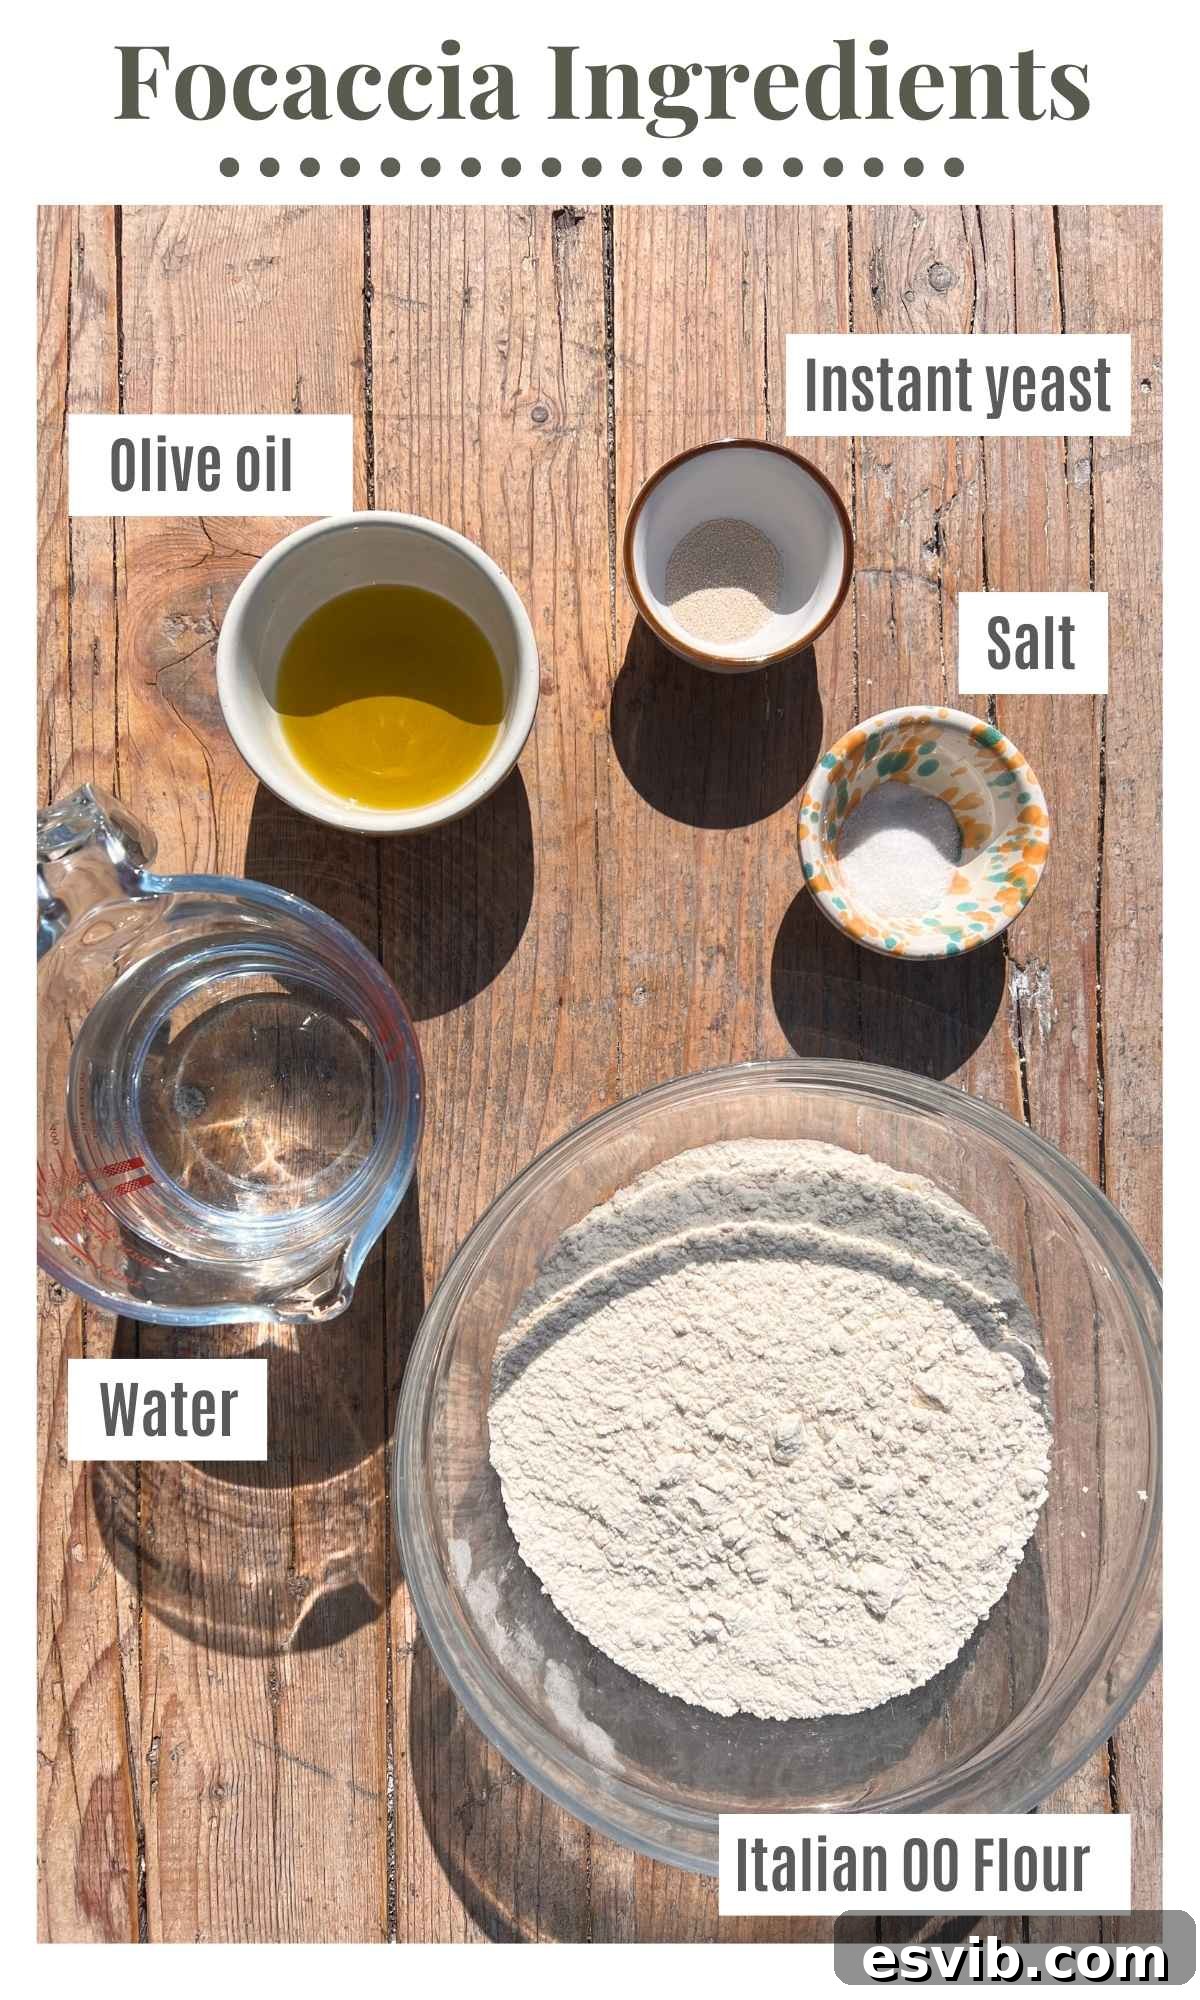
- **Italian 00 Flour with 12% Protein or Bread Flour:** For this recipe, the type of flour plays a crucial role in developing the ideal gluten structure needed for a high-hydration dough. Italian 00 flour, known for its fine texture and typically medium protein content (around 12%), creates a very extensible and elastic dough, perfect for airy focaccia. Alternatively, high-quality bread flour, which also has a higher protein content (usually 12-14%), will yield excellent results, contributing to the focaccia’s chewiness and structure. Avoid all-purpose flour if possible, as its lower protein content might not provide enough strength for such a wet dough.
- **Instant Yeast:** We specify instant yeast because it can be added directly to the flour without prior activation. This simplifies the process, saving you time and an extra step. However, it’s vital to **always read the instructions on your yeast packet**. Some fast-action or instant yeasts might still benefit from, or even require, a brief activation in a small amount of warm water (taken from the total water specified in the recipe) to ensure they are active and ready to work. Active dry yeast, for example, always needs to be activated in warm water before mixing with dry ingredients.
- **High-Quality Olive Oil:** Since olive oil is a prominent flavor in focaccia and is used generously throughout the recipe (in the dough, for greasing the tray, and as a topping), choosing a good quality extra virgin olive oil is highly recommended. It contributes significantly to the bread’s aroma, richness, and golden crust.
- **Flaky Sea Salt:** For topping, flaky sea salt (like Maldon) is preferred over fine table salt. Its larger crystals provide bursts of salty flavor and a delightful textural contrast on the crust, enhancing the overall experience.
Visual Walk-Through of the Recipe Steps
Let’s walk through each stage of this incredibly rewarding focaccia recipe. These detailed steps, accompanied by visual cues, will guide you to success.
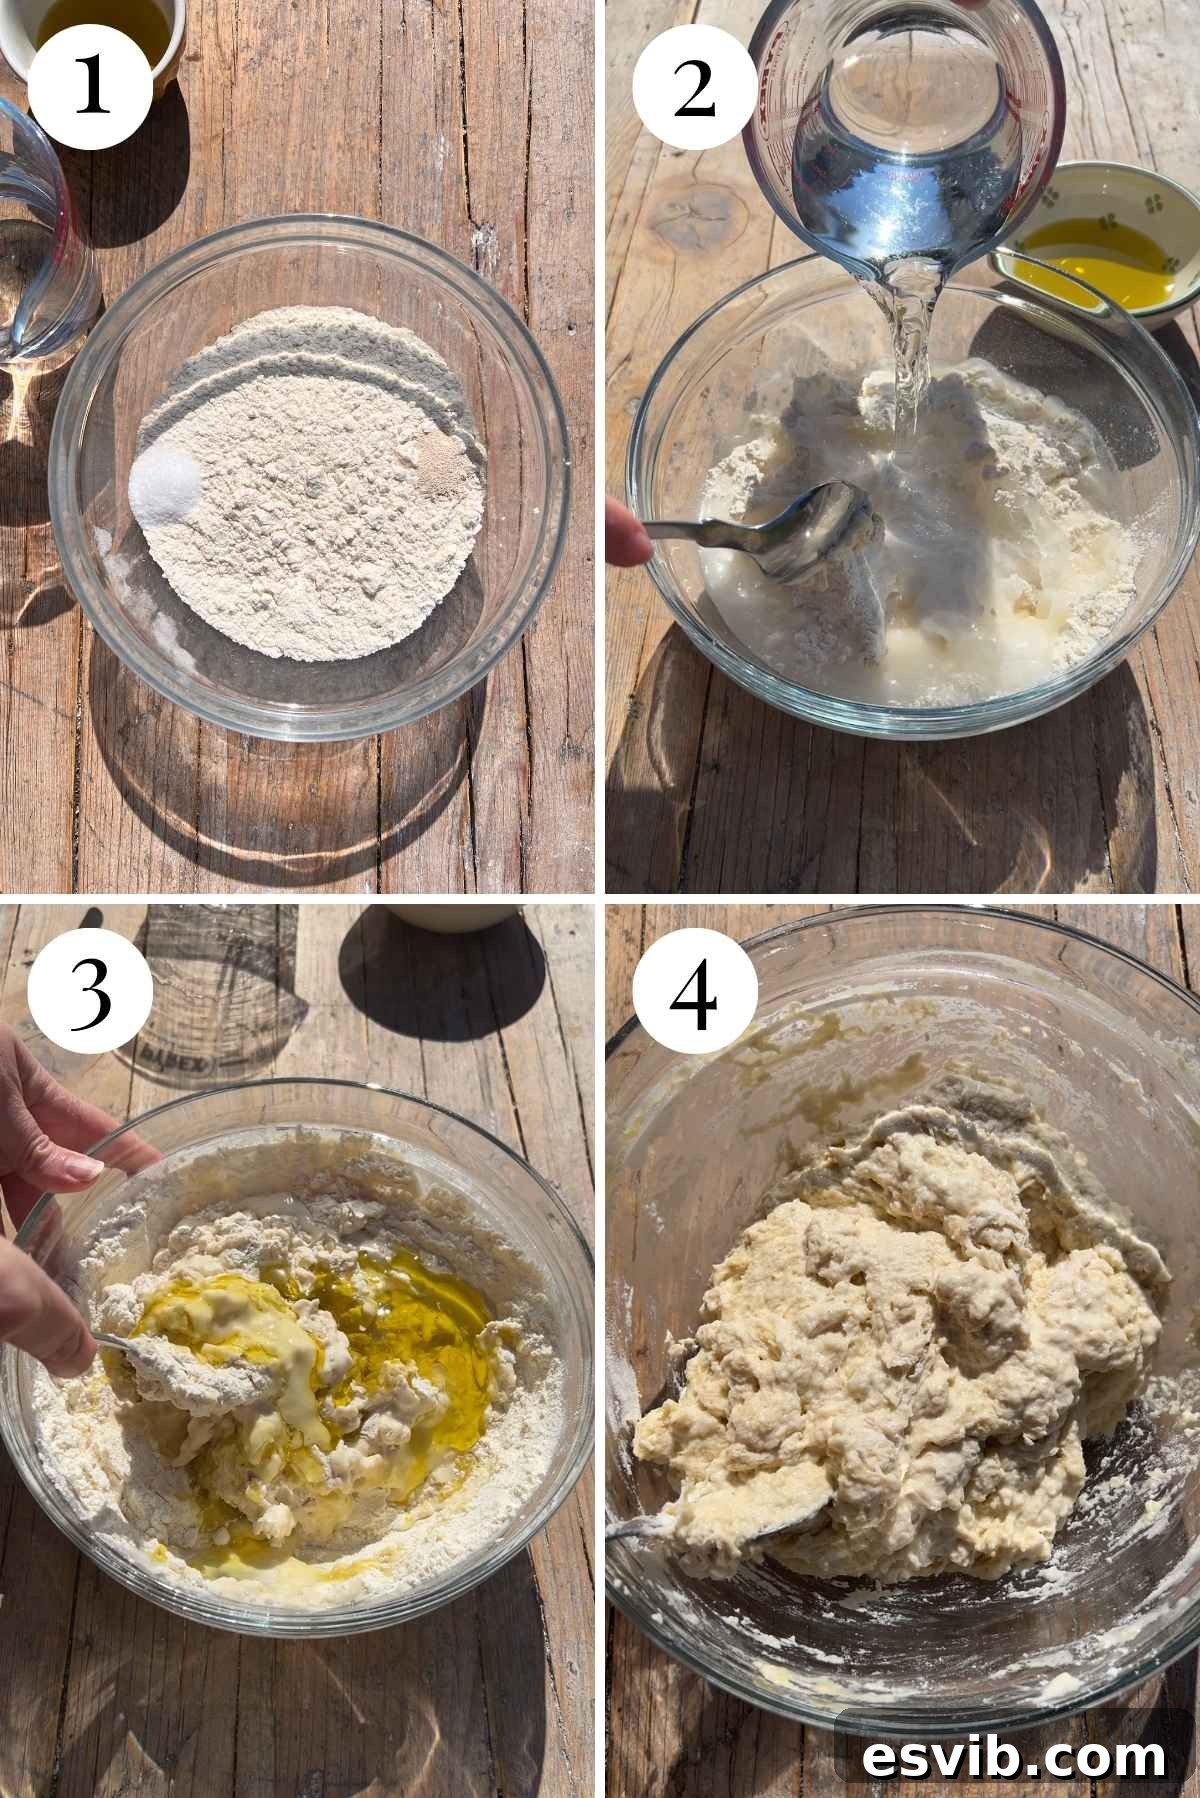
Step 1 – Prepare the Initial Mixture: Begin by combining your dry ingredients. Place the measured flour in a large mixing bowl. Crucially, add the salt and yeast at opposite ends of the bowl. This separation is important because direct contact between salt and yeast can inhibit yeast activity. (See photo 1 for visual guidance).
Step 2 – Form a Shaggy Dough and Rest: Pour the specified amount of water into the bowl and start to gently mix the ingredients with a sturdy spoon or a dough whisk until a rough, shaggy dough forms. Next, add the olive oil. Continue mixing until there are absolutely no dry pockets of flour remaining. The dough will appear very wet and sticky – this is exactly what we want for high-hydration focaccia. Cover the bowl tightly with plastic wrap or a damp kitchen towel to prevent it from drying out, and allow it to rest at room temperature for 30 minutes. This initial rest allows the flour to fully hydrate and the gluten development to begin passively. (Refer to photos 2-4 for a clear sequence of this stage).
Step 3 – The First Stretch and Fold: Now it’s time for the first stretch and fold, a gentle technique to build gluten structure without kneading. First, thoroughly wet your hand to prevent the sticky dough from adhering to it. Then, grab one edge of the dough, gently stretch it upwards, and fold it over into the middle of the dough ball. Rotate the bowl a quarter turn and repeat this action with the next section of dough. Continue this process all the way around the dough, typically 4-6 folds. This process helps to strengthen the dough’s structure. Once complete, cover the dough again and let it rest for another 30 minutes. (Photos 5 and 6 provide excellent visual instructions for this technique).
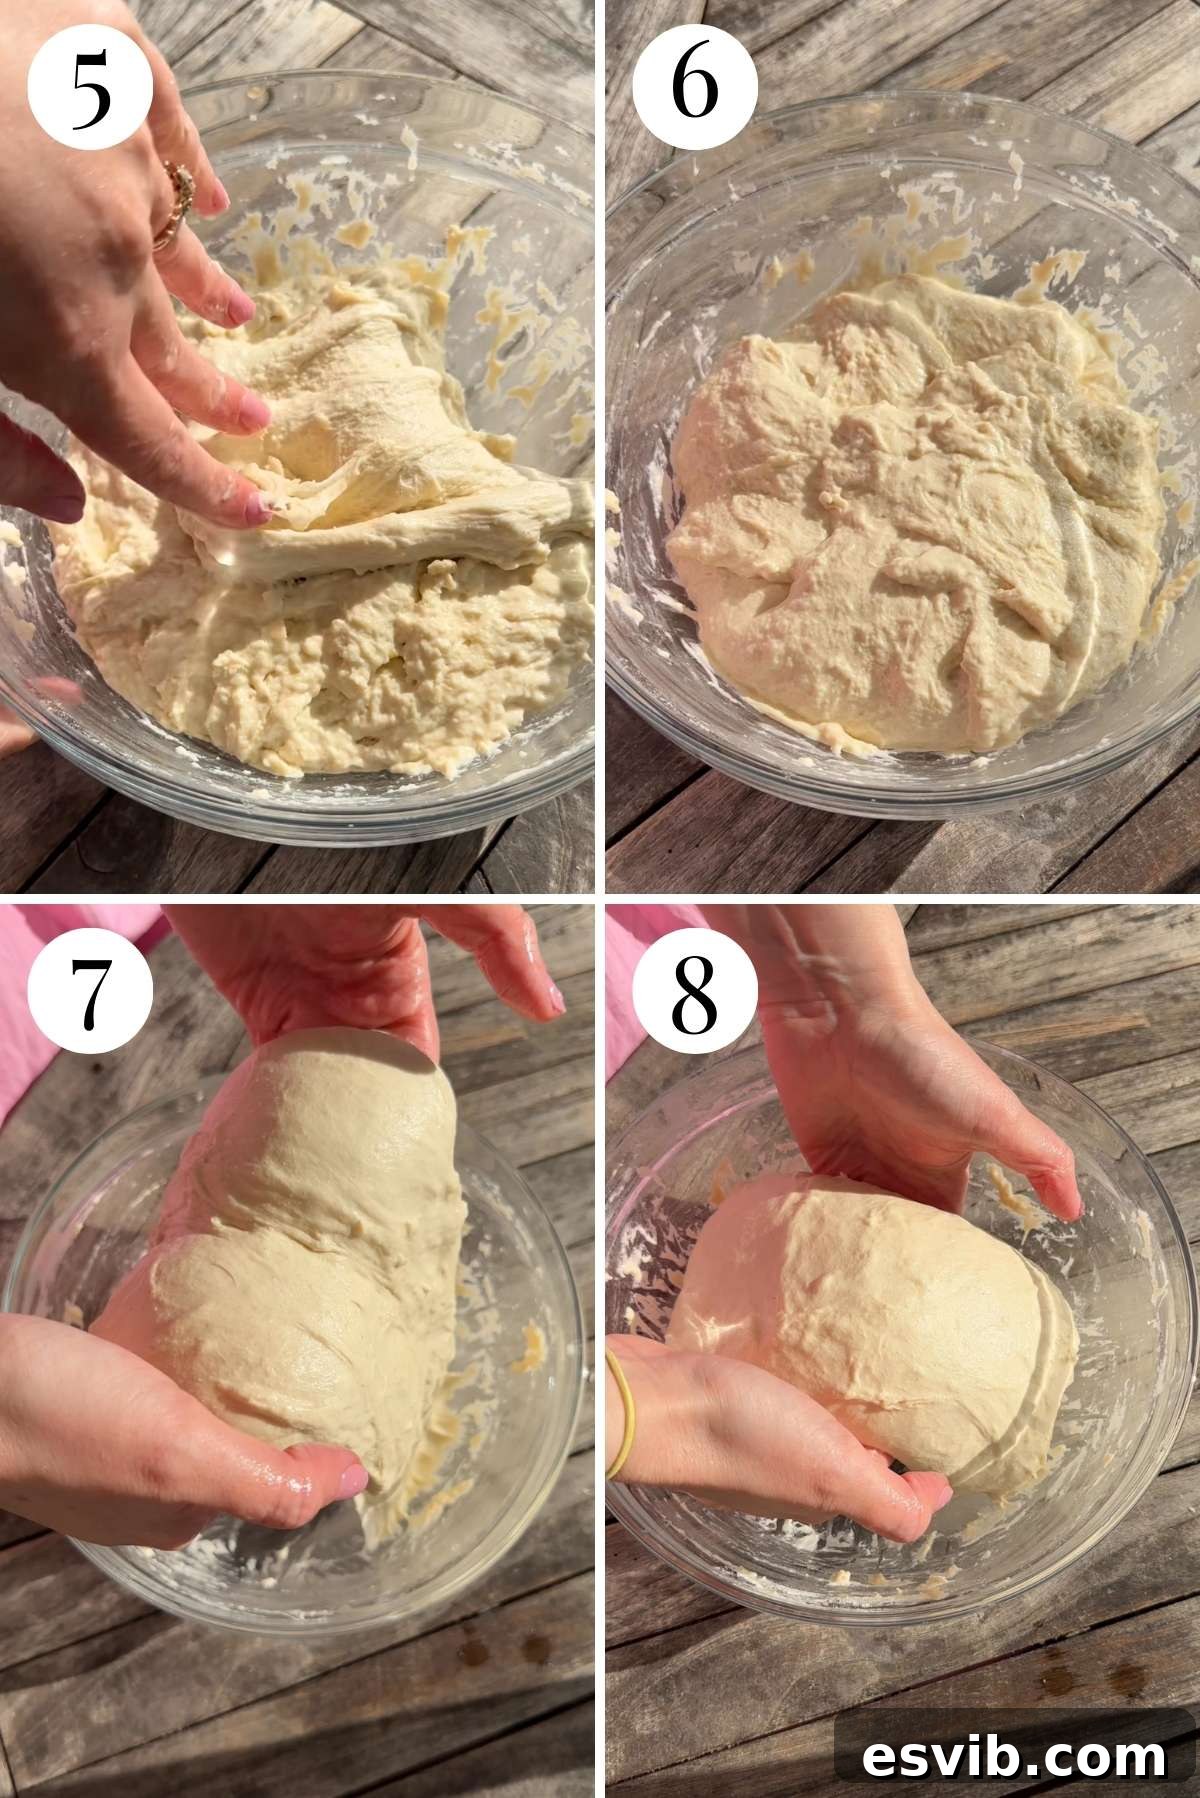
Step 4 – Coil Folds and Overnight Fermentation: This step introduces the coil fold, a technique that sounds more complex than it is. I highly recommend watching the short video in the recipe card below for a clear demonstration. To perform a coil fold, wet both hands well. Gently slide your hands under the middle of the dough, lift it, and stretch it upwards. As you lift, the ends of the dough will naturally fold underneath themselves. Let the dough gently fall back into the bowl. Repeat this lifting and folding action until you can lift the entire dough mass cleanly out of the bowl without tearing it, allowing it to fold under itself as it settles back down. Turn the bowl 180 degrees and repeat the coil fold from the opposite edge. This technique further develops gluten and traps air. Cover the dough and let it rest for another 30 minutes. Repeat this entire coil fold process two more times, with 30-minute rests in between each fold. After the third coil fold, cover the bowl securely and place the dough in the refrigerator. This slow, cold fermentation will develop incredible flavor overnight, or for up to 48 hours. (Photos 7 and 8 visually demonstrate the coil fold).
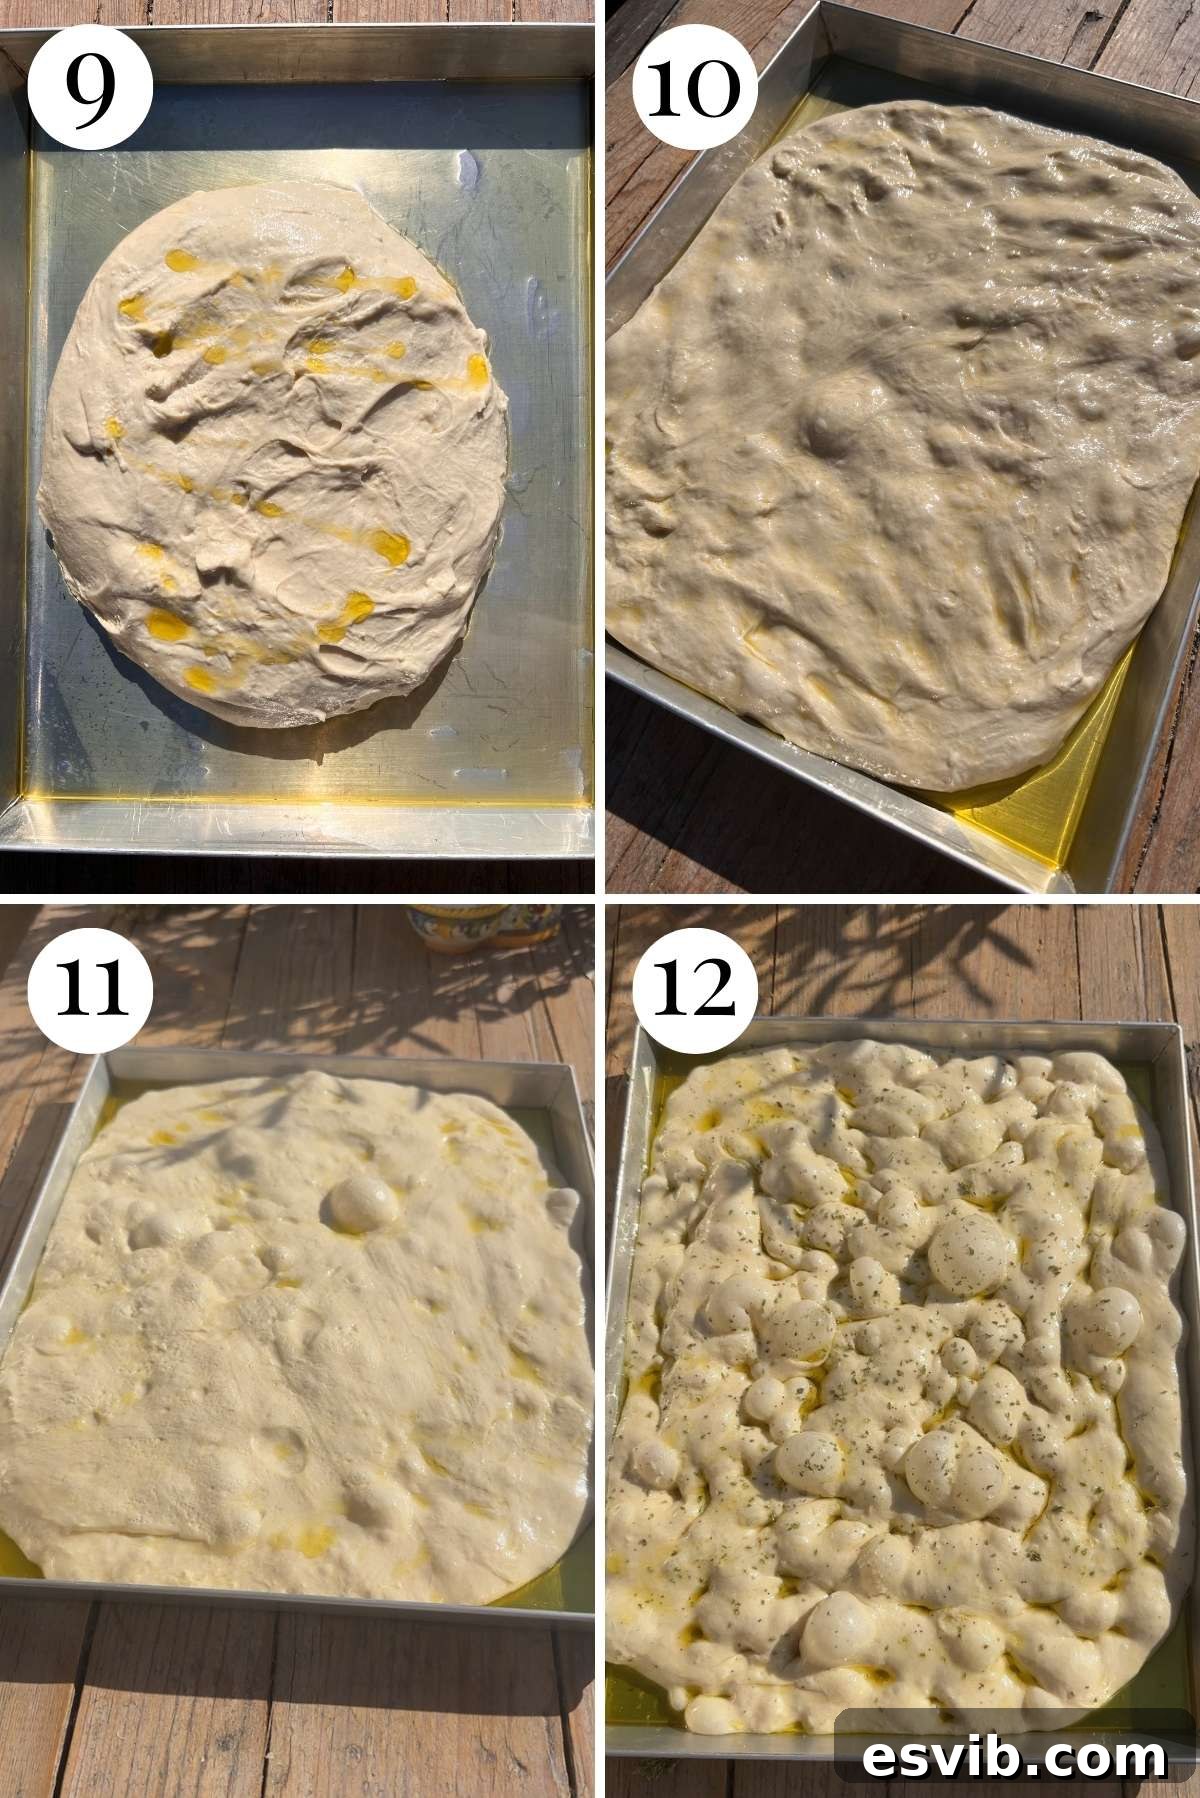
Step 5 – Tray Proofing for Ultimate Airiness: The next morning (or after 24-48 hours in the fridge), generously grease your baking tray with olive oil. Also, lightly oil your hands. Carefully remove the dough from its bowl and transfer it to the prepared tray. Gently begin to spread the dough out to fit the tray as much as possible, being careful not to deflate the precious air bubbles that have formed. Drizzle more olive oil over the surface of the dough, then cover the tray loosely with plastic wrap. Allow the dough to proof at room temperature until it has almost doubled in size, which typically takes about 2-4 hours, depending on your ambient room temperature. Avoid placing it in direct sun or high heat, which can over-proof it too quickly. (See photos 9-11 for this crucial stage).
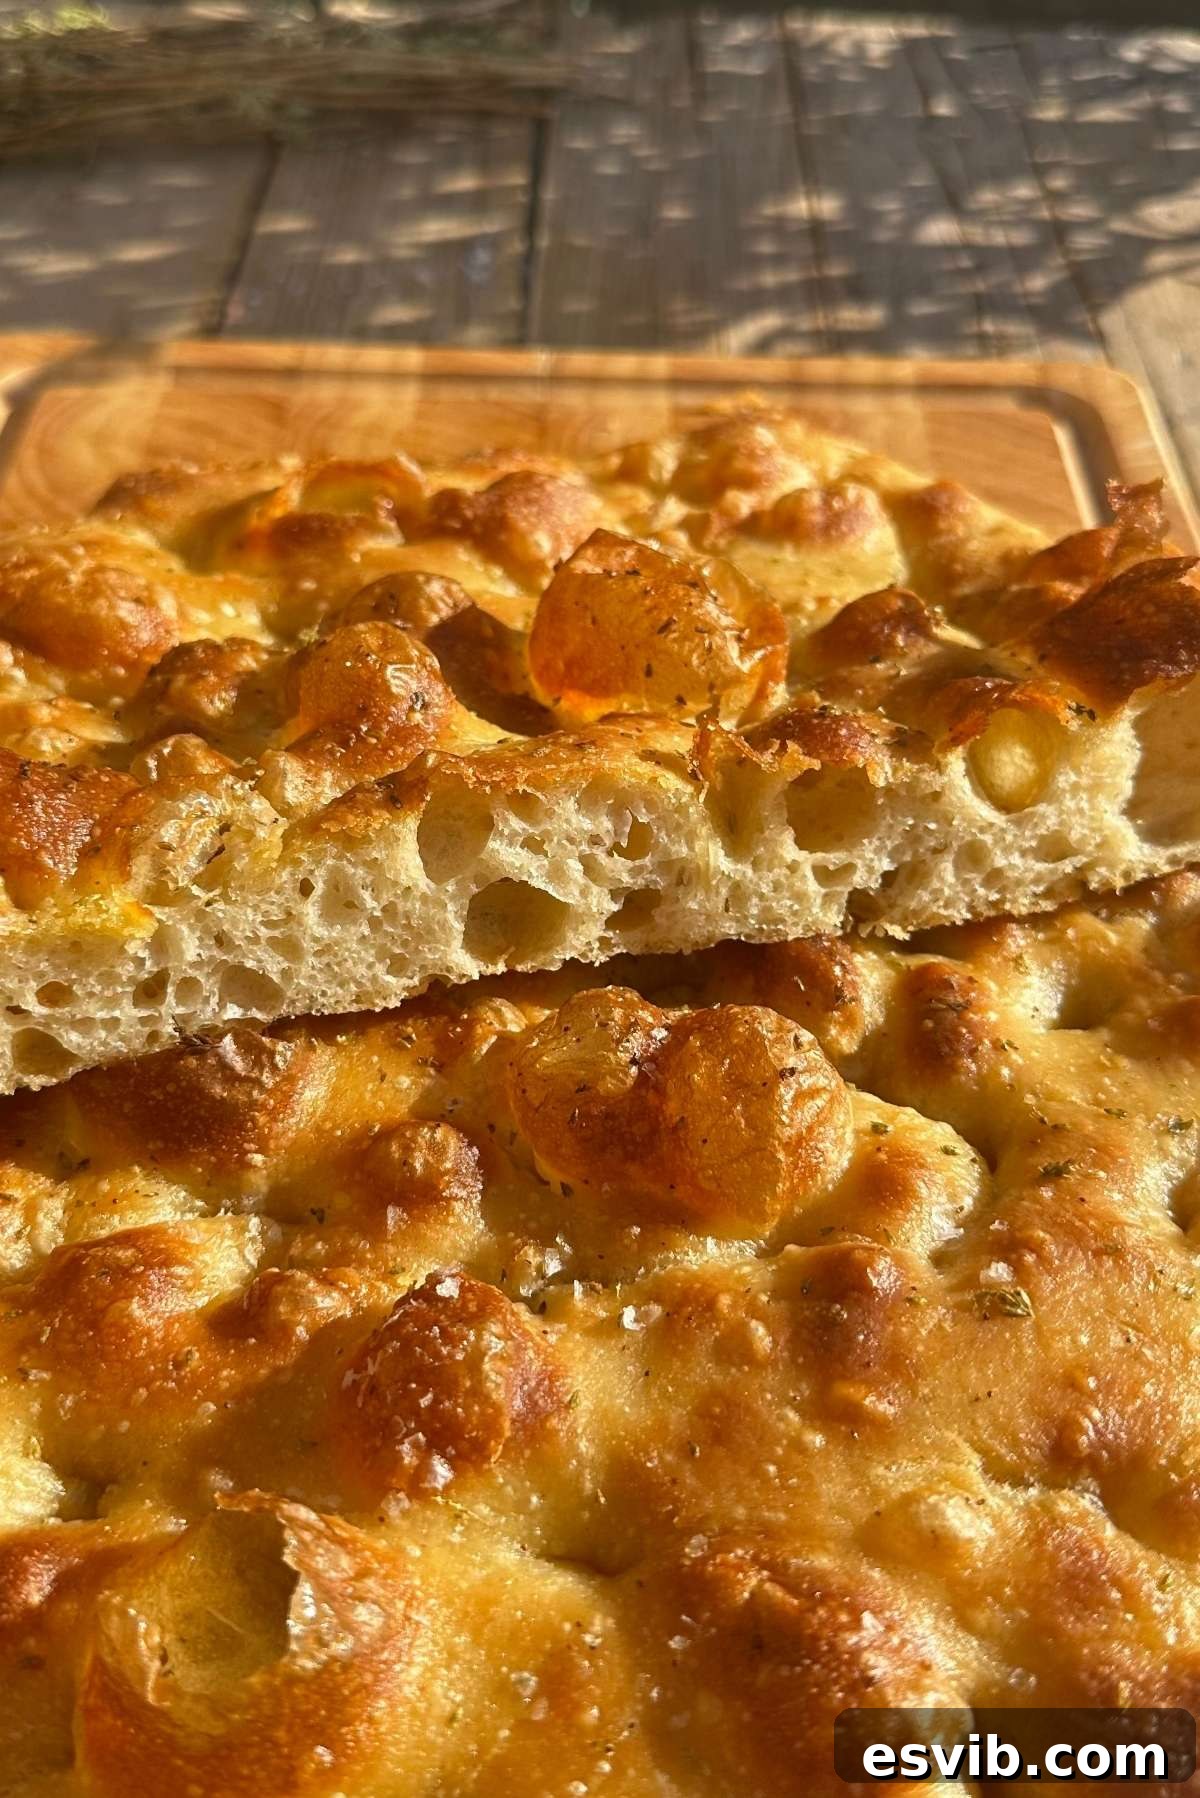
Step 6 – Dimpling and Baking to Golden Perfection: Once the dough has sufficiently proofed, pre-heat your oven to 230°C (450°F). Lightly oil your hands again. Now, it’s time to create the signature dimples! Gently press your fingertips all over the dough, pushing down to create small indentations without completely deflating the airy structure. Sprinkle generously with flaky sea salt and any desired herbs (like rosemary or oregano). Give it one final, light drizzle of olive oil. Transfer the tray to the pre-heated oven and bake for 20-25 minutes, or until the focaccia is beautifully golden brown all over and sounds hollow when tapped on the bottom. Remove from the oven, and for an extra touch of richness, you can drizzle a bit more olive oil over the hot focaccia before serving. It’s best enjoyed warm or at room temperature on the same day it’s baked.
Example Baking Timeline for Perfect Focaccia
To help you integrate this no-knead focaccia into your schedule, here’s an example of how a typical baking timeline might look. This demonstrates the “overnight” aspect and the flexibility it offers:
- **5:30 pm (Day 1):** Mix up the initial focaccia dough ingredients.
- **6:00 pm (Day 1):** Perform the first stretch and fold.
- **6:30 pm (Day 1):** Execute the first coil fold.
- **7:00 pm (Day 1):** Complete the second coil fold.
- **7:30 pm (Day 1):** Finish the third and final coil fold. At this point, place the covered dough in the fridge for its overnight (or up to 48-hour) cold proof.
- **8:00 am (Day 2):** Remove the dough from the fridge and transfer it into the well-oiled baking tray. Allow it to come to room temperature and proof.
- **12:00 pm (Day 2):** Bake your perfectly proofed focaccia!
It’s important to note that the actual proofing time for the dough in the tray (on day 2) will vary significantly based on your environment’s temperature. For instance, in a warmer summer kitchen, your dough might be perfectly doubled in size by 10 am and ready to bake, whereas in a cooler winter setting, it could take closer to 12 pm or even a little longer. Always judge by the dough’s visual cues (doubled in size, visibly bubbly) rather than strictly by the clock.
Focaccia Flavor Variations and Toppings
One of the most exciting aspects of focaccia is its incredible versatility when it comes to flavor variations and toppings. The possibilities are truly endless, allowing you to get creative with whatever ingredients you love or have on hand. Here are some delicious combinations to inspire you, or explore our Italian Bread Category for even more inspiration!
- **Classic Olive Focaccia:** A timeless choice! After dimpling the dough, simply scatter your favorite olives over the surface. Green olives like Nocellara or Castelvetrano, or briny Kalamata olives, all work wonderfully. You can keep them whole for a juicy burst or slice them for more even distribution.
- **Rustic Tomato Focaccia:** There are several delightful ways to incorporate tomatoes. For a rich base, lightly spread some homemade tomato sauce (please, no store-bought here – your homemade focaccia deserves the best!). Alternatively, sprinkle sun-dried tomatoes, or fresh cherry tomatoes (halved or quartered) over the dimpled dough. Roasting the cherry tomatoes beforehand can intensify their sweetness.
- **Aromatic Herb Focaccia:** Herbs are a fantastic way to infuse flavor. I particularly love sprinkling dried Italian oregano, especially whole dried bunches, for an authentic taste. Fresh or dried rosemary is another classic and beloved choice. Don’t hesitate to experiment with other herbs like thyme, basil, or a mix of Italian herbs.
- **Savory Onion Focaccia:** Onions add a wonderful sweetness and depth. You can thinly slice raw onions (red, yellow, or white) and arrange them over the dough before baking. For an even richer, sweeter flavor, try caramelizing onions beforehand and spreading them over the focaccia – it’s absolutely divine!
- **Garlic Infused Oil or Butter:** Elevate your focaccia with a fragrant garlic infusion. Crush several cloves of garlic and gently warm them in olive oil or melted butter. Drizzle this aromatic oil or butter generously over the dimpled focaccia before baking for an irresistible garlicky crust.
- **Hearty Potato Focaccia:** This is a beloved classic topping in Italy, especially in regions like Puglia. For a fantastic example of how to prepare this, refer to our cheesy potato pizza recipe and adapt the potato topping for this focaccia dough. Thinly sliced potatoes, often with rosemary and olive oil, create a surprisingly tender and flavorful crust.
Frequently Asked Questions (FAQs)
While this recipe is optimized for an overnight cold proof to maximize flavor and texture, you can make it on the same day if necessary. However, you will need to increase the yeast quantity to at least 4 grams (approximately 1 teaspoon) to speed up the fermentation. Prepare the dough as early as possible in the day, complete all the stretch and fold/coil fold steps, and then let it rise at room temperature until it has visibly doubled or even tripled in size before baking. Be aware that the flavor complexity might not be as pronounced as with an overnight proof.
For optimal results, I recommend refrigerating the focaccia dough for a maximum of 48 hours after completing the folding steps. Beyond 48 hours, the dough tends to over-proof, leading to a flatter bread with a less desirable texture and potentially an overly sour flavor. The sweet spot for maximum flavor development and perfect rise is usually between 18 and 36 hours.
Yes, you can freeze focaccia dough! After completing all the stretch and fold/coil fold steps, allow the dough to rest at room temperature for at least 2 hours (this helps the yeast become active before freezing). Then, transfer the dough to a well-oiled, freezer-safe container, ensuring there’s enough room for expansion. Freeze for up to 2-3 weeks. When you’re ready to bake, transfer the frozen dough to a bowl and let it defrost completely in the refrigerator overnight. Then, bring it to room temperature for its final proof in the baking tray, as described in Step 5, before proceeding with dimpling and baking.
Several factors can lead to a dense or flat focaccia. The most common reasons include insufficient proofing time (the dough wasn’t allowed to double in size), using old or inactive yeast, not enough hydration in the dough (leading to a stiffer texture), or over-handling the dough during the dimpling stage, which deflates too many air bubbles. Ensure your yeast is fresh, the dough has adequate time to rise, and you are gentle during the final shaping.
Large, open bubbles are a sign of a well-developed, high-hydration dough. To achieve this, ensure you are using a high-protein flour (like 00 or bread flour), following the stretch and fold/coil fold techniques correctly to build gluten structure, allowing for a long, slow cold fermentation (overnight proofing is key!), and being very gentle when transferring and dimpling the dough to avoid deflating the accumulated gases. High oven temperature also helps create a rapid burst of steam and oven spring.
More Delicious Italian Breads to Try
Bread & Savory Bakes
Walnut Focaccia
Bread & Savory Bakes
La Piadina: Italian Flatbread
Bread & Savory Bakes
Cherry Tomato Focaccia with Anchovies and Oregano
Pizza
Focaccia Pizza
If you’ve tried this **Overnight No-Knead Focaccia Recipe** or any other recipe on the blog, please don’t forget to rate the recipe and let me know how you got on in the comments below – I love hearing from you! You can also **follow us** on Facebook, Instagram, and Pinterest or sign up to our Newsletter to discover more of our delicious food.
Step By Step Photos Above
Most of our recipes come with step by step photos, helpful tips and tricks to make it perfectly first time and even video!
Easy Overnight No-Knead Focaccia Recipe
By Emily
2 hours
20 minutes
14 hours
16 hours
20 minutes
8
– 10 servings (1 large focaccia)
Print Recipe
Equipment
-
11×14 inch Baking tray
-
Large mixing bowl
Ingredients
- 500 g Italian 00 flour or bread flour, (approx 3 and 3/4 cups spooned and leveled)
- 400 ml water, (1 and 2/3 cups)
- 1 g instant yeast, (¼ teaspoon) Please see notes
- 4 tablespoons olive oil, plus more for greasing and topping
- 7 g salt, plus sea salt flakes for topping
Instructions
-
Put the flour (500g) in a large mixing bowl and place the yeast (1g) and salt (7g) at opposite ends of the bowl. Please check your packet instructions to see if your yeast needs to be activated in water first (see notes).
-
Add the water (400ml) and stir to form a rough dough. Add the olive oil (4 tablespoons), then continue to stir the dough with a spoon until there are no dry bits left. It should look very wet and sticky.
-
Cover the bowl with plastic wrap and leave it to rest at room temperature for 30 minutes.
-
Next, uncover the bowl and wet your hands well with water. Using one hand, fold each edge of the dough into the middle (see photos or video for reference). This takes just a few seconds. Re-cover the bowl and let it rest for another 30 minutes.
-
Repeat the stretch and fold step above once more, then leave it again for 30 minutes.
-
Next, wet your hands again and do a coil fold. To do this, pick the dough up from the middle and stretch it right up until you feel the edges start to come away from the bowl. Release the dough, then do this again up to 3-4 times until you can lift the dough right out of the bowl without tearing it.
Place the dough back in the bowl, letting the ends fold in on themselves. Repeat it from the opposite edge you started with (I recommend watching the quick video below as this is a very simple technique but can sound complicated written out). Let the dough rest for another 30 minutes, then repeat this another twice with 30 minutes rest in between.
-
Cover the bowl securely and refrigerate the dough overnight or for up to 48 hours.
-
Remove the dough from the fridge and put it into a well-oiled baking tray. Drizzle more olive oil over the top, then place more plastic wrap loosely over the tray. Let the dough proof at room temperature until almost doubled in size (don’t put it near any direct sun or high heat). This can take 2-5 hours depending on ambient temperature.
-
Pre-heat the oven to 230°C (450°F). Oil your hands well, then create dimples all over the dough by gently pressing your fingertips all over the dough. Try not to burst any large air bubbles.
-
Sprinkle over some flaky sea salt and any herbs you like, then give it another light drizzle of olive oil. Bake in the pre-heated oven for 20-25 minutes until golden brown all over.
-
Remove from the oven. We like to drizzle more olive oil over it once baked, but that’s optional. You can serve the focaccia warm or at room temperature.
-
It’s best served the same day (see notes for storing leftovers).
Video
Watch a quick demonstration showing you how to do the corner fold and coil fold with the focaccia dough.
Note: Original video source was from JW Player/AdThrive; replaced with a placeholder YouTube embed for simplicity and JS removal.
Notes
- Environmental temperature – The proofing time in the tray (next day) will depend significantly on how warm your environment is. For example, in summer, it may take 1.5-2 hours, and in winter, it could take 4-5 hours to double in size. Always judge by the dough’s appearance rather than strictly by the clock.
- Baking tray – You can use a slightly smaller tray than 11×14 inches, but I don’t recommend using a larger one, or your focaccia will be a lot thinner and potentially drier.
- Measuring in cups – While cup measurements are provided as an approximation, I highly recommend using a digital scale to weigh your flour and water for this recipe. When spooning flour into cups and leveling it off with a knife, measurements can vary greatly (I tend to get around 135g per cup), which can significantly impact the dough’s hydration and consistency. Precision with weight ensures the best results for a high-hydration dough.
- Instant yeast – As mentioned, some types of yeast need to be activated in warm water first. Make sure to read your packet instructions carefully. If you do need to activate the yeast (usually 5-15 minutes before mixing), simply take the required amount of liquid from the total water amount needed in the dough to perform the activation.
- Initial proofing and folding time – The entire process of mixing and folding the dough before refrigeration gives the dough approximately 2 hours of active room temperature proofing. Don’t worry if you forget and it goes over this time – up to 4 hours is absolutely fine. However, I don’t recommend doing any less than 2 hours, as you need to give the yeast sufficient time to begin its work and develop the dough’s structure.
- Leftovers and storage – Focaccia, like most fresh breads, is at its absolute best the same day it’s made. Once completely cool, wrap any leftovers tightly in foil to keep them as fresh as possible. The next day, if your focaccia feels a little dry, just wrap it loosely in foil and place it in a pre-heated oven at 180°C (350°F) for about 10 minutes to soften it up. It still makes fantastic sandwiches or delicious bread for dipping, even on the second day.
Helpful Info for All Recipes
- I always use extra virgin olive oil in all of my recipes unless stated otherwise.
- When I use canned or jarred tomatoes of any kind, I always recommend Cirio or Mutti brands for the best results and flavor.
- All vegetables are medium-sized unless stated otherwise.
- All recipes are tested and developed using a fan (convection) oven.
- Find out more about how nutrition is calculated.
- Check out our must-have Italian Pantry Staples.
- You can also find all our Essential Kitchen Tools for Italian Cooking.
Nutrition
|
Carbohydrates: 48g
|
Protein: 7g
|
Fat: 8g
|
Saturated Fat: 1g
|
Polyunsaturated Fat: 1g
|
Monounsaturated Fat: 5g
|
Sodium: 343mg
|
Potassium: 68mg
|
Fiber: 2g
|
Sugar: 0.2g
|
Calcium: 11mg
|
Iron: 3mg
Nutrition information is automatically calculated, so should only be used as an approximation.
Did you try this recipe?
Leave a comment below!