
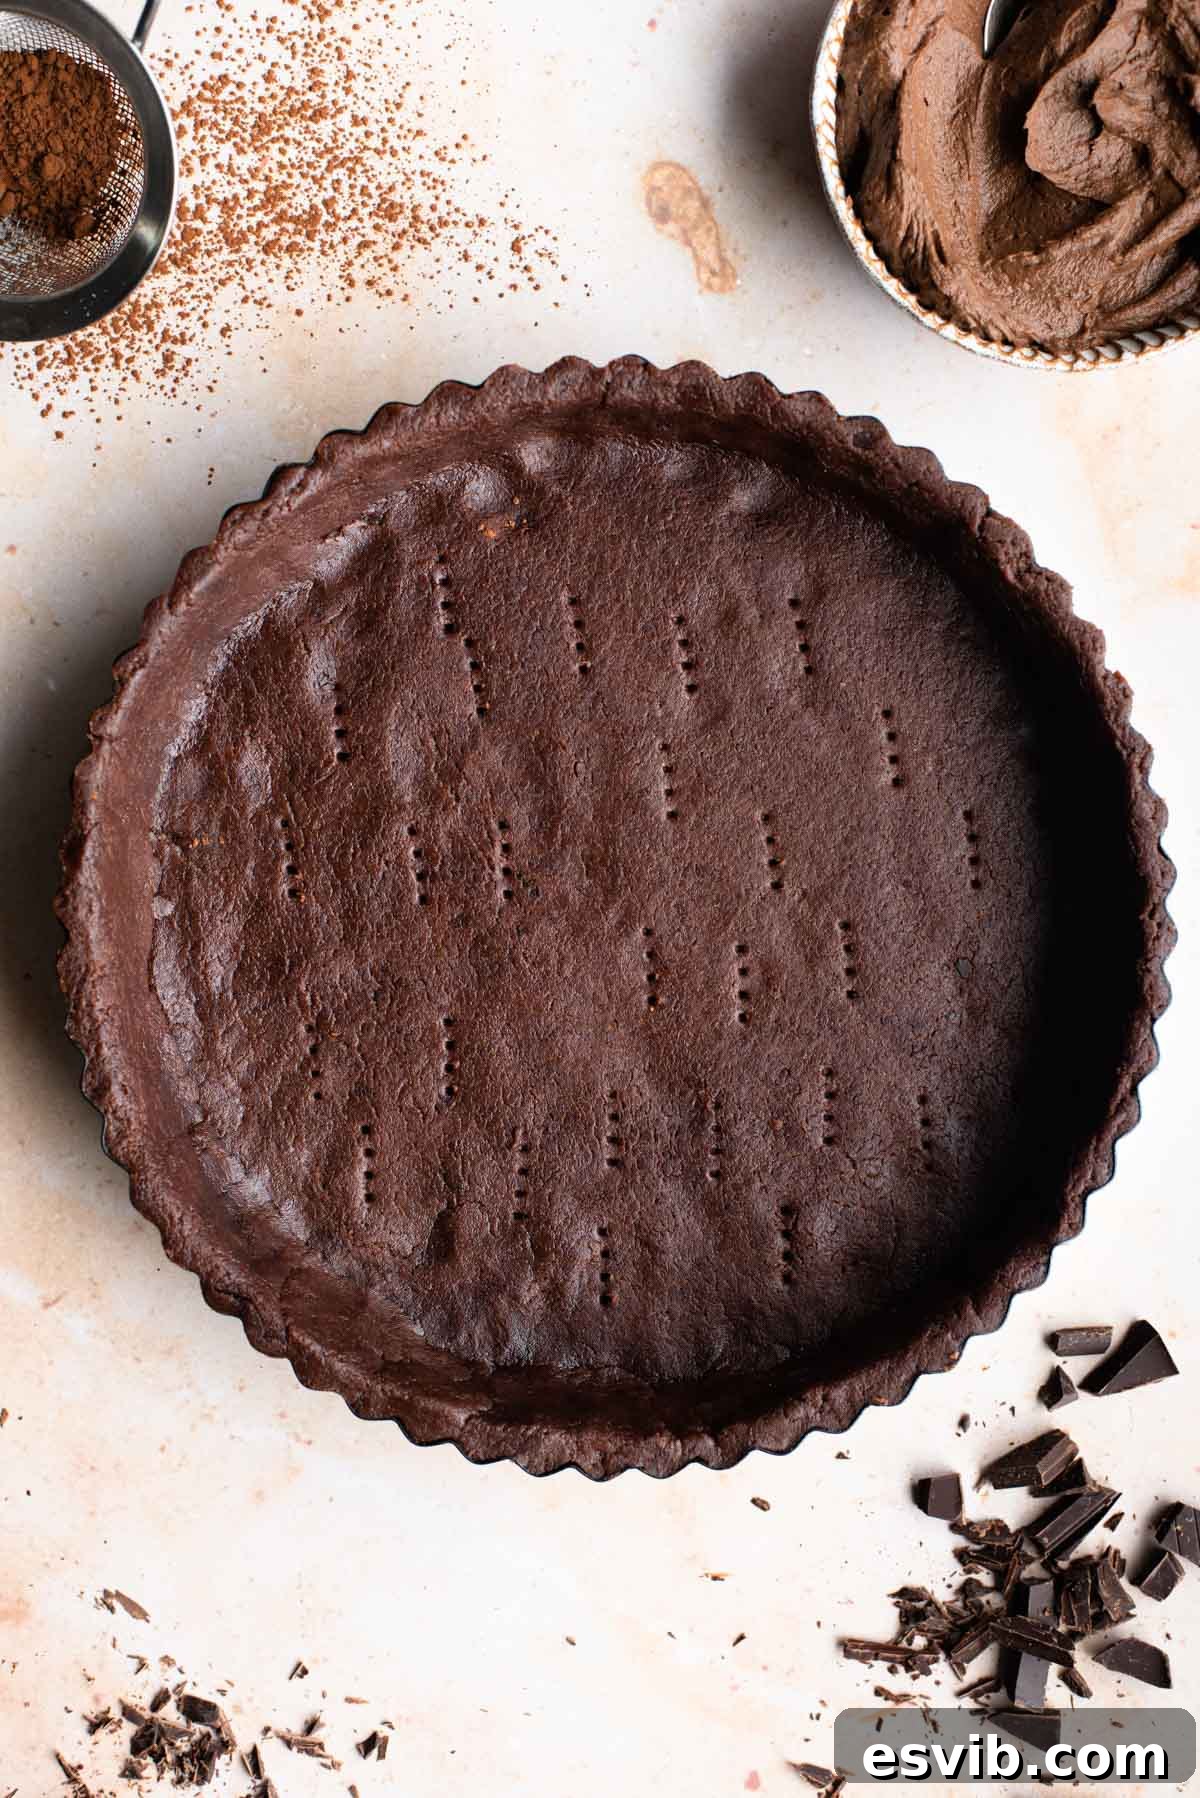
Dive into the decadent world of homemade chocolate shortcrust pastry, a fundamental recipe that will elevate your baking endeavors. Perfect for crafting exquisite tarts, delightful pies, and irresistible cookies, this recipe transforms simple ingredients into a rich, crumbly, and intensely chocolatey foundation for countless desserts. Forget store-bought alternatives; our easy-to-follow guide ensures a consistently delicious result with a melt-in-your-mouth texture that’s simply unmatched.
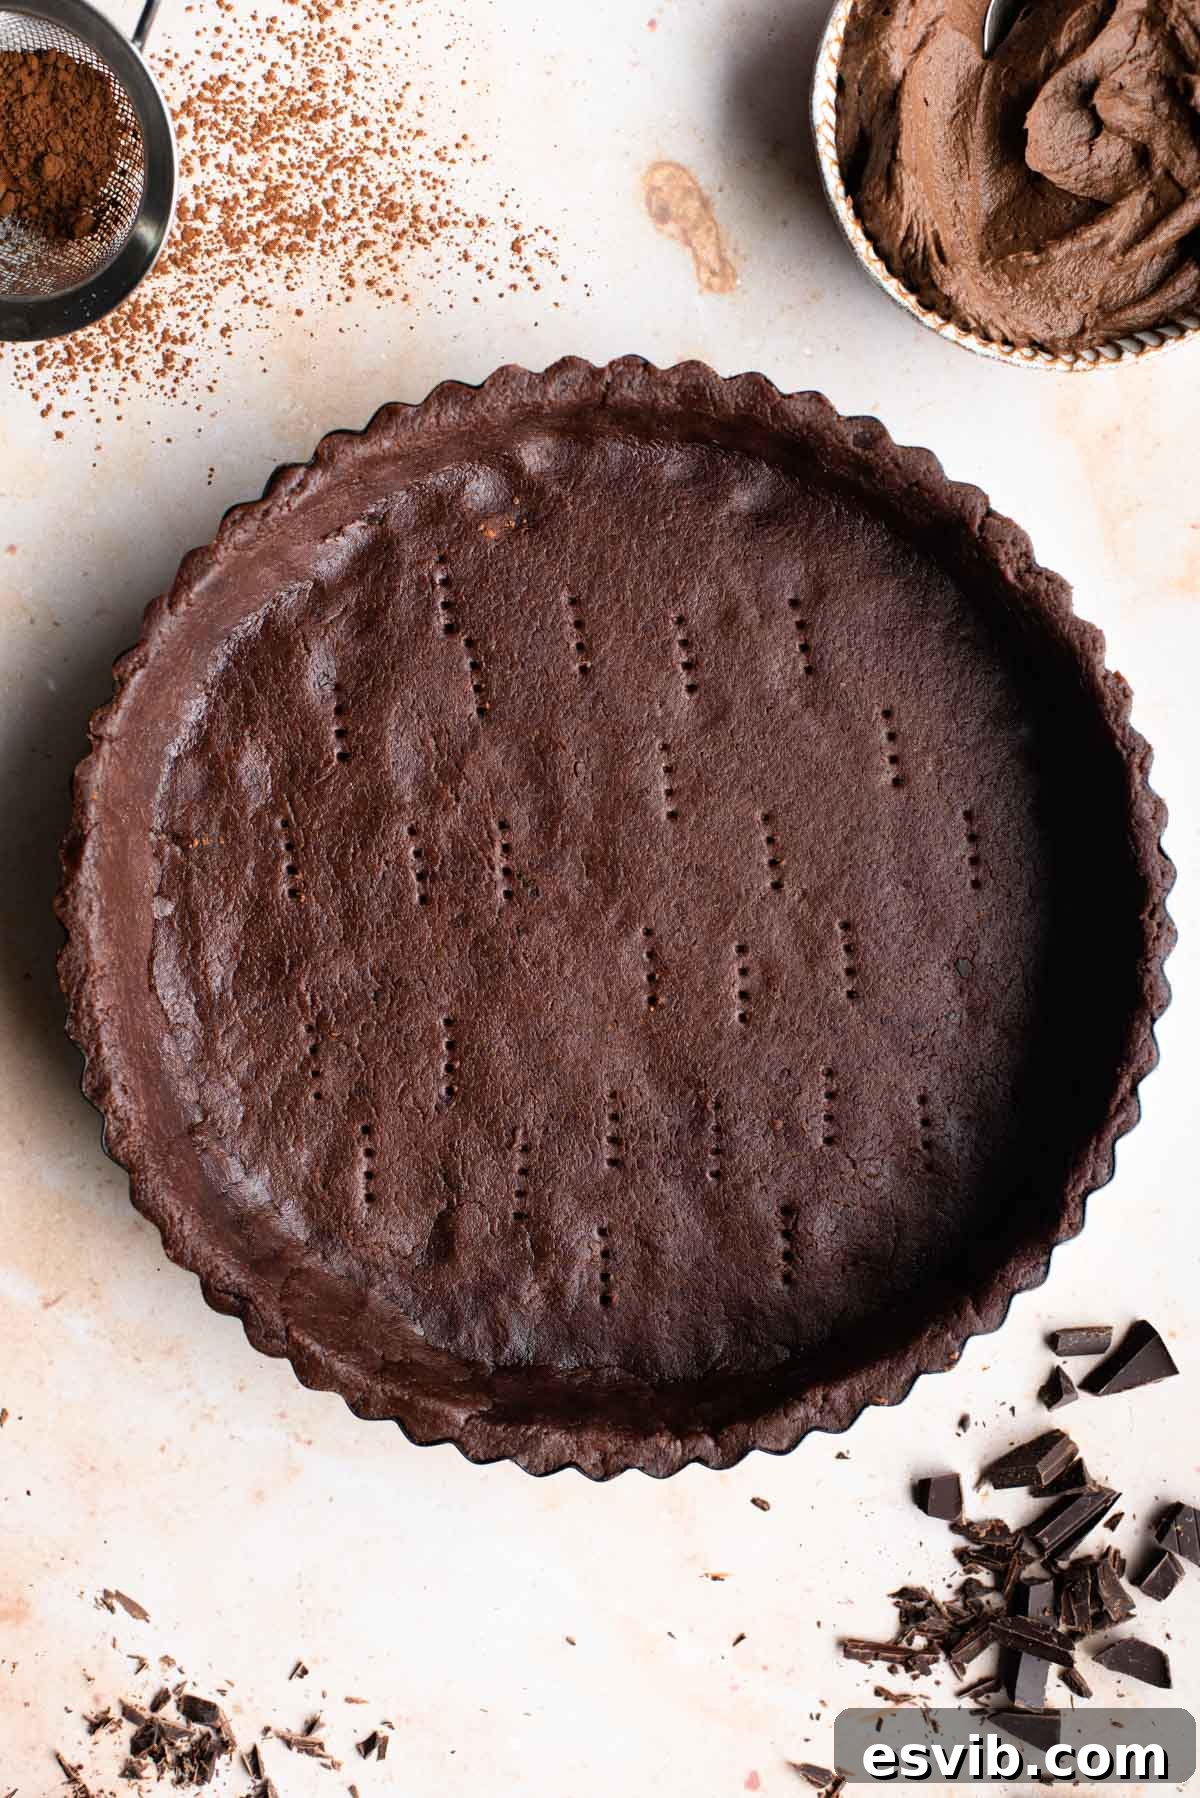
Welcome to the ultimate chocolate version of our beloved classic Italian Pasta Frolla. Just like its traditional counterpart, this chocolate-infused pastry boasts incredible versatility, making it an indispensable tool in any baker’s repertoire. Its deep cocoa notes and tender, crumbly consistency provide a perfect contrast to sweet fillings, making every bite a memorable experience.
With this recipe, you can effortlessly create stunning crostatas (Italian baked tarts), elegant chocolate tarts, comforting pies, and a variety of delicious cookies. The beauty of shortcrust pastry, often referred to as pie crust in the US, lies in its simplicity and its ability to come together without the need for extensive kneading. This minimizes gluten development, ensuring that signature crumbly texture we all adore.
Below, you’ll find our comprehensive recipe, complete with step-by-step instructions, essential tips for success, creative uses for your finished pastry, and helpful photos to guide you through each stage of the process. Prepare to master this foundational baking skill and unlock a world of chocolatey dessert possibilities.
Essential Ingredients for Perfect Chocolate Pastry
Crafting the perfect chocolate shortcrust pastry begins with understanding the role of each ingredient. The photo below illustrates everything you’ll need, followed by important tips to ensure the best flavor and texture:
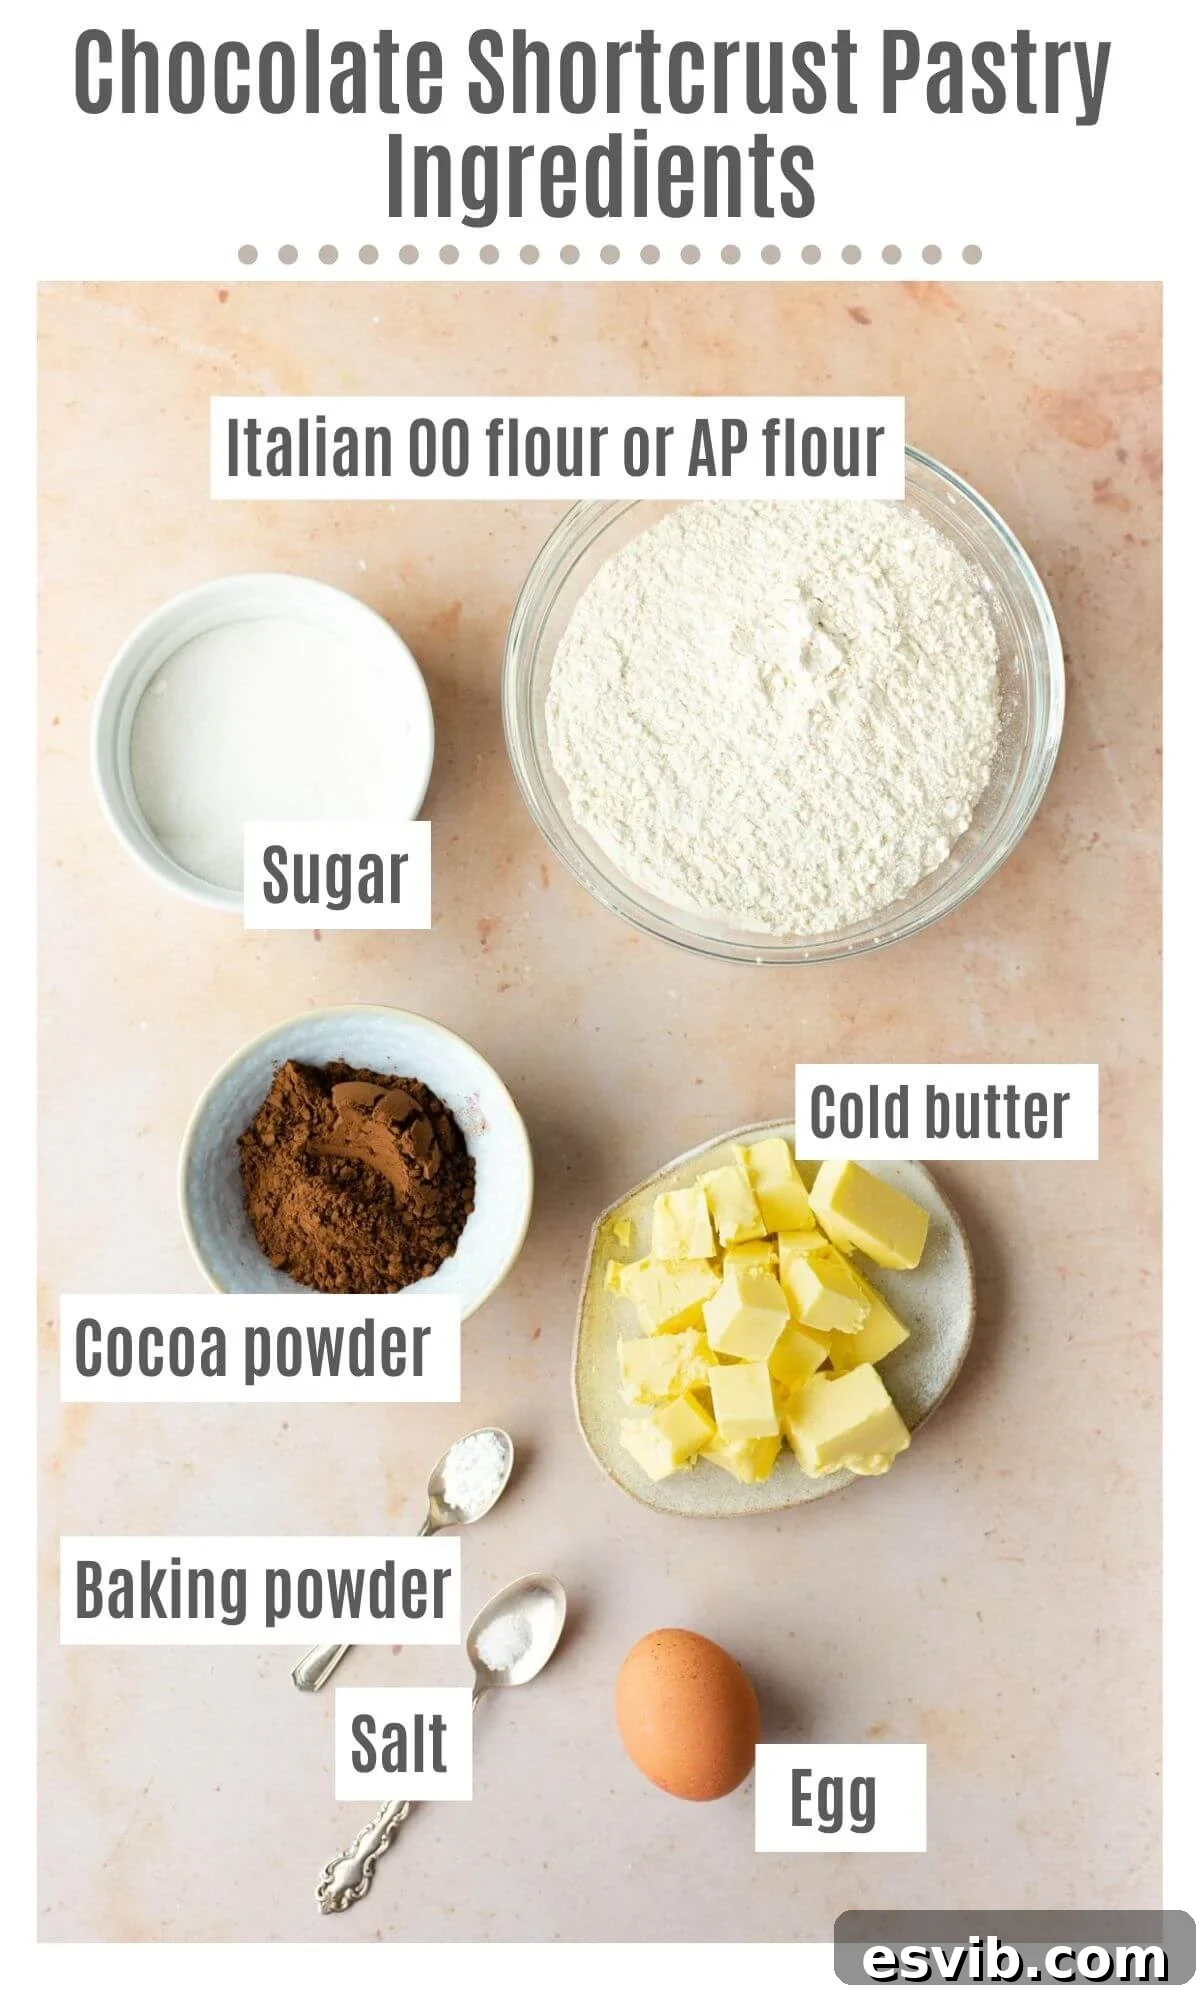
- Flour: For an authentic Italian touch and the finest texture, opt for 00 flour. If 00 flour isn’t readily available, a good quality all-purpose flour will also yield excellent results. Ensure it’s spooned and leveled for accurate measurement.
- Cocoa Powder: The key to an intense chocolate flavor lies in using a high-quality unsweetened cocoa powder. Dutch-processed cocoa powder often provides a darker color and smoother flavor, but natural cocoa powder works well too.
- Baking Powder: A small amount of baking powder provides a subtle lift, contributing to the pastry’s tender crumb. Always check the expiration date to ensure it’s active.
- Egg: A large, fresh egg acts as a binder, helping to bring the dough together and add richness.
- Butter: Unsalted butter is crucial, as it allows you to control the salt content of your pastry. It must be cold and cubed straight from the fridge. Cold butter is essential for creating those desirable pockets of fat that result in a flaky, crumbly texture.
- Sugar: Caster sugar (superfine sugar), whether white or light brown, is ideal. Caster sugar dissolves easily, ensuring a smooth dough without grittiness. Light brown sugar can add a subtle caramel note.
- Salt: Just a pinch of fine sea salt is enough to enhance the deep chocolate flavor and balance the sweetness, bringing out the best in all the other ingredients.
Step-by-Step Guide to Making Chocolate Shortcrust Pastry
Follow these detailed instructions to create your perfect chocolate shortcrust pastry. We’ve included practical tips to ensure success from start to finish.
Preparing the Dough
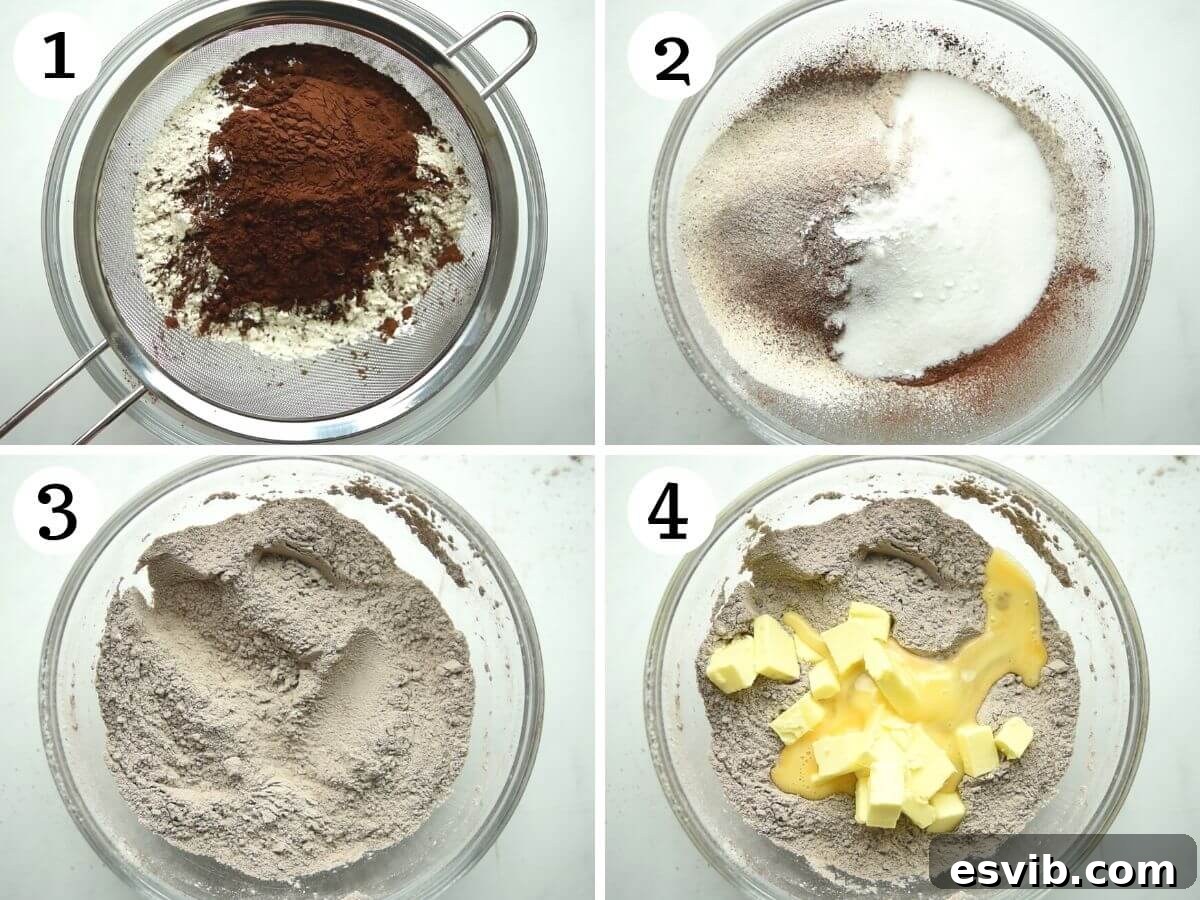
1. **Combine Dry Ingredients:** Begin by sifting the flour and cocoa powder into a large mixing bowl. Sifting prevents lumps and ensures even distribution of the cocoa. Add the sugar, baking powder, and a pinch of salt. Stir these dry ingredients thoroughly with a whisk or spatula until they are well combined (similar to what is shown in original photos 1 – 3). This initial mixing is vital for uniform flavor.
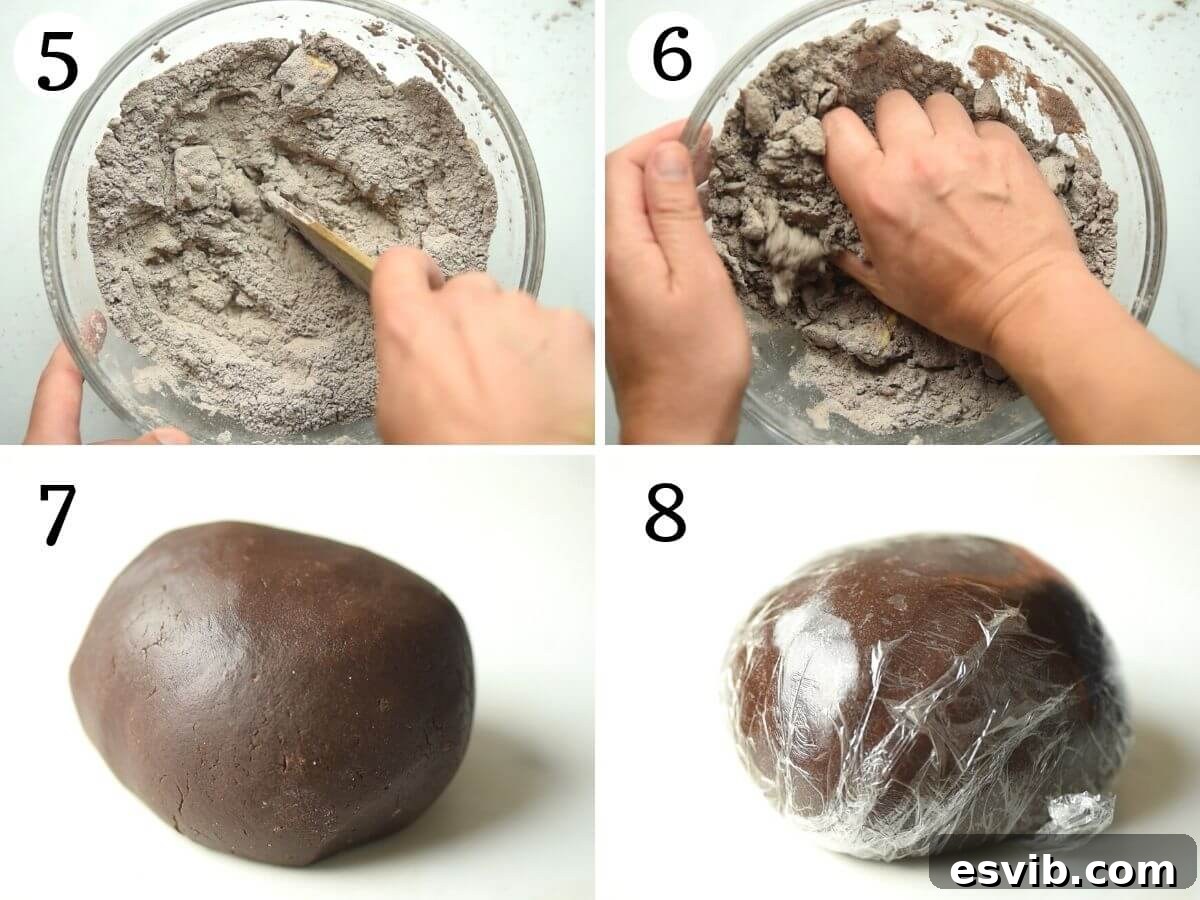
2. **Incorporate Butter and Egg:** Add the cold, cubed butter and the large egg to the dry mixture. Using a pastry scraper or your fingertips, swiftly cut the butter into the flour until the mixture resembles coarse crumbs. The goal is to work quickly to prevent the butter from warming up too much. This creates small pockets of butter that will yield a flaky texture (as depicted in original photos 4 & 5).
3. **Form the Dough:** Gently bring the crumbly mixture together with your hands. It will seem dry and crumbly at first, but as you press and gather it, the moisture from the egg and the warmth from your hands will bind it into a smooth, cohesive ball of dough. Avoid over-kneading, as this can develop the gluten and make the pastry tough. Knead just enough until all the flour is absorbed and the dough is smooth (as shown in original photos 6 & 7).
4. **Chill the Dough:** Wrap the finished dough tightly in plastic wrap and place it in the refrigerator for at least 1 hour. Chilling is a crucial step; it allows the butter to firm up again, prevents the dough from shrinking during baking, and makes it much easier to roll out without sticking (consistent with original photo 8).
Rolling and Shaping the Pastry
5. **Roll Out the Dough:** Once the dough is thoroughly chilled, remove it from the fridge. Lightly flour your work surface; for chocolate pastry, we recommend mixing a little cocoa powder with flour for dusting, which helps maintain the dark color and prevents a white residue. Using a rolling pin, roll the dough evenly until it is approximately ¼ inch (½ cm) thick. Work from the center outwards, rotating the dough frequently to prevent sticking and ensure an even thickness (as seen in original photos 9 & 10).
6. **Choose Your Creation:** At this stage, your versatile chocolate pastry is ready for various applications. You can use cookie cutters to create delightful chocolate cookies, or proceed to line a pie or tart dish for a more elaborate dessert.
Crafting a Chocolate Pie or Tart Crust
Transform your rolled-out chocolate pastry into a beautiful pie or tart crust with these simple steps:
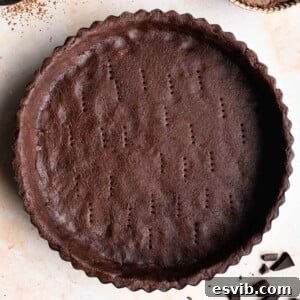
1. **Line the Pan:** Carefully lift the rolled pastry and gently lay it over your tart or pie tin. Center it, then gently press the pastry into the contours of the pan, ensuring it fits evenly and without stretching. Lightly press the pastry into the corners and up the sides (as illustrated in original photos 11 & 12).
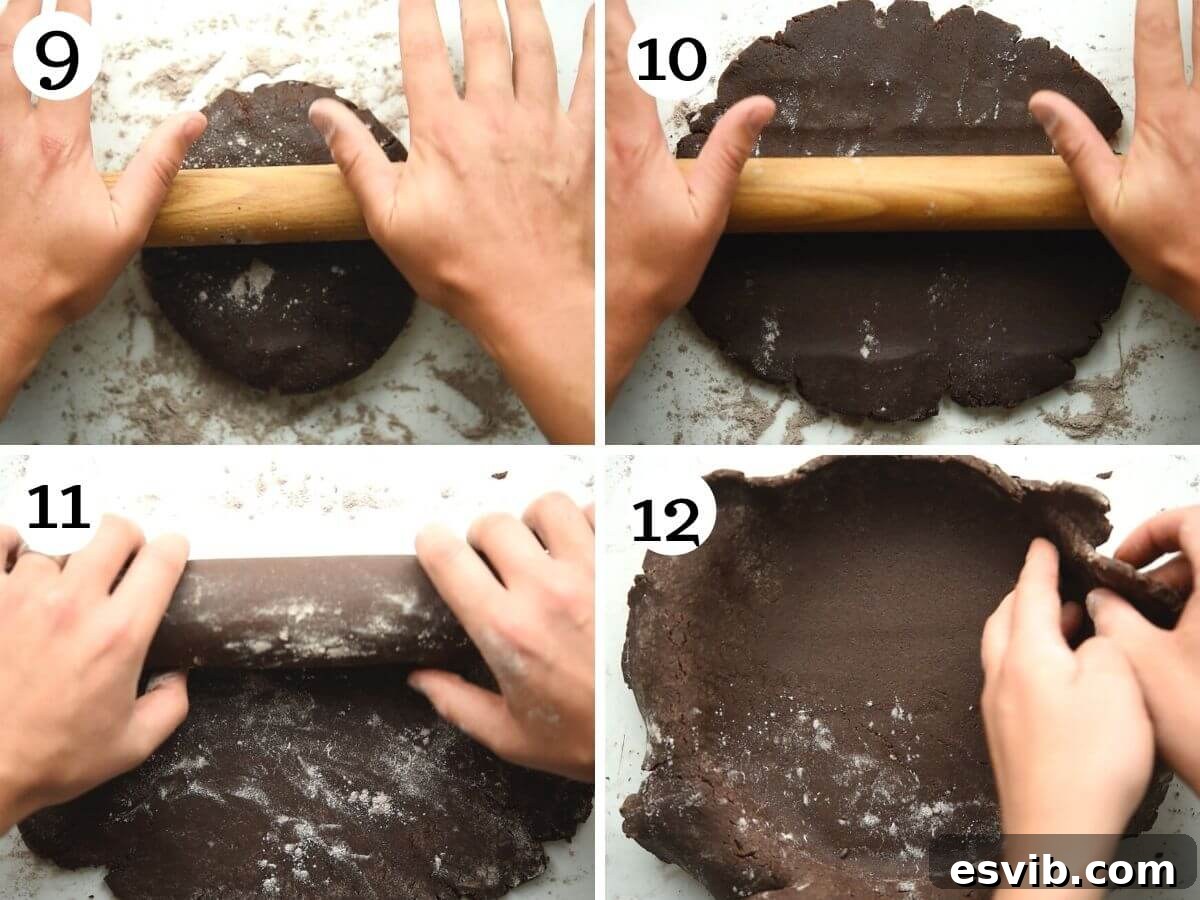
2. **Trim the Edges:** To create a neat edge, roll your rolling pin over the top of the tart case to cleanly cut off any excess pastry. Alternatively, you can use a sharp knife to trim the edges, leaving a slight overhang if you plan to crimp or decorate (as shown in original photo 13).
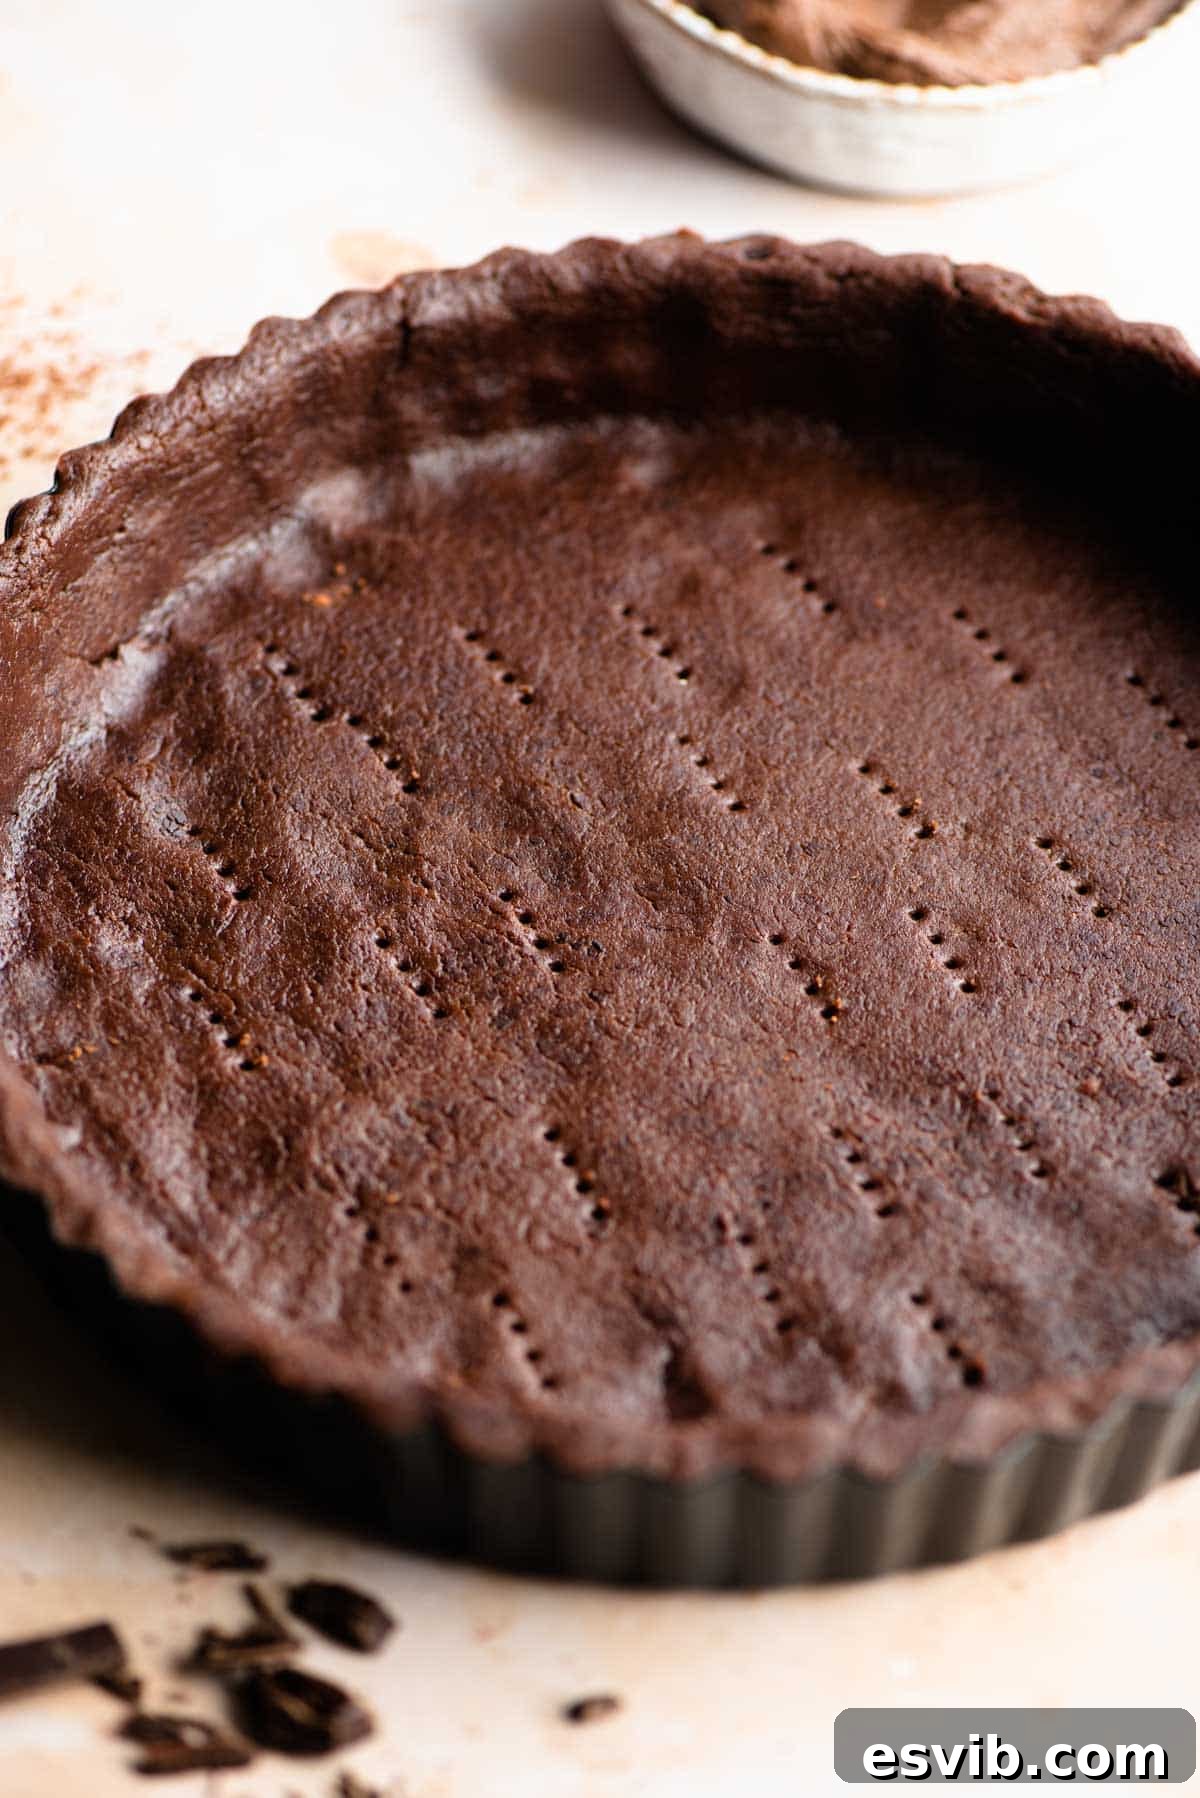
3. **Final Chill and Bake Prep:** Prick the base of the pastry all over with a fork. This prevents air bubbles from forming and the crust from puffing up during baking. Place the lined tart or pie pan back in the fridge for another 30 minutes. This second chill helps the pastry maintain its shape. After chilling, fill with your chosen filling and bake as directed in your specific recipe (consistent with original photo 14).
How to Blind Bake Chocolate Pastry
Blind baking is essential for tarts or pies with wet fillings, or those that will be filled with an unbaked mixture (like custard or jam), ensuring a crisp, fully cooked crust:
1. **Prepare for Baking:** After lining your tart or pie pan with the chocolate pastry as described above, gently line the pastry with baking parchment. Ensure the parchment covers the entire surface of the pastry (as seen in original photo 15).
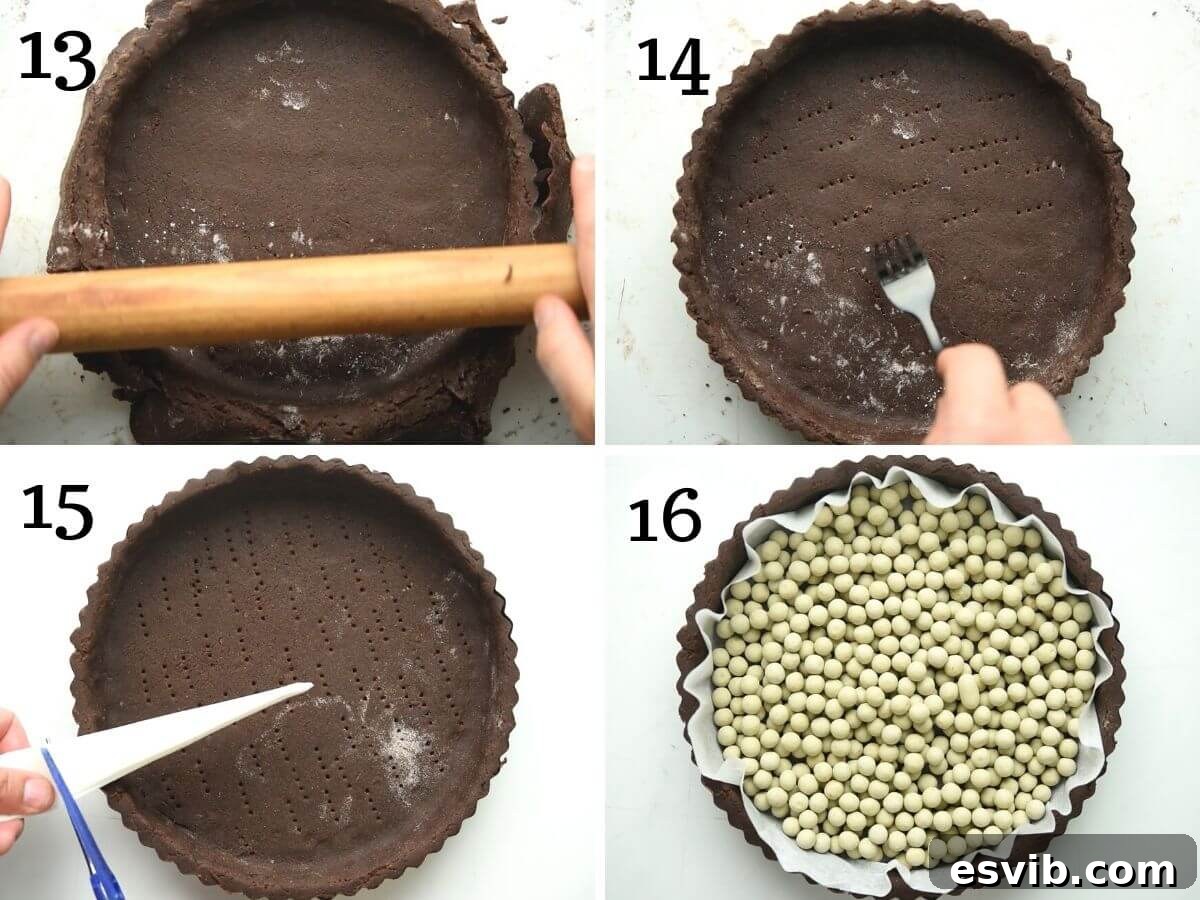
2. **Add Baking Weights:** Fill the parchment-lined pastry with baking beads, dried beans, or uncooked rice. These weights prevent the pastry from shrinking and the base from rising too much during baking. Bake in a preheated oven at 350°F (180°C) for 30 minutes (as depicted in original photo 16).
3. **Finish Baking:** Carefully remove the pan from the oven. Lift out the baking parchment and the baking beads. If your recipe requires a fully baked crust, return the pastry to the oven for another 5-10 minutes, or until the base is dry and lightly golden. Allow the blind-baked crust to cool completely on a wire rack before adding any filling. This prevents condensation and keeps the crust crisp.
Expert Tips & Frequently Asked Questions for Chocolate Pastry
Achieving the perfect chocolate shortcrust pastry is simple with these essential tips and answers to common questions:
- Dough Consistency is Key: Don’t be alarmed if your shortcrust pastry seems very crumbly at first – it’s meant to be! The dough is naturally dry and will gradually come together into a smooth ball as you gently work it. Resist the temptation to add more liquid or butter, as this will alter the texture and make it tough.
- Chill for Success: Chilling the dough is perhaps the most critical step. It allows the butter to re-solidify, making the dough much easier to handle and roll out without tearing or sticking. It also helps prevent the pastry from shrinking during baking, ensuring your tart or pie crust holds its shape beautifully. Always chill for at least 1 hour, or even longer if time permits.
- Mindful Rolling Out: When rolling out, a lightly floured work surface is crucial. To prevent white flour marks on your dark chocolate pastry, try mixing a small amount of cocoa powder with your flour for dusting. This maintains the rich color of the dough while preventing sticking. Roll evenly from the center outwards, rotating the dough frequently.
- Tarts and Pies: Depending on your chosen filling, you can either bake the tart or pie directly with its filling, or blind bake the crust first. Blind baking is particularly important for liquid fillings like custard or jam, or for fillings that do not require baking. Refer to our blind baking instructions for a perfectly crisp base.
- Chocolate Cookies: To make delicious chocolate shortcrust cookies, simply roll out the dough to your desired thickness (typically ¼ inch or ½ cm) and cut out shapes with your favorite cookie cutters. Place them on a baking tray lined with parchment paper and bake in a preheated oven at 350°F (180°C) for 10-12 minutes, or until the edges are firm.
- Gentle Kneading for Tender Pastry: Knead the pastry dough for the shortest time possible, just enough to bring it together into a smooth ball. Over-kneading develops gluten, which can lead to a tough, less crumbly pastry. Shortcrust pastry thrives on minimal handling.
- Cracking Dough? Don’t Panic! It’s perfectly normal for shortcrust pastry to crack or split slightly as you roll it out or press it into a tart pan. Don’t worry! Simply use your fingers to gently press the cracks back together. Once baked, these repairs will be virtually unnoticeable.
- Storage and Freezing: Unbaked chocolate shortcrust pastry will keep well in the fridge, tightly wrapped in plastic wrap, for 3-4 days. For longer storage, you can freeze the dough. Wrap it tightly in plastic wrap and then in foil, or store it in an airtight container. Defrost completely in the refrigerator before using, which typically takes several hours or overnight.
- Serving Temperature: While delicious warm, chocolate shortcrust pastry often develops its best texture and flavor when allowed to cool slightly, or even completely, depending on the filling. This allows the butter to set and the crumb to become perfectly tender.
Creative Ways to Use Your Chocolate Shortcrust Pastry
This versatile chocolate pastry is your canvas for a wide array of sweet treats. Here are some inspiring ideas to get you started:
- Decadent Chocolate Crostata: Replace the classic pastry in this rustic Crostata recipe with your homemade chocolate version. Fill it with your favorite fruit jam – raspberry, cherry, or even orange marmalade would provide a delightful contrast to the rich chocolate.
- Elevated Italian Fruit Tart: For an unforgettable dessert, use this chocolate pastry to make our Italian fruit tart. Elevate it further by replacing the traditional vanilla pastry cream with our luscious chocolate pastry cream and generously topping it with fresh, vibrant strawberries or mixed berries.
- Rich Chocolate Tart with Hazelnuts: Create a truly impressive dessert by making our Rich Chocolate Tart with Hazelnuts. The chocolate shortcrust base pairs exquisitely with the crunchy texture and nutty flavor of hazelnuts.
- Custom Chocolate Cookies: Roll out the pastry to your desired thickness and unleash your creativity with cookie cutters of any shape. Bake them at 350°F (180°C) for approximately 10-12 minutes for quick and satisfying chocolate cookies. Dust with powdered sugar or drizzle with white chocolate for extra flair.
- Mini Chocolate Tartlets: Use mini tart pans to create individual chocolate tartlets. These are perfect for parties or as elegant single-serving desserts, allowing you to experiment with various fillings from fruit curd to ganache.
- Chocolate Hand Pies: Cut the rolled pastry into circles, place a dollop of fruit filling or chocolate ganache on one half, fold it over, and crimp the edges. These portable treats are delightful for picnics or lunchboxes.
Step-by-Step Photos Provided Above
Our recipes are designed with comprehensive step-by-step photos, along with helpful tips and tricks, to ensure your first attempt is a resounding success.
Chocolate Shortcrust Pastry (Pasta Frolla al Cacao)
By Emily
10 mins
30 mins
1 hr
1 hr 40 mins
10 servings
Ingredients
- 2 cups 00 flour or all-purpose flour, (250g) *spooned and levelled
- 3 tbsp cocoa powder, (30g)
- ½ cup caster sugar, golden or white (80g)
- 8.5 tbsp cold unsalted butter, cubed (120g)
- 1 large egg
- ¼ tsp baking powder
- 1 pinch of salt
Instructions
- Sift the flour and cocoa powder into a large bowl. Add the rest of the dry ingredients (sugar, baking powder, salt) and stir to combine thoroughly.
- Add the cold, cubed butter and the large egg to the dry mixture. Use a spatula or pastry scraper to cut the butter into the flour until rough crumbs form.
- Gently bring the mixture together with your hands to form a dough. Knead the pastry for a very short time, just until all the flour is fully absorbed and it forms a smooth ball. Do not over-knead. Wrap the dough in plastic wrap and place it in the fridge to chill for at least 1 hour.
- After the dough is chilled, remove it from the fridge. Lightly flour your work surface (using a mix of flour and a little cocoa powder is recommended) and roll out the dough using a rolling pin until it is approximately ¼ inch (½ cm) thick.
- At this point, the pastry is ready to be used for cookies or for lining a tart or pie pan.
- To make a tart or pie crust, carefully lay the rolled pastry over your chosen pan. Gently tuck in the sides and press it to fit evenly without stretching. To trim the edges, roll your rolling pin over the tart case, or use a sharp knife.
- Prick the base of the pastry all over with a fork, then place the lined pan back in the fridge for an additional 30 minutes to chill.
- Fill the chilled crust with your desired filling. If your recipe requires a pre-baked crust for wet or no-bake fillings, follow the blind baking instructions below.
How to Blind Bake
- To blind bake the pastry, first line your tart or pie pan with the pastry as described above. Then, line the pastry with baking parchment paper, ensuring it covers the base and extends up the sides.
- Fill the parchment-lined pastry with baking beads, dried beans, or uncooked rice to weigh it down. Bake in a preheated oven at 350°F (180°C) for 30 minutes.
- Remove the pan from the oven. Carefully remove the baking parchment and the baking beads. If needed, return the pastry to the oven for another 5-10 minutes until the base is dry and lightly cooked. Allow the crust to cool completely on a wire rack before filling.
Video Tutorial
Watch our detailed video guide to see each step of making Chocolate Shortcrust Pastry come to life:
Video: How to make Chocolate Shortcrust Pastry, perfect for making tarts, pies, cookies and more!
Additional Notes & Baking Wisdom
- Dough Consistency Matters: Shortcrust pastry is inherently crumbly, and that’s precisely its charm. The dough will feel quite dry initially, but as you work it gently with your hands, it will bind into a smooth ball. Avoid the urge to add extra liquid or butter, as this can lead to a tough, dense pastry.
- The Importance of Chilling: Never skip the chilling step! Allowing the pastry to rest in the fridge for at least 1 hour is vital. This time allows the gluten to relax and the butter to firm up, which prevents shrinkage during baking and makes the dough significantly easier to handle and roll without sticking.
- Rolling Technique: For a clean rollout, lightly dust your work surface and rolling pin with flour. For chocolate pastry, consider mixing a small amount of cocoa powder with your flour to avoid leaving white streaks on the dark dough. Roll with even pressure, turning the dough periodically to ensure uniform thickness.
- Versatile for Tarts and Pies: This pastry is perfect for both baked and unbaked fillings. For custard, jam, or other no-bake fillings, blind bake the crust first to ensure it’s fully cooked and crisp (refer to the blind baking instructions). For fillings that bake with the crust, simply fill and bake as directed by your recipe.
- Quick Chocolate Cookies: To make delightful chocolate shortcrust cookies, roll the dough to your preferred thickness, then cut out shapes using cookie cutters. Bake on a lined baking tray at 350°F (180°C) for 10-12 minutes, or until just set. They are wonderfully tender and full of chocolate flavor.
- Optimal Storage and Freezing: Unbaked chocolate shortcrust pastry keeps beautifully in the fridge for 3-4 days when tightly wrapped in plastic. For longer preservation, it freezes exceptionally well. Wrap the dough securely in plastic wrap, then an additional layer of aluminum foil, or store it in an airtight freezer bag. Thaw completely in the refrigerator before using for best results.
Helpful Information for All Recipes on Our Blog
- We consistently use extra virgin olive oil in our recipes unless specifically stated otherwise.
- For canned or jarred tomatoes, we recommend Cirio or Mutti brands for their superior flavor and quality, ensuring the best outcome in your dishes.
- Unless otherwise specified, assume all vegetables are of medium size for accurate recipe outcomes.
- All our recipes are meticulously tested and developed using a fan (convection) oven. Adjustments may be necessary for conventional ovens.
- For detailed information on how nutritional values are calculated, please refer to our privacy policy.
- Discover our essential Italian Pantry Staples to stock your kitchen with key ingredients.
- Explore our recommended Essential Kitchen Tools for Italian Cooking for a smooth cooking experience.
Nutrition Information (Approximate)
Carbohydrates: 29g |
Protein: 4g |
Fat: 11g |
Saturated Fat: 7g |
Polyunsaturated Fat: 1g |
Monounsaturated Fat: 3g |
Trans Fat: 1g |
Cholesterol: 42mg |
Sodium: 220mg |
Potassium: 82mg |
Fiber: 2g |
Sugar: 8g |
Vitamin A: 324IU |
Calcium: 19mg |
Iron: 2mg
Nutrition information is automatically calculated and should be used as an approximation only.
We hope you enjoy mastering this delightful Chocolate Shortcrust Pastry recipe! Your feedback means the world to us. If you’ve tried this recipe or any other on our blog, please don’t hesitate to rate it and share your experience in the comments section below. We love hearing from our community! You can also FOLLOW US on FACEBOOK, INSTAGRAM, and PINTEREST, or subscribe to our NEWSLETTER for a weekly dose of delicious food inspiration and new recipes straight to your inbox.