
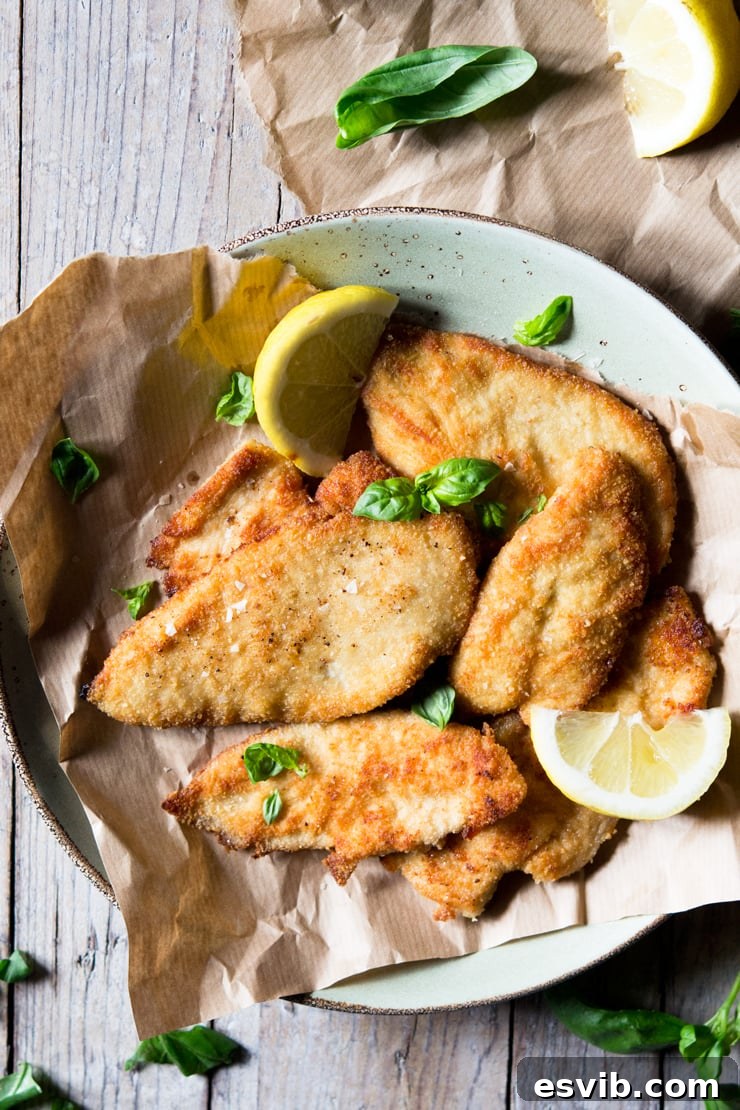
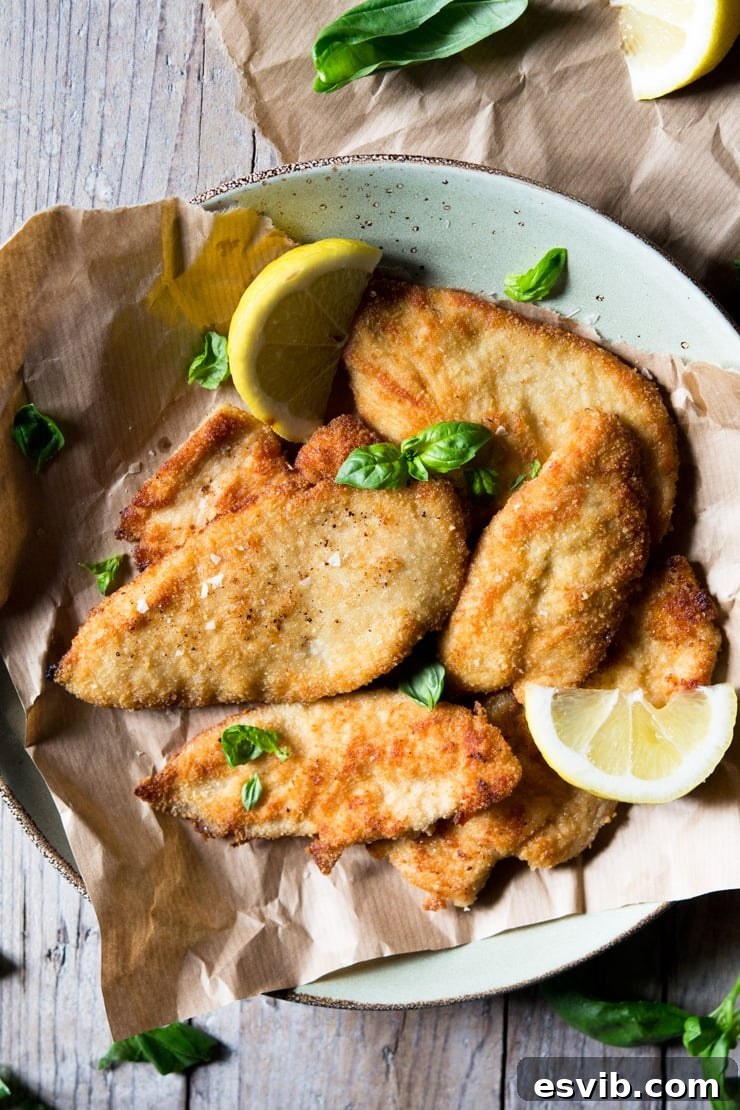
Imagine a weeknight dinner that’s both incredibly quick to prepare and unbelievably delicious. We’re talking about super crispy breaded chicken cutlets, pan-fried to golden perfection in a zesty lemon butter sauce. But here’s the best part: these mouth-watering cutlets are made without a single egg or a speck of flour, making them astonishingly simple to whip up. This method significantly cuts down on prep time and, perhaps even better, leaves you with less washing up to do. Hooray for easier recipes!
Because we all love recipes made easier and tastier…
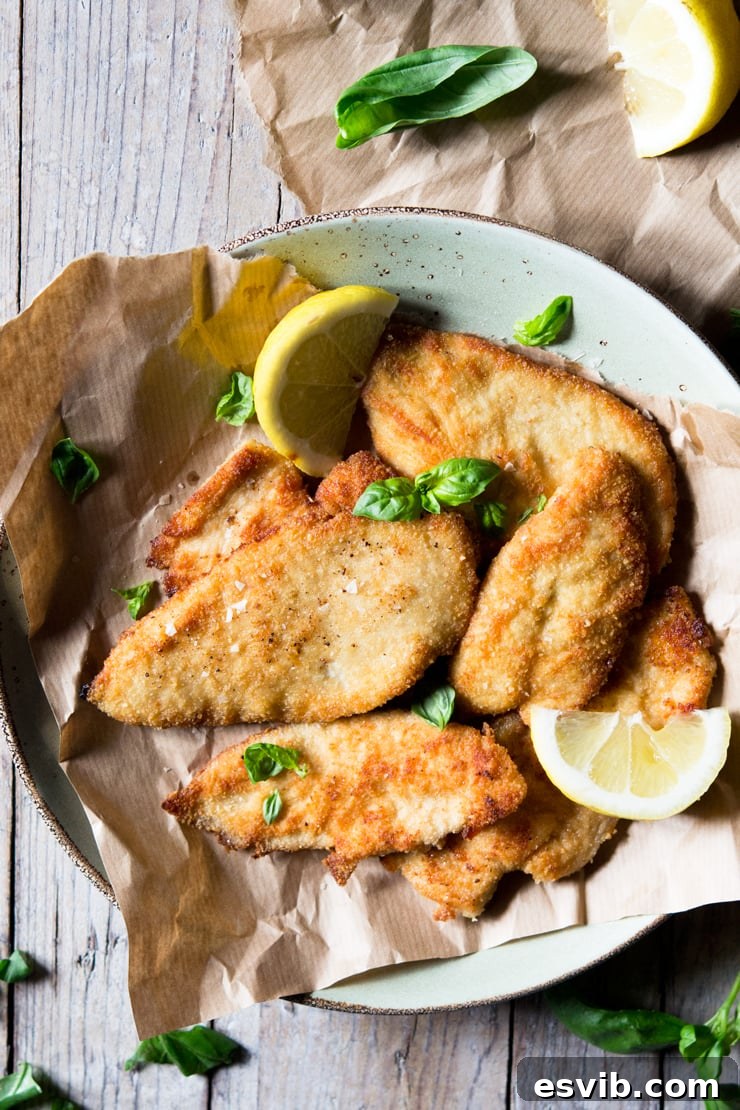
Why Go “No Egg, No Flour” for Your Breaded Chicken?
Breaded chicken cutlets are a universal crowd-pleaser, a guaranteed hit at any dinner table. While the classic method of breading with flour, egg, and breadcrumbs (like our Italian Chicken Cutlets with Pesto and Spinach Recipe, which is undeniably delicious) yields fantastic results, it often comes with a multi-station mess and a longer preparation time. This alternative method, however, is a true game-changer. It’s not just quicker and easier; it also produces incredibly light, wonderfully crispy, and exquisitely delicious chicken cutlets that will surprise even traditionalists.
This ingenious technique was passed down to me by my mother-in-law, a true master of traditional Italian cooking. She revealed this old Italian secret for breading chicken, and let me tell you, it’s so remarkably simple, you’ll wonder why you didn’t discover it sooner. It strips away the unnecessary steps without compromising on that coveted crunch and juicy interior. It’s a testament to how sometimes, the simplest methods are indeed the best.
Minimal Ingredients, Maximum Flavor: What You’ll Need
One of the most appealing aspects of this recipe is its sheer simplicity when it comes to ingredients. You truly only need two primary components to create these fantastic breaded chicken cutlets. Yesss, just two main ingredients, plus a few staples you likely already have in your pantry. What are they?
- High-Quality Breadcrumbs: The star of our coating! We recommend using fine breadcrumbs, with Panko being an excellent choice for an extra crispy texture. The quality of your breadcrumbs will significantly impact the final crunch.
- Fresh Chicken Breasts: Boneless, skinless chicken breasts are ideal for creating thin, even cutlets. Look for fresh, good-quality chicken for the best flavor and texture.
Whaaat, no secret ingredient? No fancy concoctions? That’s right! There’s nothing elaborate going on here. We’re simply streamlining the process by strategically omitting ingredients that, in this particular method, prove to be unnecessary. You’ll also need olive oil for frying, a knob of butter, a squeeze of fresh lemon juice, and salt and pepper to season. It’s a minimalist approach that delivers gourmet results, proving that delicious food doesn’t always require a long list of obscure items.
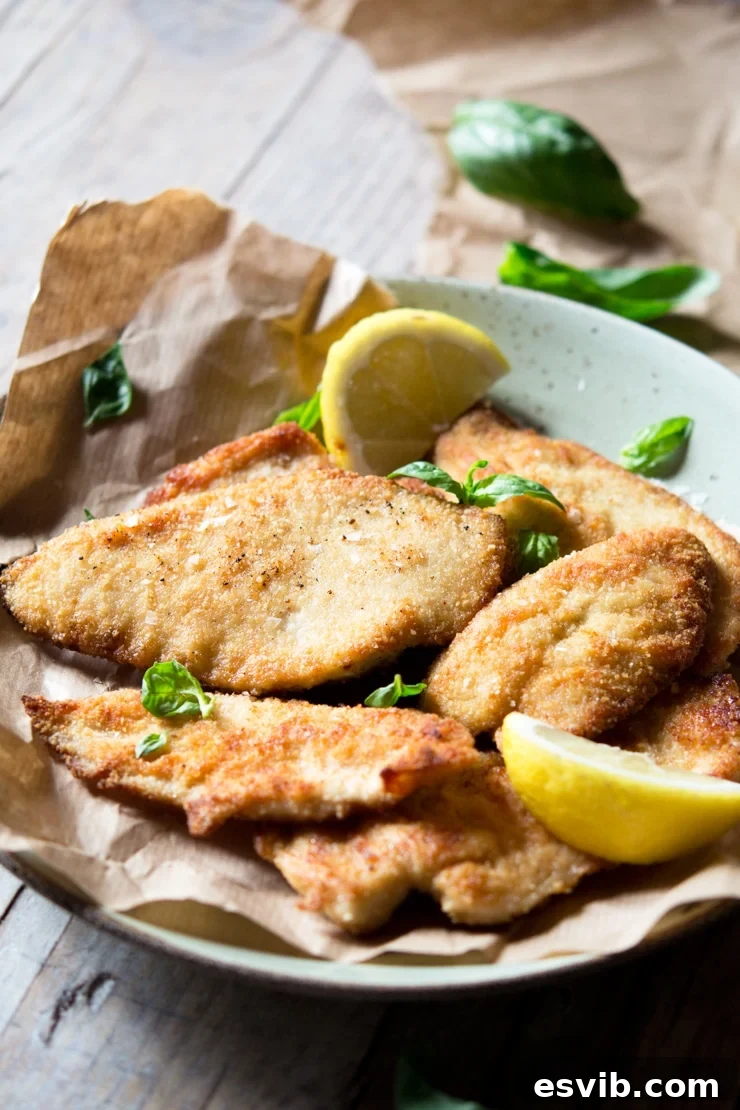
The Simple Secret: How Breadcrumbs Adhere Without Egg or Flour
This is the question everyone asks, and it was certainly my first thought when I learned this method: “So how do the breadcrumbs stick to the chicken without any flour or egg?” The answer is remarkably simple and effective: they actually stick incredibly well! The key lies in the inherent moisture and slight tackiness of the chicken itself, especially after it has been pounded thin. When the chicken breast is flattened, its surface becomes slightly adhesive, providing the perfect natural grip for the breadcrumbs.
After you have expertly pounded out your chicken breasts to form thin, even cutlets, the process is straightforward. Simply press each side of the chicken firmly into the breadcrumbs, applying gentle but consistent pressure about 2-3 times. This action ensures that the breadcrumbs adhere securely to the chicken’s surface. The result is a much lighter and finer coating compared to the traditional egg and flour dredge. This lighter breading is precisely what contributes to an exquisitely crispy exterior, while the inside remains wonderfully juicy and tender. Best of all, you won’t experience any of those frustrating floppy, soggy crumbs falling off the chicken during frying. It’s a clean, efficient, and highly effective way to achieve perfectly breaded chicken every time.
Step-by-Step Guide: Crafting Your Perfect Crispy Chicken Cutlets
Let’s walk through the simple steps to create these incredibly tasty and effortlessly crispy breaded chicken cutlets. With just a few actions, you’ll have a gourmet-quality meal on your table in no time.
1. Preparing the Chicken Breasts for Even Cooking
The foundation of a great chicken cutlet is an evenly thin piece of chicken. Your first step is to prepare your chicken breasts by pounding them thin. If you’re looking for ultimate convenience, some supermarkets offer pre-cut chicken cutlets, which you can certainly use if available. However, pounding them yourself ensures perfect thickness and tenderness.
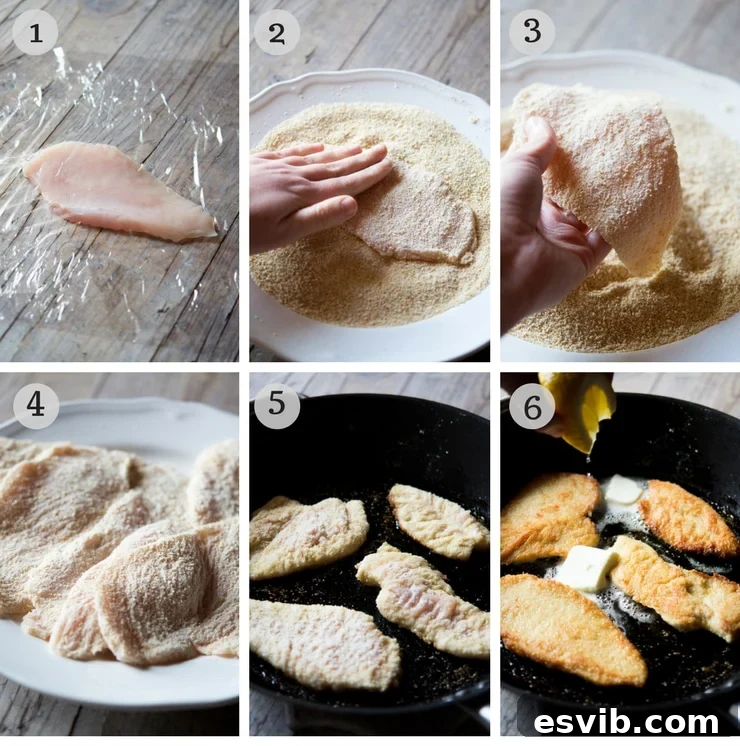
To bash the chicken, place one boneless, skinless chicken breast between two pieces of cling film or parchment paper. This prevents tearing and keeps your workspace clean. Using a meat mallet or a rolling pin, beat the chicken evenly until it reaches a uniform thickness of approximately 1/4 inch. This crucial step ensures that the chicken cooks quickly and evenly, remaining tender and juicy throughout. (Refer to photo 1 for visual guidance).
2. Mastering the No-Egg, No-Flour Breading
Now for the breading, the magic of this recipe! Take a large, shallow plate and add your breadcrumbs. This is the perfect opportunity to infuse flavor into your coating. Season the breadcrumbs generously with a good pinch of salt and freshly ground black pepper. You can also add dried herbs like oregano or a touch of garlic powder for extra zest.
Next, take one of your flattened chicken cutlets and place it onto the seasoned breadcrumbs. Press down firmly, ensuring the breadcrumbs adhere to the chicken. Flip the cutlet over and repeat the pressing motion on the other side. Repeat this firm pressing 2-3 times on each side until the cutlet is completely and evenly coated with a beautiful layer of breadcrumbs. The natural moisture of the pounded chicken will act as the perfect binder. Repeat this process for all your chicken cutlets (refer to photos 2 & 3 for detailed visuals).
3. Frying to Golden Perfection with Lemon Butter Sauce
With your chicken beautifully breaded, it’s time to fry! Heat a good glug of olive oil in a large frying pan or skillet over medium-high heat. You want the oil to be hot enough to sizzle when you add the chicken, but not smoking. A good test is to flick a tiny bit of breadcrumb into the pan; if it sizzles immediately, the oil is ready. Ensure you don’t overcrowd the pan, as this can lower the oil temperature and prevent the chicken from crisping. Fry the cutlets in batches if necessary.
Carefully place the breaded chicken cutlets into the hot oil. Fry for about 3-4 minutes per side, or until the first side is wonderfully crispy and a beautiful golden brown. Once achieved, carefully turn them over. Immediately after flipping, squeeze fresh lemon juice directly over the cutlets in the pan, and then add a knob of butter. The lemon juice will deglaze the pan slightly, and the butter will melt, creating a fragrant and delicious lemon butter sauce that will coat your cutlets as they finish cooking (photos 3-6 demonstrate this transformation).
Continue to fry the cutlets on the second side until they are also crispy, golden, and cooked through. Chicken should reach an internal temperature of 165°F (74°C). Once cooked, remove the cutlets from the pan and place them on kitchen paper towels or a draining rack for a couple of seconds. This brief rest allows any excess oil to drain off, ensuring maximum crispiness. Serve hot, perhaps with a final sprinkle of sea salt, and enjoy with your favorite sides. You’ll find some delicious recommendations below!
Top Tips for Flawless Chicken Cutlets & Your FAQs Answered
- Pat Chicken Dry: Before pounding and breading, ensure your chicken breasts are thoroughly patted dry with paper towels. Excess moisture can prevent breadcrumbs from sticking effectively and lead to less crispy results.
- Season Generously: Don’t just season the breadcrumbs; a light sprinkle of salt and pepper directly on the chicken before breading can also enhance flavor.
- Don’t Overcrowd the Pan: Frying in batches is crucial. Overcrowding lowers the oil temperature, leading to steamed rather than crispy chicken. Give each cutlet space to sizzle!
- Use Fresh Lemon Juice: The fresh squeeze of lemon juice at the end is non-negotiable. It adds brightness, cuts through the richness, and creates that irresistible lemon-butter pan sauce.
- Drain on Kitchen Paper: After frying, make sure to drain the hot cutlets on paper towels or a wire rack set over a baking sheet. This allows any excess oil to be absorbed, preserving that desirable crispy texture.
- What to do with leftovers: Leftovers are incredibly versatile! They can be enjoyed cold in salads or sandwiches, or gently reheated. To reheat, place them in a hot oven (around 350°F / 175°C) or in a skillet over medium heat until warmed through and re-crisped. They’re absolutely delicious on a focaccia with grilled veggies and a dollop of fresh pesto!
- Can I prepare these in advance? Yes, you can bread the chicken cutlets in advance. Once coated, place them on a baking sheet lined with parchment paper, cover loosely with cling film, and keep them in the fridge for up to 4-6 hours until you are ready to fry them. This is a great meal prep hack!
- How long do leftovers last? Cooked chicken cutlets will keep well in an airtight container in the fridge for 2-3 days. While they will remain delicious, their crispy texture will naturally soften the longer they are stored.
- Can I freeze these chicken cutlets? Absolutely! Both uncooked (breaded) and cooked cutlets can be frozen.
- **To freeze uncooked:** Lay breaded cutlets on a baking sheet and freeze until solid. Transfer to a freezer-safe bag or container, separating layers with parchment paper. Cook from frozen, adding a few extra minutes to the frying time.
- **To freeze cooked:** Allow cooked cutlets to cool completely. Arrange them in a single layer on a baking tray and freeze until solid. Transfer to a freezer-safe bag or container. To reheat from frozen, pre-heat your oven to 400°F (200°C) and bake for 15-20 minutes, or until piping hot all the way through and crispy.
- What’s the best oil to use for frying? I primarily use high-quality olive oil for frying, and it’s what I highly recommend for its flavor benefits. If you prefer a more neutral oil or a higher smoke point, sunflower oil or grapeseed oil are also excellent options.
- Can I bake or air fry these instead of pan-frying? While this recipe is optimized for pan-frying to achieve that specific crispness and lemon-butter sauce, you can adapt it. For baking, preheat your oven to 400°F (200°C), lightly spray the breaded cutlets with olive oil, and bake for 15-20 minutes, flipping halfway, until golden and cooked through. For air frying, preheat to 375°F (190°C), lightly spray with oil, and air fry for 10-14 minutes, flipping halfway, until golden and crispy. Note that the lemon butter sauce would be added after cooking in these methods.
What to Serve with Crispy Breaded Chicken Cutlets
These versatile and utterly delicious chicken cutlets pair beautifully with a wide array of side dishes, making them perfect for any occasion, from a casual weeknight meal to a more elaborate dinner. Their light, crispy texture and bright lemon flavor make them an excellent canvas for various accompaniments. Here are some of our favorite recommendations:
- Classic Italian Roast Potatoes: Crispy, herby Italian roasted potatoes are a fantastic choice, offering a comforting and satisfying pairing.
- Flavorful Bean Dishes: For a hearty and traditional touch, serve them with Fagioli all’uccelletto (beans in tomato sauce) or a vibrant Summer easy bean salad.
- Peas and Pancetta: The savory and slightly sweet notes of Peas and Pancetta create a delightful contrast.
- Southern Italian Herb Sauce (Salmoriglio): Drizzle with Salmoriglio, a bright and aromatic Southern Italian herb sauce, for an extra burst of freshness.
- Light & Fresh Salads: Complement the richness of the chicken with a fresh Zucchini ribbon salad or a crisp Fennel courgette salad with smoked scamorza and chilli for a refreshing counterpoint.
- Roasted Asparagus: Elevate your meal with elegant Roasted asparagus with gorgonzola, adding a touch of sophistication.
- Creamy White Bean Mash: A velvety White bean mash with rosemary and lemon provides a creamy texture and herbaceous aroma that pairs wonderfully.
This recipe is truly incredibly easy, isn’t it? I’m totally converted to breading my chicken this way all the time now. Who needs extra washing up, anyway? I know I certainly don’t, and I honestly love using this streamlined method. The chicken consistently turns out lighter, crispier, and just as delicious as ever!
If you’ve tried these Crispy Breaded Chicken Cutlets (Flour and Egg-Free) or any other recipe on the blog, please don’t forget to rate the recipe and let me know how you got on in the comments below. I absolutely love hearing from you! You can also FOLLOW ME on FACEBOOK, TWITTER, INSTAGRAM, and PINTEREST to see more delicious food and what culinary adventures I’m embarking on.
Step By Step Photos Above
Most of our recipes come with step by step photos, helpful tips and tricks to make it perfectly first time and even video!
Breaded Chicken Cutlets With Lemon Butter
By Emily
Saved
Pin
Ingredients
- 2 large chicken breasts
- 1 cup (140g) fine breadcrumbs, ,such as panko
- olive oil, for frying
- 1 knob butter
- 1 squeeze of lemon juice
- salt and pepper, to season
Instructions
-
First, you need to bash your chicken breasts out thin or use pre-cut chicken cutlets from the supermarket for ease if they’re available.
-
To bash the chicken, place one breast in between two pieces of cling film and beat it with a meat mallet or rolling pin until thin (around 1/4inch thick)
-
Add the breadcrumbs to a large plate and season with a good pinch of salt and pepper. Press each side of the chicken into the breadcrumbs firmly 2-3 times, repeat with all the cutlets.
-
Heat a good glug of olive oil in a large frying pan and when hot add the chicken cutlets. Once crispy and golden on one side turn them over and squeeze over lemon juice then add a knob of butter.
-
Continue to fry the cutlets until crispy and golden on both sides, remove and sit on kitchen paper or a draining rack for a couple seconds. Sprinkle with an extra pinch of salt.
-
Serve hot with salad or your favourite sides.
Notes
- Drain the chicken on kitchen paper – after frying make sure to drain the cutlets on paper towels so they soak up any excess oil.
- What to do with leftovers – leftovers can be eaten cold or reheated in a hot oven or in a skillet until hot. Use them up in salads or sandwiches, they’re delicious on a focaccia with grilled veggies and pesto!
- Storage – leftovers will keep well in the fridge for 2-3 days or can be frozen.
- Freezing – the cutlets can be reheated from frozen. Lay them on a baking tray, pre-heat the oven to 200C (400F) and bake for 15-20 minutes until piping hot all the way through.
Helpful Info for All Recipes
- I always use extra virgin olive oil in all of my recipes unless stated otherwise.
- When I use canned or jarred tomatoes of any kind, I always use Cirio or Mutti brands for the best results and flavor.
- All vegetables are medium sized unless stated otherwise.
- All recipes are tested and developed using a fan (convection) oven.
- Find out more about how nutrition is calculated.
- Check out our must-have Italian Pantry Staples.
- You can also find all our Essential Kitchen Tools for Italian Cooking.
Nutrition
Carbohydrates: 42g |
Protein: 19g |
Fat: 4g |
Saturated Fat: 1g |
Cholesterol: 36mg |
Sodium: 498mg |
Potassium: 324mg |
Fiber: 2g |
Sugar: 3g |
Vitamin A: 15IU |
Vitamin C: 1.2mg |
Calcium: 111mg |
Iron: 3.1mg
Nutrition information is automatically calculated, so should only be used as an approximation.