
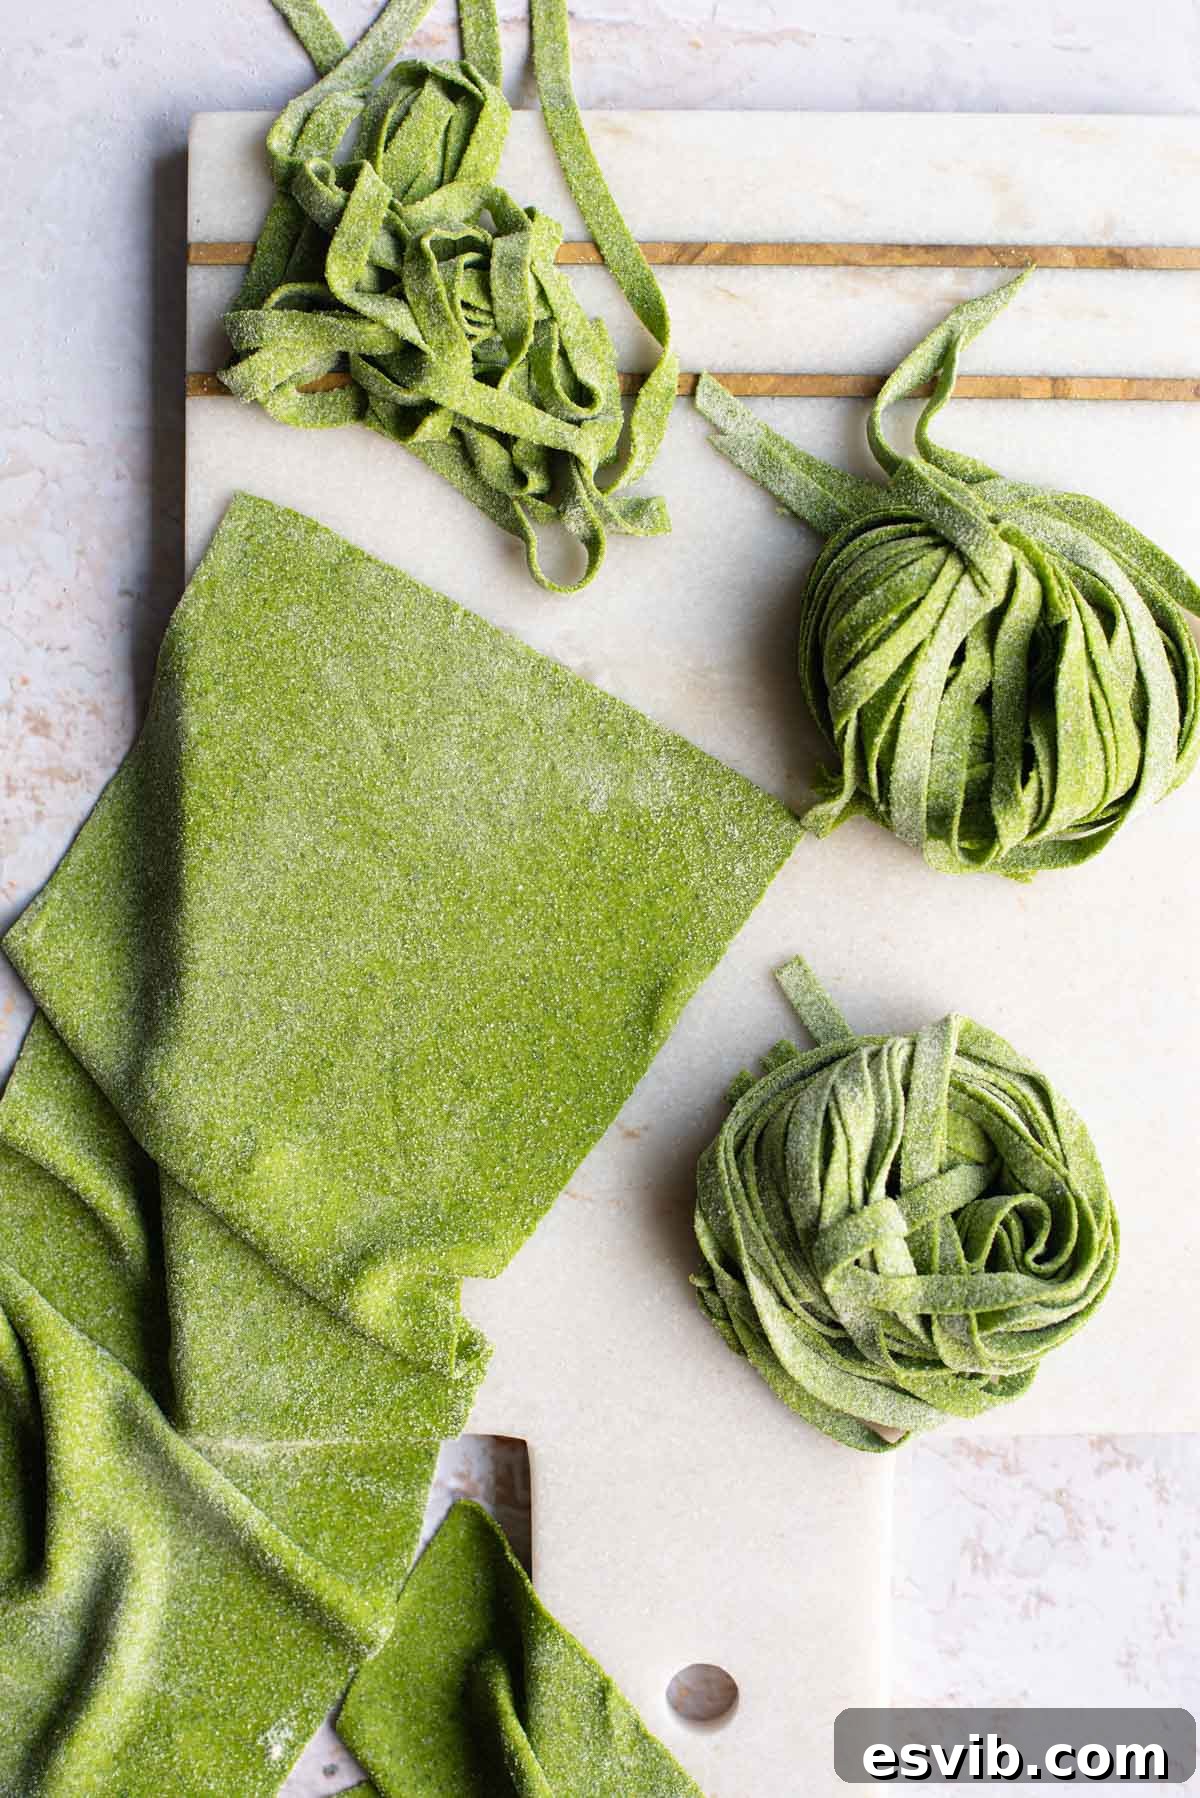
Embark on a culinary adventure with our incredibly simple recipe for **homemade spinach pasta dough**. Crafted with just two key ingredients—flour and fresh spinach—this recipe promises a strikingly vibrant green dough that’s as delightful to look at as it is to eat. Whether you envision delicate tagliatelle, sturdy lasagna sheets, or any other pasta shape your heart desires, this guide will empower you to create delicious, fresh pasta from your own kitchen.
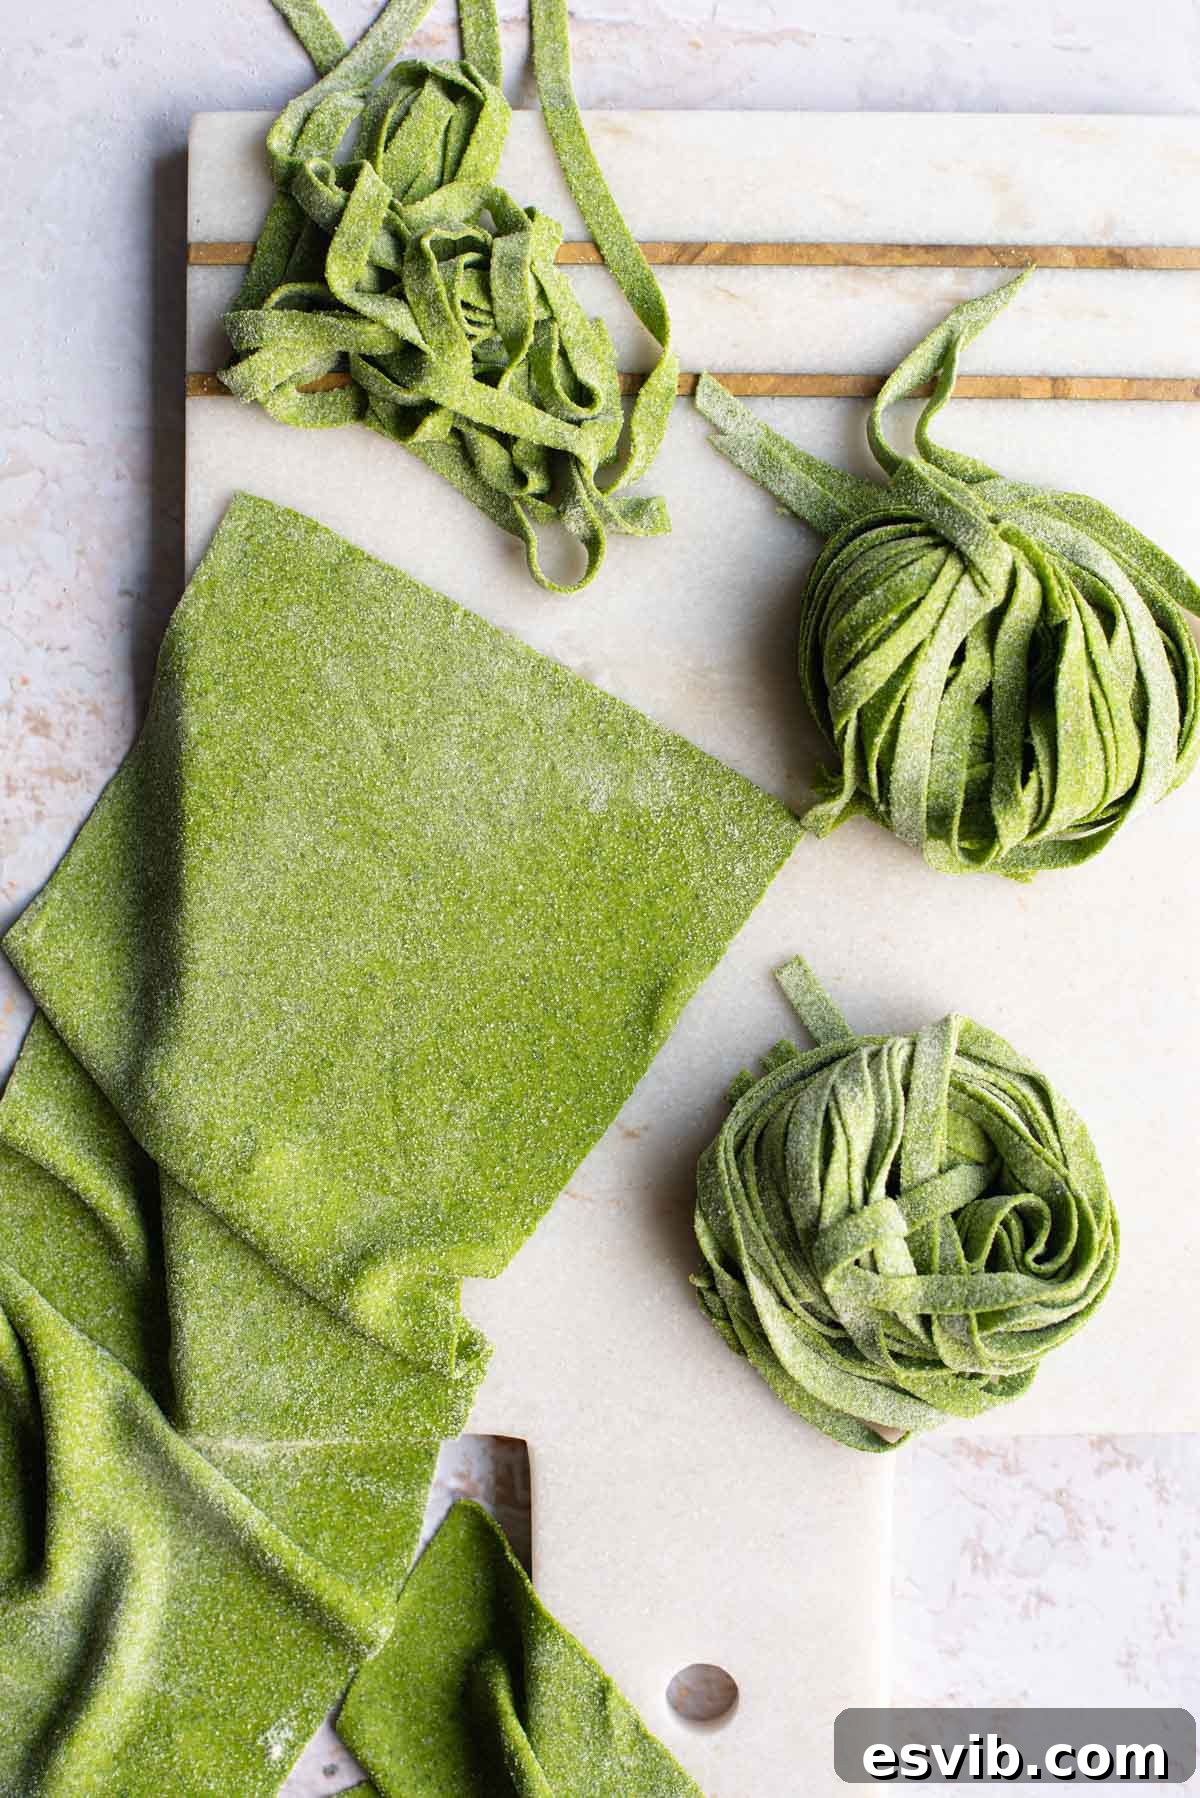
There’s an undeniable magic to homemade pasta. While some shapes might demand a little more patience and effort, the unparalleled taste and texture of freshly made pasta make every moment spent in the kitchen utterly worthwhile. This spinach pasta dough recipe, in particular, stands out for its simplicity and unique characteristics. Thanks to the natural moisture found in spinach, it effortlessly forms a beautiful, bright green dough without the need for eggs, making it an excellent option for those with dietary preferences or allergies.
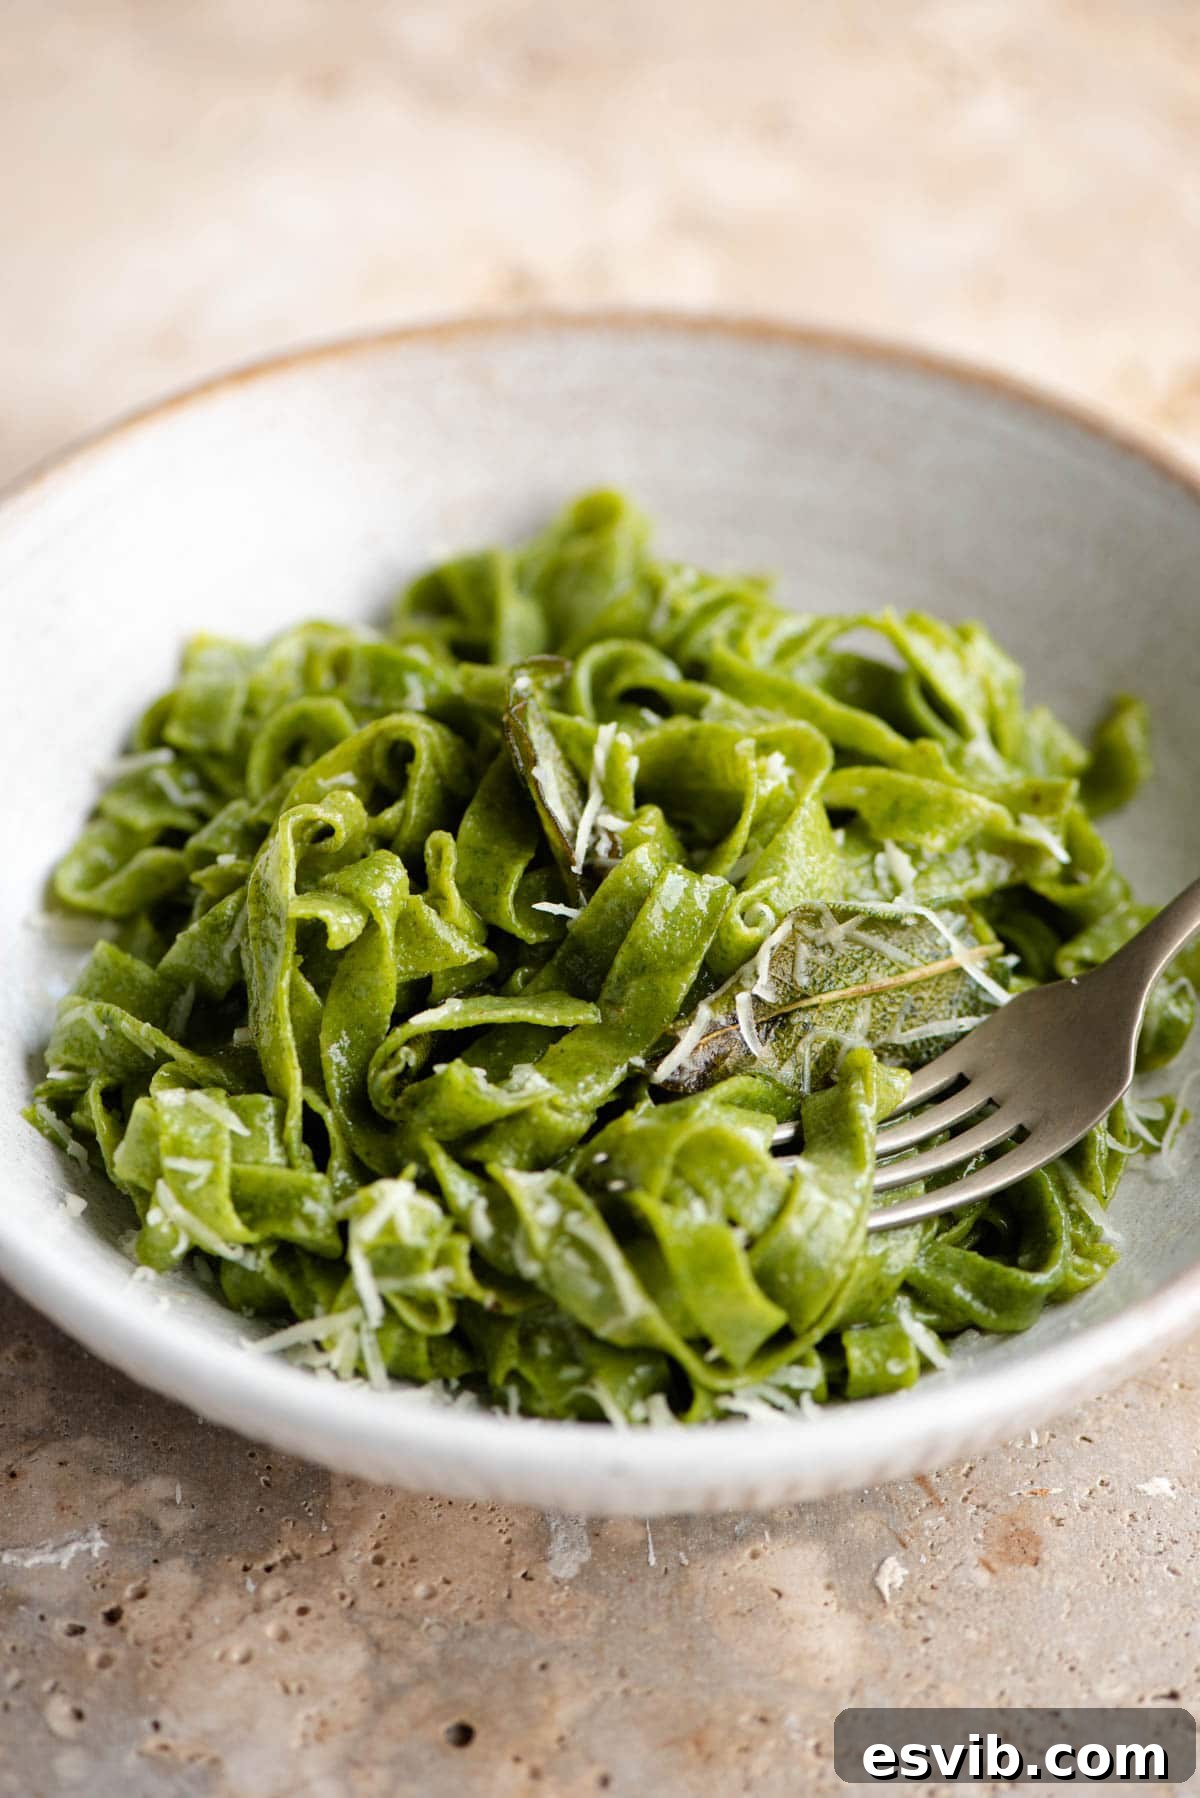
Our method leverages the convenience of a food processor, transforming a few humble ingredients into a versatile dough with minimal fuss. Imagine serving this vibrant pasta as perfect tagliatelle tossed with a rich pesto, or layering it into classic Lasagne alla Bolognese for a truly authentic Italian experience. Don’t stop there—let your creativity flow and mold this dough into any pasta shape you can dream of. Follow our comprehensive tutorial below, packed with expert tips, detailed step-by-step photographs, and even a helpful video, to guide you through every stage of the process. Get ready to impress yourself and your loved ones with exquisite, homemade spinach pasta!
Ingredients You’ll Need for Perfect Spinach Pasta
Crafting this stunning spinach pasta requires only a handful of ingredients, and selecting the right ones is key to achieving the best results. Below, you’ll find a detailed look at what you need, along with our top tips for each component.
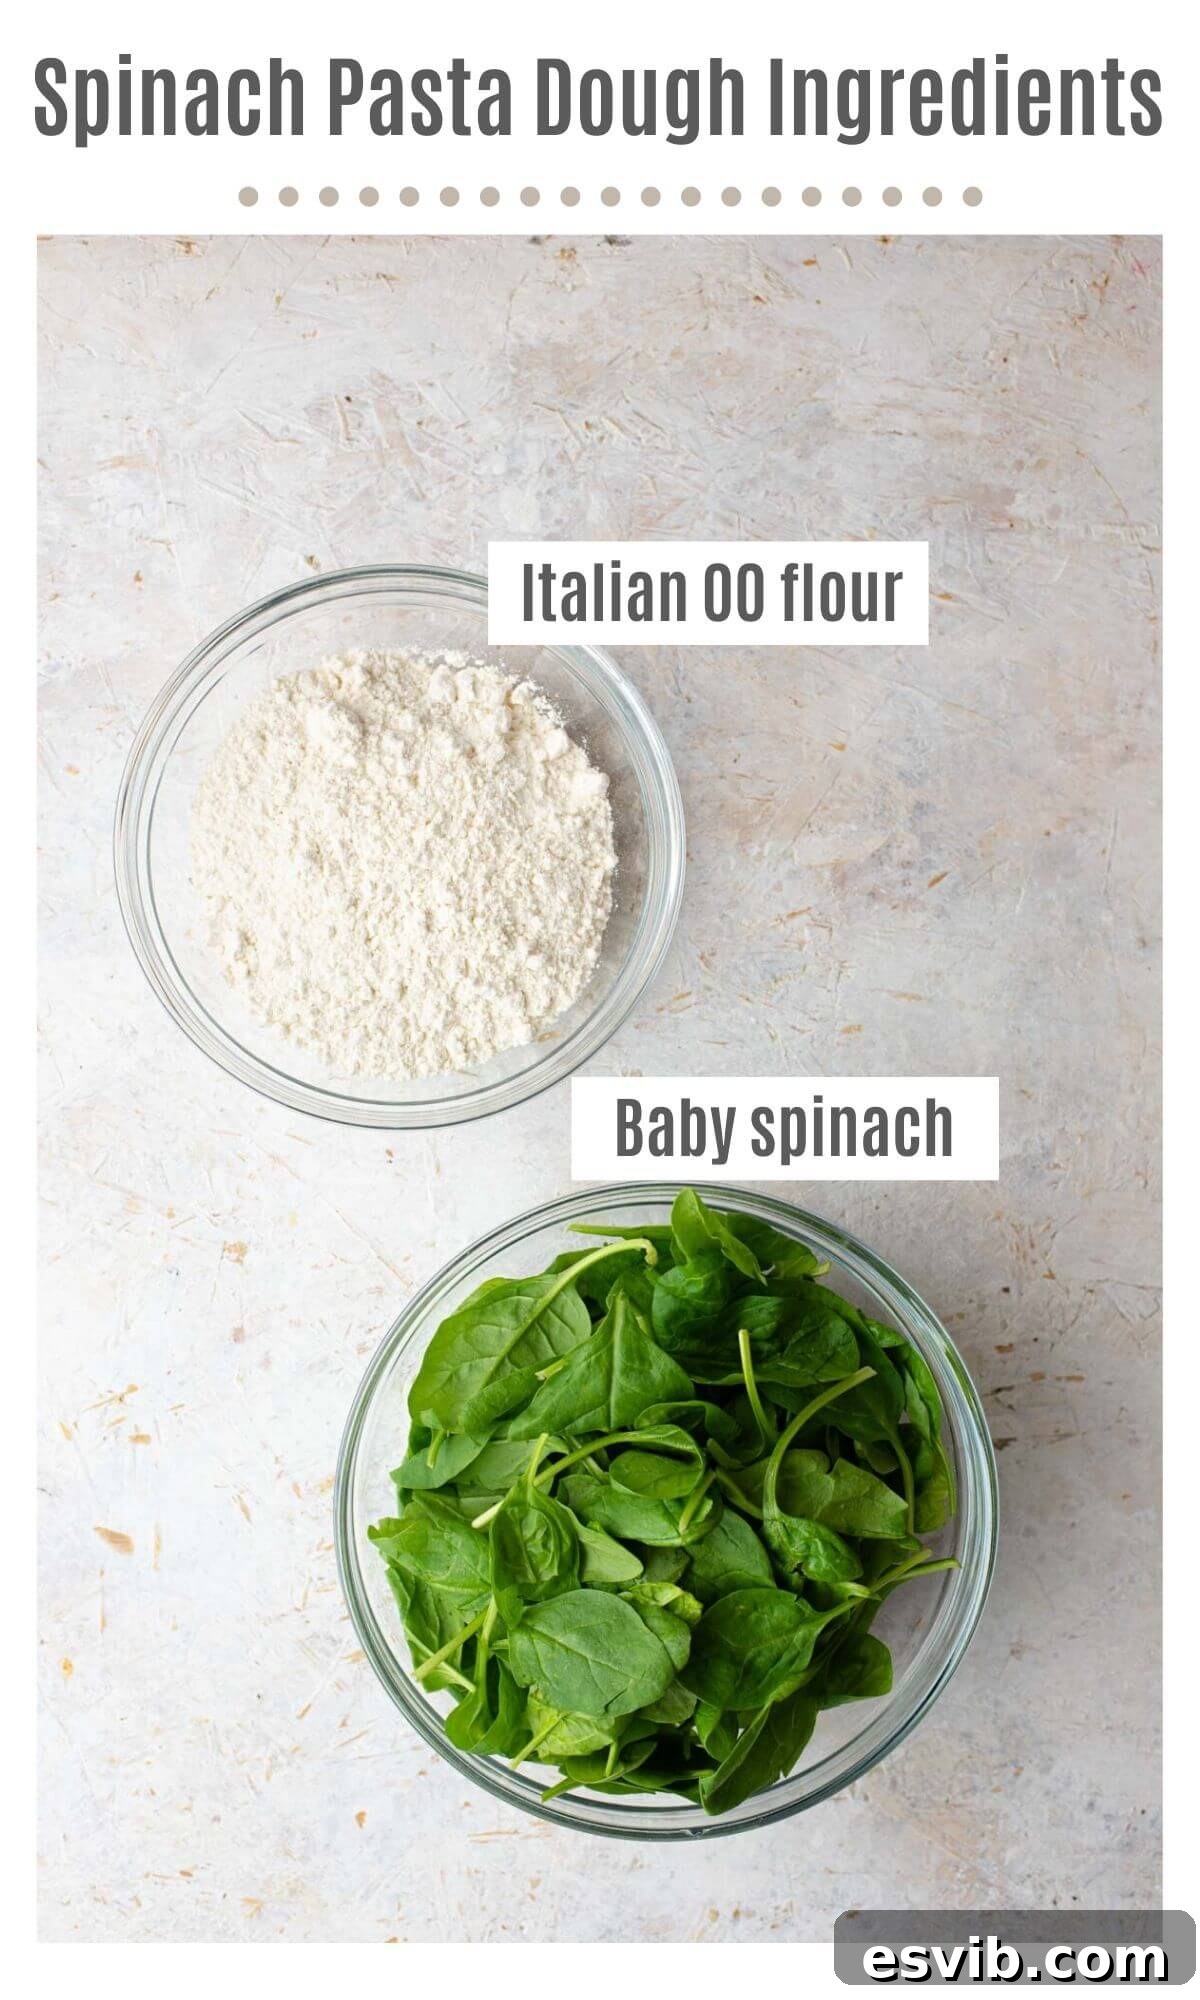
- Fresh Spinach: The star of our recipe, spinach not only imparts a beautiful green hue but also provides the necessary moisture, eliminating the need for eggs. It is crucial that your spinach is thoroughly washed and completely dried. Any residual water can make your dough too soft and sticky, making it difficult to work with. For best results, opt for baby spinach, which has tender leaves and fewer thick stalks. If you’re using larger, more mature spinach leaves, be sure to trim off any fibrous stalks before processing.
- Italian 00 Flour: Just as with traditional egg pasta dough, Italian 00 flour is widely considered the gold standard for homemade pasta. Its finely milled texture and low protein content create a silky, tender pasta that holds its shape beautifully when cooked. While 00 flour is highly recommended for an authentic texture, you can substitute it with good quality all-purpose flour if 00 flour isn’t readily available. However, be aware that using all-purpose flour might slightly alter the final texture, potentially making the pasta a bit chewier.
- Extra Flour or Semola Rimacinata (for dusting): Essential for preventing the dough from sticking to your work surface or pasta machine during the rolling and shaping stages. Semola rimacinata, a re-milled durum wheat flour, is often preferred by professional pasta makers for its fine grain and ability to absorb moisture, creating a perfect non-stick coating. All-purpose flour also works effectively.
Preparing Your Spinach and Flour
Before you begin, ensure your baby spinach is already washed and completely dry. If you’re using larger spinach leaves, take the time to carefully remove any tough, thick stalks. This ensures a smoother dough consistency and prevents any stringy bits in your pasta.
To begin the dough-making process, place your chosen flour into the bowl of a food processor. Then, add the prepared spinach on top. Secure the lid and begin to blitz the flour and spinach mixture. Initially, you’ll observe the spinach breaking down and the mixture becoming powdery. Continue processing for a few minutes; gradually, you’ll notice the ingredients starting to come together, forming small clumps. This transformation is a good sign that the spinach’s moisture is being incorporated into the flour.
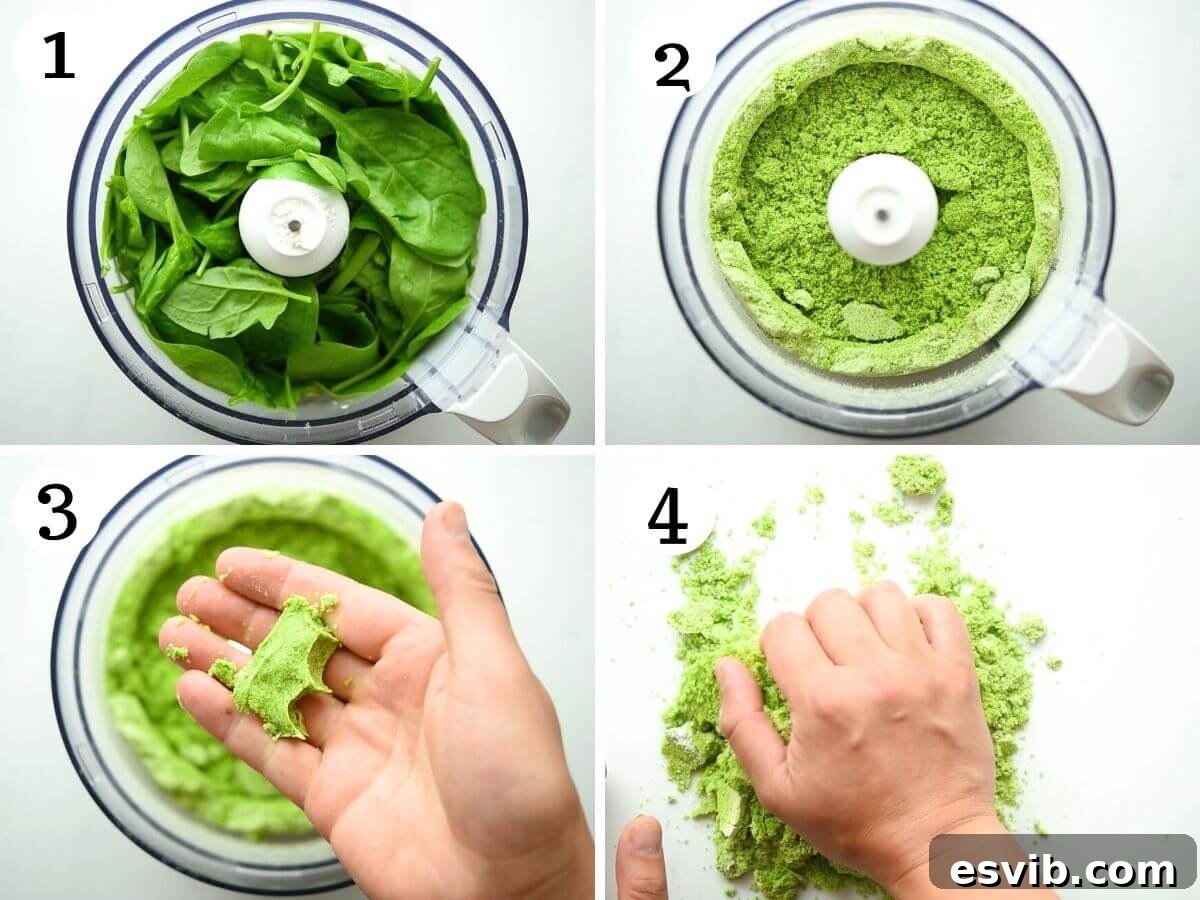
Periodically stop the food processor and check the dough’s consistency. Take a small amount between your fingers; it should feel soft and cohesive, easily sticking together when pressed. If, however, the mixture appears too dry and crumbly, add a tiny bit more spinach (a handful at a time) and blitz again until the desired consistency is achieved. Be cautious not to add too much spinach, as this can make the dough overly wet. A perfect dough will be just moist enough to hold its shape.
Kneading Your Spinach Pasta Dough
Once your dough has come together in the food processor, carefully tip it out onto a clean, lightly floured work surface. Gather the dough into a ball and begin the crucial kneading process. Initially, the dough may feel quite stiff and resistant. This is perfectly normal. Continue to knead vigorously for approximately 10 minutes. The act of kneading develops the gluten in the flour, which is essential for giving the pasta its characteristic chewiness and elasticity. As you knead, you’ll feel the dough transform under your hands, becoming progressively smoother, more pliable, and wonderfully elastic. This change in texture indicates that the gluten has properly developed.
The Importance of Resting Your Dough
After kneading, cover the dough tightly with plastic wrap to prevent it from drying out, and let it rest at room temperature for at least 30 minutes. This resting period is a critical, often overlooked step in pasta making. It allows the gluten, which became tense during kneading, to relax. A relaxed dough is significantly more pliable, easier to roll, and less likely to snap back or tear when passed through the pasta machine. This ensures you achieve thin, uniform pasta sheets effortlessly. You don’t need to refrigerate it unless you plan to use it later the same day or the next.
Rolling and Shaping with a Pasta Machine
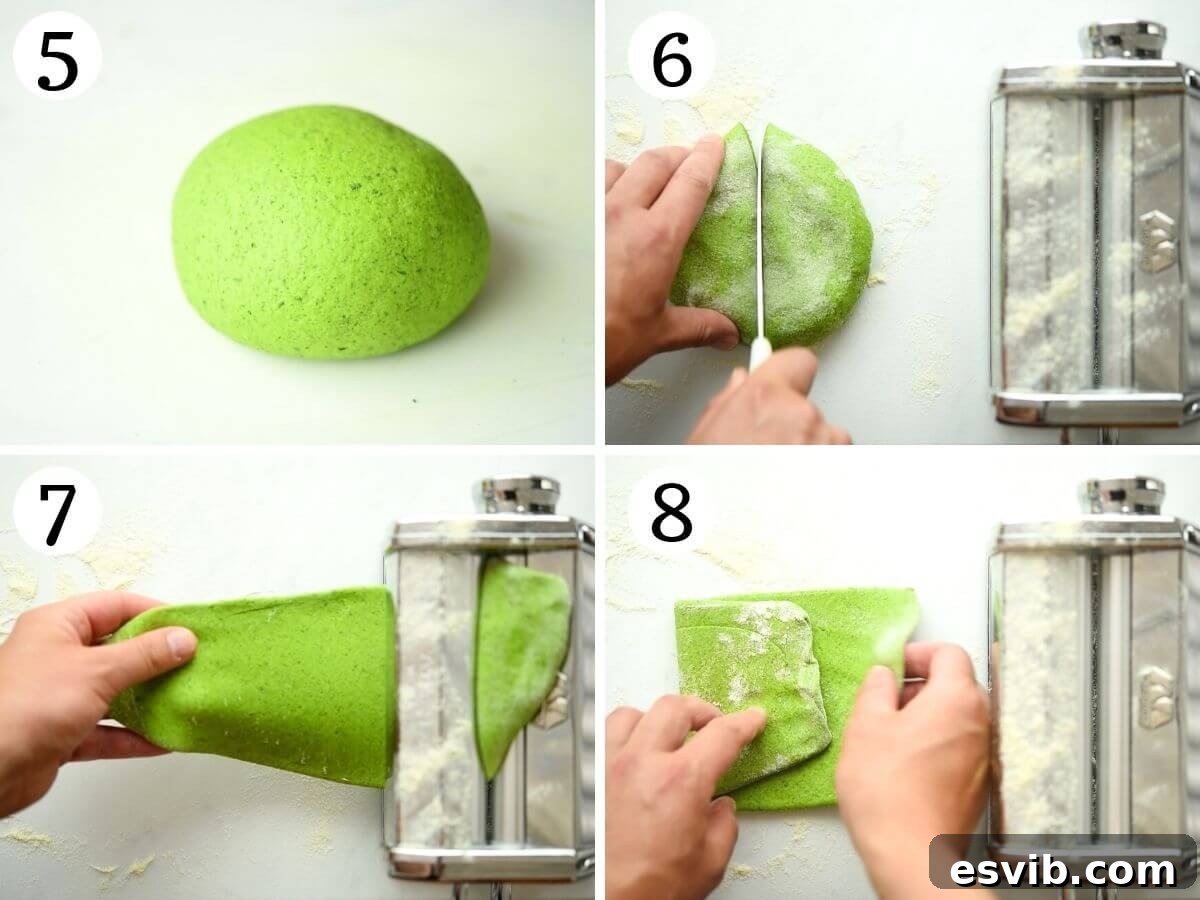
When your dough is well-rested and ready, unwrap it and cut it in half. Take one half and gently flatten it with your hands into an oval or rectangular shape that will easily fit into the widest setting of your pasta machine. Lightly dust the dough with extra flour or semola rimacinata to prevent any sticking.
Pass the flattened dough through the widest setting of your pasta machine once. This initial pass helps to further smooth and even out the dough. Next, take the dough sheet, fold one edge into the middle, and then fold the other edge over that, creating a neat, layered rectangle (similar to folding a letter). Pass this folded dough through the widest setting again. Repeat this folding and rolling process approximately 4 times. This technique, known as lamination, is vital for strengthening the gluten structure, removing any air bubbles, and creating a perfectly smooth, uniform dough sheet that will result in beautifully textured pasta.
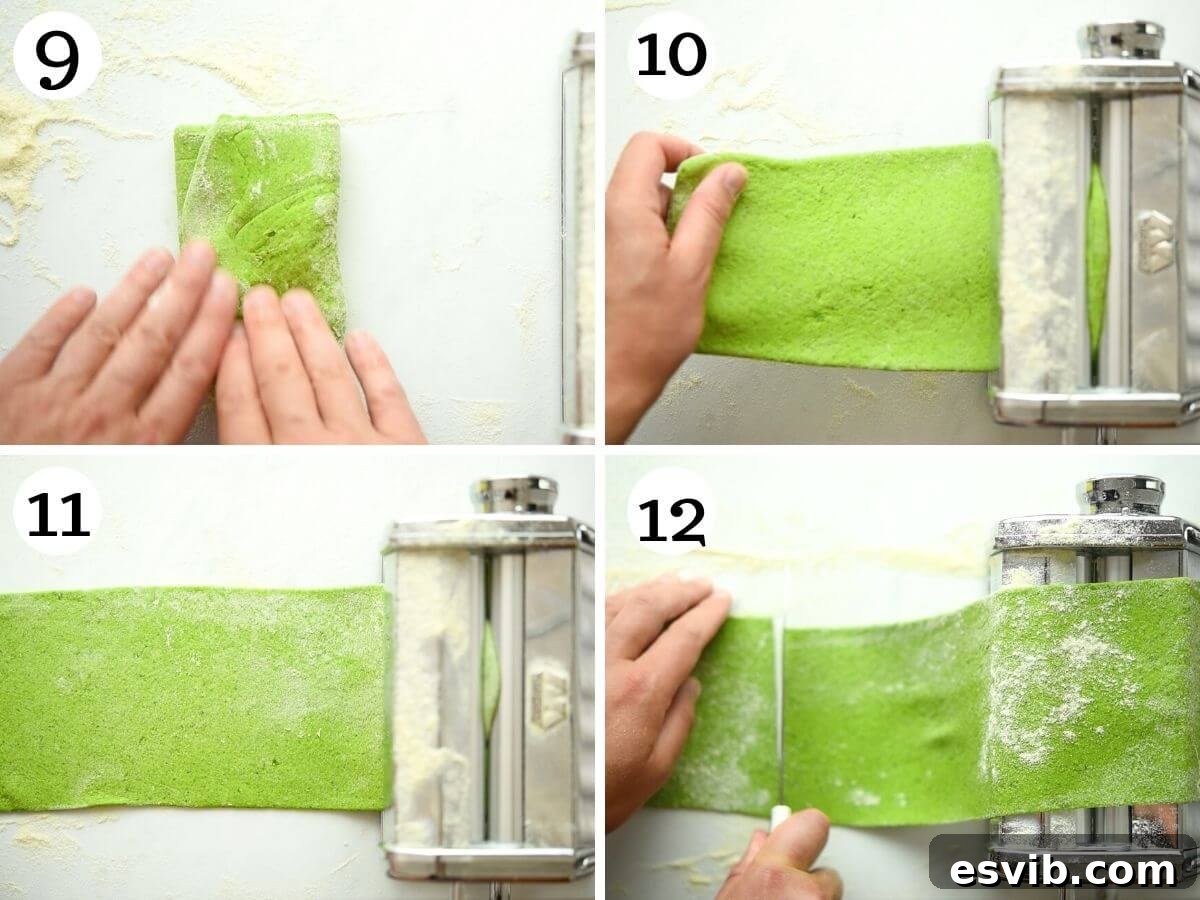
Once you’ve completed the lamination steps, you can begin to thin your pasta dough. Gradually adjust your pasta machine to one higher setting at a time, passing the dough through each setting. Continue this process until you reach your desired thickness for the specific pasta shape you intend to make. For classic tagliatelle, many find that stopping at setting number 5 on a Marcato Atlas machine yields the ideal texture, but feel free to adjust this to your personal preference for thickness.
Cutting Your Pasta into Shapes
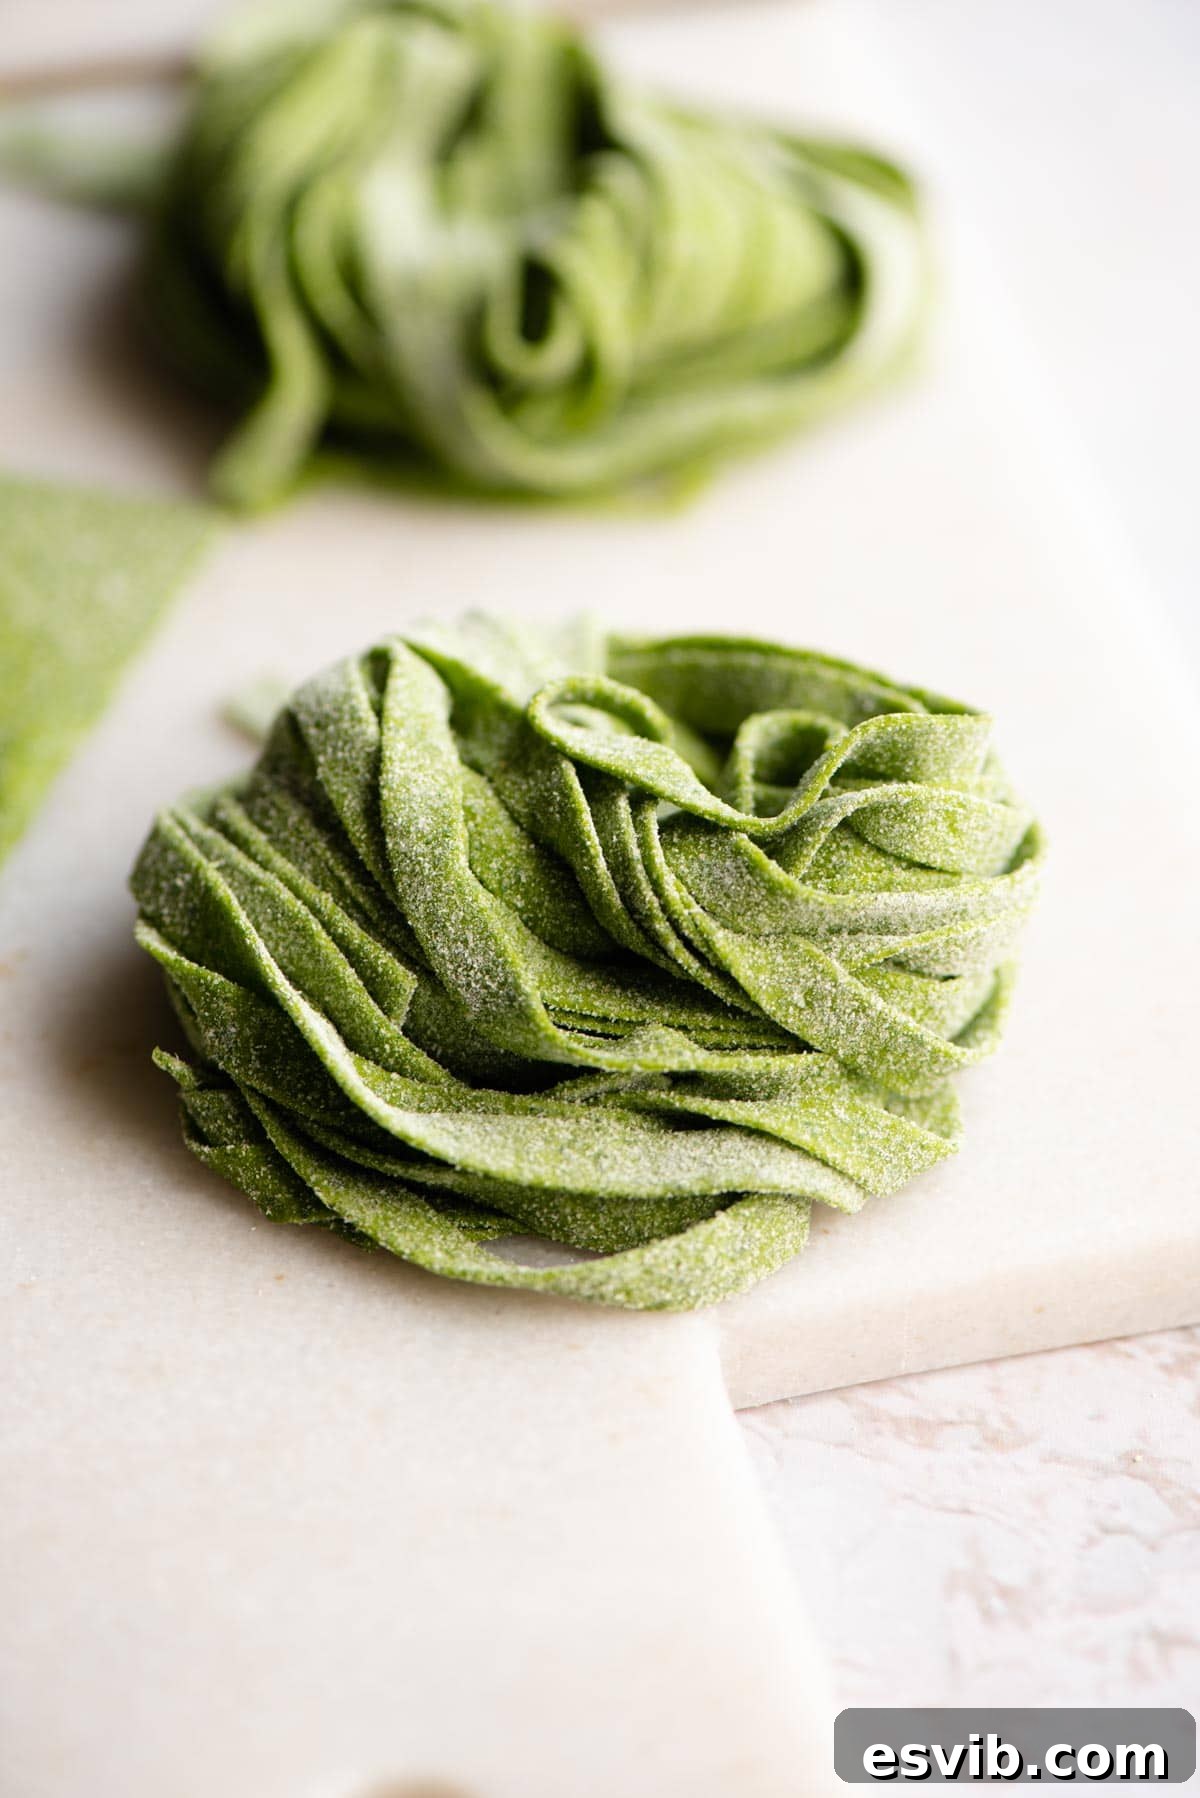
If you’re making tagliatelle, once your pasta sheets are rolled to the desired thickness, cut them in half crosswise for easier handling. Then, carefully feed each sheet through the tagliatelle attachment of your pasta machine. The machine will effortlessly cut the dough into uniform strands of beautiful green tagliatelle.
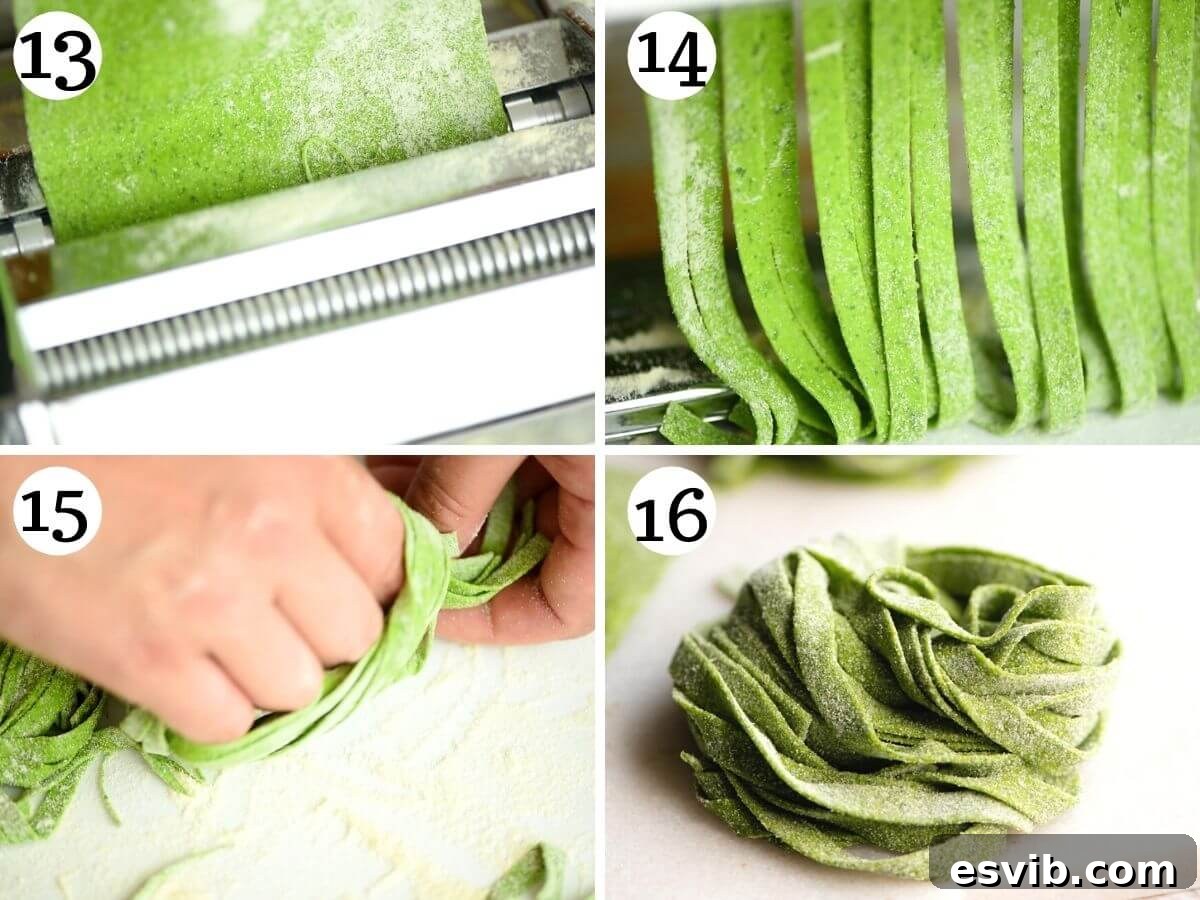
Alternatively, if you don’t have a pasta machine attachment or prefer the artisanal touch, you can easily cut various pasta shapes by hand. Roll your pasta sheet into a loose cylinder or gently fold it lengthwise a few times. Using a sharp knife, carefully cut the rolled or folded dough into strands of your desired width—for tagliatelle, fettuccine, or pappardelle. For wider shapes like pappardelle, you might prefer to lay the sheet flat and cut strips directly.
This versatile spinach pasta dough isn’t just for long strands! It’s also perfect for creating a variety of other shapes. Roll it thicker for robust lasagne sheets, or cut out circles and fill them to make fresh ravioli or tortellini. The possibilities are endless, allowing you to bring a touch of green vibrancy to any pasta dish.
Explore Other Colorful Pasta Varieties
If you’ve enjoyed making this vibrant green spinach pasta, why not experiment with other exciting colors? Discover our Beetroot Pasta Dough recipe for a stunning pink hue, or master the fundamentals with our basic egg pasta dough, perfect for countless traditional dishes.
Top Tips for Success and Frequently Asked Questions
Achieving perfect homemade spinach pasta is simpler than you might think, especially with these helpful tips and answers to common questions:
- Ensure Your Spinach is Bone Dry: This cannot be stressed enough. Any excess moisture on your spinach leaves will throw off the dough’s hydration balance, potentially making it too sticky and difficult to handle. Always use pre-washed, ready-to-eat spinach, or wash and thoroughly dry it yourself using a salad spinner or by patting it dry with paper towels.
- Mind Your Measurements (Especially with Cups): I’ve made this recipe countless times, and I’ve observed that the volume of spinach can vary by as much as a full cup, depending on how densely it’s packed and its natural water content. For consistency, while gram measurements are provided for precision, if you’re using cups, it’s safer to start with the specified packed amount (e.g., 2 packed cups). You can always add a little more spinach if the dough feels too dry and fails to come together properly in the food processor.
- Don’t Skip the Dough Resting Time: The 30-minute resting period after kneading is not merely a suggestion; it’s a crucial step. It allows the gluten structure, which becomes taut during kneading, to relax. This relaxation makes the dough significantly more pliable, easier to roll thinly without tearing, and prevents it from shrinking back excessively. You do not need to refrigerate the dough during this rest period unless you plan to use it much later in the day.
Common Questions Answered
What’s the best kind of spinach to use?
For both optimal color and texture, I highly recommend using baby spinach. Its tender leaves break down easily and integrate smoothly into the dough. If mature spinach leaves are your only option, be sure to meticulously remove their thicker, tougher stalks before adding them to the food processor to avoid fibrous bits in your pasta.
My dough feels too dry when kneading it. What can I do?
It’s normal for the dough to feel a bit stiff at the very beginning of the kneading process. However, it should gradually become softer and more elastic as you continue to knead. If this doesn’t happen and your dough remains stubbornly dry and crumbly, don’t despair! Break the dough into smaller pieces and return it to the food processor. Add a very small amount (a tablespoon or two) of fresh spinach or even a few drops of water, then blitz again until it reaches the desired soft, cohesive consistency. Remember, it’s easier to add more moisture than to remove it, so proceed cautiously.
Why do I need to knead the dough for 10 minutes?
The 10-minute kneading period is fundamental for developing the gluten within the flour. Gluten is a protein network that gives pasta its essential structure, elasticity, and chewy texture. Proper kneading ensures that this network is strong and well-formed, allowing the pasta to hold its shape during rolling and cooking, and providing that satisfying bite. By the end of the 10 minutes, your dough should feel wonderfully smooth and springy to the touch.
Can I make this spinach pasta dough in advance?
Absolutely! Preparing the dough ahead of time can be a great time-saver. Once kneaded, simply wrap the dough tightly in plastic wrap to prevent any air exposure and store it in the refrigerator for 1-2 days. Before rolling, allow the dough to come back to room temperature for about 30 minutes, as it will be more pliable and easier to work with.
How to Cook Fresh Spinach Pasta
Cooking fresh pasta is quick and straightforward. Bring a large pot of generously salted water to a rolling boil. Carefully add your fresh spinach pasta to the boiling water. Fresh pasta cooks much faster than dried pasta, typically taking only 2-4 minutes, depending on its thickness and shape. Cook until al dente, meaning it’s tender but still has a slight bite. Drain immediately, reserving a little pasta water if your sauce requires it, and toss with your favorite sauce.
Storing Fresh Spinach Pasta
If you’ve made a batch of fresh spinach pasta and won’t be cooking it all immediately, there are a few storage options:
- For Immediate Use (within a few hours): Lightly dust the shaped pasta with semola rimacinata or flour to prevent sticking. Arrange it in a single layer on a floured baking sheet or form small nests and cover with a clean kitchen towel.
- Refrigeration (1-2 days): Lightly dust the pasta with flour, then place it in an airtight container or sealable bag. Store in the refrigerator.
- Freezing (up to 1 month): For longer storage, flash freeze your fresh pasta. Arrange the dusted pasta in a single layer on a baking sheet and freeze until solid (about 30-60 minutes). Once frozen, transfer the pasta to an airtight freezer bag or container. Cook directly from frozen in boiling salted water, adding an extra minute or two to the cooking time.
Sauces to Perfectly Complement Your Spinach Pasta
The earthy, subtle flavor of spinach pasta makes it incredibly versatile, pairing beautifully with a wide array of sauces. Here are some of our favorite recommendations to elevate your homemade creation:
- Pesto alla Trapanese (Sicilian Pesto): A fresh, vibrant pesto with tomatoes, almonds, and basil that beautifully complements the green pasta.
- How To Make Basil Pesto: A classic, aromatic basil pesto will cling perfectly to the tagliatelle strands, creating a fresh and flavorful dish.
- Authentic Bolognese Sauce (Ragu alla Bolognese): The rich, hearty flavors of a slow-cooked Bolognese are a magnificent match for fresh pasta, especially if you’ve made wider shapes like pappardelle or lasagna.
- Ricotta Pasta Sauce: 2 Ways: A creamy, light ricotta-based sauce offers a wonderful contrast to the spinach, allowing its flavor to shine through.
- Walnut Sauce – Salsa di Noci: For a unique and elegant pairing, this rich, nutty sauce provides depth and sophistication.
- Authentic Italian Tomato Sauce – Quick, Easy & Delicious: Sometimes, simple is best. A fresh, robust tomato sauce highlights the pasta’s natural flavors without overpowering them.
We truly hope you enjoy making and savoring this **Spinach Pasta Dough Recipe**. If you’ve tried this, or any other recipe from our blog, please don’t hesitate to rate the recipe and share your experience in the comments section below—we always love hearing from you! For more delicious food inspiration and recipes, be sure to **FOLLOW US** on FACEBOOK, INSTAGRAM, and PINTEREST, or sign up for our NEWSLETTER to get new recipes delivered directly to your inbox every week!
Spinach Pasta Dough
By Emily
Print Recipe
Learn to make incredibly easy and delicious homemade spinach pasta dough from scratch. This egg-free recipe uses just two ingredients—flour and fresh spinach—to create vibrant green pasta that can be shaped into lasagna sheets, tagliatelle, or any pasta you desire!
Equipment
- Food processor
- Pasta machine (optional, but recommended)
Ingredients
- 3 packed cups baby spinach (approx. 100g), washed and thoroughly dried
- 1.5 cups Italian 00 Flour (approx. 200g)
- Extra flour or semola rimacinata, for dusting
Instructions
- Ensure you are using washed and ready-to-eat baby spinach. If using mature spinach leaves, remove any large, tough stalks.
- Place the Italian 00 flour into a food processor. Add the prepared spinach.
- Blitz the flour and spinach mixture for a few minutes. It will initially look powdery, then gradually start to clump together as the spinach’s moisture is incorporated. This process typically takes a couple of minutes.
- Stop the food processor and check the dough’s consistency. It should feel soft and stick together when pressed. If it’s too dry and crumbly, add a tiny bit more spinach (a small handful) and blitz again until it reaches the correct texture.
- Tip the dough out onto a clean, lightly floured work surface. Gather the dough and knead it vigorously for about 10 minutes. The dough will feel stiff at first but will become smooth, elastic, and pliable with continued kneading.
- Cover the kneaded dough tightly in plastic wrap and let it rest at room temperature for at least 30 minutes. This essential step allows the gluten to relax, making the dough much easier to roll and work with.
- Once rested, cut the dough in half. Take one half and flatten it with your hands to fit into the widest setting of your pasta machine. Lightly dust the dough with extra flour or semola rimacinata to prevent sticking.
- Pass the dough through the widest setting of the pasta machine once. Then, fold one edge of the dough sheet to the middle, and fold the other edge over that, creating a neat rectangle. Pass this folded dough through the widest setting again. Repeat this folding and rolling process 4 times to laminate the dough, ensuring a smooth and strong texture.
- Now, gradually roll the dough thinner by passing it through progressively higher settings on your pasta machine, one setting at a time, until it reaches your desired thickness. For tagliatelle, stopping at setting number 5 on a Marcato Atlas machine is often ideal, but adjust to your preference.
- If making tagliatelle, cut your rolled pasta sheets in half for easier handling. Then, pass them through the tagliatelle attachment of your pasta machine to cut them into even strands.
- Alternatively, for shapes like tagliatelle, fettuccine, or pappardelle, you can cut the pasta by hand. Roll the pasta sheet into a loose cylinder or fold it lengthwise, then use a sharp knife to cut it into strips of your desired width.
Notes
- Spinach Dryness: Always ensure spinach is completely dry to prevent a sticky dough.
- Cup Measurements: If using cups, start with 2 packed cups of spinach and add more cautiously if the dough is too dry.
- Resting: Resting the dough for 30 minutes is crucial for pliability. No refrigeration needed for this rest period.
Helpful Information for All Our Recipes
- We exclusively use extra virgin olive oil in all our recipes unless otherwise specified.
- For canned or jarred tomatoes, we always recommend Cirio or Mutti brands to ensure superior flavor and results.
- All vegetable sizes are assumed to be medium unless explicitly stated.
- Our recipes are meticulously tested and developed using a fan (convection) oven.
- Learn more about how our nutrition information is calculated.
- Discover our essential Italian Pantry Staples to stock your kitchen.
- Explore our recommended Essential Kitchen Tools for Italian Cooking.
Nutrition (per serving)
Calories: 186 kcal |
Carbohydrates: 37 g |
Protein: 7 g |
Fat: 1 g |
Saturated Fat: 1 g |
Polyunsaturated Fat: 1 g |
Monounsaturated Fat: 1 g |
Sodium: 21 mg |
Potassium: 190 mg |
Fiber: 2 g |
Sugar: 1 g |
Vitamin A: 2345 IU |
Vitamin C: 7 mg |
Calcium: 32 mg |
Iron: 1 mg
Nutrition information is automatically calculated and should be used as an approximation only.