
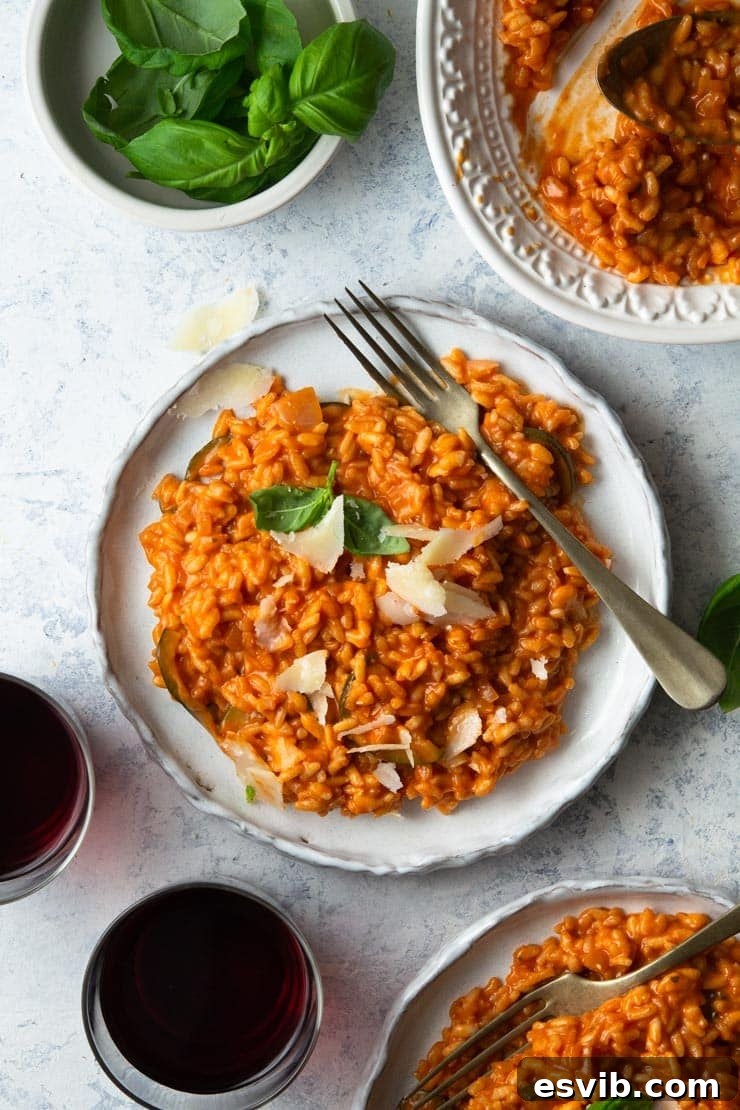

Creamy Tomato Risotto: Your Go-To 30-Minute Italian Comfort Food
Experience the ultimate in quick and comforting Italian cuisine with this incredibly easy, creamy Tomato Risotto. Crafted from simple pantry staples, this delightful dish comes together in just 30 minutes, making it the perfect weeknight indulgence that promises warmth and satisfaction.
Because delicious food has a way of brightening every day and bringing joy to the table…
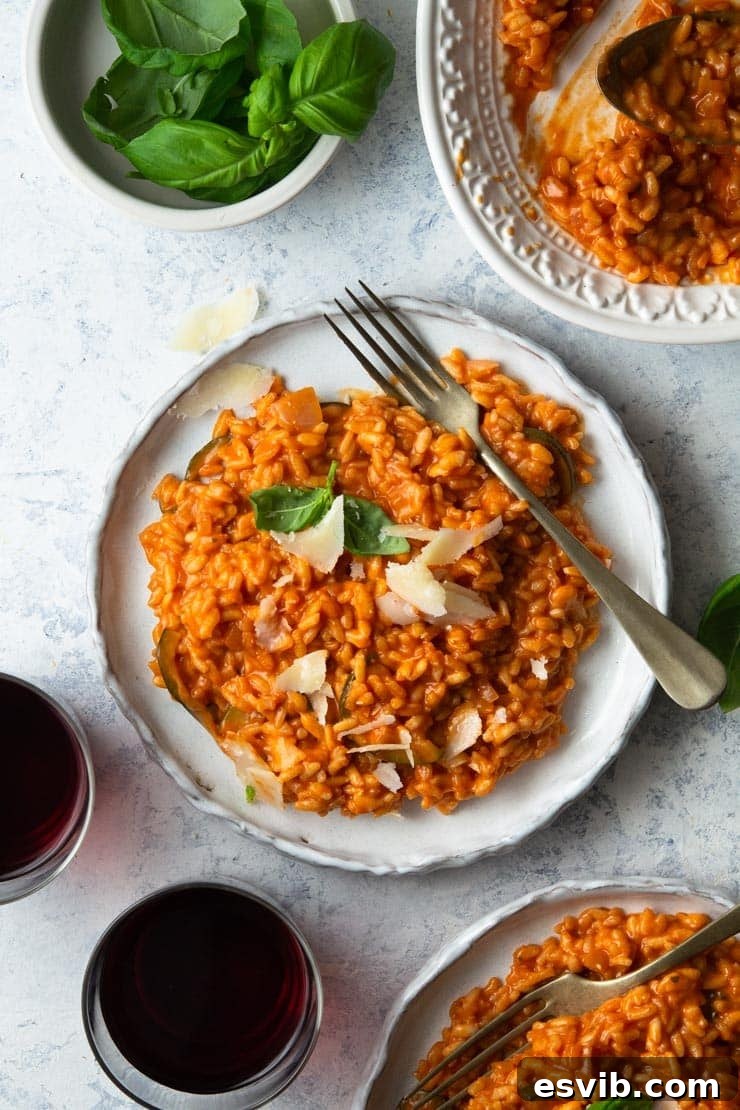
If you’ve never had the pleasure of tasting **creamy tomato risotto**, you are in for a truly delightful surprise! This vibrant and flavorful dish offers a completely different experience from traditional white-based risottos. The natural acidity and sweetness of ripe tomatoes introduce a wonderful freshness and a subtle tang that beautifully balances the inherent richness and creaminess of the rice. It’s a combination that’s utterly irresistible and surprisingly straightforward to prepare, proving that authentic Italian comfort food doesn’t have to be complicated.
Demystifying Risotto: Simplicity in a Bowl
For many home cooks, risotto carries an undeserved reputation for being an overly complicated and time-consuming dish, often associated with endless stirring and elusive perfection. This perception couldn’t be further from the truth! In reality, making a truly excellent risotto is not only easy but also remarkably quick, often taking no more than 30 minutes from start to finish. There’s absolutely no need to be intimidated by it; with a few simple techniques and a little patience, **you can confidently create a perfect, restaurant-quality creamy tomato risotto every time.** Forget the myths and embrace the ease of this classic Italian staple.
The beauty of risotto lies in its incredible versatility. The combinations and flavor variations are virtually endless, allowing you to get creative and personalize your dish based on seasonal ingredients or personal preferences. While many enjoy experimenting with various vegetables or even meats, I personally prefer to stick to **simple, classic flavors** that truly allow the quality of the ingredients to shine through. My approach often omits a lot of “extras,” especially meat. Historically, risotto began as “poor man’s food” in Italy, meaning it rarely contained expensive ingredients like meat. This tradition, coupled with my preference for lighter, vegetable-focused dishes, shapes my risotto philosophy. However, the kitchen is your playground, so feel free to adapt this recipe to your tastes – after all, it’s *your* food to enjoy!
Selecting the Perfect Rice for Your Risotto
The foundation of any great risotto is the rice itself. Not just any rice will do; specific varieties are cultivated for their unique starch content and ability to absorb liquid while maintaining a delightful firm bite. This characteristic is crucial for achieving that signature creamy risotto texture. There are two primary types of rice highly recommended for success:
- Arborio Rice: This is the most common and widely available risotto rice, found in most major supermarkets globally. Arborio grains are short, plump, and boast a high amylopectin (a type of starch) content on their exterior. This starch releases gradually as the rice cooks, creating the rich, creamy sauce that is so characteristic of risotto. It’s forgiving and a great choice for beginners.
- Carnaroli Rice: Often hailed as the “king of risotto rice,” Carnaroli is a bit harder to find but offers superior results for those seeking an extra special touch. It has an even higher starch content and a firmer grain than Arborio, making it less prone to overcooking. Carnaroli also absorbs liquid more evenly, resulting in an even creamier texture with a more distinct *al dente* bite. You can often find Carnaroli rice online or in specialty Italian food stores.
Both Arborio and Carnaroli are short-grain varieties, specifically chosen because they absorb less liquid than long-grain rice while releasing more starch. This starch is the magical component that develops the luxuriously creamy texture that defines a perfect risotto. A crucial tip: resist the urge to rinse your risotto rice before cooking, as this washes away the very starch you need for that exquisite creaminess!
How to Make Creamy Tomato Risotto – Step-by-Step Guide
Creating this delicious creamy tomato risotto is a straightforward process, and with our detailed guide, you’ll master it in no time. Follow these steps for a perfect dish:
-
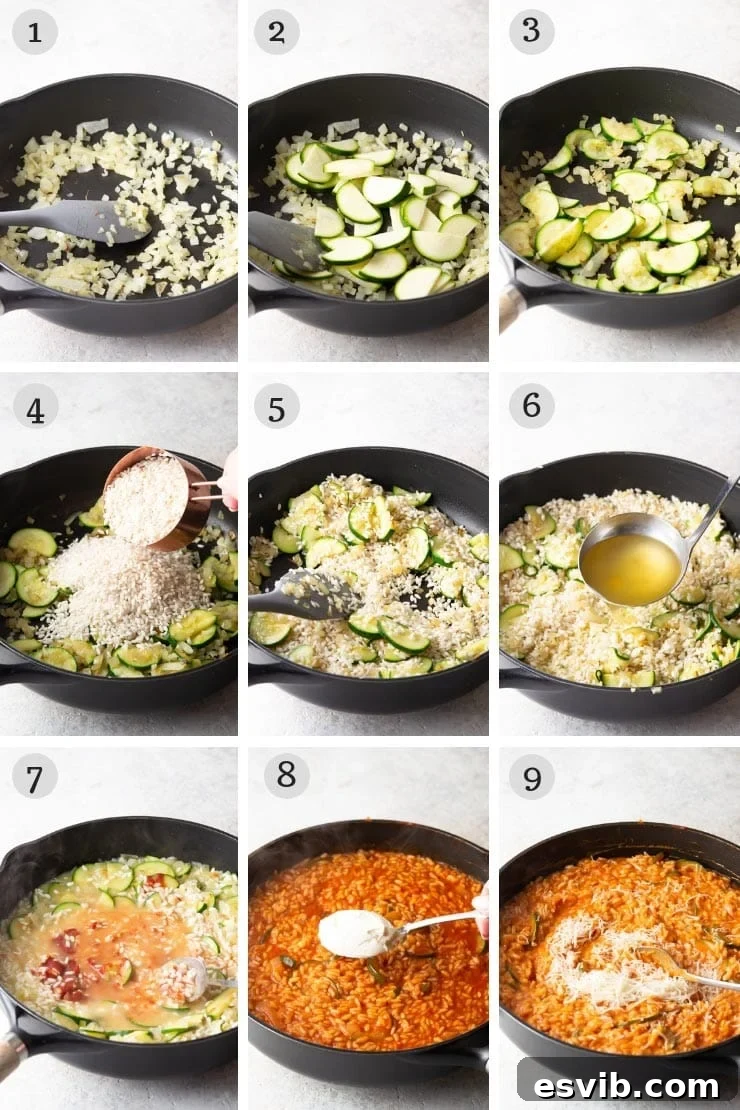
Prepare Aromatics and Zucchini: Finely chop your white onion. In a large, deep saucepan, add 1 tbsp of olive oil and sauté the onion over medium heat for 2-3 minutes until it becomes translucent and fragrant. Meanwhile, prepare the zucchini: cut it in half lengthwise, then slice it into even pieces. Add the zucchini to the pan with the onion and fry for an additional minute, allowing it to slightly soften without browning. (Visualize photos 1-3 from the step-by-step imagery).
-
Toast the Rice: Next, introduce the garlic. Add the finely chopped garlic to the pan and sauté for just 1 minute until aromatic. Be careful not to let it burn. Immediately add the Arborio (or Carnaroli) rice to the pan. Stir continuously for a few seconds, ensuring each grain is thoroughly coated with the olive oil and infused with the flavors of the onion, zucchini, and garlic. This crucial step, known as toasting the rice (*tostatura*), helps the grains retain their shape and absorb liquid more evenly, preventing them from becoming mushy. (Visualize photos 4 & 5).
-

Gradually Add Stock and Tomato Paste: Now, it’s time to begin the liquid absorption process. Add a few ladles of warm chicken stock to the rice. Stir gently but consistently, allowing the rice to slowly absorb the stock. Once most of the first addition of stock has been absorbed, stir in the tomato paste. Mix it thoroughly with the rice and vegetables to ensure an even distribution of its rich, concentrated tomato flavor. Continue adding the warm stock, one ladle at a time, allowing the rice to absorb almost all the liquid before adding the next. This constant, gentle stirring and gradual addition of stock are key to releasing the rice’s starch and developing that signature creamy texture. Keep going until you have just a couple of ladles of stock remaining. (Visualize photos 6 & 7).
-
Finish and Serve: For the final touches, stir in the mascarpone cheese for an extra layer of richness and creaminess. Season with salt and freshly ground black pepper to taste. Then, add the remaining ladles of stock and continue stirring until the risotto reaches a beautifully creamy consistency – it should flow gently on the plate (*all’onda*), not be too sticky or thick. Finally, stir in the freshly grated Parmesan cheese. Give it one last good stir and serve immediately for the best experience. (Visualize photos 8 & 9).
Beyond the Bowl: Creative Ways to Use Leftover Risotto
One of the many wonderful things about risotto is that it never goes to waste, even if you find yourself with leftovers. In fact, cold risotto can be surprisingly delicious straight from the fridge, eaten by the spoonful! However, if you’re looking for a more inspired and satisfying way to enjoy your creamy creation the next day, transforming it into Arancini (classic Italian fried rice balls) is an absolute must-try. This ingenious method turns humble leftovers into a gourmet treat!
Making Delicious Arancini from Leftover Risotto
To prepare these delightful golden spheres, perfect as a snack or appetizer:
- Allow your leftover risotto to cool completely in the refrigerator. Chilled risotto is much easier to work with and shape.
- Once cold, take portions of the risotto (about 1-2 tablespoons per ball) and form them into small, compact spheres, roughly the size of a golf ball or slightly larger. Ensure they are tightly packed.
- Set up a dredging station: prepare three shallow bowls. One with all-purpose flour, another with beaten eggs, and a third with fine breadcrumbs (Panko breadcrumbs work wonderfully for extra crispiness).
- Roll each risotto ball first in the flour, shaking off any excess.
- Next, dip it into the beaten egg, ensuring it’s fully coated.
- Finally, roll the ball generously in the breadcrumbs until it’s completely covered on all sides. For an extra treat, you can even stuff the center of each ball with a small cube of mozzarella or another good melting cheese before coating – a truly irresistible, gooey surprise!
- Heat a generous amount of vegetable oil (enough to submerge the balls) in a deep pan or pot to about 350-375°F (175-190°C).
- Carefully fry the Arancini in batches, ensuring not to overcrowd the pan, until they are beautifully golden brown and crispy on all sides.
- Remove the fried Arancini with a slotted spoon and drain them thoroughly on kitchen paper to absorb any excess oil.
These savory Arancini make for a fantastic fun snack, a delightful appetizer (*antipasto*) served with drinks, or even a light lunch. They’re a testament to how versatile and rewarding Italian cooking can be, proving that no delicious bite should ever go to waste!
Expert Tips for the Perfect Creamy Tomato Risotto
While risotto is far from complicated, mastering a few key techniques can elevate your dish from good to absolutely outstanding. Pay attention to these expert tips for a truly authentic, creamy, and delicious result:
- Sauté the Onion Properly (Soffritto is Key): Don’t rush this initial step. Ensure the onion is finely chopped and sautéed until it’s soft, translucent, and deeply fragrant, but not browned. This process, known as *soffritto*, is crucial as it releases the onion’s natural sweetness and savory depth, forming the essential aromatic base of your risotto. A good *soffritto* sets the stage for a flavorful dish.
- Always Use Warm Stock: This is a non-negotiable rule for risotto success. Keep your chicken stock simmering gently in a separate pot next to your risotto pan. Adding cold stock to hot rice will drastically cool everything down, interrupting the cooking process, hindering proper starch release, and resulting in unevenly cooked rice.
- Add Stock Gradually and Stir Consistently: This is perhaps the most critical technique for achieving the signature creamy texture. Add your warm stock one ladleful (about 1/2 to 3/4 cup) at a time, allowing the rice to absorb almost all the liquid before adding the next. This controlled, gradual absorption encourages the rice grains to slowly release their starches, which is what creates that desired creamy, silky texture. It also allows the rice to fully absorb all the rich flavors from the stock. If you add all the stock at once, the rice will simply boil, resulting in a less flavorful and much less creamy dish.
- Stir Often, But Not Constantly: While regular stirring is essential for even cooking and starch release, you don’t need to stir constantly without a break. Excessive, vigorous stirring can sometimes release *too much* starch too quickly, making the rice overly sticky or gummy rather than wonderfully creamy. The key is to keep an eye on it, ensure it doesn’t stick to the bottom of the pan, and stir it well after each addition of stock to help distribute the liquid and released starch.
- Season Thoughtfully: The exact amount of salt you’ll need will largely depend on the saltiness of the chicken stock you use. Always taste your risotto as it cooks (especially after a few additions of stock) and adjust the seasoning (salt and freshly ground black pepper) gradually. Remember, it’s always easier to add more salt than to fix an overly salty dish.
- Achieve the Right Consistency (All’onda): A perfectly cooked risotto should have a flowing, wave-like consistency, known in Italian as *all’onda* (meaning “like a wave”). It shouldn’t be dry and stiff, nor should it be too watery. When you gently shake the pan, the risotto should spread slightly and gently ripple. This is the ideal creamy, loose texture.
- Finish with a “Mantecatura”: Just before serving, remove the risotto from the heat and vigorously stir in the mascarpone and Parmesan (and often a knob of cold butter, if desired, for extra richness). This final, energetic stir, called *mantecatura*, whips air into the risotto, making it incredibly light, fluffy, and exceptionally creamy.
Delicious Pairings and Serving Suggestions for Tomato Risotto
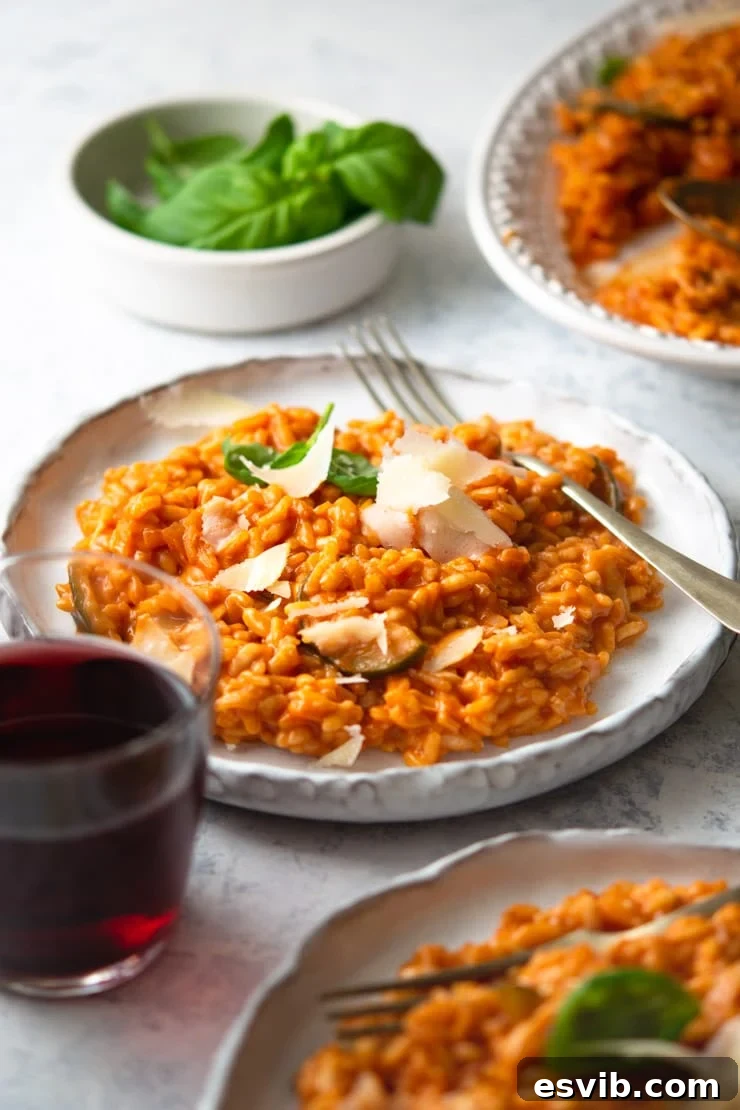
This Creamy Tomato Risotto is a satisfying and flavorful meal on its own, but it also pairs beautifully with a variety of accompaniments to elevate your dining experience. For a complete and authentic Italian meal, consider these suggestions:
- Fresh Green Salad: A simple, crisp green salad with a light vinaigrette provides a refreshing contrast to the richness of the risotto, cleansing the palate between bites.
- Crusty Italian Bread: A warm, crusty loaf of Italian bread is perfect for soaking up any remaining creamy sauce on your plate – not a drop should go to waste!
- Wine Pairing: For wine enthusiasts, a dry white wine like a crisp Pinot Grigio or a light-bodied red like a young Sangiovese or Barbera would complement the vibrant tomato flavors wonderfully, enhancing the overall meal.
- Garnish for Freshness: A final sprinkle of freshly grated Parmesan cheese, a delicate drizzle of high-quality extra virgin olive oil, and a few vibrant fresh basil leaves will enhance both the flavor and visual presentation of your risotto.
- Protein Addition (Optional): For those who prefer a heartier meal, grilled chicken, pan-seared scallops, or even a side of Italian sausage can be served alongside the risotto.
More Easy Dinner Recipes You’ll Love:
If you enjoyed preparing and savoring this simple yet elegant tomato risotto, you might also like to explore these other comforting and authentic Italian dishes from our kitchen:
- Easy Squash Risotto with Thyme
- Creamy Mushroom Risotto
- Gnocchi with a Brown Butter Sage Sauce
- Easy Sausage Ragu with Ricotta Gnocchi
Creamy Tomato Risotto Recipe
This super easy, creamy, and comforting Tomato Risotto is crafted from simple pantry ingredients and can be on your table in just 30 minutes. It’s the perfect way to bring a taste of Italy and true comfort food to your weeknight meals.
Prep time: 15 minutes
Cook time: 15 minutes
Total time: 30 minutes
Servings: 6 people
By Emily

Ingredients
- 14 oz (400g) Arborio rice
- 4 3/4 cups (1.1 liters) chicken stock (kept warm)
- 1 large white onion, finely chopped
- 4 tbsp tomato paste
- 1 tbsp mascarpone cheese
- 1 tbsp olive oil
- 3 garlic cloves, finely chopped
- 1 large zucchini, cut into 1/2 inch slices
- Salt and freshly ground black pepper, to taste
- 1 tbsp freshly grated Parmesan cheese (plus more for serving)
Instructions
- In a large, deep saucepan over medium heat, add 1 tbsp of olive oil. Sauté the finely chopped white onion for 2-3 minutes until it becomes soft and translucent.
- While the onion cooks, prepare the zucchini by cutting it in half lengthwise, then slicing it into even pieces. Add the zucchini to the pan and fry for 1 minute to slightly soften.
- Add the finely chopped garlic to the pan and cook for another minute until fragrant. Be careful not to let it brown.
- Add the Arborio rice to the pan. Stir continuously for a few seconds to toast the rice grains, ensuring they are well coated with the olive oil and aromatics. This *tostatura* step is important for texture.
- Pour in a few ladles of warm chicken stock and stir gently until the rice begins to absorb the liquid.
- Once the first stock addition is mostly absorbed, stir in the tomato paste until thoroughly combined with the rice mixture.
- Continue adding the warm stock, one ladle at a time, allowing the rice to absorb most of the liquid before adding the next. Stir frequently during this process to encourage starch release and achieve a creamy texture. Repeat until you have only a couple of ladles of stock remaining. The total cooking time for the rice should be about 15-20 minutes.
- When the risotto is almost done (it should be *al dente* – tender but still with a slight bite), stir in the mascarpone cheese, then season with salt and freshly ground black pepper to taste.
- Add the remaining stock and continue stirring vigorously until the risotto reaches a beautifully creamy, flowing consistency (*all’onda*). It should not be too sticky or dry.
- Finally, remove from heat and stir in the freshly grated Parmesan cheese. Give it one last good stir (*mantecatura*) and serve immediately, garnished with extra Parmesan and fresh basil if desired.
Recipe Video Tutorial
For a visual guide to mastering this recipe, watch our step-by-step video tutorial:
Chef’s Notes for Success
- Sauté the onion until soft to build a rich flavor base – this *soffritto* is crucial.
- Always add warm stock a ladleful at a time, allowing the rice to absorb the liquid between additions. This technique is vital for creating a creamy, silky texture as the rice gradually releases its starch and absorbs all the delicious flavors.
- Stir regularly, but avoid constant, vigorous stirring. Too much stirring can release excessive starch, leading to a sticky rather than a creamy consistency.
- Taste and Season: The exact amount of seasoning needed will depend on the saltiness of your chicken stock. Always taste your risotto as you go and add salt and pepper a little at a time until perfectly seasoned.
- Finish with a *mantecatura*: A final vigorous stir with mascarpone and Parmesan (and butter, if using) off the heat will make your risotto extra light and creamy.
Helpful Info for All Recipes
- I always use extra virgin olive oil in all of my recipes unless stated otherwise.
- When I use canned or jarred tomatoes of any kind, I always recommend Cirio or Mutti brands for the best results and flavor.
- All vegetables are medium-sized unless stated otherwise.
- All recipes are tested and developed using a fan (convection) oven.
- Find out more about how nutrition is calculated.
- Check out our must-have Italian Pantry Staples.
- You can also find all our Essential Kitchen Tools for Italian Cooking.
Nutrition Information (Approximate per serving)
The following nutrition information is automatically calculated and should be used as an approximation:
- Calories: 323 kcal
- Carbohydrates: 59g
- Protein: 9g
- Fat: 5g
- Saturated Fat: 1g
- Cholesterol: 2mg
- Sodium: 148mg
- Potassium: 437mg
- Fiber: 2g
- Sugar: 3g
- Vitamin A: 265 IU
- Vitamin C: 10mg
- Calcium: 31mg
- Iron: 3.7mg
Nutrition information is automatically calculated, so should only be used as an approximation.