
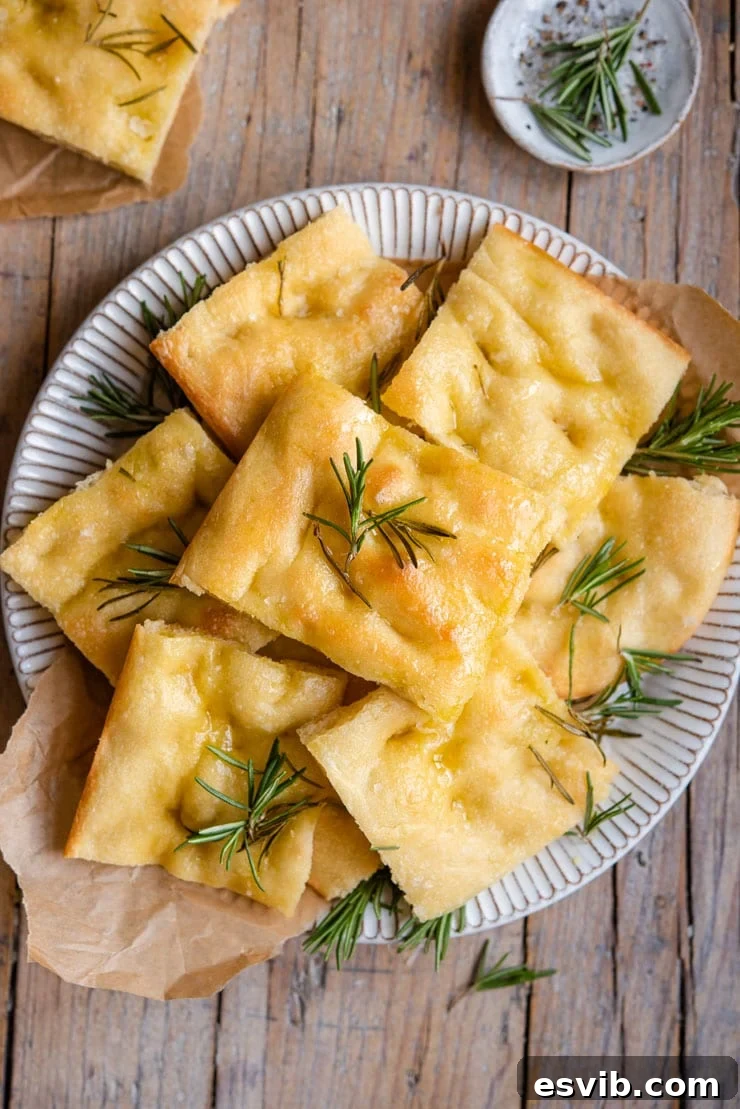
Experience the irresistible charm of a classic Rosemary Focaccia Bread, crafted effortlessly with simple pantry staples. This traditional Italian focaccia recipe promises a bread that’s not only incredibly delicious on its own but also versatile enough to elevate your sandwiches, accompany a hearty bowl of soup, or serve as the perfect canvas for your favorite creative toppings. Get ready to fill your kitchen with the aromatic scent of freshly baked bread!
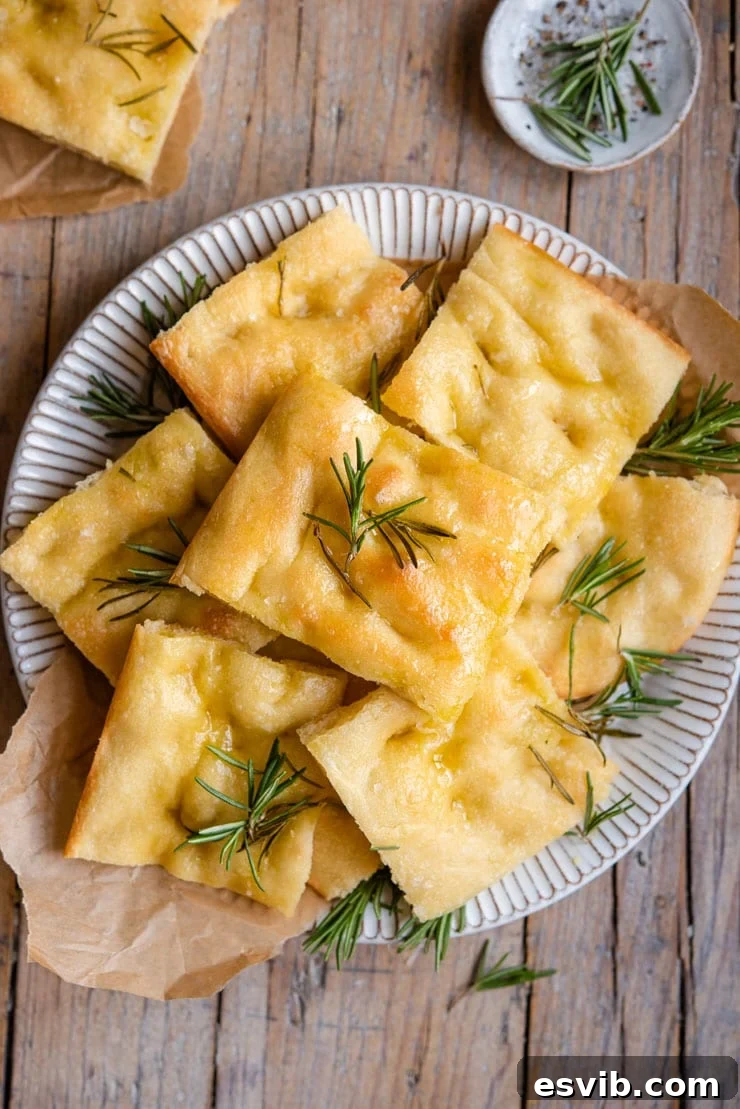
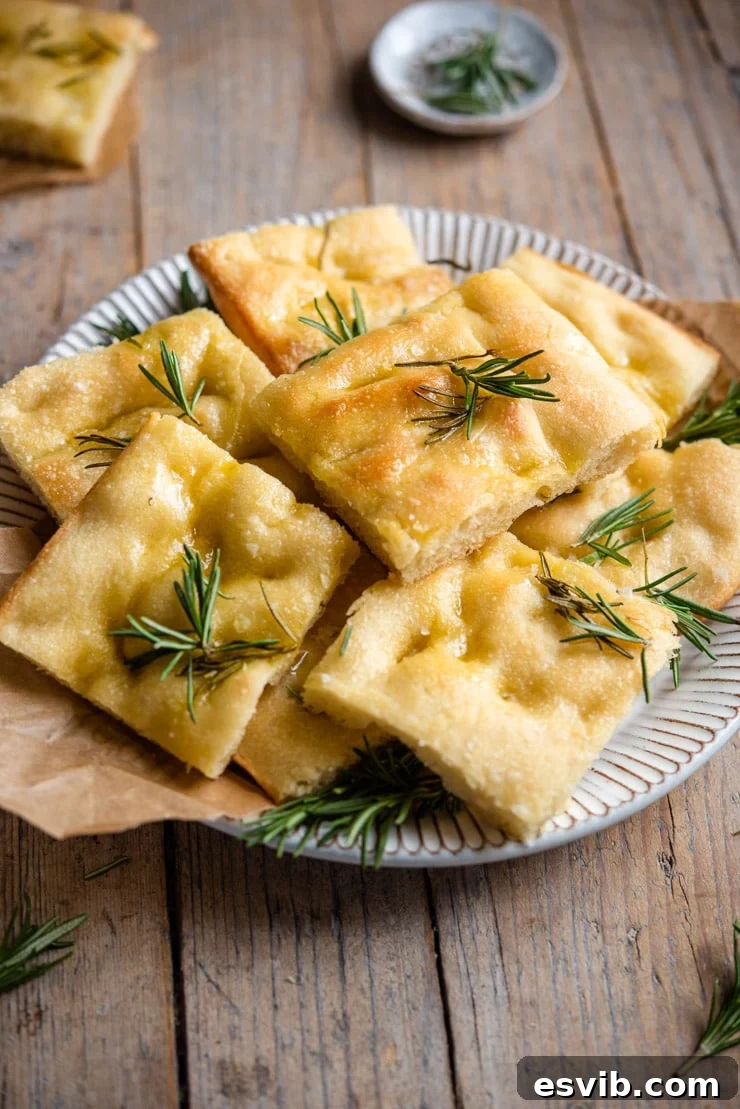
Rosemary focaccia holds a special place in the hearts of bread lovers, and for good reason. Its unique texture and exquisite flavor profile make it one of Italy’s most beloved breads. Imagine a bread that boasts a delightfully crispy crust, a remarkably light and airy interior, and a perfect balance of salty notes from the sea salt flakes complemented by the peppery richness of good quality olive oil. It’s an absolute culinary delight, especially when served warm straight from the oven.
If you’re new to the world of bread making or find the idea of baking focaccia a bit daunting, fret not! This recipe is designed to be incredibly straightforward, proving that making rosemary focaccia at home is much simpler than you might imagine. We’ll guide you through each step, ensuring a successful and delicious outcome even for first-time bakers.
At its core, focaccia is made from a yeast dough that undergoes two crucial rising periods – once in a mixing bowl for its initial bulk fermentation, and again in the baking tray, allowing it to puff up beautifully before baking. This double-rise process is key to achieving that signature light and airy texture.
While fresh rosemary, sea salt flakes, and a generous drizzle of premium olive oil constitute the quintessential and most beloved flavor combination, the beauty of focaccia lies in its endless versatility. Once you’ve mastered the basic recipe, you can unleash your creativity with a myriad of toppings. From savory delights like caramelized onions and olives to creating a delightful Focaccia Pizza topped with vibrant tomato sauce and melted mozzarella, the possibilities are truly limitless. This guide, however, focuses on the timeless classic: rosemary focaccia.
Why Bake Homemade Focaccia?
There’s a special magic in homemade bread, and focaccia is no exception. The aroma alone, wafting through your home as it bakes, is enough to lift spirits. Beyond the sensory experience, baking focaccia from scratch offers numerous advantages:
- **Unmatched Freshness:** Enjoy bread that’s truly fresh, without any preservatives or additives.
- **Superior Flavor and Texture:** Control the quality of your ingredients and baking process to achieve a taste and texture far superior to store-bought versions.
- **Customization:** Tailor the toppings, herbs, and even the type of flour to your exact preferences.
- **Rewarding Experience:** The process of transforming simple ingredients into a beautiful loaf is incredibly satisfying and a wonderful way to unwind.
Essential Ingredients for Perfect Rosemary Focaccia
Creating this magnificent bread requires only a handful of readily available ingredients. The quality of these ingredients, especially the olive oil, plays a significant role in the final flavor of your focaccia. Here’s what you’ll need:
- 00 Flour (or strong bread flour): Italian “00” flour is finely milled and has a moderate protein content, ideal for a soft, airy crumb with a slight chew. If unavailable, a good quality strong bread flour with a higher protein content works wonderfully, providing the necessary gluten structure for a great rise.
- Fast-Action Yeast: Also known as instant yeast, this type is convenient as it doesn’t require prior activation in water. It can be mixed directly with the dry ingredients.
- Sugar: A small amount of sugar acts as food for the yeast, helping to activate it and encourage a robust rise. It also contributes to the beautiful golden-brown crust.
- Sea Salt Flakes: Crucial for both flavor within the dough and as a textural topping. Flaky sea salt provides bursts of briny goodness on the crust.
- High-Quality Olive Oil: This is non-negotiable for authentic focaccia. Use extra virgin olive oil for both the dough and for drizzling generously before baking. Its fruity, peppery notes are a hallmark of focaccia’s flavor.
- Warm Water: The ideal temperature for activating yeast is around 105-115°F (40-46°C). Water that’s too cold won’t activate the yeast, and water that’s too hot can kill it.
- Fresh Rosemary: The star herb! Fresh sprigs are essential for that aromatic, herbaceous flavor that defines rosemary focaccia.
How to Make Rosemary Focaccia – A Step-by-Step Guide
Follow these detailed steps to bake your own exquisite rosemary focaccia. Patience during the rising stages is key!
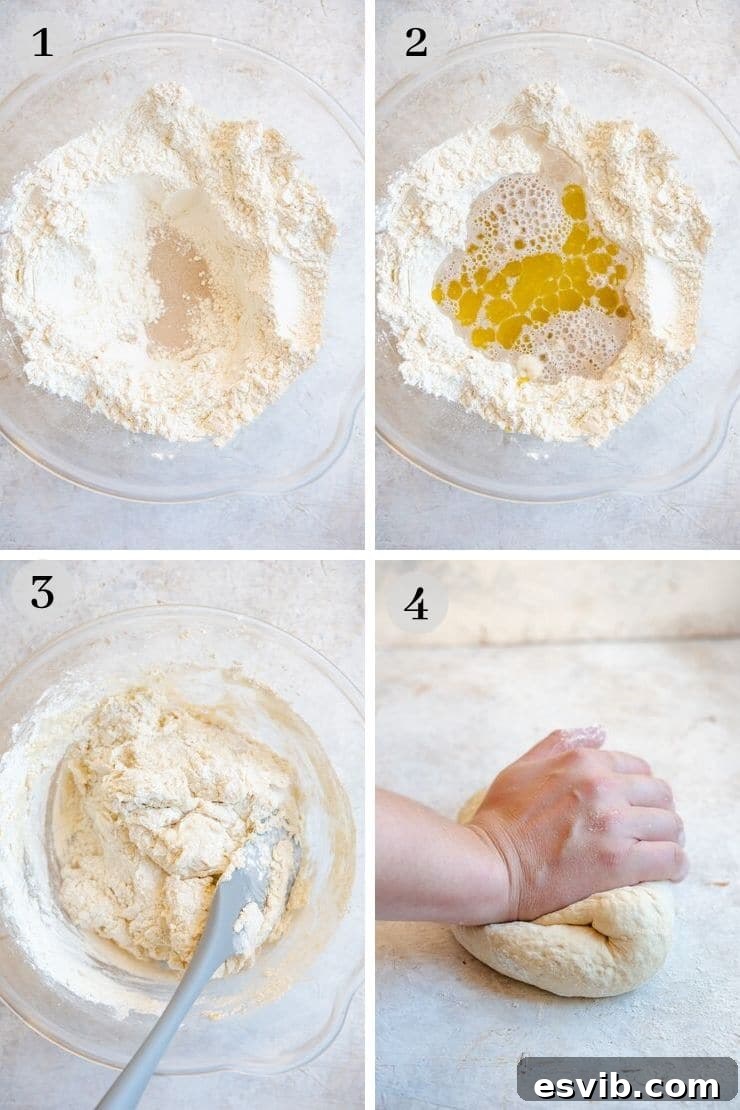
1. Prepare the Dough Base
- Begin by adding the flour to a large mixing bowl. Creating a well in the middle is crucial for proper yeast activation.
- Carefully pour the fast-action yeast and sugar into the center of this well. This ensures direct contact with the warm liquids that follow, kickstarting the yeast activity.
- **Important Tip:** Place the salt at one side of the bowl, away from the yeast. Direct contact between yeast and salt can inhibit or even kill the yeast, preventing your dough from rising effectively.
2. Mix and Knead the Dough
- Pour the warm water and a generous amount of olive oil into the well with the yeast and sugar. Using a sturdy wooden spoon or a spatula, gently mix all the ingredients together, starting from the center and gradually incorporating the flour from the sides until a shaggy dough forms.
- Once the dough comes together into a rough mass, turn it out onto a clean work surface that has been lightly dusted with a little extra flour. This prevents sticking during kneading.
- Knead the dough for a full 10 minutes. This process is vital for developing the gluten, which gives the focaccia its characteristic chewiness and helps it rise. You’ll know the dough is ready when it transforms from shaggy to smooth, elastic, and springy. A simple test: gently press your finger into the dough; if it springs back quickly, it’s perfectly kneaded.
3. First Rise (Bulk Fermentation)
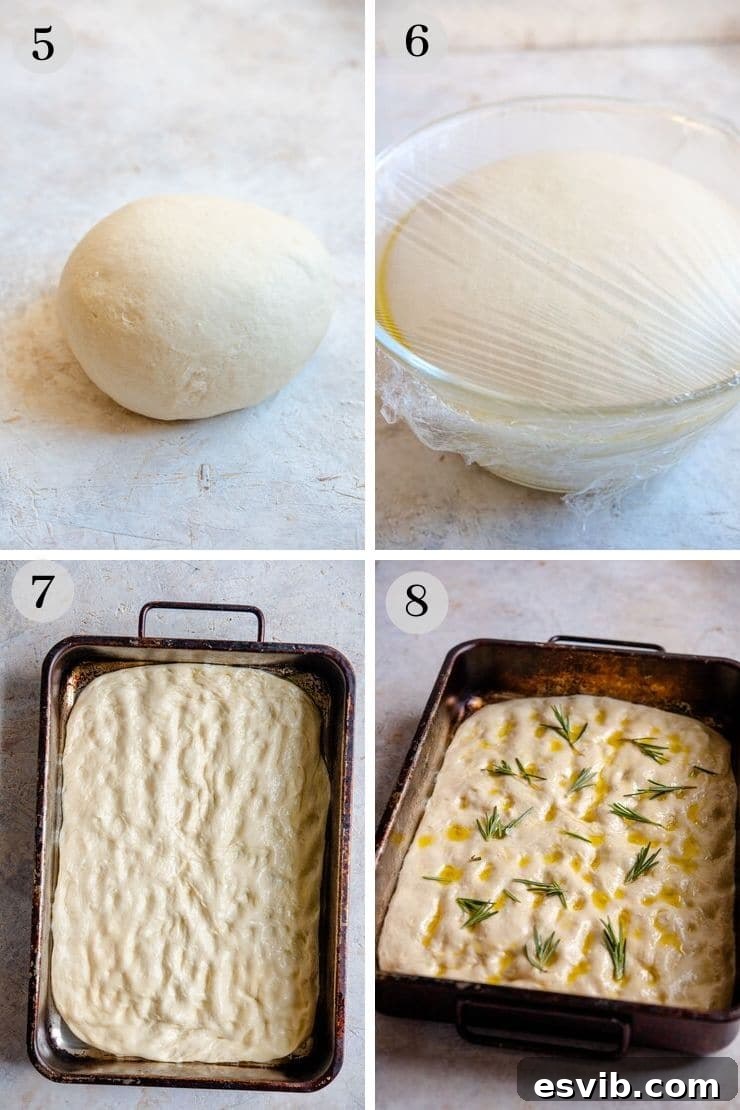
- Clean and thoroughly dry your mixing bowl, then lightly coat the inside with a little olive oil. This prevents the dough from sticking as it expands.
- Place the kneaded ball of dough into the oiled bowl. Lightly rub the top of the dough with a small amount of olive oil to prevent it from drying out and forming a crust during the rise.
- Cover the bowl tightly with plastic wrap or cling film. Place it in a warm, draft-free spot for approximately 1 hour, or until the dough has visibly doubled in size. Avoid extremely hot places or direct sunlight, which can over-proof the dough too quickly.
4. Shape and Second Rise (Proofing)
- Once your dough has successfully doubled in size, gently remove it from the bowl. At this point, you can cut the dough in half. This recipe makes two large focaccia breads.
- Lightly oil two separate baking trays (standard 10×15-inch trays work well). Place each half of the dough into a prepared tray and gently spread it out with your fingertips to fit the tray. If you only wish to bake one focaccia, the other half of the dough can be frozen for later use (see freezing instructions below).
- Allow the dough to rise in the trays for another hour or even longer, until it looks visibly puffy and soft. This second rise, known as proofing, builds air pockets and contributes to the focaccia’s light texture.
5. Dimple, Top, and Bake
- Preheat your oven to 230°C (450°F) or its hottest setting. High heat is essential for a crispy crust.
- When the dough is ready for baking, use your fingers to gently but firmly make deep dimples all over the surface of the dough. This creates those signature indentations that hold the olive oil and toppings, preventing the focaccia from puffing up too much like a regular bread loaf.
- Generously sprinkle fresh rosemary sprigs, sea salt flakes, and drizzle a final coating of extra virgin olive oil over the dimpled dough.
- Bake for 15-20 minutes, or until the focaccia is beautifully golden brown on top and baked through.
- Allow the focaccia to cool for about 10 minutes on a wire rack before slicing and serving. This helps the internal structure set and prevents it from being too sticky.
Elevate Your Focaccia: Exciting Topping Ideas
While rosemary and sea salt are undeniably delicious, focaccia offers an incredible canvas for culinary creativity. Here are some fantastic topping ideas to experiment with:
- Classic & Savory:
- Mozzarella: Shredded or fresh mozzarella adds a delightful gooeyness.
- Tomato Sauce: Top with a thin layer of our Authentic Italian Tomato Sauce for a focaccia pizza experience – a very popular choice in Italy!
- Caramelized Onions: Sweet and savory, these add a rich umami depth.
- Olives: Kalamata, black, or green olives, sliced or whole, add a briny burst.
- Garlic: Thinly sliced garlic cloves or roasted garlic paste offer pungent flavor.
- Cherry Tomatoes: Halved cherry tomatoes burst with sweetness when baked.
- Herbs Galore: Thyme, oregano, sage, or a mix of Italian herbs can be used instead of or in addition to rosemary.
- Vegetable Power:
- Mushrooms: Sautéed mushrooms or thinly sliced raw mushrooms bake beautifully.
- Bell Peppers: Sliced colorful bell peppers add sweetness and vibrant color.
- Zucchini: Thinly sliced zucchini rounds become tender and delicious.
- Artichoke Hearts: Quartered artichoke hearts (from a jar, drained) provide a lovely tang.
- Cheesy Indulgences:
- Different Cheeses: Beyond mozzarella, try crumbled feta, creamy Taleggio, or soft Stracchino for unique flavors.
- Parmesan/Pecorino: A sprinkle of hard grated cheese after baking adds sharpness.
- Adventurous & Sweet (Yes, Sweet Focaccia!):
- Grapes and Rosemary: A surprisingly delicious combination, the grapes caramelize beautifully.
- Figs and Honey: Fresh figs, a drizzle of honey, and a hint of thyme create an elegant sweet focaccia.
Baking with Ease: Stand Mixer vs. Hand Kneading
Wondering if you can use your trusty KitchenAid or stand mixer for this recipe? Absolutely! While manual kneading is a wonderful way to connect with your dough and understand its texture, a stand mixer with a dough hook can certainly simplify the process.
For first-time focaccia makers, I always recommend kneading by hand. This allows you to truly feel the dough as it transforms – from sticky to smooth and elastic. Understanding this tactile feedback is invaluable for knowing when your dough is perfectly kneaded and ready for rising. The “soft and springy” feel is your best indicator.
If you opt for a stand mixer, attach the dough hook and knead the dough for approximately 5-7 minutes on a medium-low speed, or until it reaches that smooth, elastic, and springy consistency. Always perform the finger-press test: if the dough springs back, it’s ready!
Storing and Freezing Your Delicious Focaccia
Focaccia is best enjoyed fresh and warm, but proper storage allows you to savor it for longer. It also freezes exceptionally well, both baked and unbaked!
Storing Baked Focaccia:
- Once completely cooled, store leftover focaccia in an airtight container or wrap it tightly in plastic wrap at room temperature for up to 2-3 days.
- To refresh stale focaccia, sprinkle it lightly with water, wrap it in foil, and reheat in a moderate oven (180°C/350°F) for 10-15 minutes until warmed through and slightly crisp.
Freezing Focaccia:
- Baked Focaccia: To freeze baked focaccia, cut it into individual portions once completely cool. Wrap each portion tightly in plastic wrap, then place them in a freezer-safe bag or container. It can be frozen for up to 3 months. Thaw at room temperature or reheat directly from frozen in an oven until warm.
- Focaccia Dough (Unbaked): This is a fantastic time-saver! After the first rise and dividing the dough into portions, lightly oil each portion, wrap it tightly in plastic wrap, and then place it in a freezer-safe bag. Freeze for up to 1 month. When ready to bake, thaw the dough in the refrigerator overnight, then let it come to room temperature and proceed with shaping, the second rise, and baking as instructed in the recipe.
Top Tips for Focaccia Perfection Every Time
Achieving a consistently perfect focaccia is easy with these helpful tips:
- Flour Choice: If “00” flour isn’t available, strong bread flour (high protein content) is an excellent substitute. Avoid all-purpose flour if possible, as it results in a less chewy texture.
- Yeast and Salt Separation: Always keep salt and yeast separate during the initial mixing phase. Salt can dehydrate and kill yeast, hindering the dough’s rise.
- Quality Olive Oil: Invest in a good quality extra virgin olive oil. It’s a foundational flavor in focaccia, both in the dough and as a generous drizzle on top.
- Don’t Rush the Rise: Allow ample time for both rises. The yeast needs time to work its magic, developing flavor and creating that airy texture. A warm, draft-free environment is ideal.
- Cool Before Cutting: Let the baked focaccia cool for at least 10-15 minutes on a wire rack before cutting. This allows the internal structure to set, preventing a gummy texture.
- Versatile Serving: Slice it horizontally to make incredible sandwiches, cut it into squares for dipping in olive oil or balsamic, or serve it alongside your favorite Italian meal.
- Tray Shape Matters Not: Feel free to use a round, square, or rectangular baking tray – the shape won’t impact the deliciousness! Just ensure the dough is spread evenly.
- High Oven Temperature: Focaccia loves high heat! A hot oven quickly creates a crispy crust while keeping the interior moist and soft.
More Italian Snacks and Breads You Might Like
If you’ve enjoyed making this Rosemary Focaccia, explore more delicious Italian specialties from our kitchen:
- La Piadina: Italian Flatbread – A simple, thin flatbread perfect for wraps.
- Gnocco Fritto (Italian Fried Dough) – Light and puffy fried dough, often served with cured meats.
- Cecina Toscana Tuscan Chickpea Flatbread – A naturally gluten-free, savory pancake made from chickpea flour.
- Bagna Cauda Recipe (Anchovy, Garlic & Butter Dip) – A warm, pungent dip perfect for fresh vegetables.
- Easy Marinated Olives – Ready In 5 Minutes – A quick and flavorful appetizer.
- Fried Sausage Stuffed Olives – Delicious And Crispy – A unique and indulgent fried treat.
We absolutely love hearing from you! If you’ve tried this Rosemary Focaccia recipe or any other delightful dish from our blog, please don’t hesitate to share your experience in the comments below. Your feedback and culinary adventures truly inspire us! For more delicious Italian food inspiration, behind-the-scenes glimpses, and what we’re cooking up next, make sure to FOLLOW US on FACEBOOK, INSTAGRAM, and PINTEREST.
Rosemary Focaccia Bread Recipe
This easy rosemary focaccia is light, delicious, and simple to prepare. There’s nothing quite like the comforting aroma of homemade focaccia bread baking in your oven.
| Prep Time: 25 mins | Cook Time: 20 mins | Rising Time: 2 hrs | Total Time: 2 hrs 45 mins | |
| Servings: 12 servings | |
Ingredients |
|
For the dough:
|
|
For the topping:
|
|
Instructions |
|
|
|
Notes
|
Helpful Information for All Our Recipes
- We consistently use extra virgin olive oil in all our recipes unless a different type is specifically mentioned.
- For canned or jarred tomatoes, we recommend Cirio or Mutti brands to ensure the best flavor and quality in your dishes.
- All vegetables are assumed to be medium-sized unless otherwise specified.
- All recipes are carefully tested and developed using a fan (convection) oven.
- Discover more about how nutrition information is calculated on our site.
- Explore our list of must-have Italian Pantry Staples to stock your kitchen.
- Find all our recommended Essential Kitchen Tools for Italian Cooking.
Nutrition Information (Approximate per serving)
| Calories | Carbohydrates | Protein | Fat | Saturated Fat | Sodium | Potassium | Fiber | Sugar | Calcium | Iron |
|---|---|---|---|---|---|---|---|---|---|---|
| 206 kcal | 31g | 5g | 7g | 1g | 196mg | 48mg | 1g | 1g | 6mg | 1mg |
Nutrition information is automatically calculated and should only be used as an approximation.
Did you try this recipe? We’d love to hear from you! Leave a comment below!