
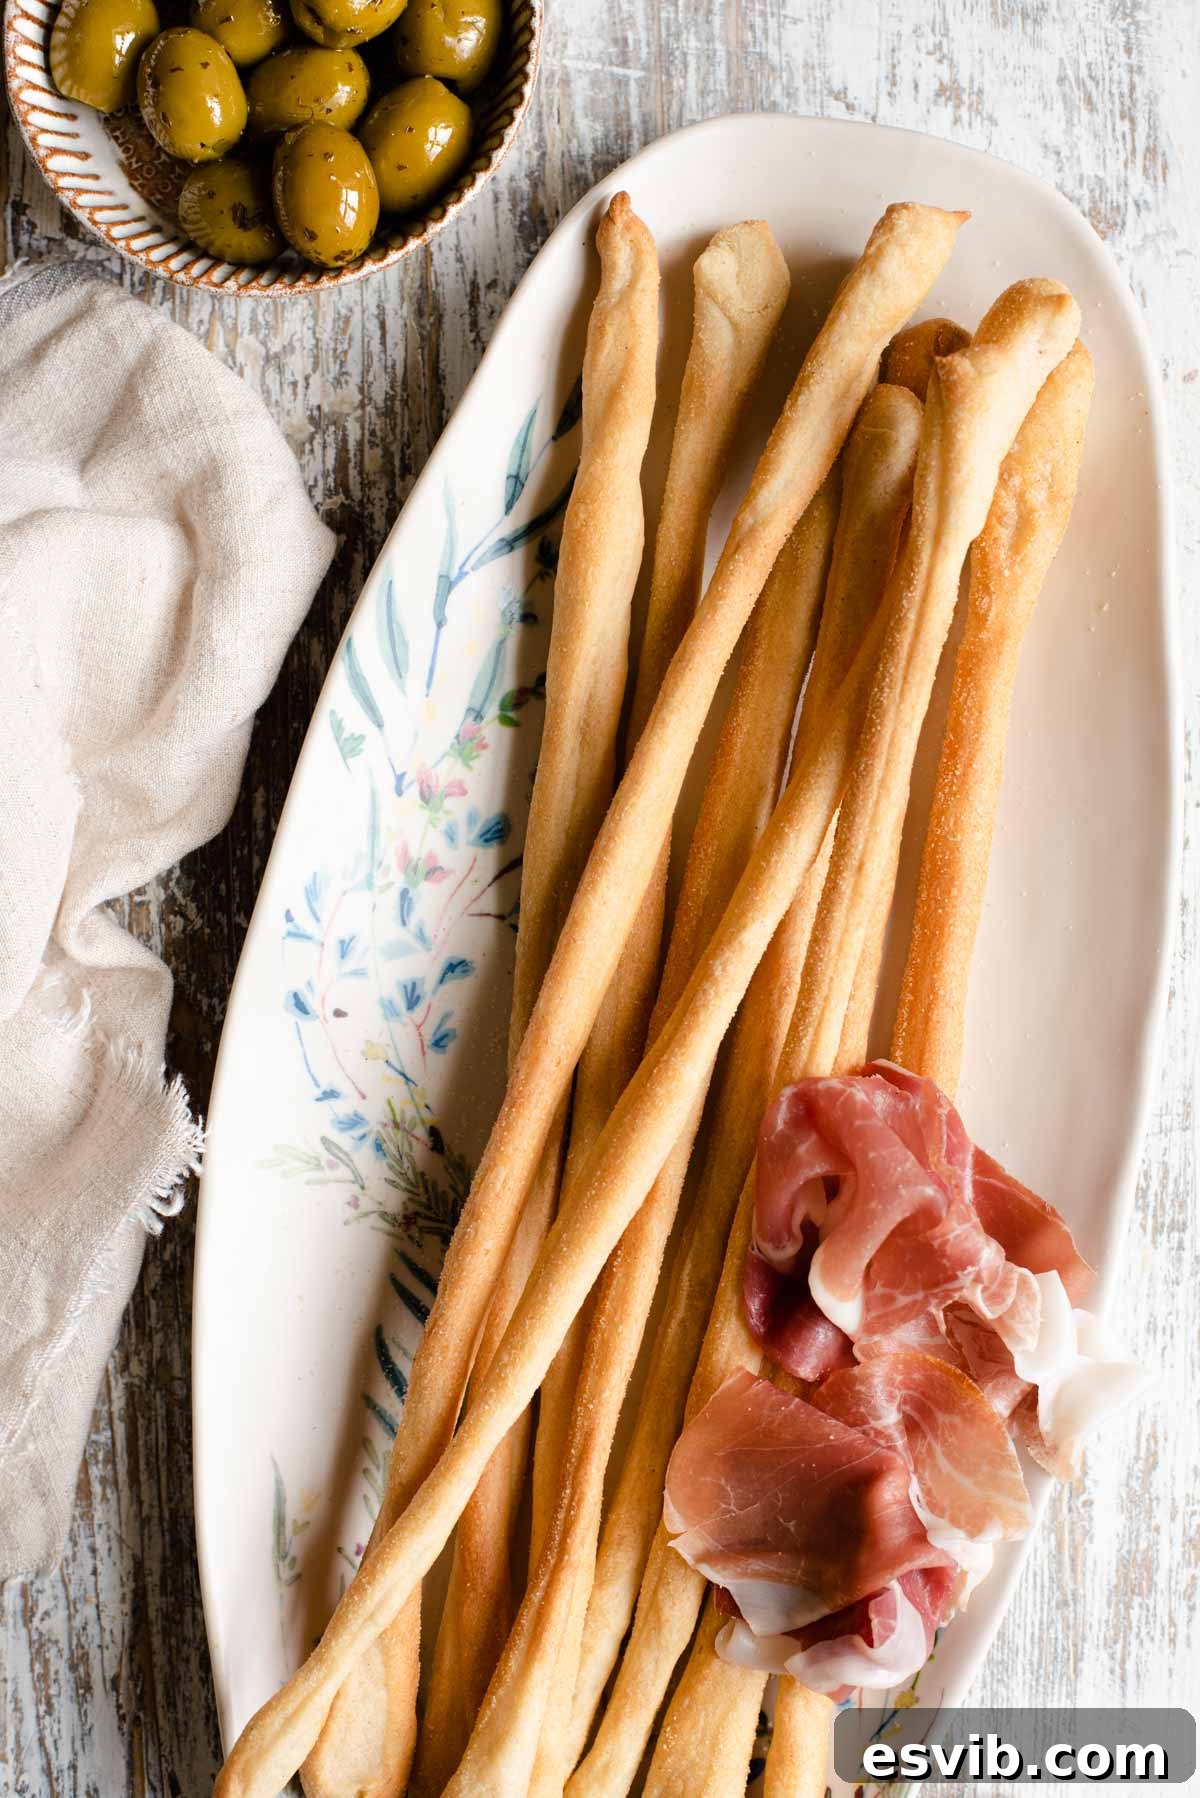
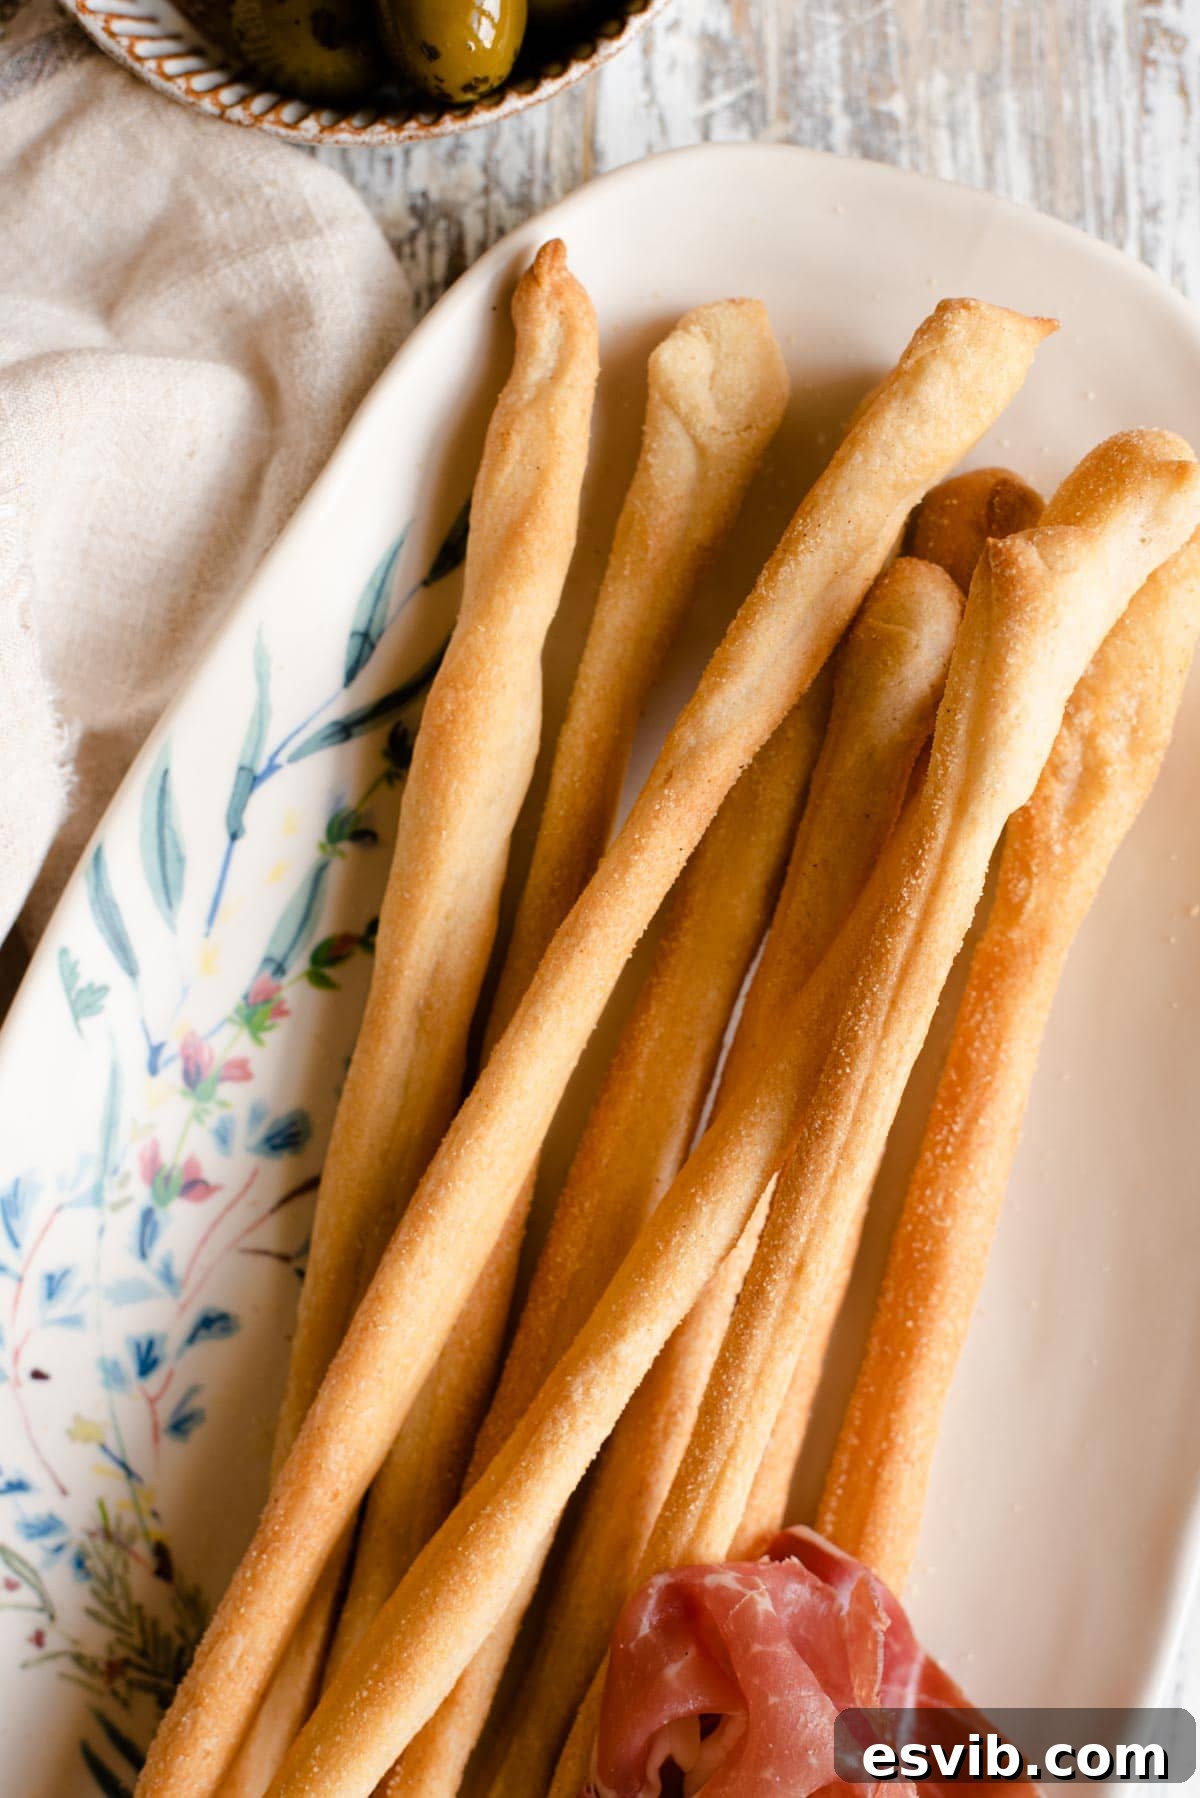
Homemade Italian Grissini – Long, thin, and delightfully crispy, these homemade Italian breadsticks are an absolute joy to create and even more delicious to savor. Perfect for serving alongside fine Italian beverages, an array of cured meats, and a selection of artisanal cheeses for a true Italian aperitivo experience. They also make an excellent companion for dunking into your favorite creamy dips or heartwarming soups. This recipe is not only incredibly satisfying but also surprisingly easy to master right in your own kitchen!
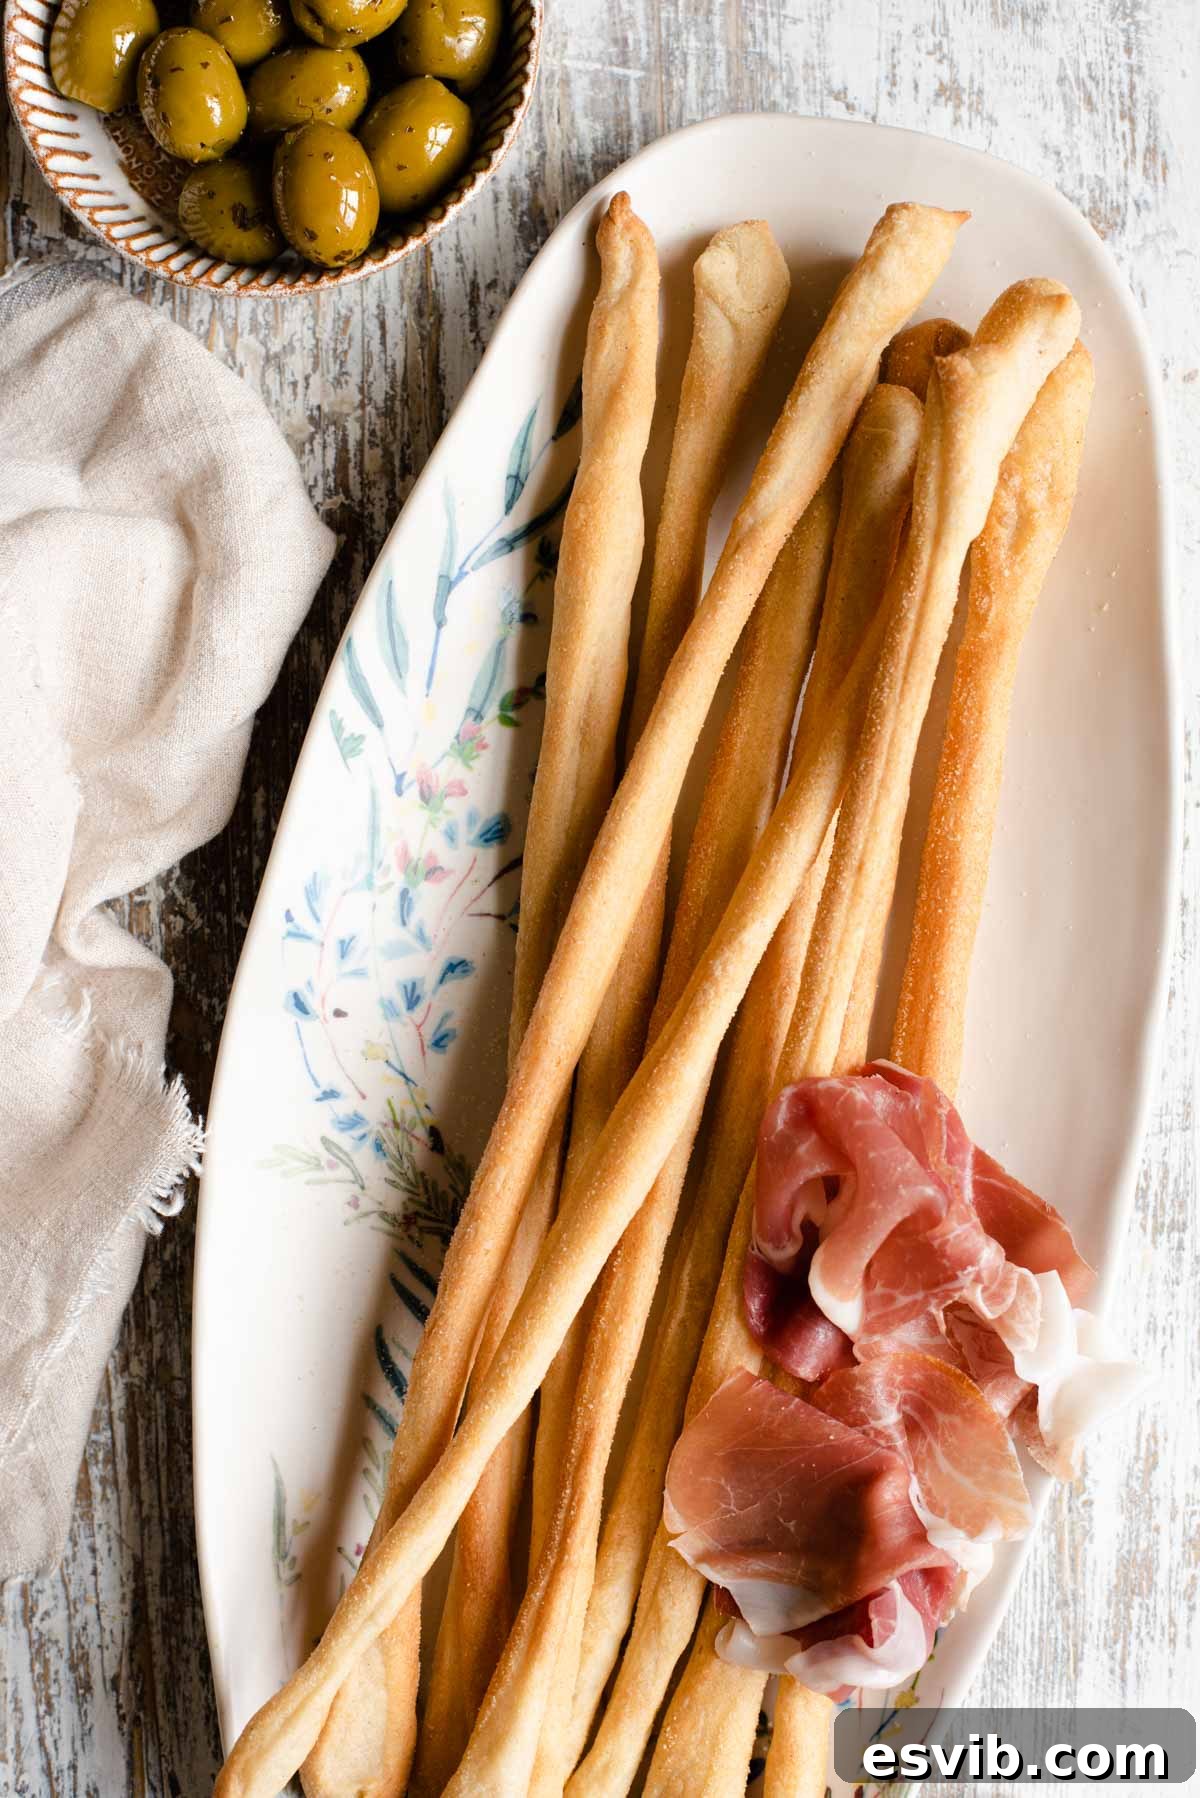
Discover the Charm of Homemade Grissini: Authentic Italian Breadsticks
Grissini, those beautifully rustic Italian breadsticks, are celebrated for their distinctive hand-stretched shape, giving them an irresistibly unique and knobbly homemade charm. Originating in the culinary heart of Turin, Italy, these slender delights have graced countless tables, evolving into various delicious forms. From a simple sprinkle of poppy seeds to the aromatic infusion of finely chopped fresh rosemary or a hint of fiery red pepper flakes stirred directly into the dough, the possibilities are endless.
Crafting your own grissini is an incredibly rewarding and straightforward process that yields impressive results. They are guaranteed to elevate your dinner table presentation, making any meal feel like a special occasion. Beyond their visual appeal, grissini are wonderfully versatile. Serve them proudly as part of a traditional Italian antipasti spread, complementing an assortment of cured meats, aged cheeses, and vibrant marinated olives. Alternatively, let them be your go-to utensil for scooping up luscious dips or a comforting accompaniment to hearty soups. The homemade flavor and satisfying crunch will truly delight your senses!
The Storied Origin of Grissini: A Taste of Turin
The history of grissini is as rich and fascinating as their flavor. These beloved breadsticks trace their roots back to the late 17th century in Turin, the capital of Italy’s Piedmont region. Legend has it that they were invented by a baker named Antonio Brunero for Duke Vittorio Amedeo II of Savoy, who suffered from digestive issues and found regular bread difficult to consume. The Duke’s doctor prescribed a lighter, more digestible bread, leading to the creation of these thin, crispy sticks.
Grissini quickly gained popularity not just in Turin but throughout Italy and beyond. Their dry, crisp nature made them ideal for long-term storage, a significant advantage in a time before modern refrigeration. This characteristic also made them a favored staple for travelers and soldiers. The hand-stretching technique, which is still central to making authentic grissini today, not only gives them their characteristic rustic look but also contributes to their unique airy and brittle texture, distinguishing them from other bread products. Each grissino, with its slight imperfections and irregular shape, tells a story of artisanal craftsmanship, a testament to the simple yet profound beauty of Italian baking.
Essential Ingredients for Perfect Italian Grissini
Crafting exceptional grissini begins with a careful selection of quality ingredients. Each component plays a vital role in achieving that signature crisp texture and delightful flavor. Here’s a detailed look at what you’ll need:
- Strong Bread Flour: This is the cornerstone of great grissini. Its higher protein content (typically 12-14%) develops more gluten, which is essential for giving the breadsticks their structure, elasticity, and that satisfying chewiness before becoming wonderfully crisp when baked. While all-purpose flour can be used in a pinch, strong bread flour will yield a superior texture. For an authentic Italian touch, “Tipo 00” flour can also be a fantastic choice, providing a very fine texture.
- Warm Water: The temperature of your water is crucial for activating the yeast. Lukewarm water, around 105-115°F (40-46°C), is ideal. It helps the yeast to bloom efficiently, ensuring your dough rises properly and in a timely manner. Using water that’s too hot can kill the yeast, while water that’s too cold will significantly slow down the proofing process.
- Extra Virgin Olive Oil: Olive oil serves a dual purpose in this recipe. Incorporated directly into the dough, it adds richness and a subtle depth of flavor characteristic of Italian baking. When brushed generously over the shaped breadsticks before baking, it contributes significantly to their beautiful golden-brown color and incredibly crispy exterior. Always opt for good quality extra virgin olive oil for the best taste.
- Salt and Sugar: These two seemingly simple ingredients are fundamental for both seasoning and functionality. Salt enhances the overall flavor of the breadsticks, balancing the natural sweetness of the dough. Sugar, while only a small amount, acts as food for the yeast, helping to activate it and encourage a more vigorous rise. It also aids in achieving a lovely golden crust during baking.
- Fast-Action Yeast: Also known as instant yeast, this type is incredibly convenient as it doesn’t require prior activation in water. It can be mixed directly with the dry ingredients. However, it’s always wise to check your yeast packet instructions, as some varieties might benefit from a quick bloom in warm water before combining with the flour. Active dry yeast can also be used, but typically requires activation first.
- Semolina: This coarse durum wheat flour is key for preventing the breadsticks from sticking to your baking tray. A light dusting on the tray and over the dough before shaping and baking not only ensures easy release but also imparts a slight, pleasant grittiness and extra crispness to the breadsticks’ surface, enhancing their rustic appeal.
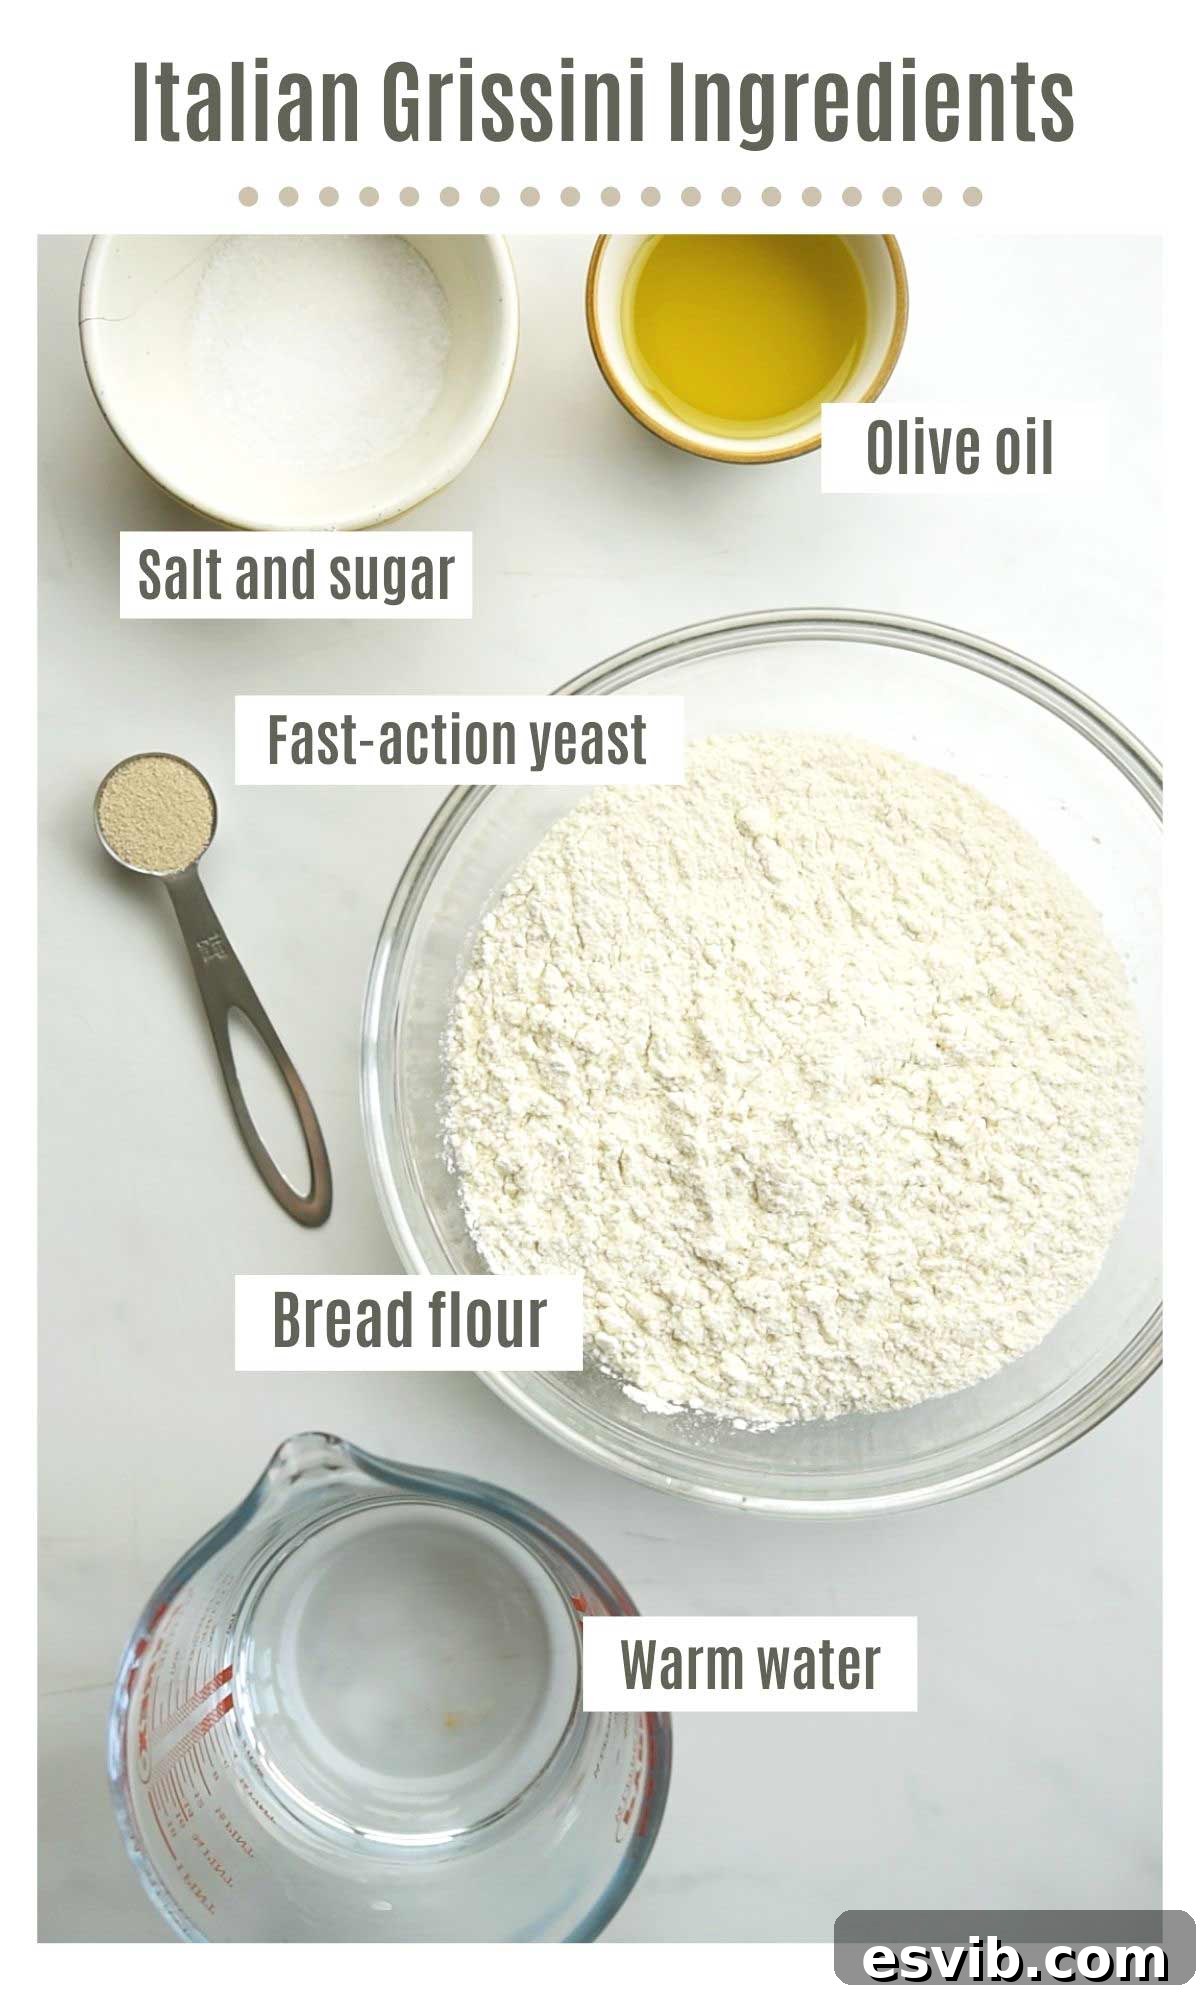
The careful balance of these ingredients, as shown in the photo below, ensures you create truly incredible, authentic Grissini right at home!
How to Make Crispy Italian Grissini Breadsticks: A Step-by-Step Guide
Making homemade grissini is a delightful process that transforms simple ingredients into golden, crispy perfection. Follow these detailed steps to achieve the best results:
- Prepare Your Dough: In a large mixing bowl, combine the strong bread flour, sugar, and fine sea salt. Whisk them together thoroughly to ensure an even distribution. Create a small well in the center of the dry ingredients. Into this well, pour the fast-action yeast, warm water (ensure it’s lukewarm, not hot!), and two tablespoons of olive oil.
- Form and Knead the Dough: Using a wooden spoon or your hands, gently stir all the ingredients together from the center outwards until a shaggy, rough dough forms. Transfer this dough onto a lightly floured, clean work surface. Begin kneading the dough vigorously. Aim for a smooth, elastic consistency, which typically takes about 8-10 minutes by hand. If the dough becomes too sticky during kneading, lightly dust your work surface with a small amount of extra flour, but avoid adding too much, as this can make the breadsticks tough. The dough should feel pliable and bounce back when gently poked.
- First Rest (Proofing): Once kneaded, shape the dough into a smooth ball. Lightly dust a clean bowl with flour, place the dough ball inside, and cover it tightly with plastic wrap or a damp kitchen towel. Let the dough rest in a warm place for about 15 minutes. This brief rest period allows the gluten to relax, making the dough easier to handle in the next step.
- Shape the Dough for Second Proofing: After the initial rest, remove the dough from the bowl and gently press it down to form a rough rectangle. Now, fold one of the longer edges lengthwise into the middle of the dough. Take the opposite long edge and fold it right over, ensuring it overlaps the first fold and reaches the other end. This folding technique helps create layers and tension in the dough, resulting in a log-like shape.
- Prepare for Second Proof: Turn the dough log over so the seam is underneath. Gently push and pat the ends inwards to refine its rectangular shape. Lightly brush a large baking tray with olive oil. Place the shaped dough rectangle onto this prepared tray. Brush the top surface of the dough with a little more olive oil to prevent it from drying out, then loosely cover the tray with plastic wrap.
- Second Proofing: Allow the dough to prove in a warm environment for approximately 1 hour, or until it has visibly doubled in size. This second proof is essential for developing flavor and achieving the right texture in your grissini.
- Preheat Oven & Prepare Tray: While your dough is finishing its second proof, pre-heat your oven to 450°F (230°C). Lightly sprinkle semolina over the baking tray where you will place the stretched breadsticks. Also, lightly sprinkle a small amount of semolina over the uncovered, proved dough rectangle. This prevents sticking and adds a lovely crunch.
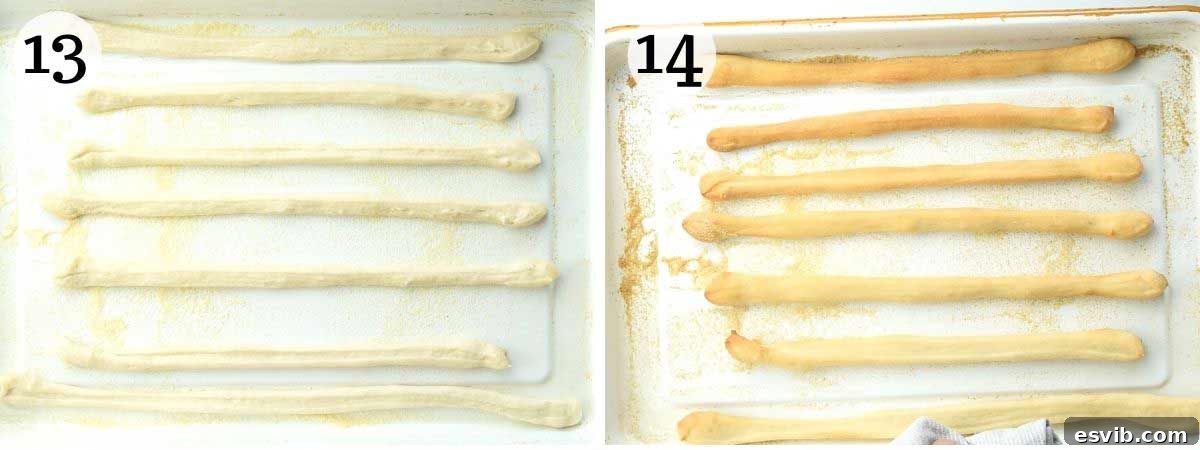
- Cut and Hand-Stretch Grissini: Using a pizza cutter or a sharp knife, carefully cut 1/4 inch (about 1 cm) thick strips widthwise from the dough rectangle. Take each strip and gently, yet confidently, stretch it by hand. Roll it between your palms or stretch it by pulling the ends outwards until it forms a long, thin breadstick that can fit comfortably on your prepared baking tray. The beauty of grissini lies in their rustic, hand-stretched nature, so don’t worry about perfect uniformity – embrace the slight variations!
- Arrange and Bake: Continue cutting and stretching the remaining dough until your baking tray is filled with individual breadsticks. Ensure you leave a small gap between each grissino so they don’t touch and can crisp up evenly on all sides. Bake them in the preheated oven for 12-15 minutes, or until they turn a beautiful light golden brown and feel firm and crispy.
- Cool and Serve: Once baked, remove the grissini from the oven and transfer them to a wire rack. Allow them to cool completely before serving. This cooling step is vital for them to achieve their ultimate crispy texture.
Elevate Your Grissini: Delicious Variations and Flavor Options
While classic grissini are delightful on their own, they also serve as a fantastic canvas for a myriad of flavor enhancements. Don’t hesitate to experiment and customize them to your liking!
- Parmesan Grissini: For a savory, cheesy twist, incorporate about 1/4 cup (30g) of freshly grated Parmesan cheese directly into the flour mixture before adding the wet ingredients. The rich, salty notes of Parmesan beautifully complement the crisp breadsticks. Pecorino Romano could also be a delightful alternative.
- Spicy Grissini: Add a tantalizing kick to your breadsticks by mixing in 1-2 teaspoons of dried chili flakes or red pepper flakes (adjust to your preferred level of heat) with the dry ingredients. For an even more complex flavor profile, I highly recommend adding 1 teaspoon of fennel seeds; their subtle anise notes pair wonderfully with the spice. A pinch of smoked paprika could also add an interesting smoky dimension.
- Rosemary Grissini: Infuse your grissini with the aromatic essence of rosemary. Finely chop 1-2 sprigs of fresh rosemary and mix them into the flour. The fragrant, piney notes of fresh rosemary are a classic pairing with Italian bread. Dried rosemary can also be used, but fresh offers a more vibrant flavor. Other fresh herbs like thyme or oregano could be experimented with for different profiles.
- Seeded Grissini: After you’ve shaped your grissini and laid them on the baking tray, lightly brush them with a little extra olive oil. Then, generously sprinkle your choice of seeds over the top. Sesame seeds are a popular choice, providing a nutty crunch. Poppy seeds offer a subtle texture and flavor. Don’t limit yourself – explore options like black sesame seeds, flax seeds, or even a mix of everything bagel seasoning for a gourmet touch. The olive oil will help the seeds adhere beautifully during baking.
- Garlic and Herb Grissini: Add 1-2 teaspoons of garlic powder and 1 tablespoon of dried Italian herb blend to your flour mixture for a wonderfully fragrant and savory breadstick that complements almost any meal.
Top Tips and Frequently Asked Questions for Grissini Success
Mastering homemade grissini is straightforward with a few key insights. Here are some expert tips and answers to common questions to ensure your breadsticks turn out perfectly every time:
- Yeast Activation: Always double-check the instructions on your yeast packet. While fast-action (instant) yeast is designed to be mixed directly with dry ingredients, some brands or types of active dry yeast may require you to dissolve them in warm water for 5-10 minutes first to “bloom” and ensure they are active. If your yeast is dormant, your dough won’t rise.
- Optimal Proving Conditions: Yeast thrives in warmth. Using warm water to make your dough is the first step, as it kickstarts the yeast’s activity. For optimal rising, place your covered dough in a warm, draft-free spot. A slightly warmed oven (turned off, with just the light on) or a sunny spot on your counter can work wonders. If your kitchen is particularly cool, the dough may simply take a little longer to double in size, so be patient.
- Controlling Texture: The baking time directly impacts the final texture of your grissini. For exceptionally crunchy and crisp breadsticks, stick to the full recommended cooking time of 12-15 minutes, ensuring they achieve a deep golden color. If you prefer a slightly softer, chewier breadstick with a crisp exterior, reduce the baking time by about 3-5 minutes. Keep a close eye on them during the last few minutes to achieve your desired crispness.
- Storage Solutions: Homemade grissini maintain their freshness and crispness best when stored in an airtight container at room temperature. They will keep beautifully for 5-7 days. If, after a few days, they start to lose some of their crunch and become slightly soft or chewy, don’t despair! You can easily revive them by popping them back into a hot oven (around 350°F or 175°C) for about 5 minutes until they crisp up again.
- Freezing for Future Enjoyment: Yes, grissini are excellent candidates for freezing! You can freeze either the unbaked dough (after the first rise) or the fully baked breadsticks. For baked grissini, allow them to cool completely, then arrange them in a single layer on a baking sheet and freeze until solid. Transfer the frozen grissini to plastic freezer bags, airtight containers, or wrap them tightly in plastic wrap and then aluminum foil to prevent freezer burn. Thaw them completely at room temperature before serving. If you wish to serve them warm or extra crispy, a quick reheat in a hot oven (around 350°F or 175°C) for 5-10 minutes will do the trick.
Frequently Asked Questions About Grissini
Grissini are incredibly versatile. They are traditionally enjoyed as a delightful snack or part of an Italian aperitivo, often served alongside drinks, an assortment of cured meats (like prosciutto or salami), fine cheeses, and marinated olives. They also make excellent dippers for various appetizers such as hummus, pesto, or creamy artichoke dip. Furthermore, they can be served with hearty soups, offering a wonderful alternative to croutons, adding a delightful crunch to every spoonful.
While strong bread flour is highly recommended for achieving the best possible texture – a robust structure that crisps beautifully – it’s not strictly essential. Bread flour has a higher protein content, which contributes to better gluten development. However, this recipe has been successfully tested with both all-purpose (plain) flour and Italian 00 flour, and both yield delicious grissini. So, feel free to use what you have on hand, though you might notice subtle differences in the final crispness and chewiness.
To keep your homemade grissini fresh and crisp, store them in an airtight container at room temperature. They will maintain their quality for about 5-7 days. If they begin to soften slightly or become chewy over time, a quick refresh in a hot oven (approximately 350°F or 175°C) for about 5 minutes will bring back their delightful crispness. Always ensure they are completely cool before storing to prevent condensation and sogginess.
Absolutely! Grissini can be frozen successfully, both baked and unbaked. For baked breadsticks, allow them to cool completely, then store them in plastic freezer bags, airtight containers, or wrap them tightly in a combination of plastic wrap and aluminum foil to protect them from freezer burn. Thaw them completely at room temperature before serving. For a warm or extra crispy treat, you can pop the thawed grissini into a hot oven for a few minutes. Freezing the dough after its first rise is also an option; just thaw, shape, proof, and bake when ready.
More Italian Antipasti Recipes You Might Love
- Rosemary Focaccia Bread – A fragrant, soft, and utterly delightful bread, perfect for sharing.
- Gnocco Fritto (Italian Fried Dough) – Light and airy fried dough, traditionally served with cured meats and cheeses.
- La Piadina: Italian Flatbread – A simple yet versatile flatbread, ideal for fillings or as an accompaniment.
- La Giardiniera sott’aceto – Italian Pickled Vegetables – A vibrant and tangy mix of pickled vegetables, a staple in Italian cuisine.
- Fried Sausage Stuffed Olives – Delicious And Crispy – A wonderfully crispy and savory appetizer, bursting with flavor.
- Italian Farinata Chickpea Flatbread (La Cecina Toscana) – A naturally gluten-free and incredibly flavorful savory pancake made from chickpea flour.
We hope you enjoy crafting these delightful Homemade Grissini Breadsticks as much as we do! If you’ve tried this recipe or any other on our blog, please take a moment to share your experience in the comments below – we truly love hearing from you! Your feedback helps our community of home cooks. Happy baking!
Grissini – Italian Breadsticks Recipe Card
By Emily
Italian Grissini – Long, thin and crispy homemade Italian breadsticks perfect served with drinks, cured meats and cheese for an Italian aperitivo or for dunking in dips or soup, so delicious and easy to make at home!
Prep Time: 30 mins
Cook Time: 12-15 mins
Proving Time: 1 hr 20 mins
Total Time: 2 hrs 2 mins
Servings: 20 breadsticks
Ingredients
- 2 cups bread flour, spooned and levelled (270g)
- 1 tsp sugar
- 1.5 tsp fine sea salt
- 1 tsp fast action yeast
- 2 tbsp olive oil
- ¾ cup warm water (180ml)
- Semolina, for dusting
Instructions
- Place the flour, sugar and salt in a mixing bowl and stir together. Make a well in the middle and add the yeast, warm water and olive oil.
- Stir everything together until a rough dough forms then tip out onto a clean work surface. Knead the dough until it’s smooth and elastic. You’ll probably need to sprinkle the work surface lightly with flour as you knead the dough if it’s sticking.
- Shape the dough into a ball and place in a clean bowl dusted lightly with flour. Cover with plastic wrap and let the dough rest for 15 minutes.
- After the dough has rested remove it from the bowl and press it gently to form a rectangle. Fold one edge lengthwise into the middle of the dough then fold the opposite edge right over so it overlaps the first fold right to the opposite end, it should resemble a log.
- Turn the log over and gently push each end in so it resembles a rough rectangle. Place the dough on a baking tray brushed with olive oil. Brush the top of the dough with more olive oil loosely top with plastic wrap.
- Leave the dough to prove for 1 hour or until doubled in size.
- Pre-heat the oven to 450F (230C).
- Lightly sprinkle semolina over the baking tray and sprinkle a little more over the uncovered dough.
- Using a pizza cutter or sharp knife cut 1/4 inch (1cm) thick strip widthwise from the dough. Gently stretch the dough into a long breadstick long enough to fit your tray. Continue with the rest of the dough until your tray is filled with breadsticks making sure to keep a small gap between each one so they aren’t touching.
- Bake in the oven for 12-15 minutes or until lightly golden. Let cool completely before serving.
Notes
- Yeast: I use fast action yeast that doesn’t need to be activated in water first. Check your own packet instructions before use and if you need to you can add it to the warm water for the advised time before pouring into the flour.
- Proving: Warm temperatures help dough rise quicker so use warm water to make the dough. If you use cold water that’s fine it might just take a little longer.
- Texture: The full cooking time will give you crunchy and crisp breadsticks. If you’d like them a little softer, cook them for around 5 minutes less.
- Storage: They will keep well in an airtight container for 5-7 days. If they start to turn slightly soft or chewy you can pop them back in a hot oven for 5 minutes to crisp up.
- Freezing: These breadsticks can be frozen in plastic freezer bags, containers or tightly wrapped in plastic wrap and aluminium foil. Thaw completely before serving; you can pop them in a hot oven to heat up if desired.
Nutrition
Nutrition information is an approximation per serving (based on 20 servings):
- Calories: 59 kcal
- Carbohydrates: 9g
- Protein: 2g
- Fat: 2g
- Saturated Fat: 1g
- Sodium: 175mg
- Potassium: 14mg
- Fiber: 1g
- Sugar: 1g
- Calcium: 2mg
- Iron: 1mg
Helpful Info for All Recipes
- I always use extra virgin olive oil in all of my recipes unless stated otherwise.
- When I use canned or jarred tomatoes of any kind I always use Cirio or Mutti brands for the best results and flavor.
- All vegetables are medium sized unless stated otherwise.
- All recipes are tested and developed using a fan (convection) oven.
- Find out more about how nutrition is calculated.
- Check out our must-have Italian Pantry Staples.
- You can also find all our Essential Kitchen Tools for Italian Cooking.