
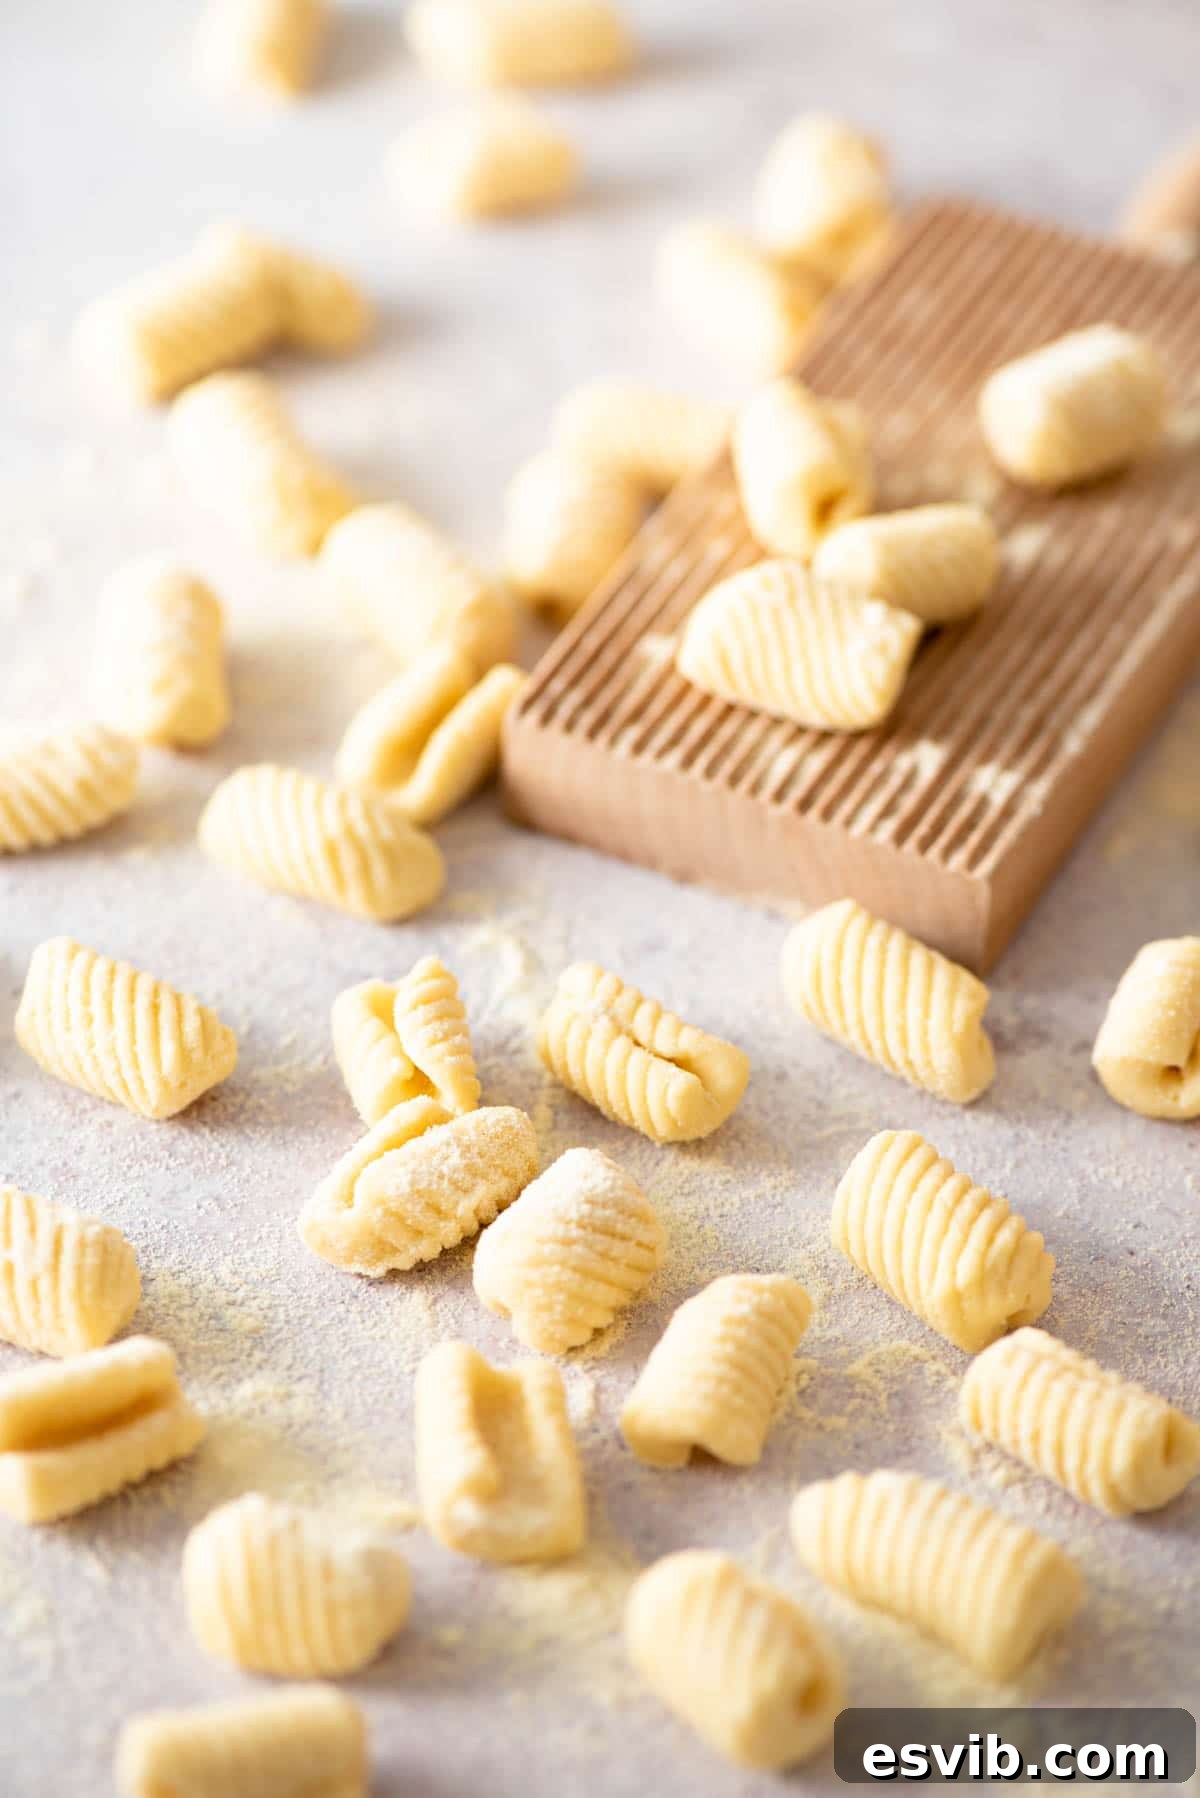
Homemade Gnocchetti Sardi (Malloreddus): Your Guide to Authentic Sardinian Pasta
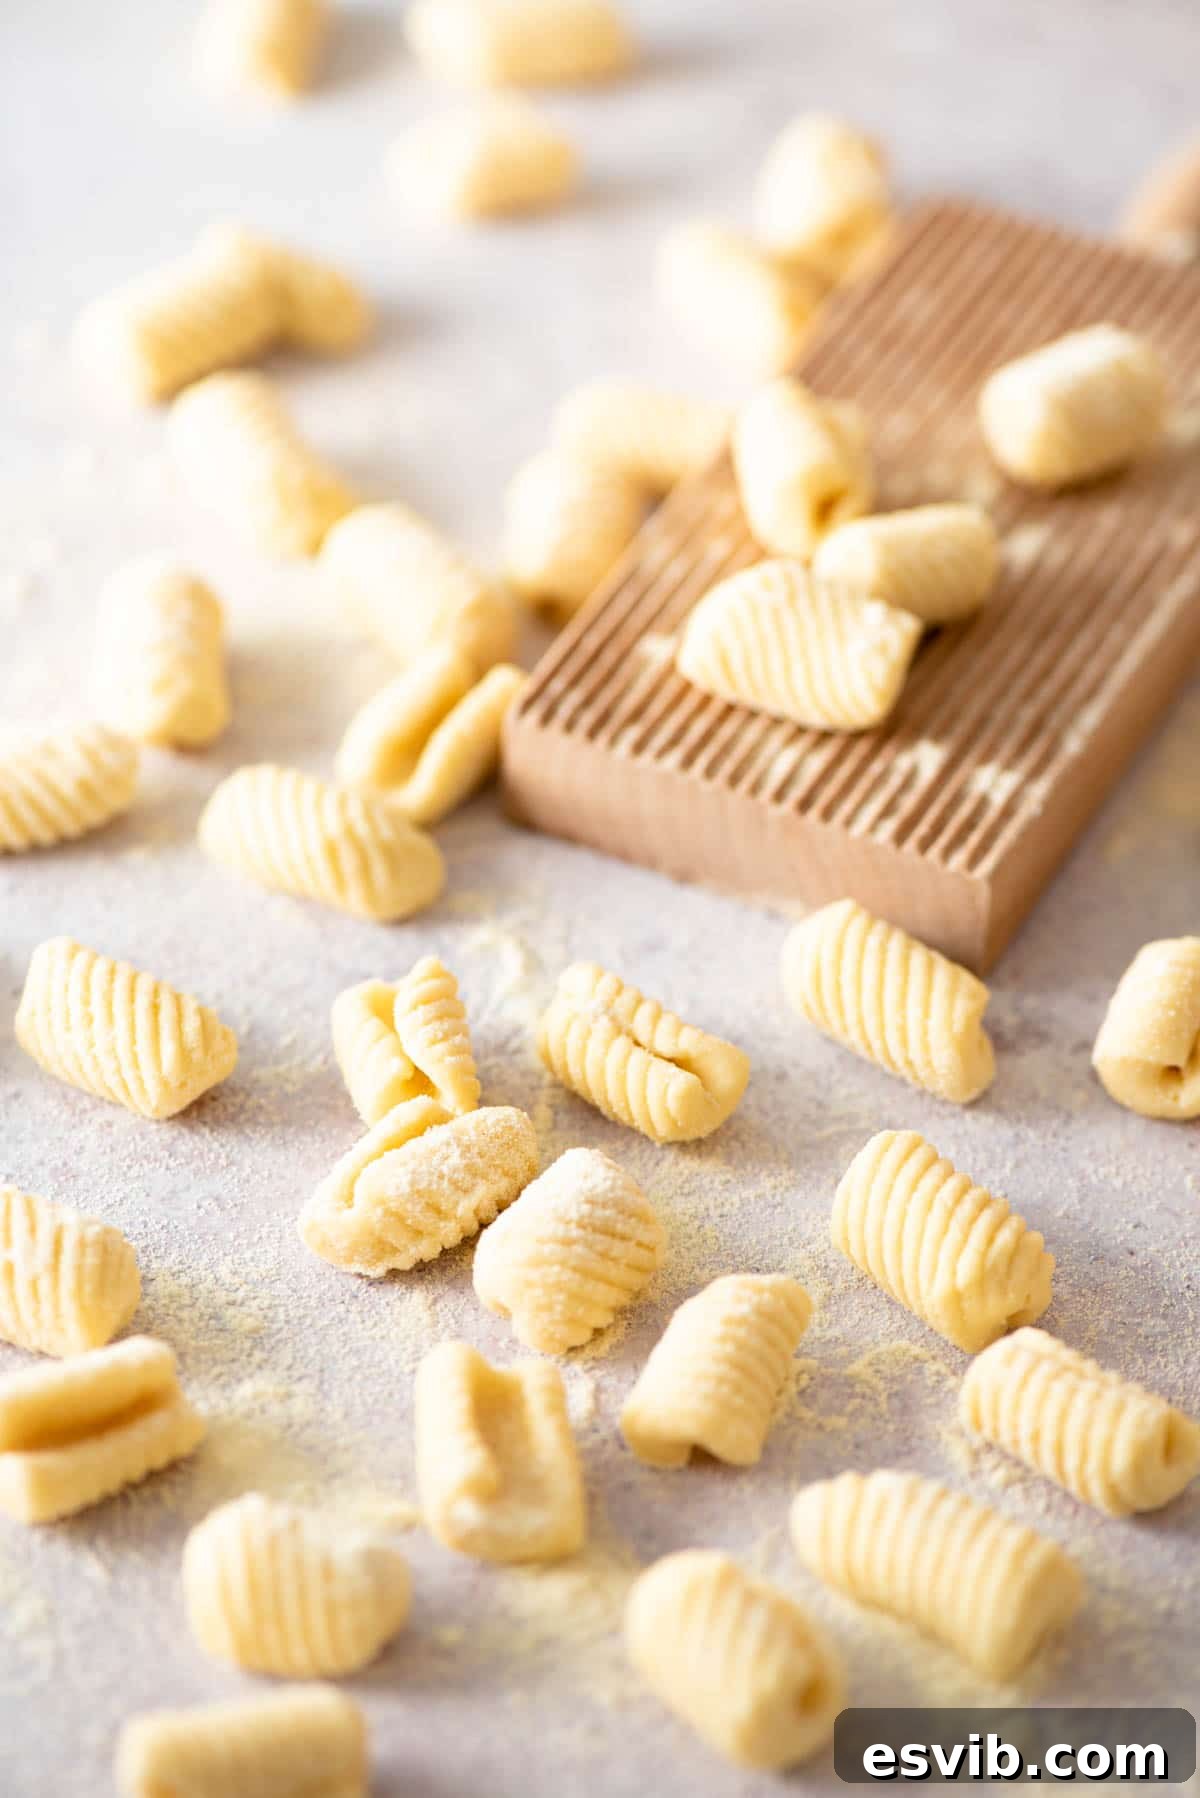
Embark on a culinary journey to the sun-drenched island of Sardinia by learning how to make Gnocchetti Sardi, affectionately known as Malloreddus. This exquisite pasta shape, a staple in Sardinian homes, is remarkably simple to create using just two fundamental ingredients: semolina flour and water. With its distinctive ridged design, perfectly crafted with a gnocchi board or even a basic kitchen fork, Malloreddus is not just a dish; it’s an experience, promising to transport your taste buds straight to the heart of Italian tradition.
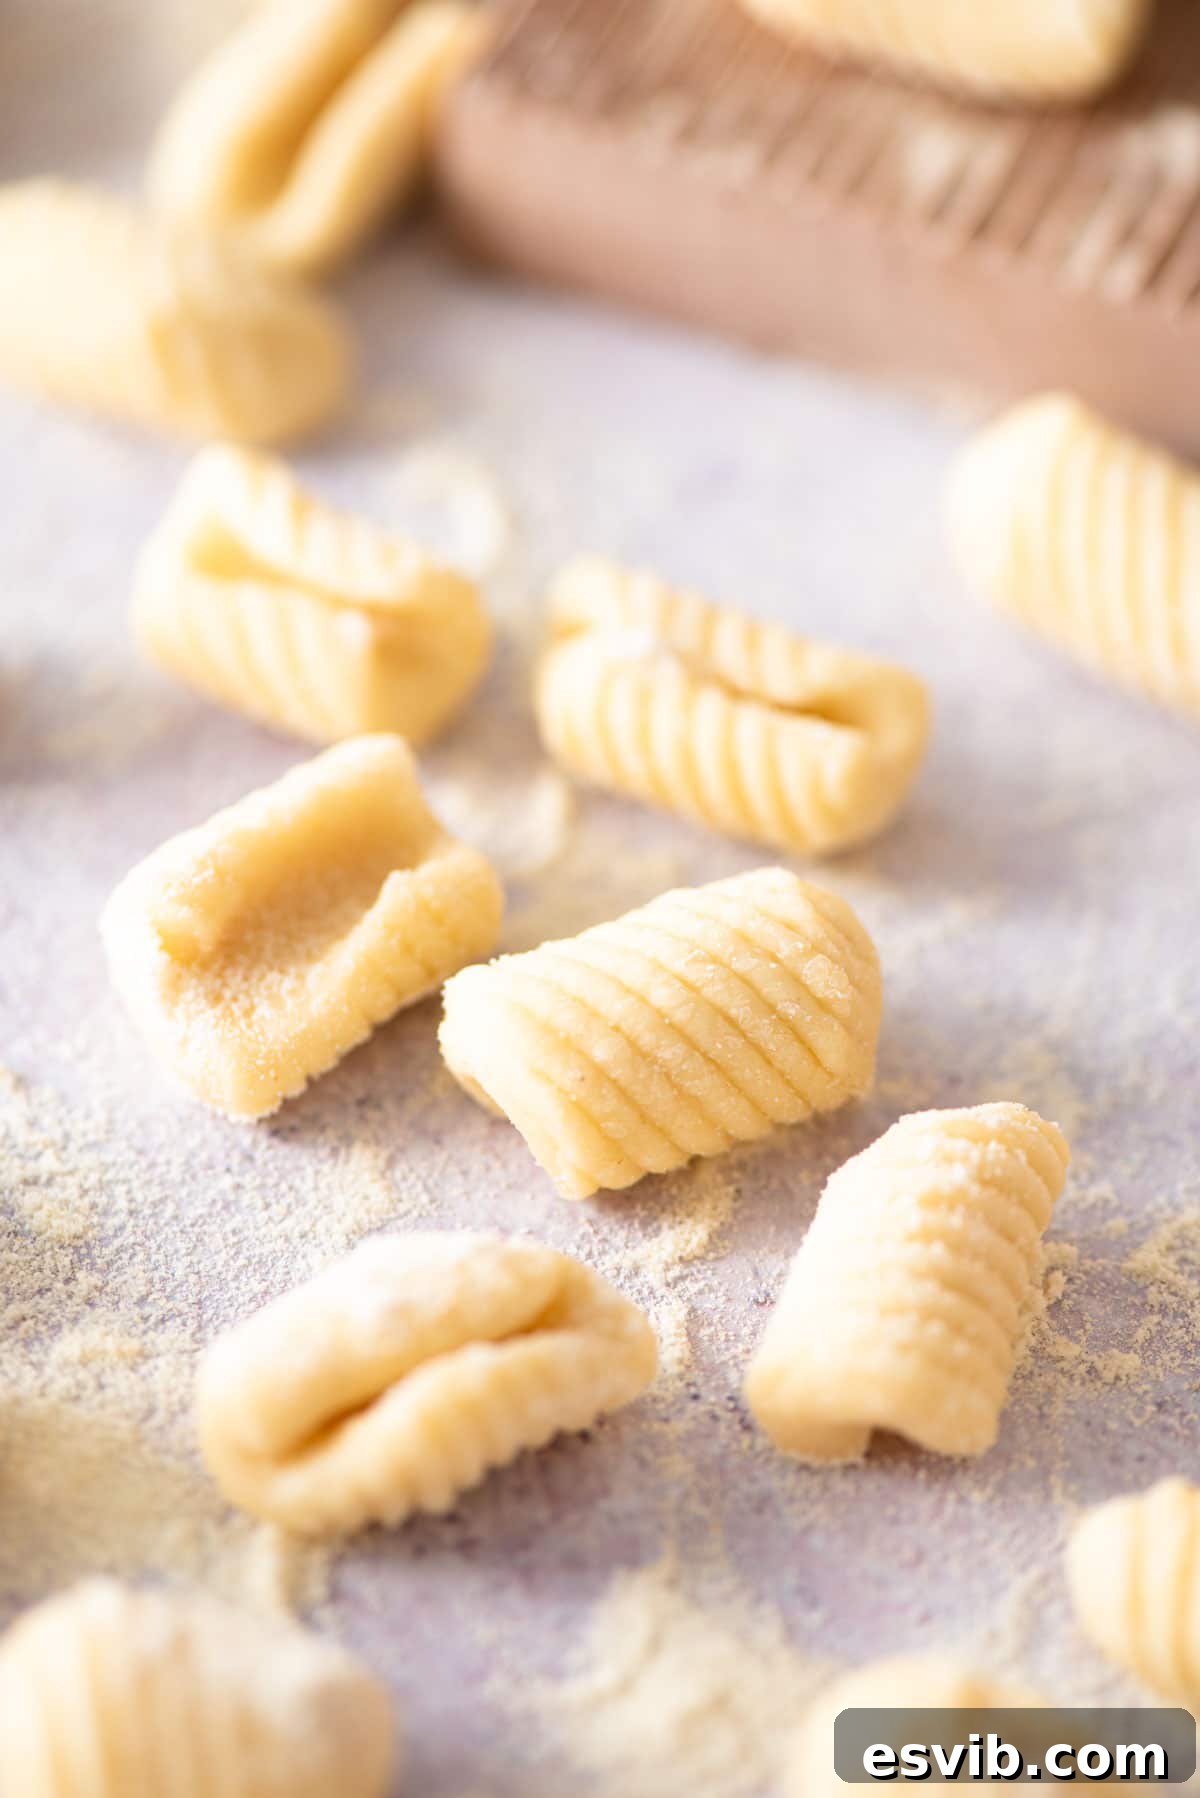
Gnocchetti Sardi, meaning “little gnocchi,” are tiny, shell-like pasta pieces with ridges that are integral to their charm and function. While their name suggests a resemblance to potato gnocchi, they are distinctly different, made from a robust semolina pasta dough. This traditional Sardinian pasta boasts a delightful chewiness and an incredible ability to cling to rich, flavorful sauces, making every bite a true delight. Unlike more delicate egg pasta doughs, semolina dough is firm and forgiving, making it an ideal choice for beginners eager to delve into the rewarding world of homemade pasta.
This comprehensive guide will walk you through every step of making perfect Gnocchetti Sardi from scratch. We’ll cover essential ingredients, provide detailed shaping techniques, offer expert tips for success, and explore traditional serving suggestions. Whether you’re a seasoned pasta maker or trying your hand at homemade pasta for the very first time, prepare to be amazed at how accessible and enjoyable crafting this Sardinian delicacy can be.
Table of Contents
- Ingredients – What You Need
- Step-by-Step Photos and Recipe Instructions
- Expert Recipe Tips
- How to Serve Gnocchetti Sardi
- More Homemade Pasta Recipes to Try
- Full Recipe
Ingredients – What You Need for Authentic Malloreddus
Crafting these traditional Sardinian pasta shells requires surprisingly few ingredients, emphasizing the quality and simplicity inherent in Italian cooking. Below is a detailed look at the essentials:
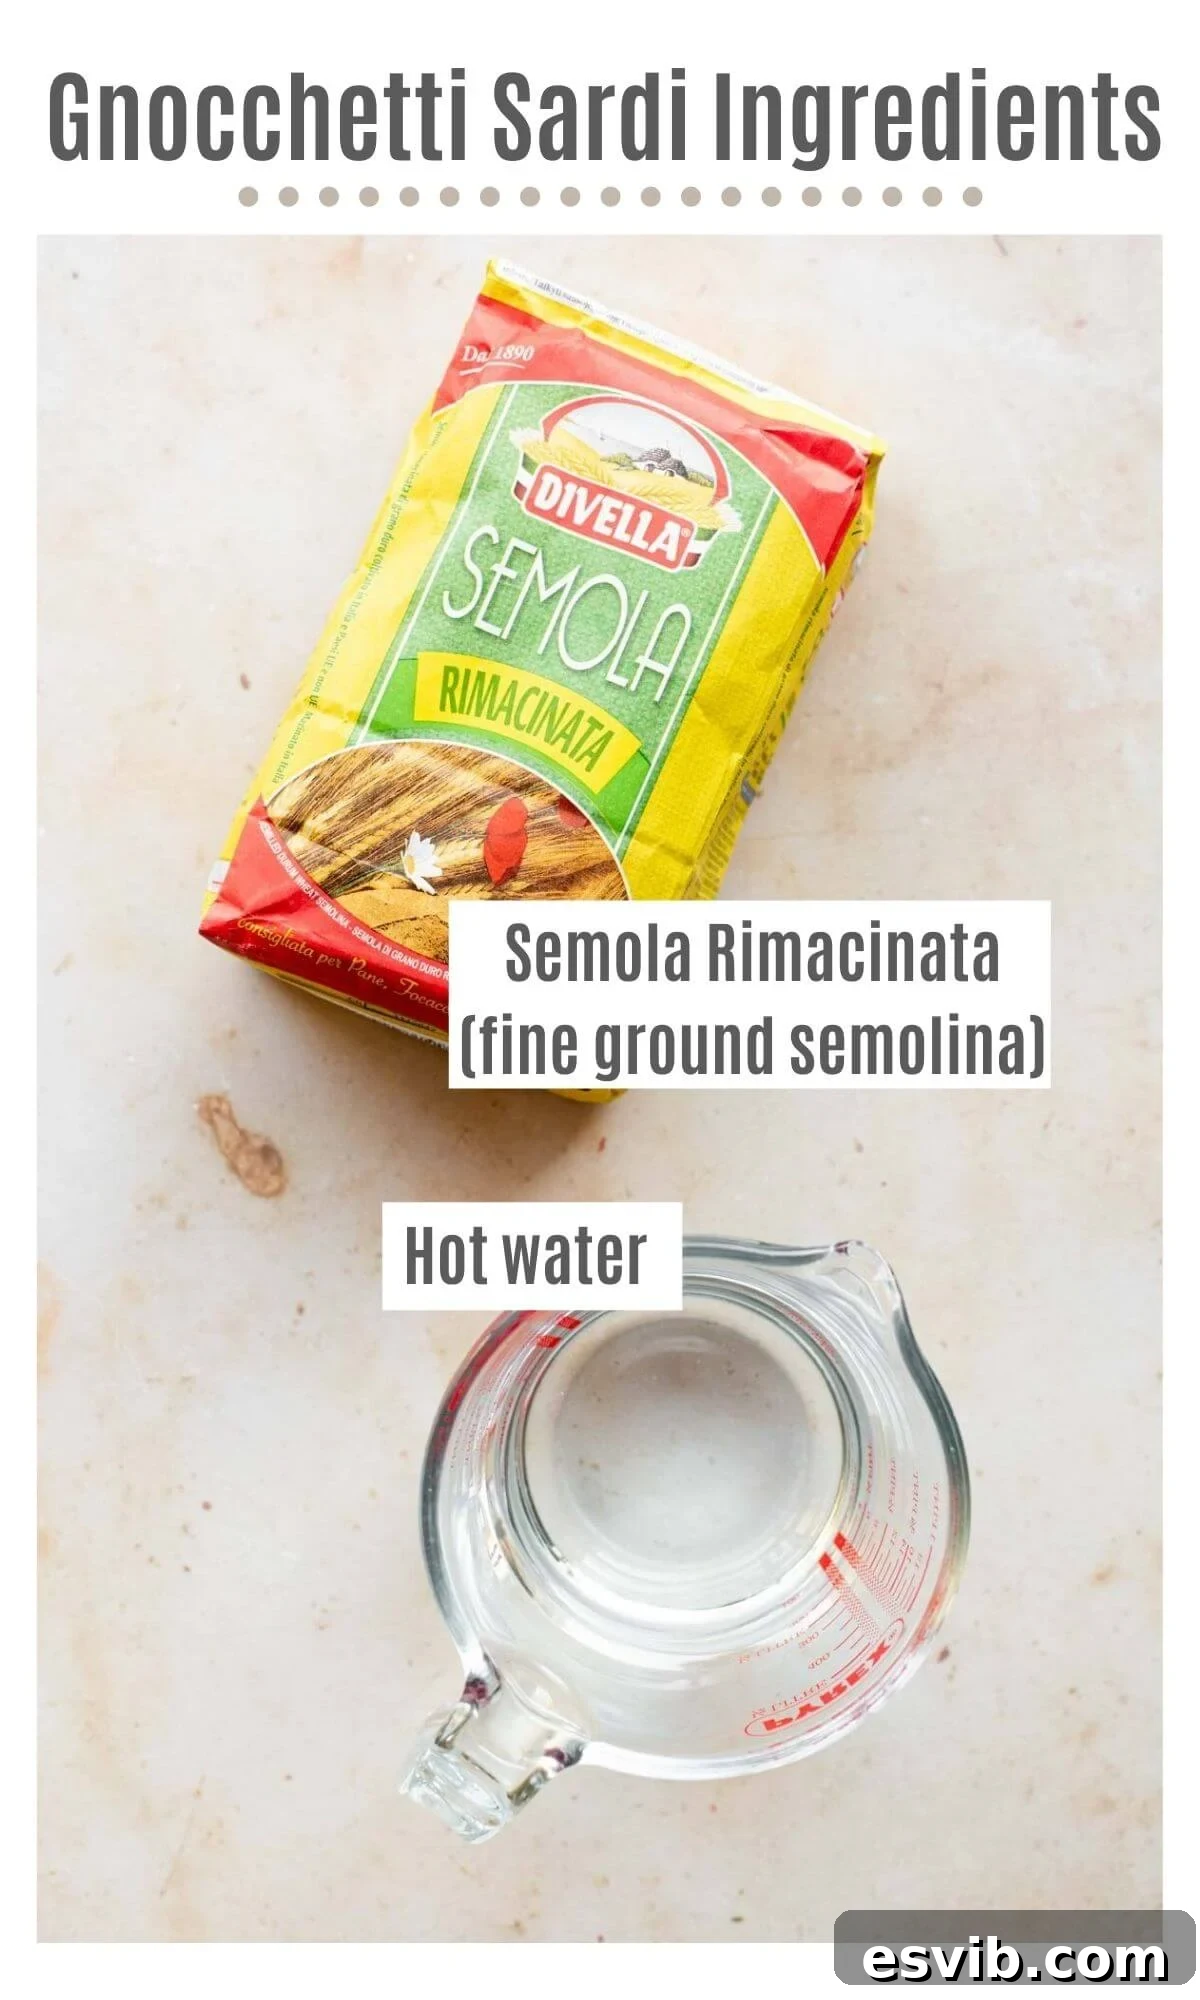
- Semola Rimacinata (300g / 2 cups): This is the star ingredient for any authentic semolina pasta. “Semola Rimacinata” translates to “re-milled semolina,” indicating that it has been ground twice, resulting in an incredibly fine flour with the consistency of a fine powder. This fine texture, combined with its high protein content, is crucial for achieving the characteristic chewiness and vibrant yellow hue of traditional Southern Italian pasta. You can often find Semola Rimacinata in Italian delis, specialty food stores, or easily order it online. Avoid regular coarse semolina or all-purpose flour for this recipe, as they will not yield the same desirable texture and flavor.
- Hot Water (150ml / 2/3 cup): While cold water can certainly be used, opting for hot or warm water makes a significant difference in the dough-making process. Warm water helps to activate the gluten in the semolina flour more efficiently, resulting in a dough that is softer, more pliable, and much easier to knead. This can drastically reduce the effort required and help you achieve that perfectly smooth, elastic dough faster. The ratio is generally half water to flour by weight, so 300g of flour will require 150ml of water.
These two humble ingredients are all you need to create a pasta that is rich in flavor and tradition.
Step-by-Step Guide to Crafting Perfect Gnocchetti Sardi
Follow these detailed instructions to create beautiful, ridged Gnocchetti Sardi from your kitchen. Each step is designed to guide you through the process with ease, ensuring delicious results.
1. Prepare the Dough
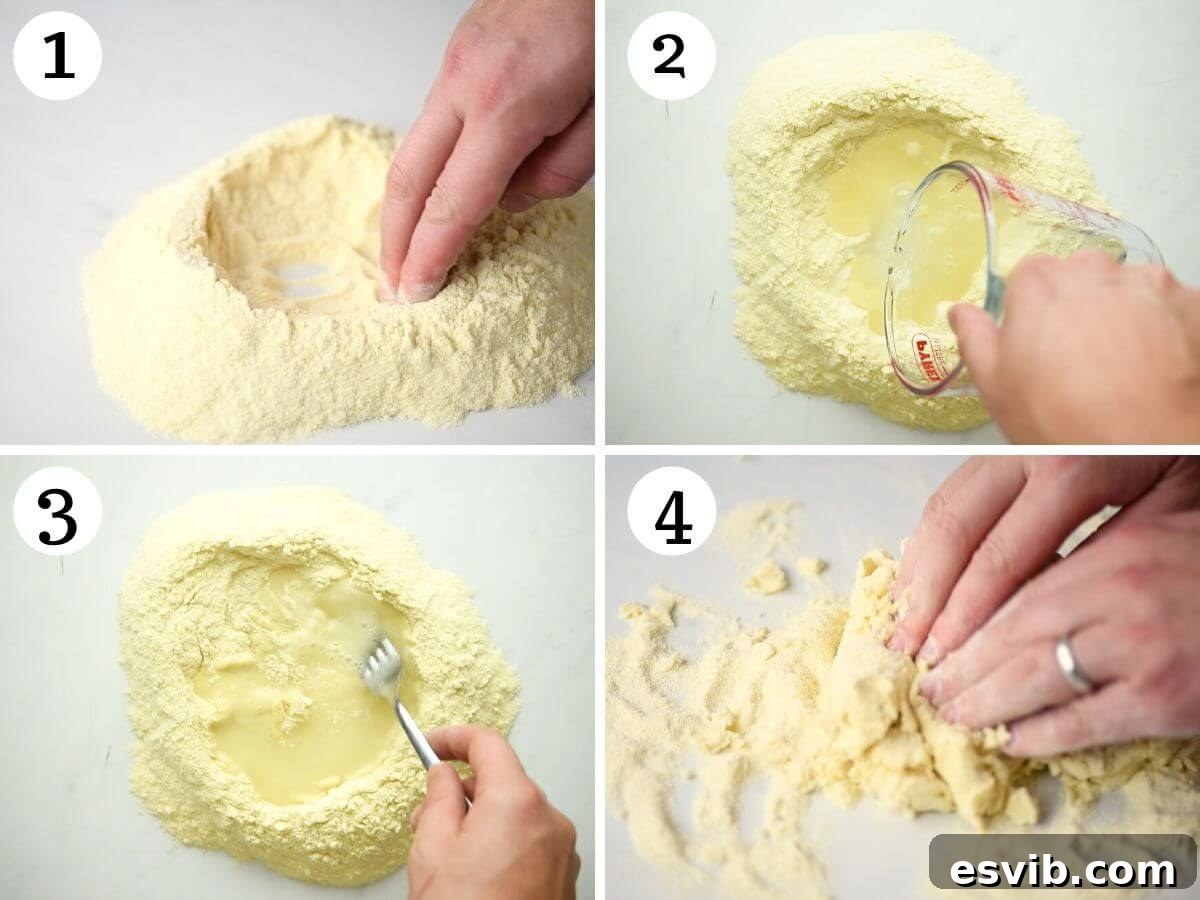
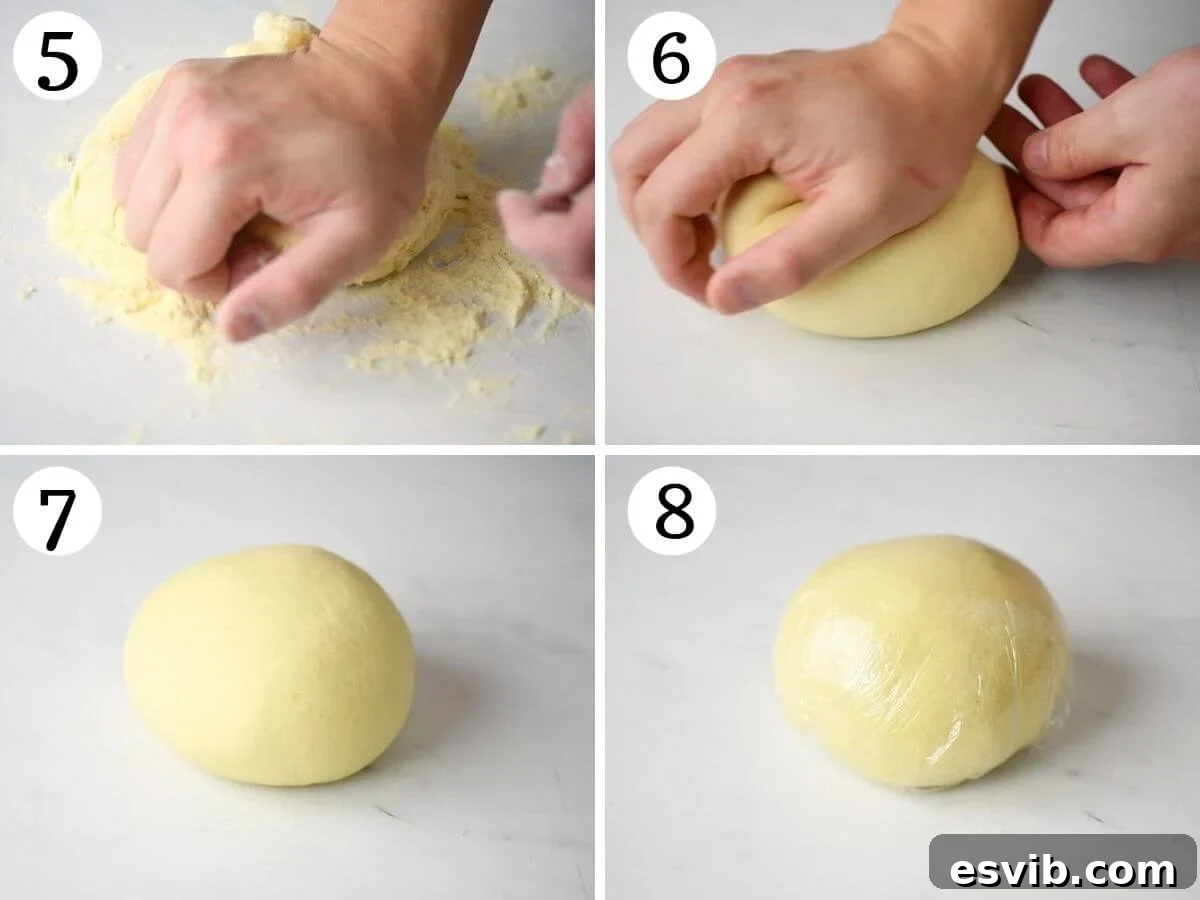
Begin by tipping the Semola Rimacinata flour onto a clean, spacious work surface or into a large mixing bowl. Form a well in the center of the flour, creating a crater-like depression. Slowly pour the hot water into this well. Using a fork, gradually start to incorporate the flour from the edges into the water in the center. Continue mixing until the water is mostly absorbed and a shaggy, rough dough begins to form. At this stage, it will look quite crumbly and not yet cohesive.
2. Knead the Dough
Once you have a rough dough, it’s time for kneading. Transfer the dough from the bowl to your clean work surface (if it wasn’t there already). Knead the dough vigorously for about 10 minutes. The kneading process is crucial for developing the gluten in the semolina, which gives the pasta its signature chewiness. You’ll know it’s ready when the dough transforms from rough and shaggy to smooth, elastic, and pliable, bouncing back slightly when poked. Wrap the kneaded dough tightly in plastic wrap (cling film) to prevent it from drying out, and let it rest at room temperature for at least 30 minutes. This resting period allows the gluten to relax and the flour to fully hydrate, making the dough much easier to roll and shape.
3. Roll Out the Dough Ropes
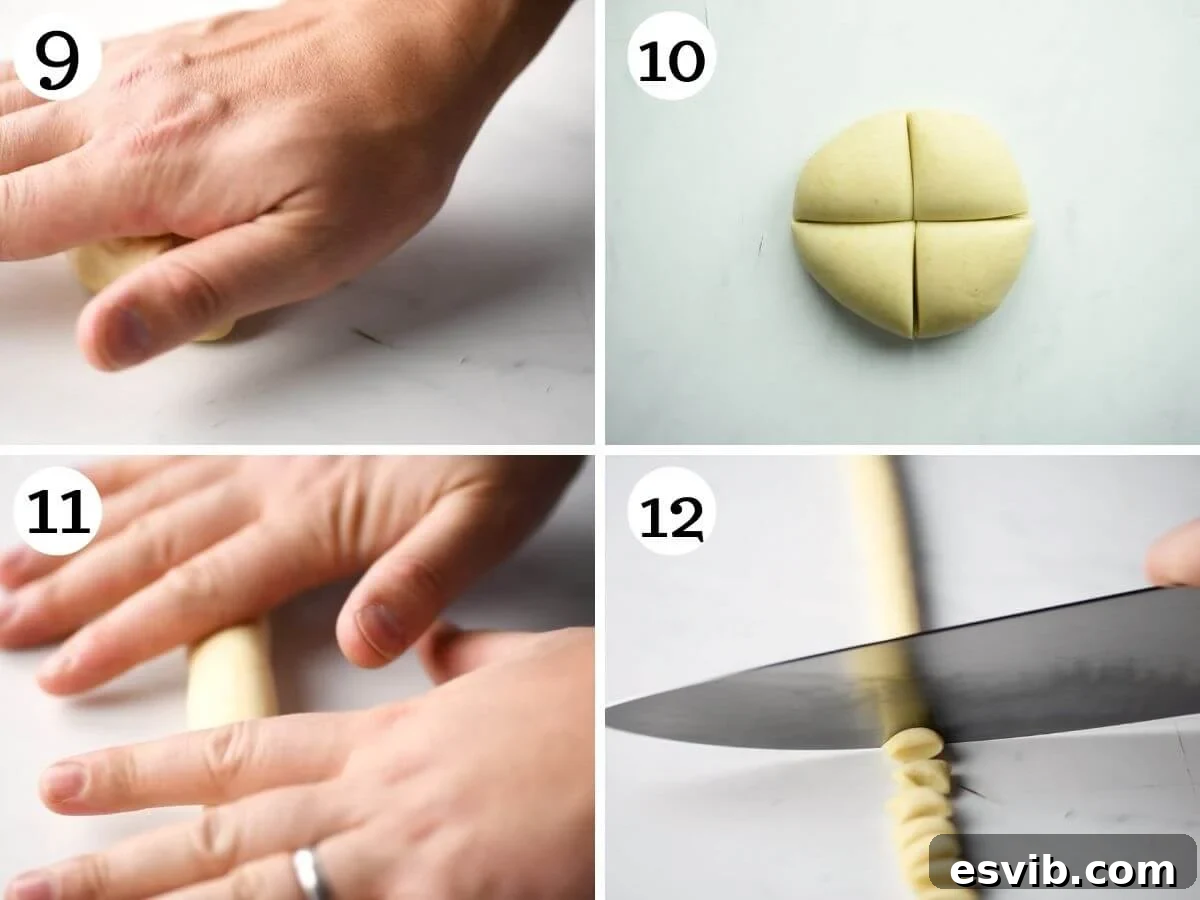
After the dough has rested, unwrap it and gently flatten it slightly. Cut the dough into four equal quarters. This makes it more manageable to work with. Take one quarter of the dough, keeping the remaining pieces covered with plastic wrap to prevent them from drying out. Roll this quarter into a long, thin rope, aiming for a thickness of approximately 1/2 inch (about 1.25 cm). Strive for an even thickness throughout the rope, as this will result in uniformly sized pasta pieces.
4. Shape the Gnocchetti Sardi
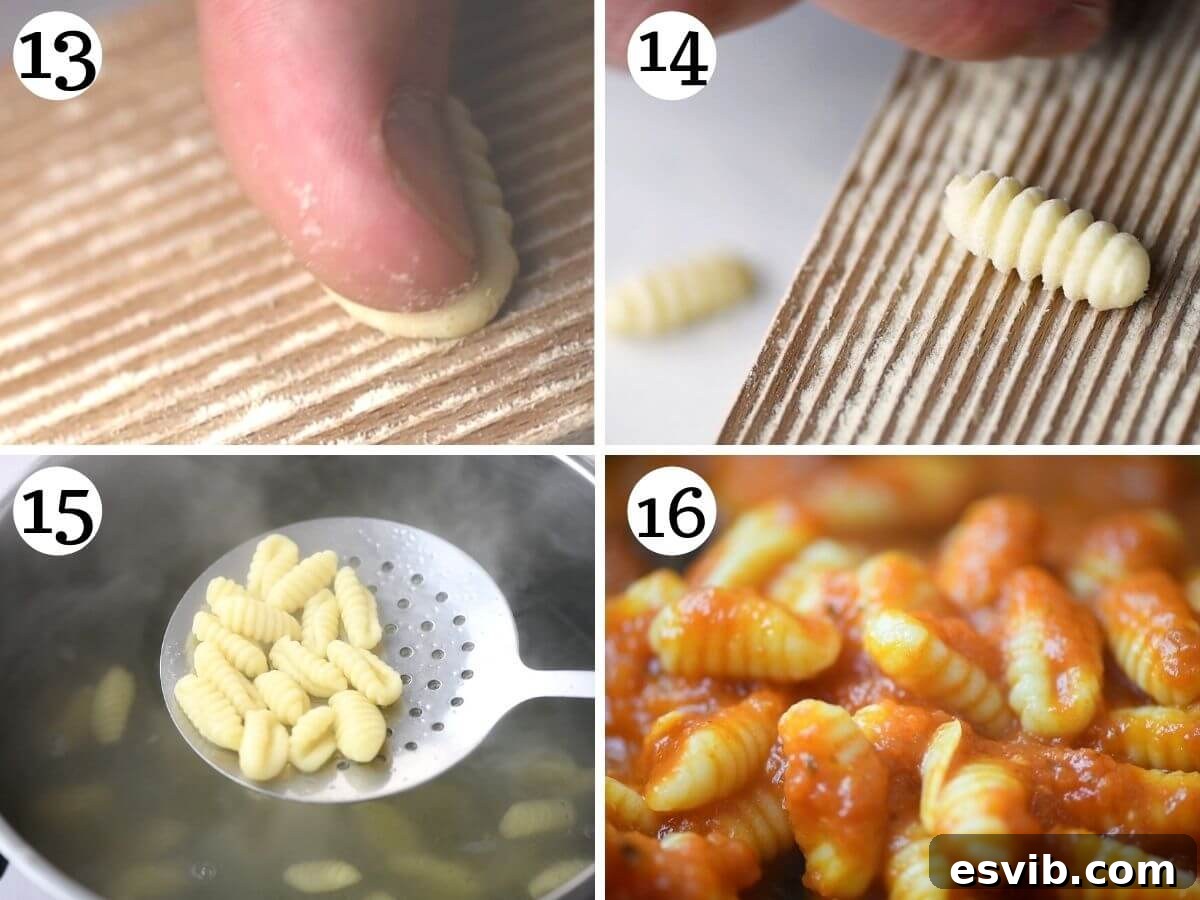
Once your rope is ready, cut it into small, uniform pieces, each about 1/2 inch (1.25 cm) wide. Now comes the fun part: shaping! Take one small piece of dough and place it on a gnocchi board (if you have one). Using the side of your thumb, gently but firmly roll the piece of dough away from you, pressing it slightly as you go. This motion will create the characteristic ridges on one side and a hollow indentation on the other. The ridges are essential as they are designed to trap and hold onto delicious pasta sauces. If you don’t have a gnocchi board, simply use the tines of a regular kitchen fork to achieve a similar ridged effect. Repeat this process with all the remaining dough pieces, ensuring you keep the shaped gnocchetti sardi dusted lightly with semolina flour on a clean surface to prevent them from sticking together.
5. Cook and Serve
To cook your freshly made Gnocchetti Sardi, bring a large pot of generously salted water to a rolling boil. Add the pasta to the boiling water and cook for approximately 2-3 minutes. Semolina pasta cooks relatively quickly, and its texture will be chewier than egg pasta. It’s always a good idea to test a single piece to ensure it’s cooked to your preferred al dente consistency. Once cooked, drain the gnocchetti sardi, reserving some of the pasta water, and immediately toss them with your desired pasta sauce. The hot pasta will absorb the sauce beautifully, and the ridges will ensure maximum flavor adhesion. A splash of reserved pasta water can help emulsify the sauce and create a luscious coating.
Expert Recipe Tips for Perfect Gnocchetti Sardi
Achieving perfect homemade Gnocchetti Sardi is easier with these valuable tips:
- Precision in Measuring Flour (Cups vs. Scale): If you are measuring Semola Rimacinata using cups, it is crucial to spoon the flour into the measuring cup and then level it off with a knife. Never scoop the flour directly from the bag, as this compacts it, resulting in too much flour and a dry, unworkable dough. For the most accurate results, especially when starting out, a kitchen scale is highly recommended. It allows for precise adjustments and consistent outcomes. Remember the golden ratio: always use half the amount of water to flour by weight (e.g., 300g flour to 150ml water). This ratio does not directly translate to cup measurements due to differences in density.
- Dough Consistency is Key: The ideal dough should be firm but pliable, not sticky. If your dough feels too dry and crumbly, add water a teaspoon at a time until it comes together. If it’s too sticky, add a sprinkle of semolina flour. Adjust gradually until you reach the right consistency.
- Keep Dough Covered: Always keep the portions of dough you are not actively working with covered with plastic wrap. Semolina dough dries out quickly, making it difficult to roll and shape.
- No Gnocchi Board? No Problem!: Don’t fret if you don’t own a traditional gnocchi board. A standard kitchen fork can be an excellent substitute. Simply press the small dough piece against the back of the fork’s tines and roll it away from you with your thumb. The result will be equally charming ridges. For a smoother pasta experience, similar to Cavatelli, you can also opt to skip the ridges entirely, though the ridges are key to Gnocchetti Sardi’s identity.
Troubleshooting Common Issues:
- Dough Too Sticky: If your dough is overly sticky, add a very small amount (half a teaspoon) of Semola Rimacinata and knead it in until the stickiness subsides. Be cautious not to add too much, or the dough will become dry.
- Dough Too Dry/Crumbly: If the dough is too dry and won’t come together, add a few drops of hot water at a time and continue kneading until it reaches a smooth, workable consistency.
- Sticking While Shaping: Lightly dust your gnocchi board or fork, and your hands, with a tiny bit of semolina flour if the dough is sticking during shaping. Avoid over-flouring, as this can dry out the pasta.
How to Serve Your Homemade Gnocchetti Sardi
Gnocchetti Sardi are incredibly versatile and pair beautifully with a variety of sauces, but certain traditions stand out as truly iconic. Their ridges and chewy texture make them perfect for capturing rich, hearty preparations.
- Malloreddus alla Campidanese: This is arguably the most famous pairing for Gnocchetti Sardi. It features a robust sauce made with Sardinian sausage, a touch of saffron for its golden color and distinct aroma, and a rich tomato base. The sausage meat nestles perfectly within the pasta’s ridges, creating a harmonious blend of flavors and textures. You can find a detailed recipe for Malloreddus alla Campidanese here.
- Seafood Pairings: Given Sardinia’s coastal location, seafood is another natural accompaniment. Malloreddus is commonly served with fresh clams (vongole) or other local seafood, often dressed simply with garlic, olive oil, and white wine, allowing the fresh flavors of the sea to shine. Saffron and Pecorino cheese (a hard, salty sheep’s milk cheese, another Sardinian specialty) also make for a delightful, simple dressing.
- Hearty Meat Ragus: The robust nature of semolina pasta holds up exceptionally well to slow-cooked, rich meat sauces. A classic lamb ragu or a rich beef ragu would be an excellent choice, with the meat clinging beautifully to the pasta.
- Simple Tomato Sauces and Pesto: For a lighter, yet equally satisfying meal, Gnocchetti Sardi are delicious with a fresh simple tomato sauce (pomodoro) or a vibrant basil pesto. The ridges ensure that even these simpler sauces are thoroughly enjoyed.
Traditionally, this beloved pasta shape graces tables during special occasions such as family Sunday dinners, festive Christmas gatherings, and joyous weddings, signifying celebration and culinary heritage.
Storage and Freezing Instructions:
- Refrigerator: If you plan to use your fresh Gnocchetti Sardi within a few days, you can store them in the refrigerator. Ensure they are lightly dusted with semolina flour and spread out in a single, even layer on a baking sheet or tray lined with parchment paper. This prevents them from sticking together. Cover loosely with plastic wrap and they will keep for up to 4 days.
- Freezer: To preserve them for longer, freezing is an excellent option. Arrange the freshly shaped gnocchetti sardi in a single layer on a tray, making sure they don’t touch. Place the tray in the freezer until the pasta pieces are completely frozen solid. Once frozen, transfer them to a freezer-safe bag or airtight container. This initial freezing step prevents them from clumping together. When ready to cook, boil them straight from frozen; they will simply require a few extra minutes of cooking time.
More Homemade Pasta Recipes to Try
If you’ve enjoyed making Gnocchetti Sardi, expand your homemade pasta repertoire with these other delicious recipes:
- Homemade Cavatelli Pasta
- How to Make Pici Pasta
- How to Make Homemade Ravioli – The Ultimate Guide
- Homemade Pasta Dough – How To Step By Step (egg pasta dough)
- Beetroot Pasta Dough
- Spinach Pasta Dough (2 ingredient easy recipe)
We hope you thoroughly enjoy this Gnocchetti Sardi Recipe. If you’ve tried it or any other recipe on our blog, don’t forget to leave a comment below and let us know how you got on – we love hearing from you! You can also FOLLOW US on FACEBOOK, INSTAGRAM and PINTEREST, or sign up to our NEWSLETTER for more delicious food straight to your inbox.
Gnocchetti Sardi Recipe Card
By Emily
Prep time: 30 minutes
Resting time: 30 minutes
Total time: 1 hour
Servings: 4 servings (makes 1 pound/450g)
Equipment
- Plastic wrap (cling film)
- Gnocchi board or a fork
Ingredients
- 300 g Semola Rimacinata, semolina flour (2 cups)*
- 150 ml hot water, (⅔ cup)
Instructions
- Put the semola flour in a large mixing bowl or in a pile on a clean work surface and make a well in the middle.
- Add the water then slowly incorporate the flour using a fork. Once a rough dough has formed, knead it for 10 minutes until smooth and elastic.
- Cover the dough with plastic wrap (cling film) and let it rest for at least 30 minutes.
- Once rested, cut the dough into quarters. On a clean work surface with no flour (important) roll one quarter into a long rope shape about ½ inch thick (make sure to keep the rest of the dough covered in plastic wrap so it doesn’t dry out).
- Cut the rope into small rectangles (about ½ inch wide). To shape the gnocchetti sardi, place one cut piece of dough on a ridged gnocchi board and roll it away from you using the side of your thumb. If you don’t have a gnocchi board you can also use the back of a fork.
- Repeat with the remaining dough. Once you’ve shaped the gnocchetti make sure they are lying on a surface dusted with semola so they don’t stick.
How to cook them
- Bring a large pot of salted water to a boil and cook the cavatelli for around 3-4 minutes. Check one to see if it’s ready (they will be chewier than egg pasta).
- Toss them with your desired pasta sauce and serve.
How to store them (refrigerator and freezer)
- If you’ll be using them soon you can store them in the fridge for up to 4 days. Make sure they are dusted with flour and in an even layer.
- To freeze them, lay them on a tray in an even layer and freeze. Once frozen, transfer them into a freezer bag to save space. Boil them straight from frozen then add to sauce (they’ll take a few minutes longer).
Notes
- *Measuring in cups – if you’re using cups to measure the semola flour you must spoon the flour into the cup and then level it off with a knife. If you scoop the flour you’ll end up with far too much flour and the recipe won’t work.
- Using a kitchen scale – if using a kitchen scale you can easily adjust the amount of pasta you make. Always use half the amount of water to flour (e.g. 300g flour 150ml water). Note: This does not work the same for cups as that measures in volume!
Helpful Info for All Recipes
- I always use extra virgin olive oil in all of my recipes unless stated otherwise.
- When I use canned or jarred tomatoes of any kind I always use Cirio or Mutti brands for the best results and flavor.
- All vegetables are medium sized unless stated otherwise.
- All recipes are tested and developed using a fan (convection) oven.
- Find out more about how nutrition is calculated.
- Check out our must-have Italian Pantry Staples.
- You can also find all our Essential Kitchen Tools for Italian Cooking.
Nutrition
Nutrition information is automatically calculated, so should only be used as an approximation.
Calories: 254 kcal | Carbohydrates: 53g | Protein: 10g | Fat: 2g | Saturated Fat: 1g | Polyunsaturated Fat: 1g | Monounsaturated Fat: 1g | Sodium: 3mg | Potassium: 323mg | Calcium: 27mg | Iron: 3mg